Fourth and Fifth Grade 3D Paper Sculptures
How does this unit relate to my Art Education philosophy as a first year classroom teacher?
One of my favorite Art Education professors stressed that a good teacher is always noticing what the students bring to the table. She’d refer to this quote in her seminar:
“We have ideals. We have philosophies. But the problem with any ideology is that it gives the answer before you look at the evidence.” ---Bill Clinton
I think the message here is to strive for our ideals, but ultimately stay honest about what works for the kids in our classroom. Two years later, working with an increasingly better understanding of my students, my curriculum has turned out to be a blend of different philosophies of art education. Yet, when I left grad school I had a certain philosophy of what makes for great art education, and I felt determined to bring the “right kind of lessons” to my future students.
I developed this ideal philosophy by listening to that same professor. From her teachings, I adopted a clear vision that I admire and will always strive to fulfill as much as I can in my practice. My vision statement puts it into words, but for this blog entry I want to explore what that philosophy may look like in practice.
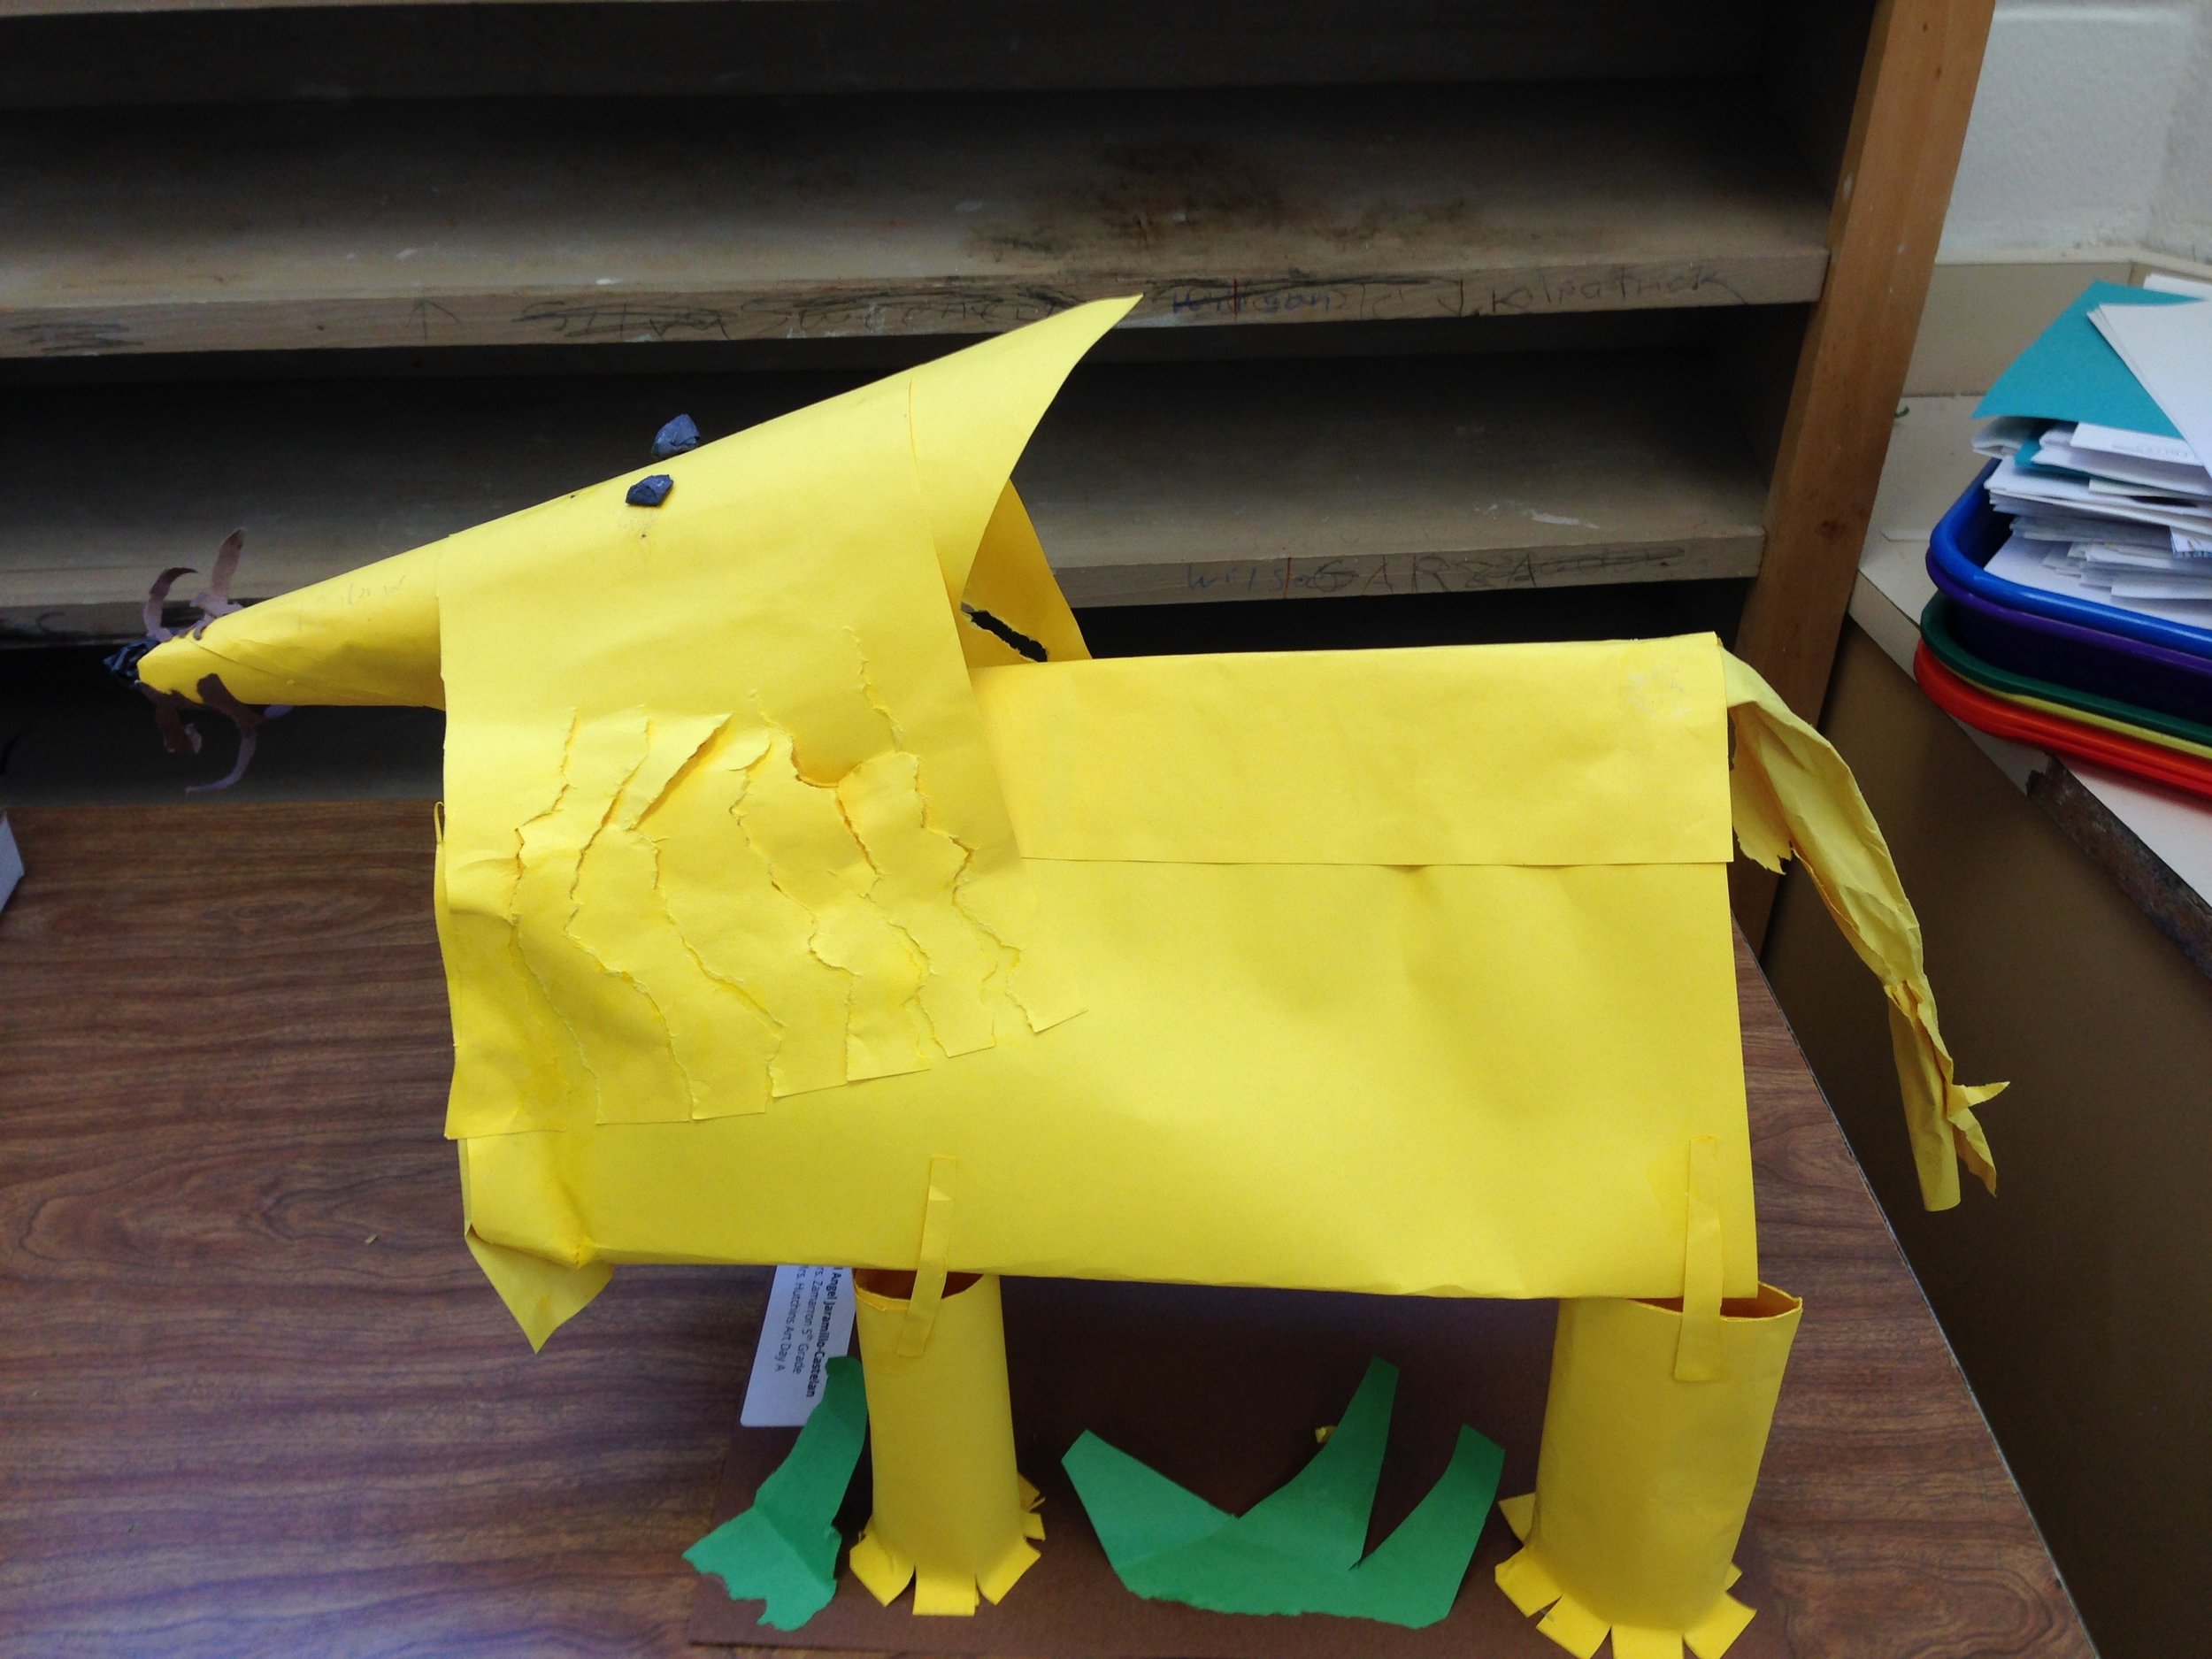
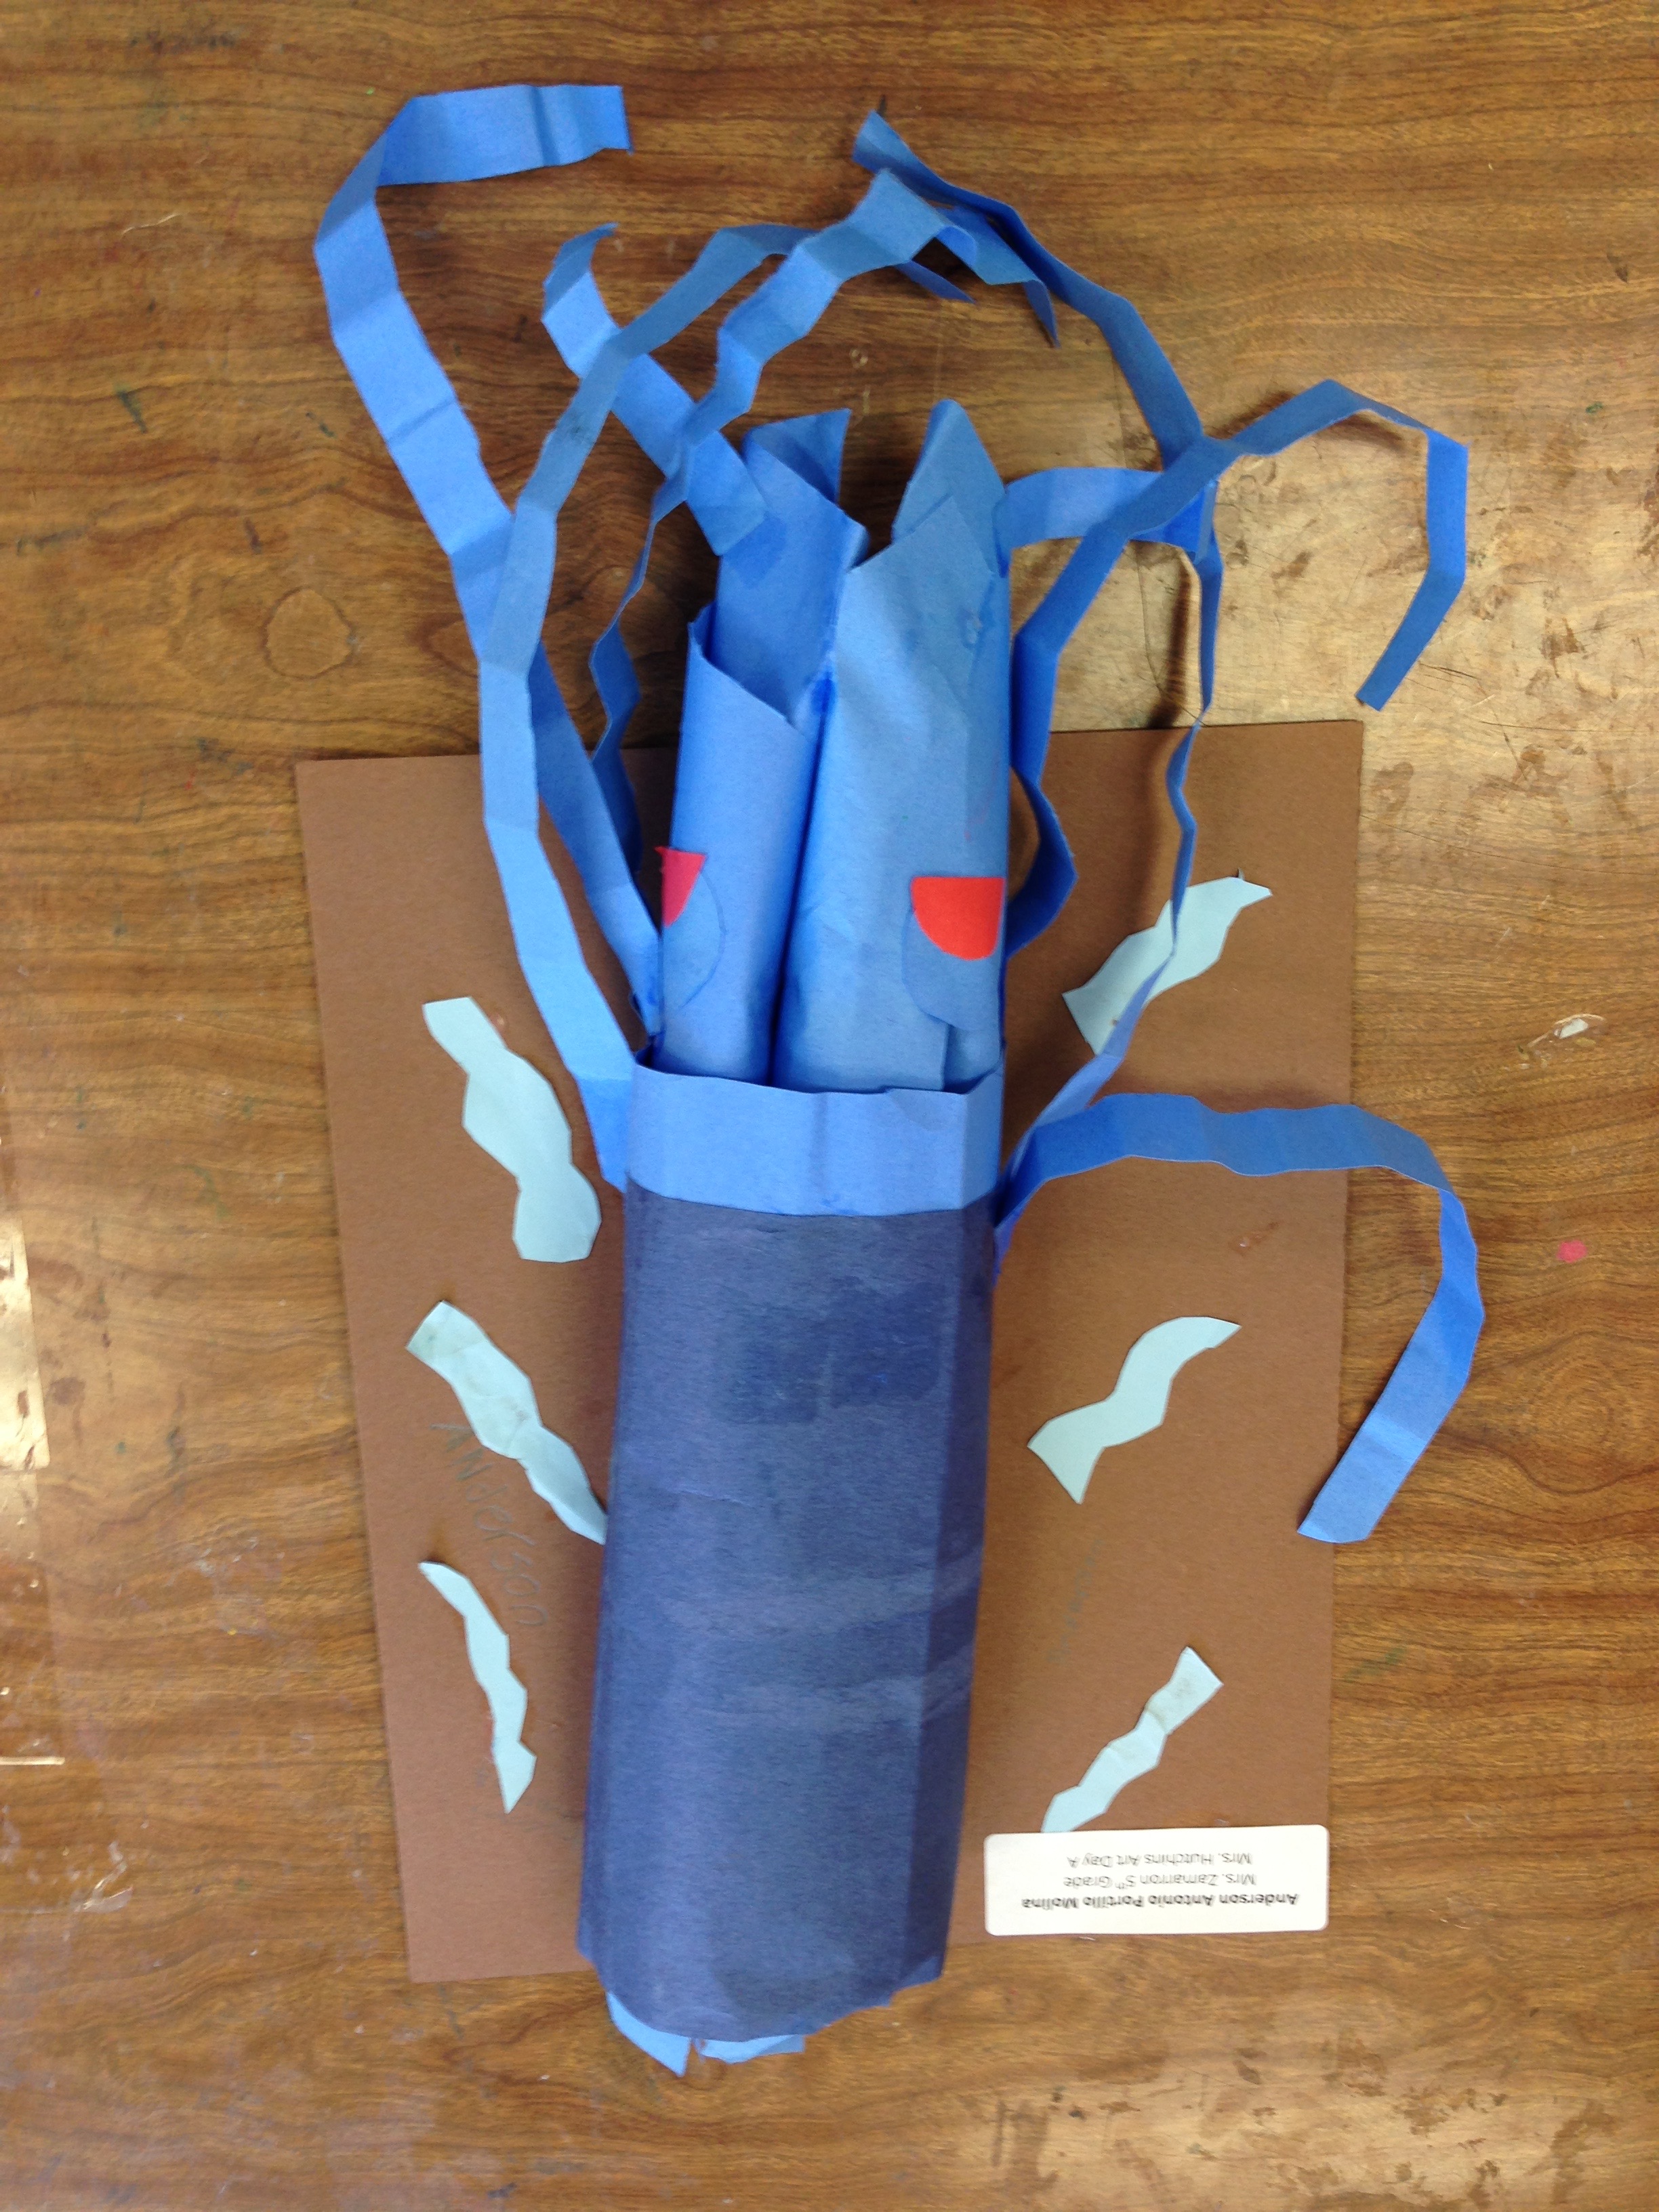
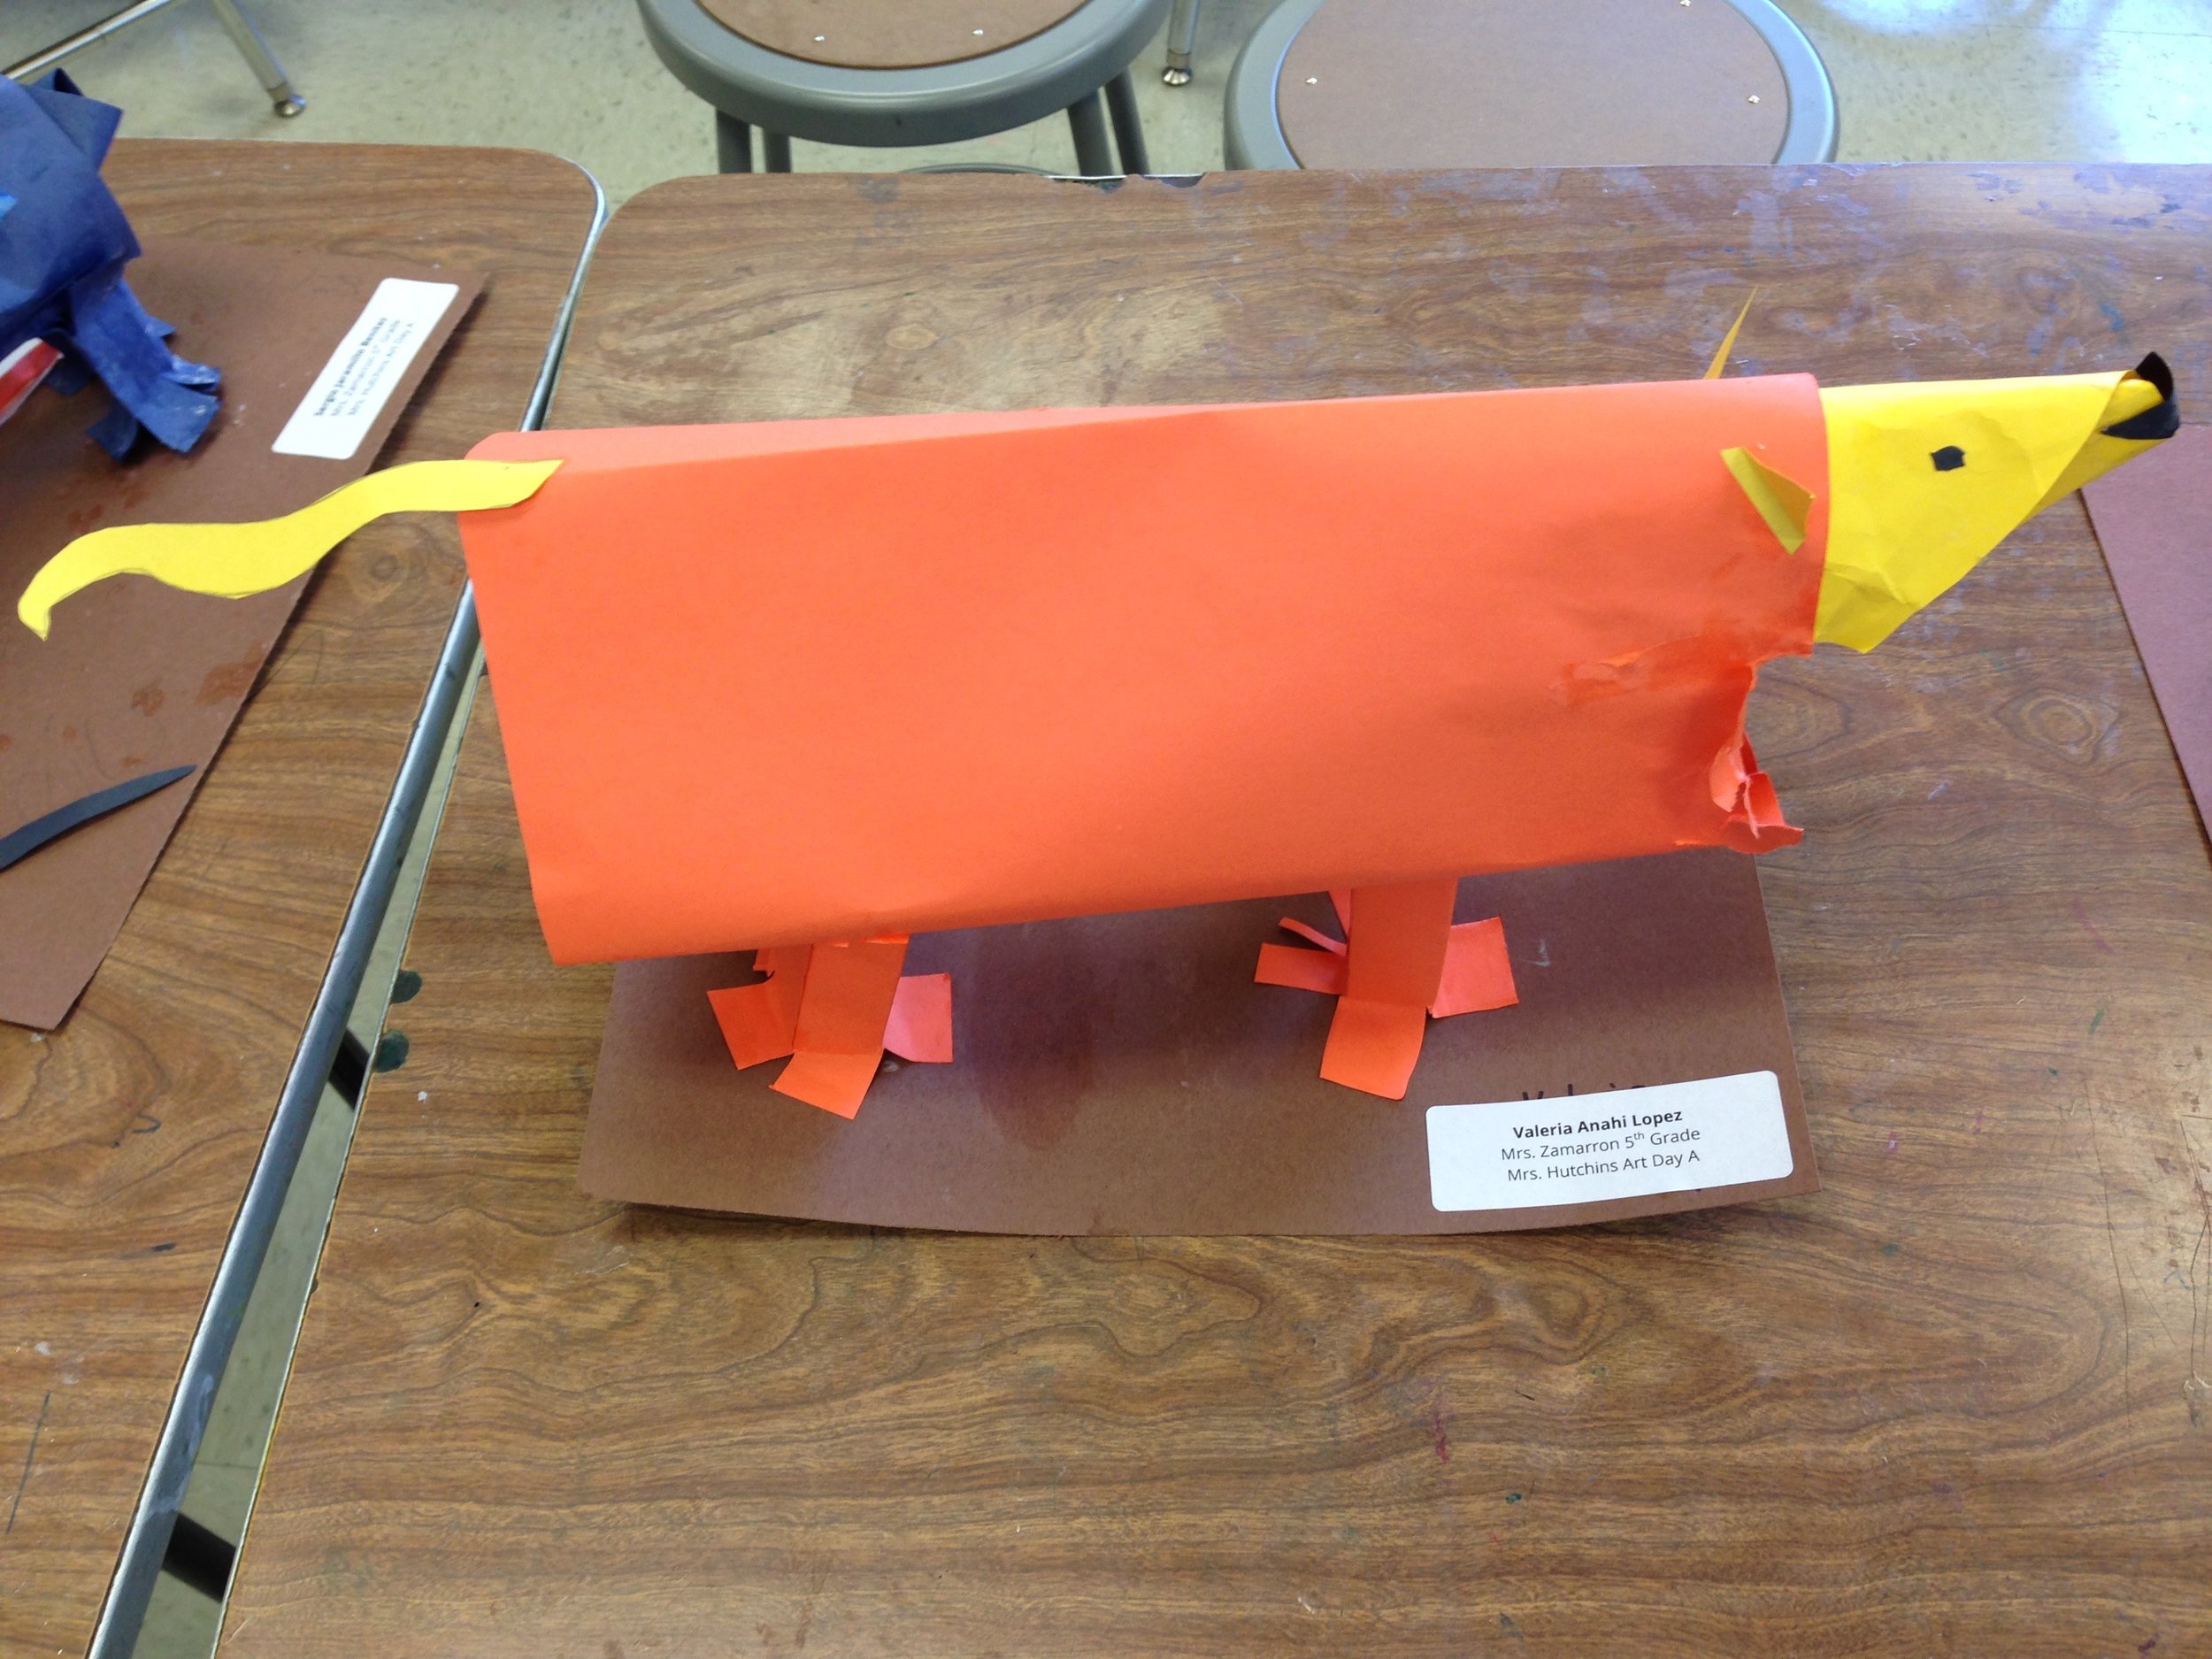
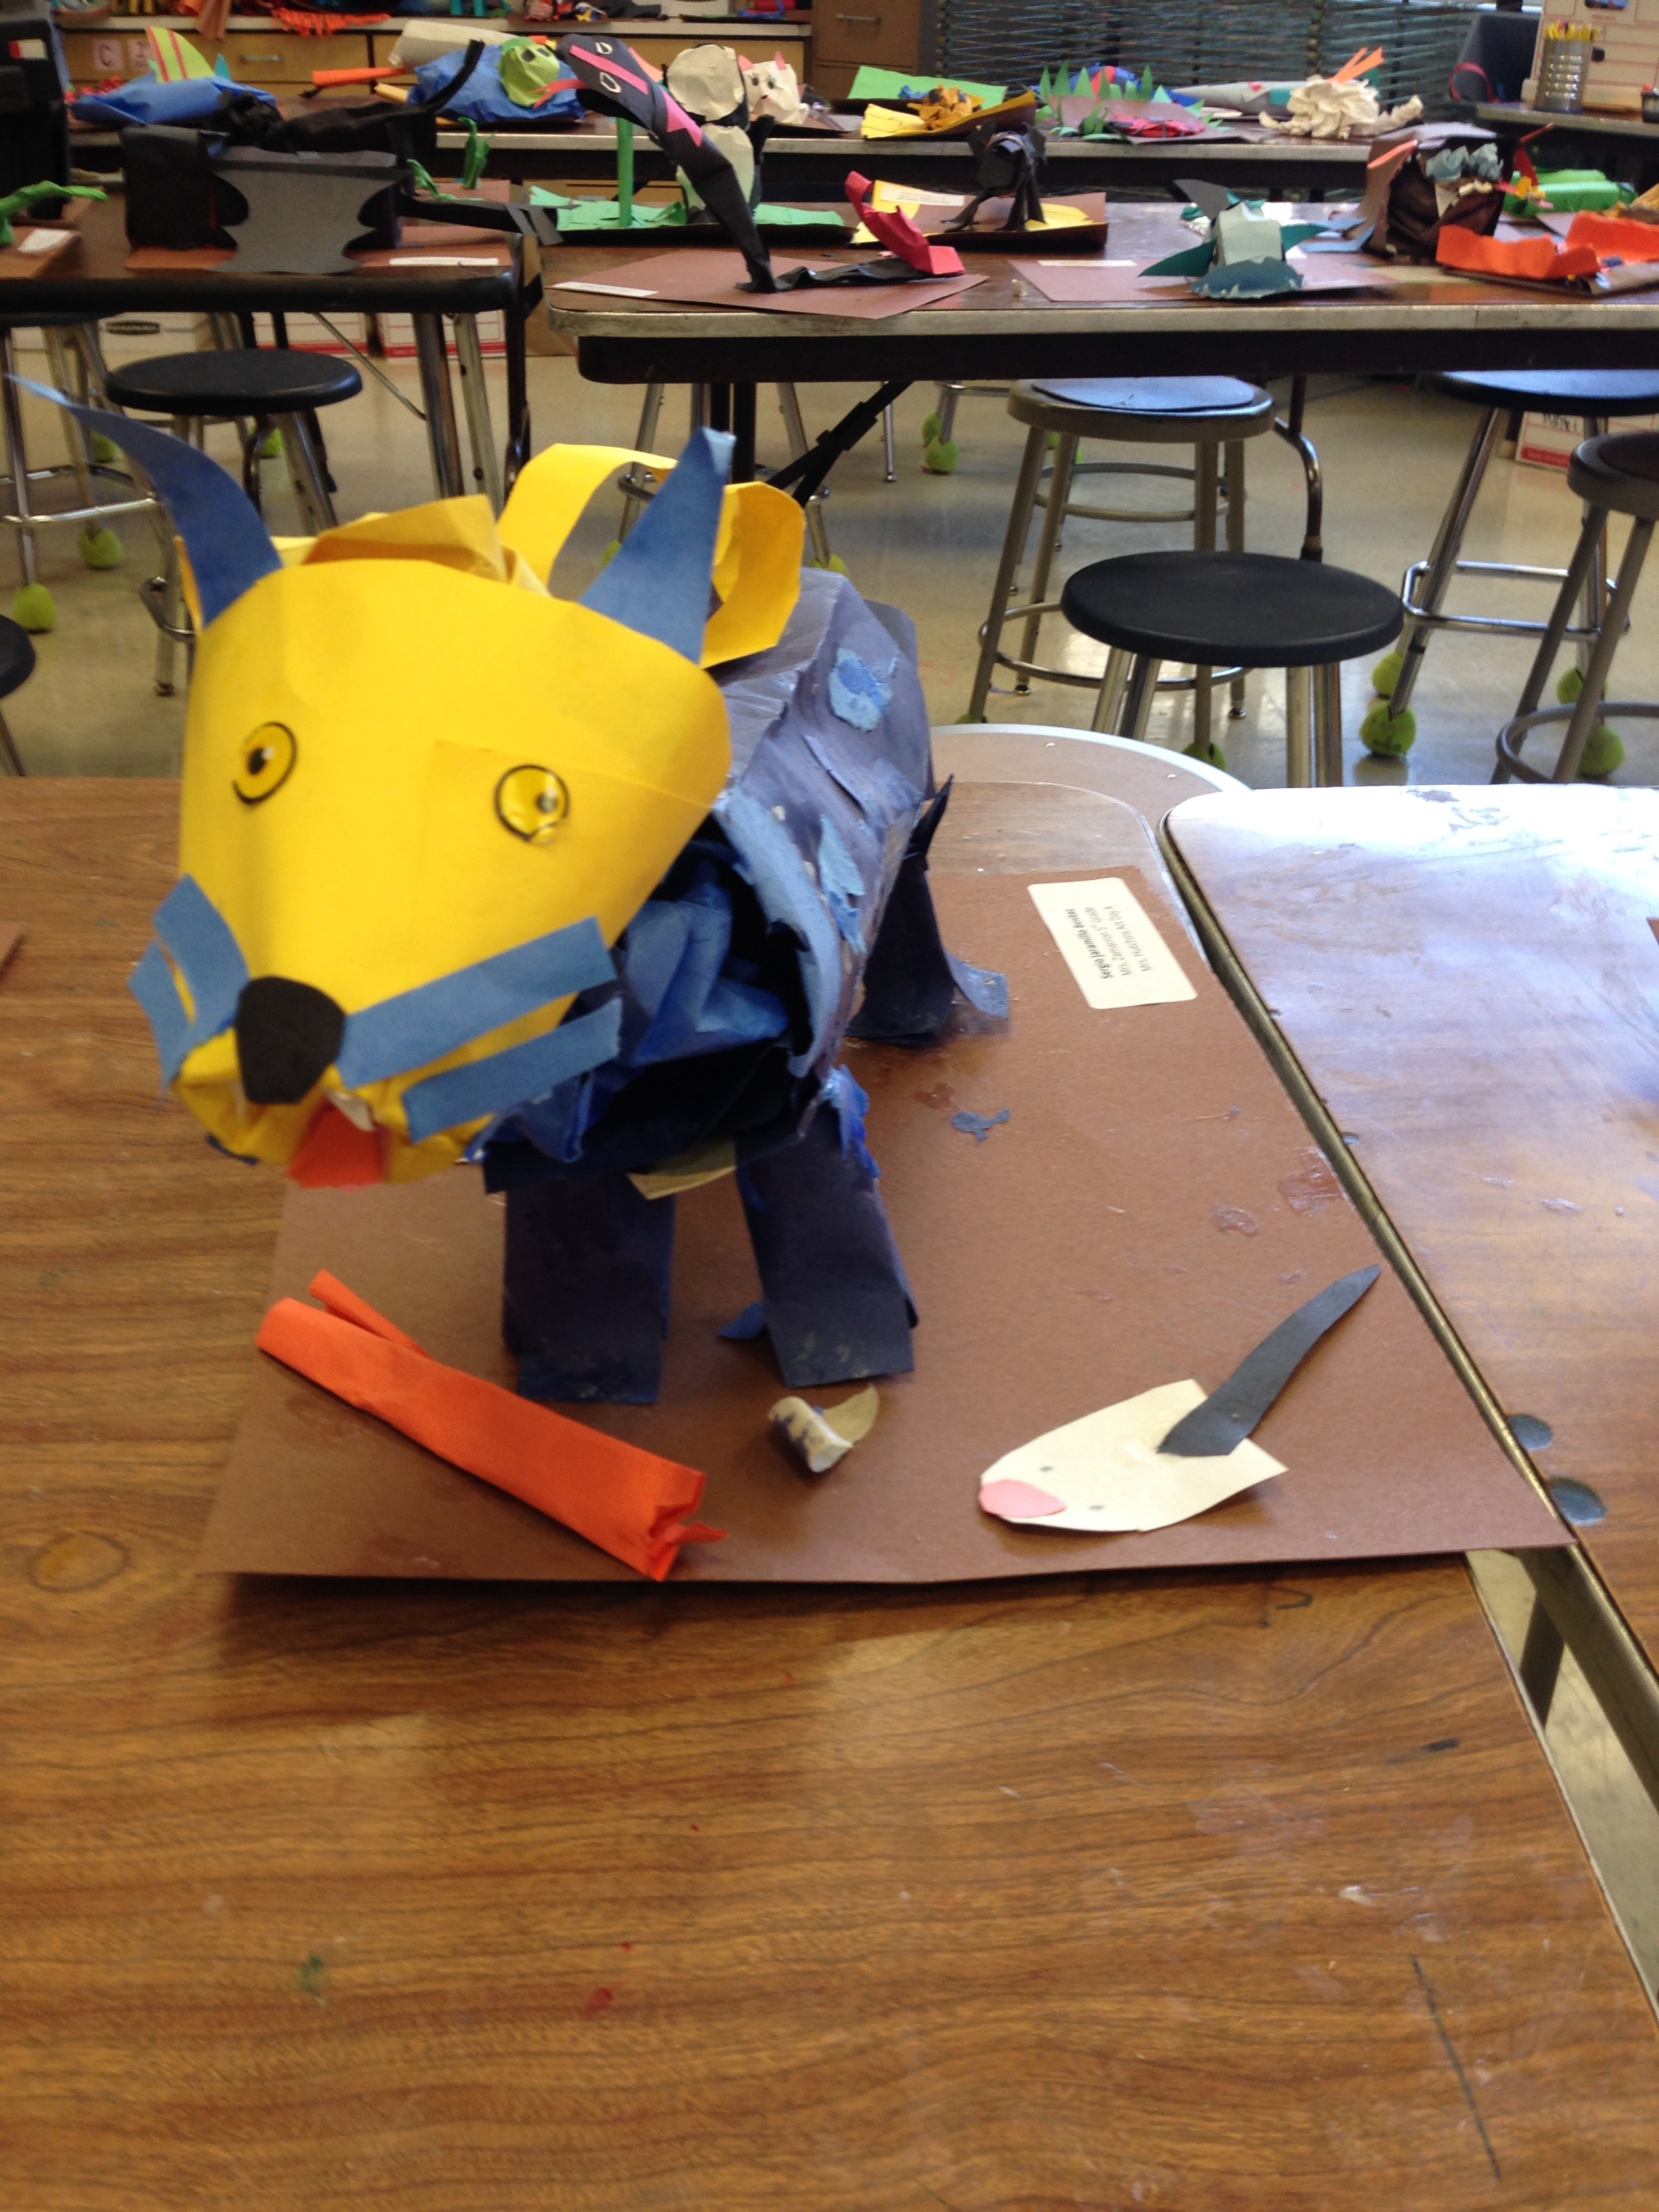
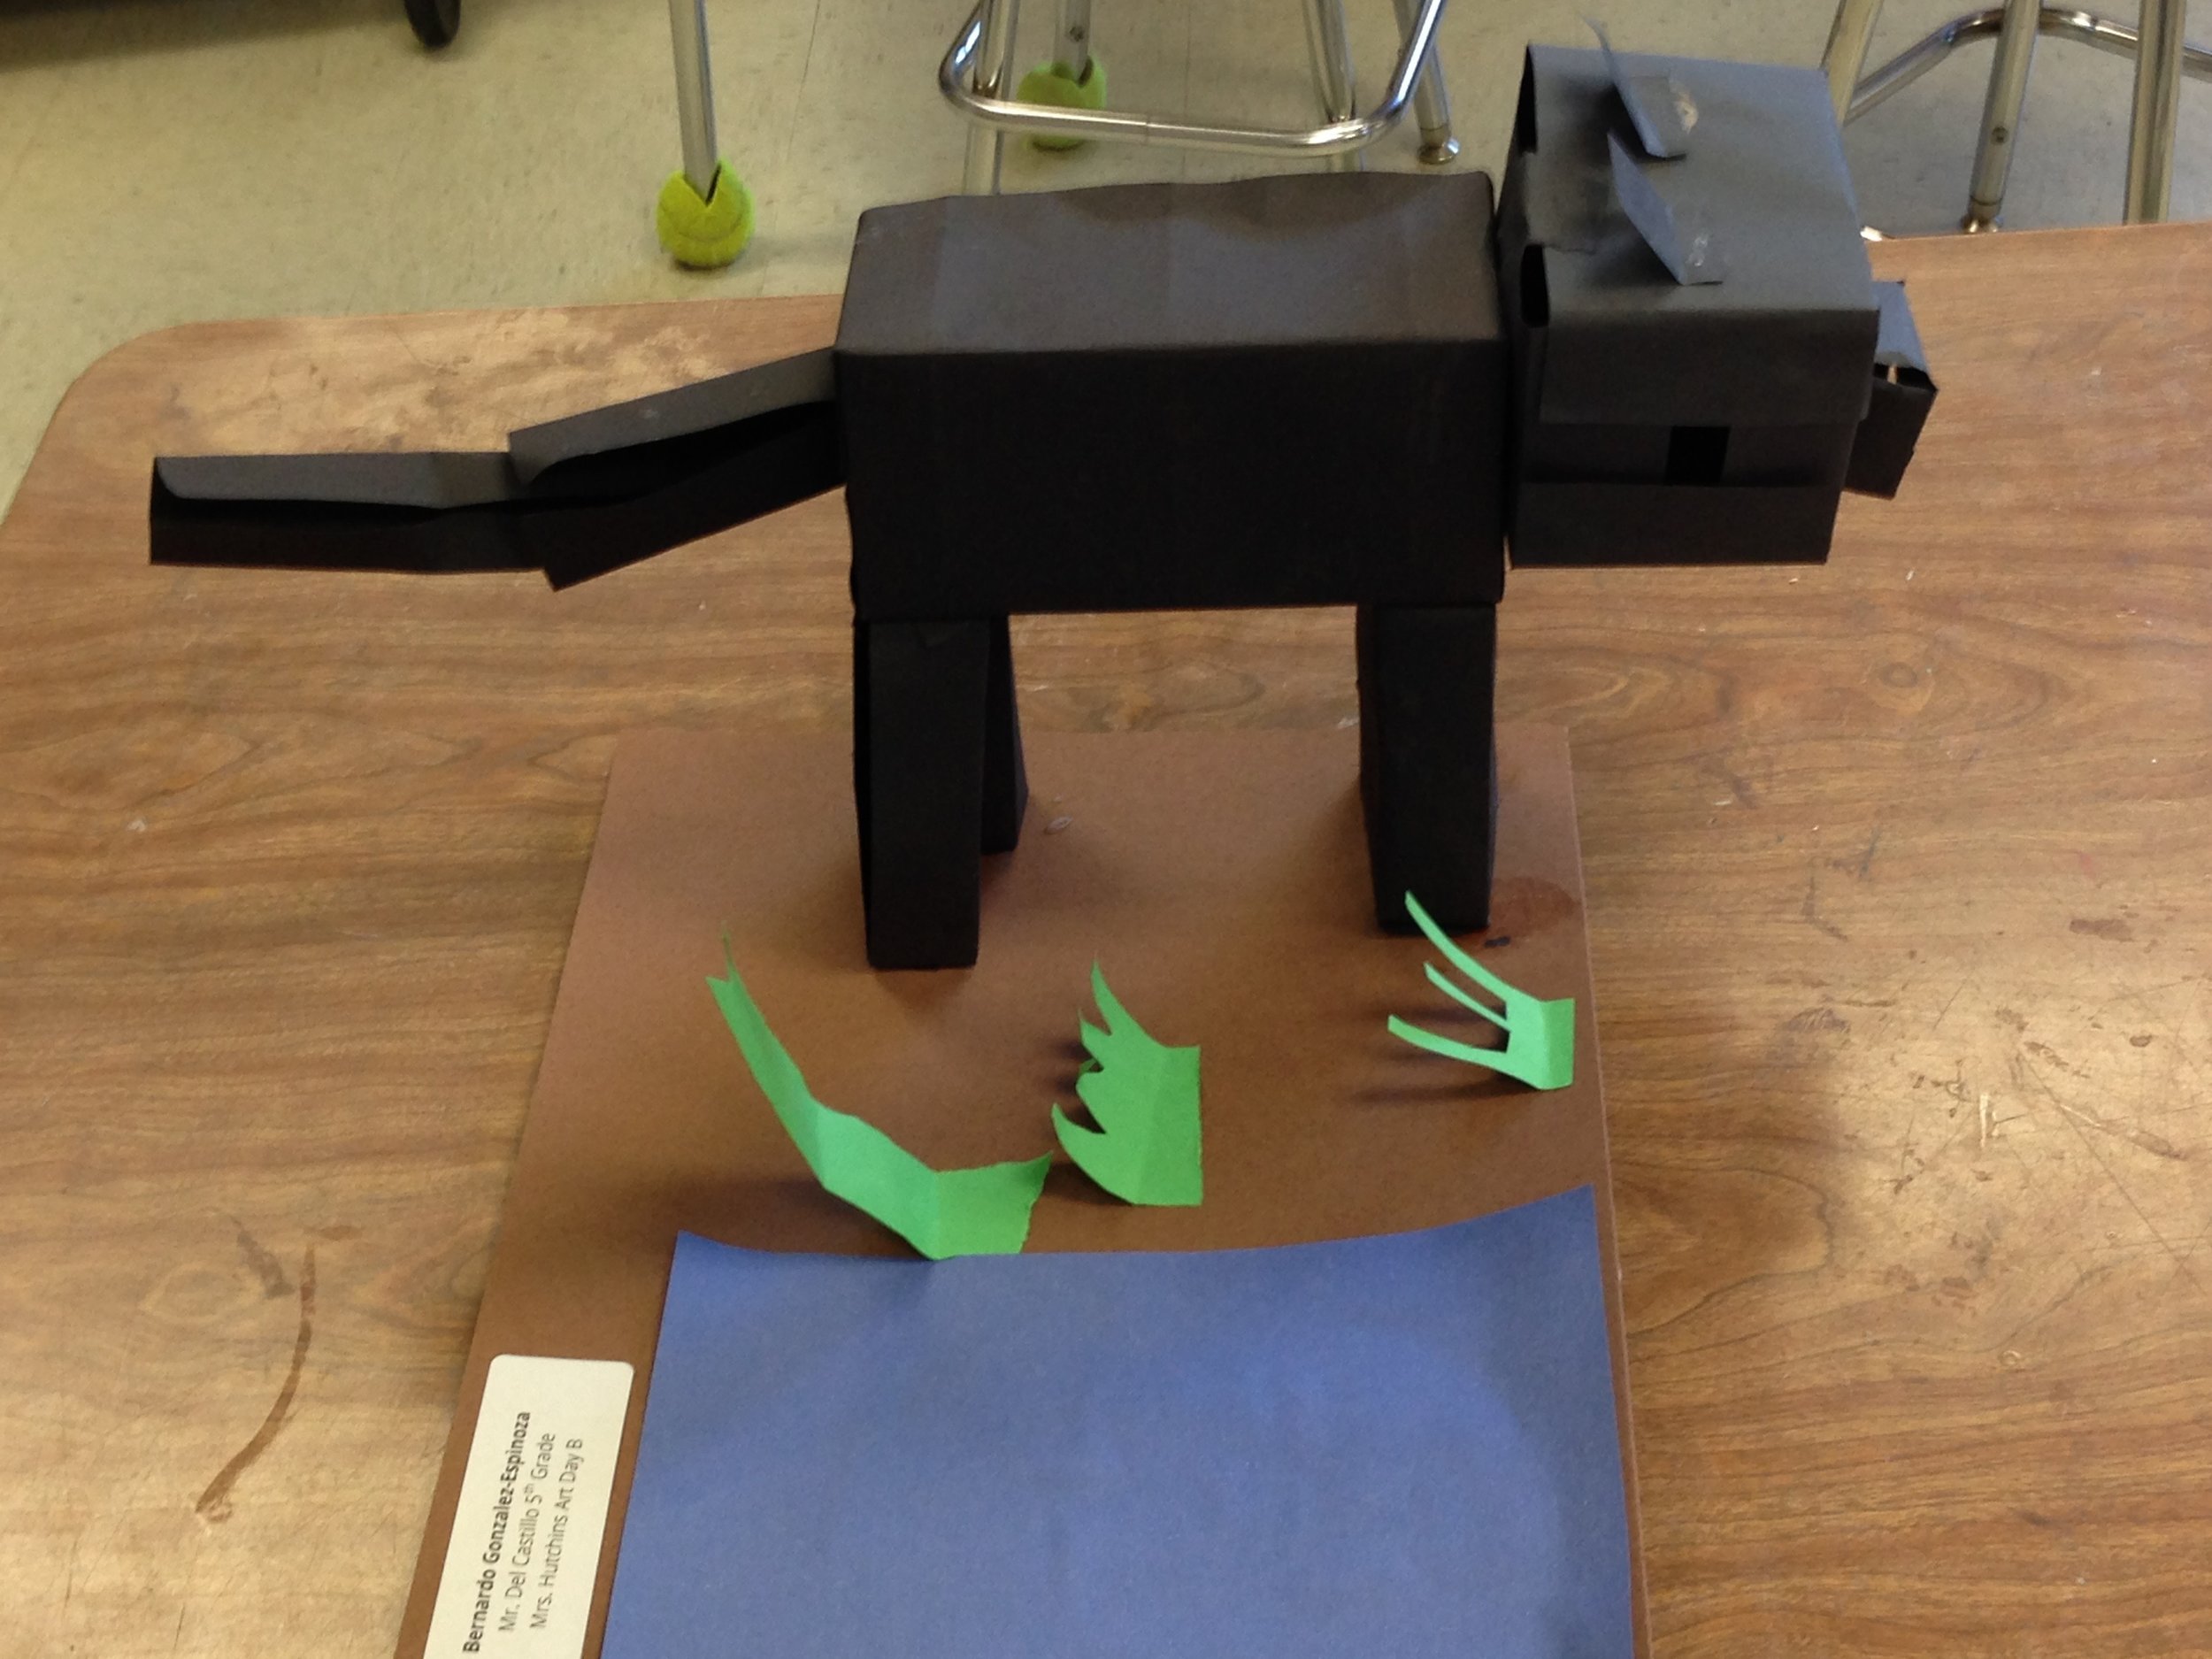
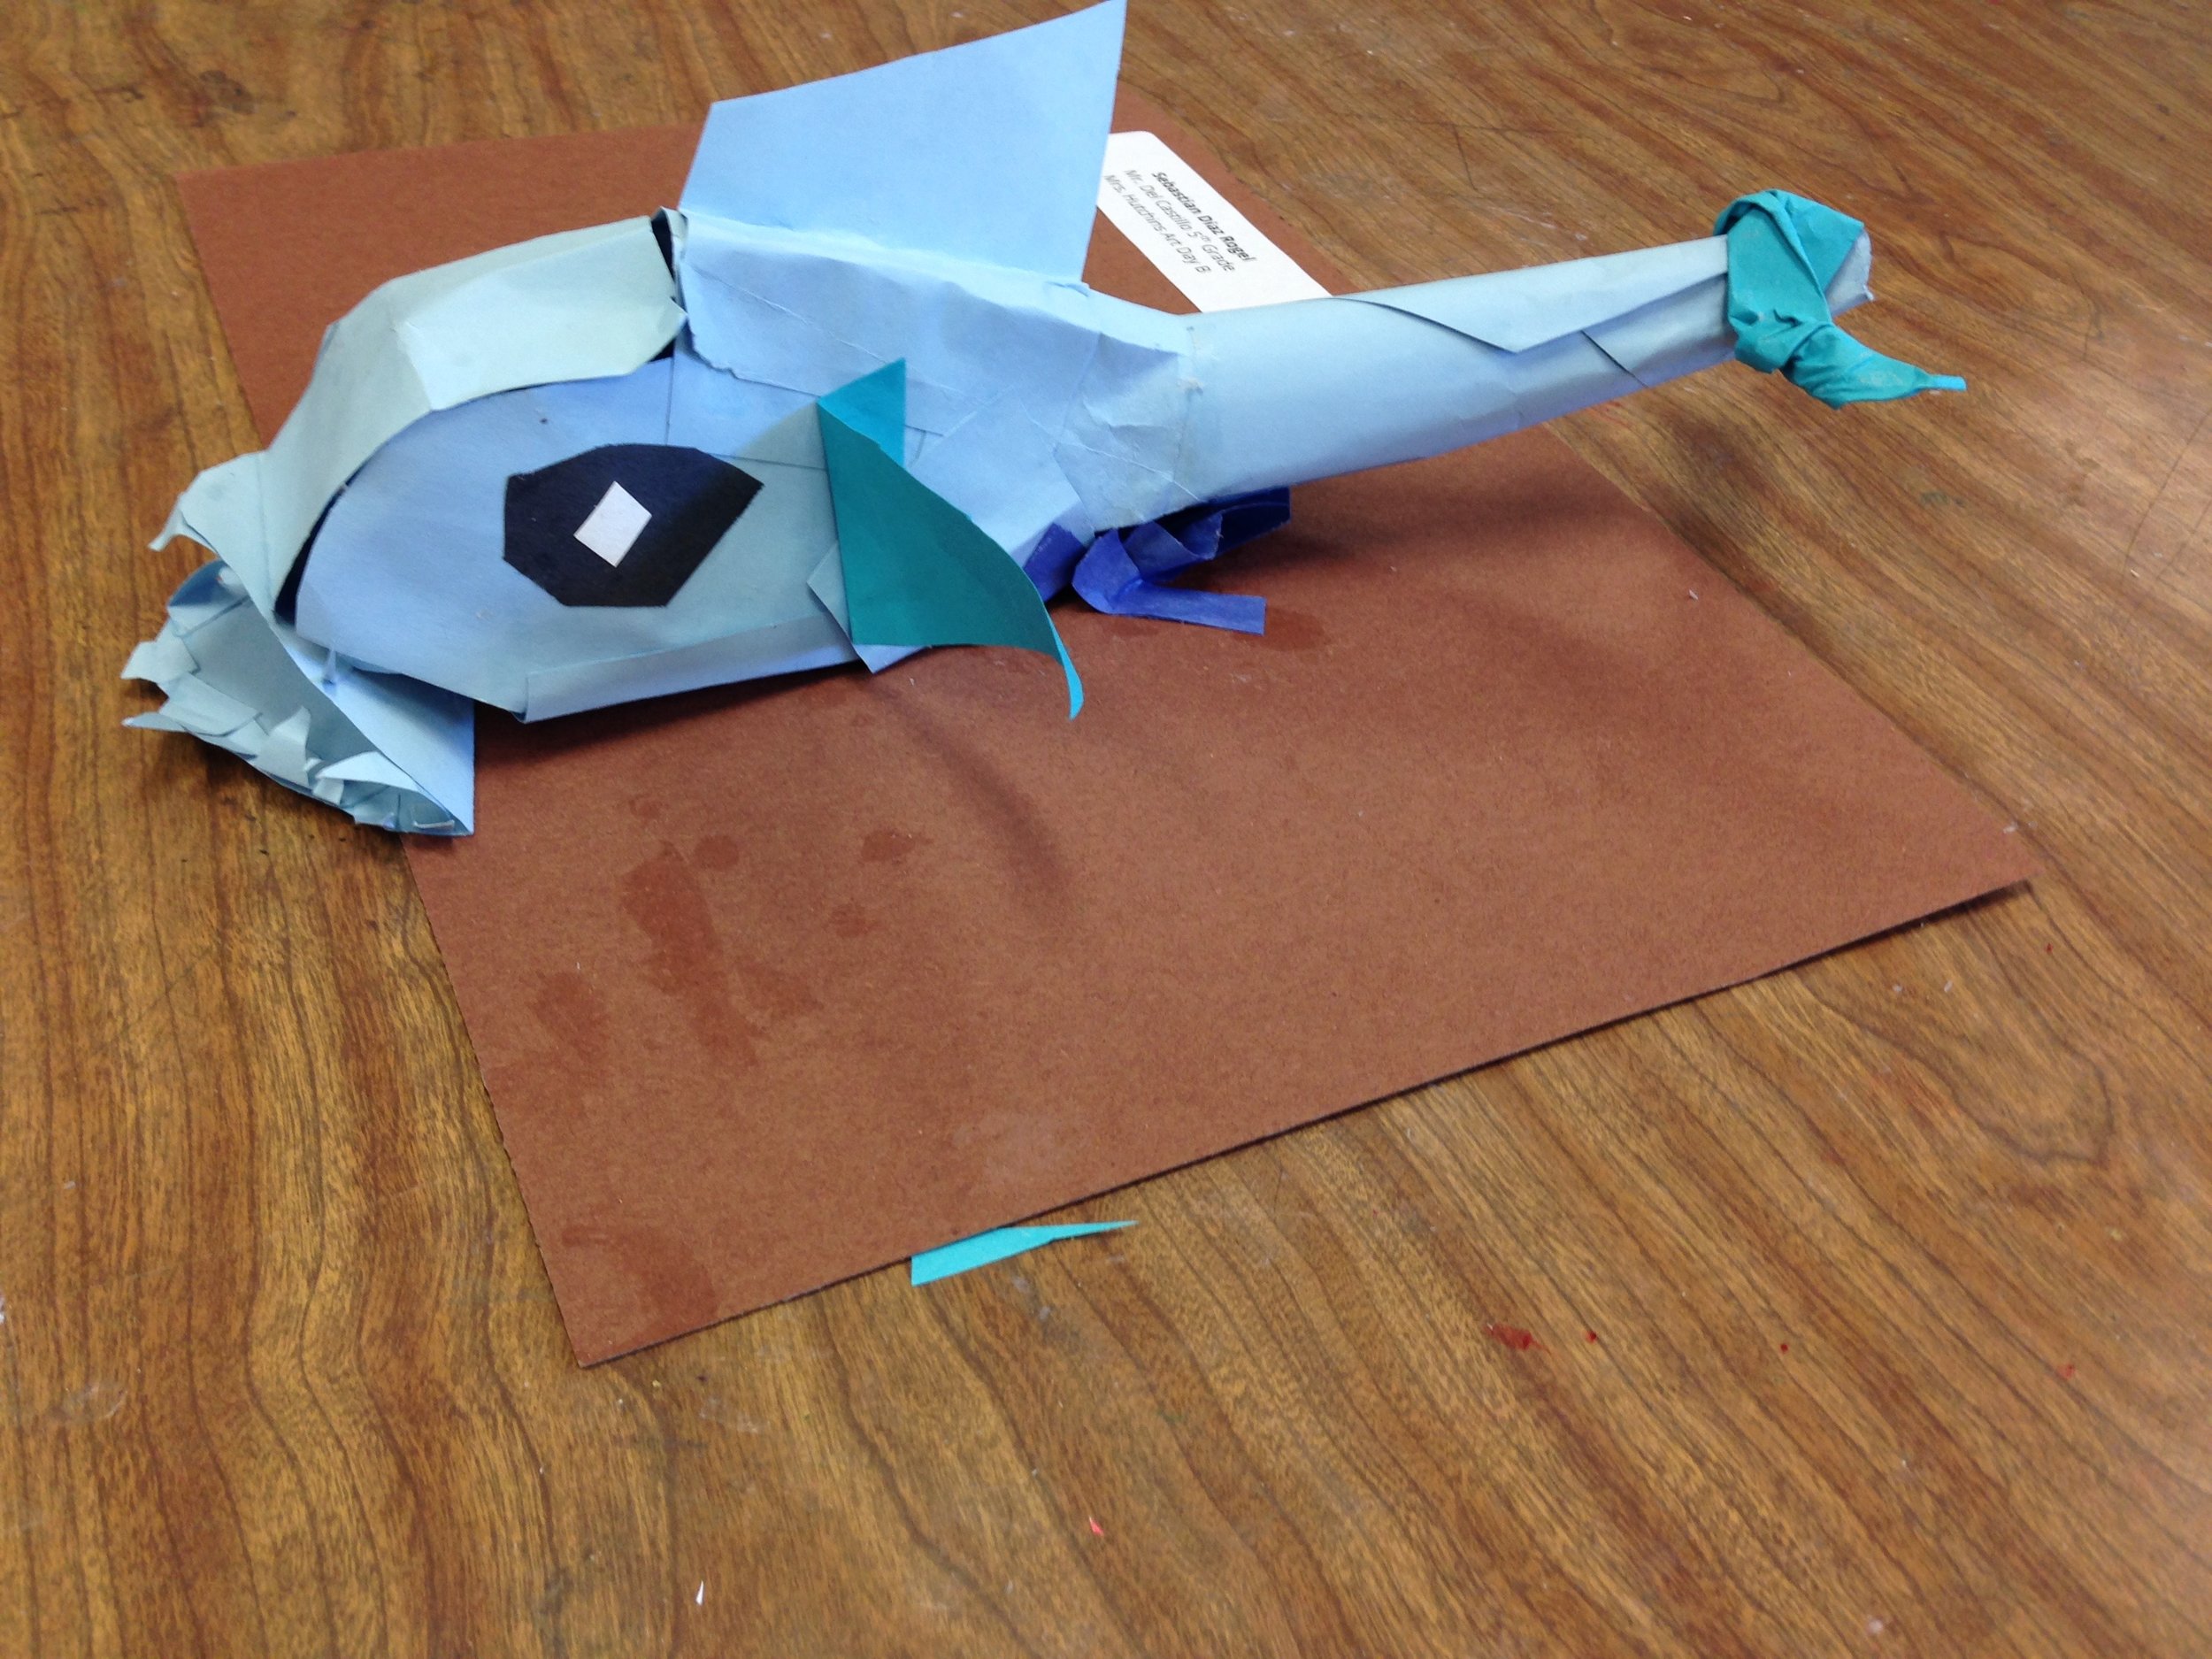
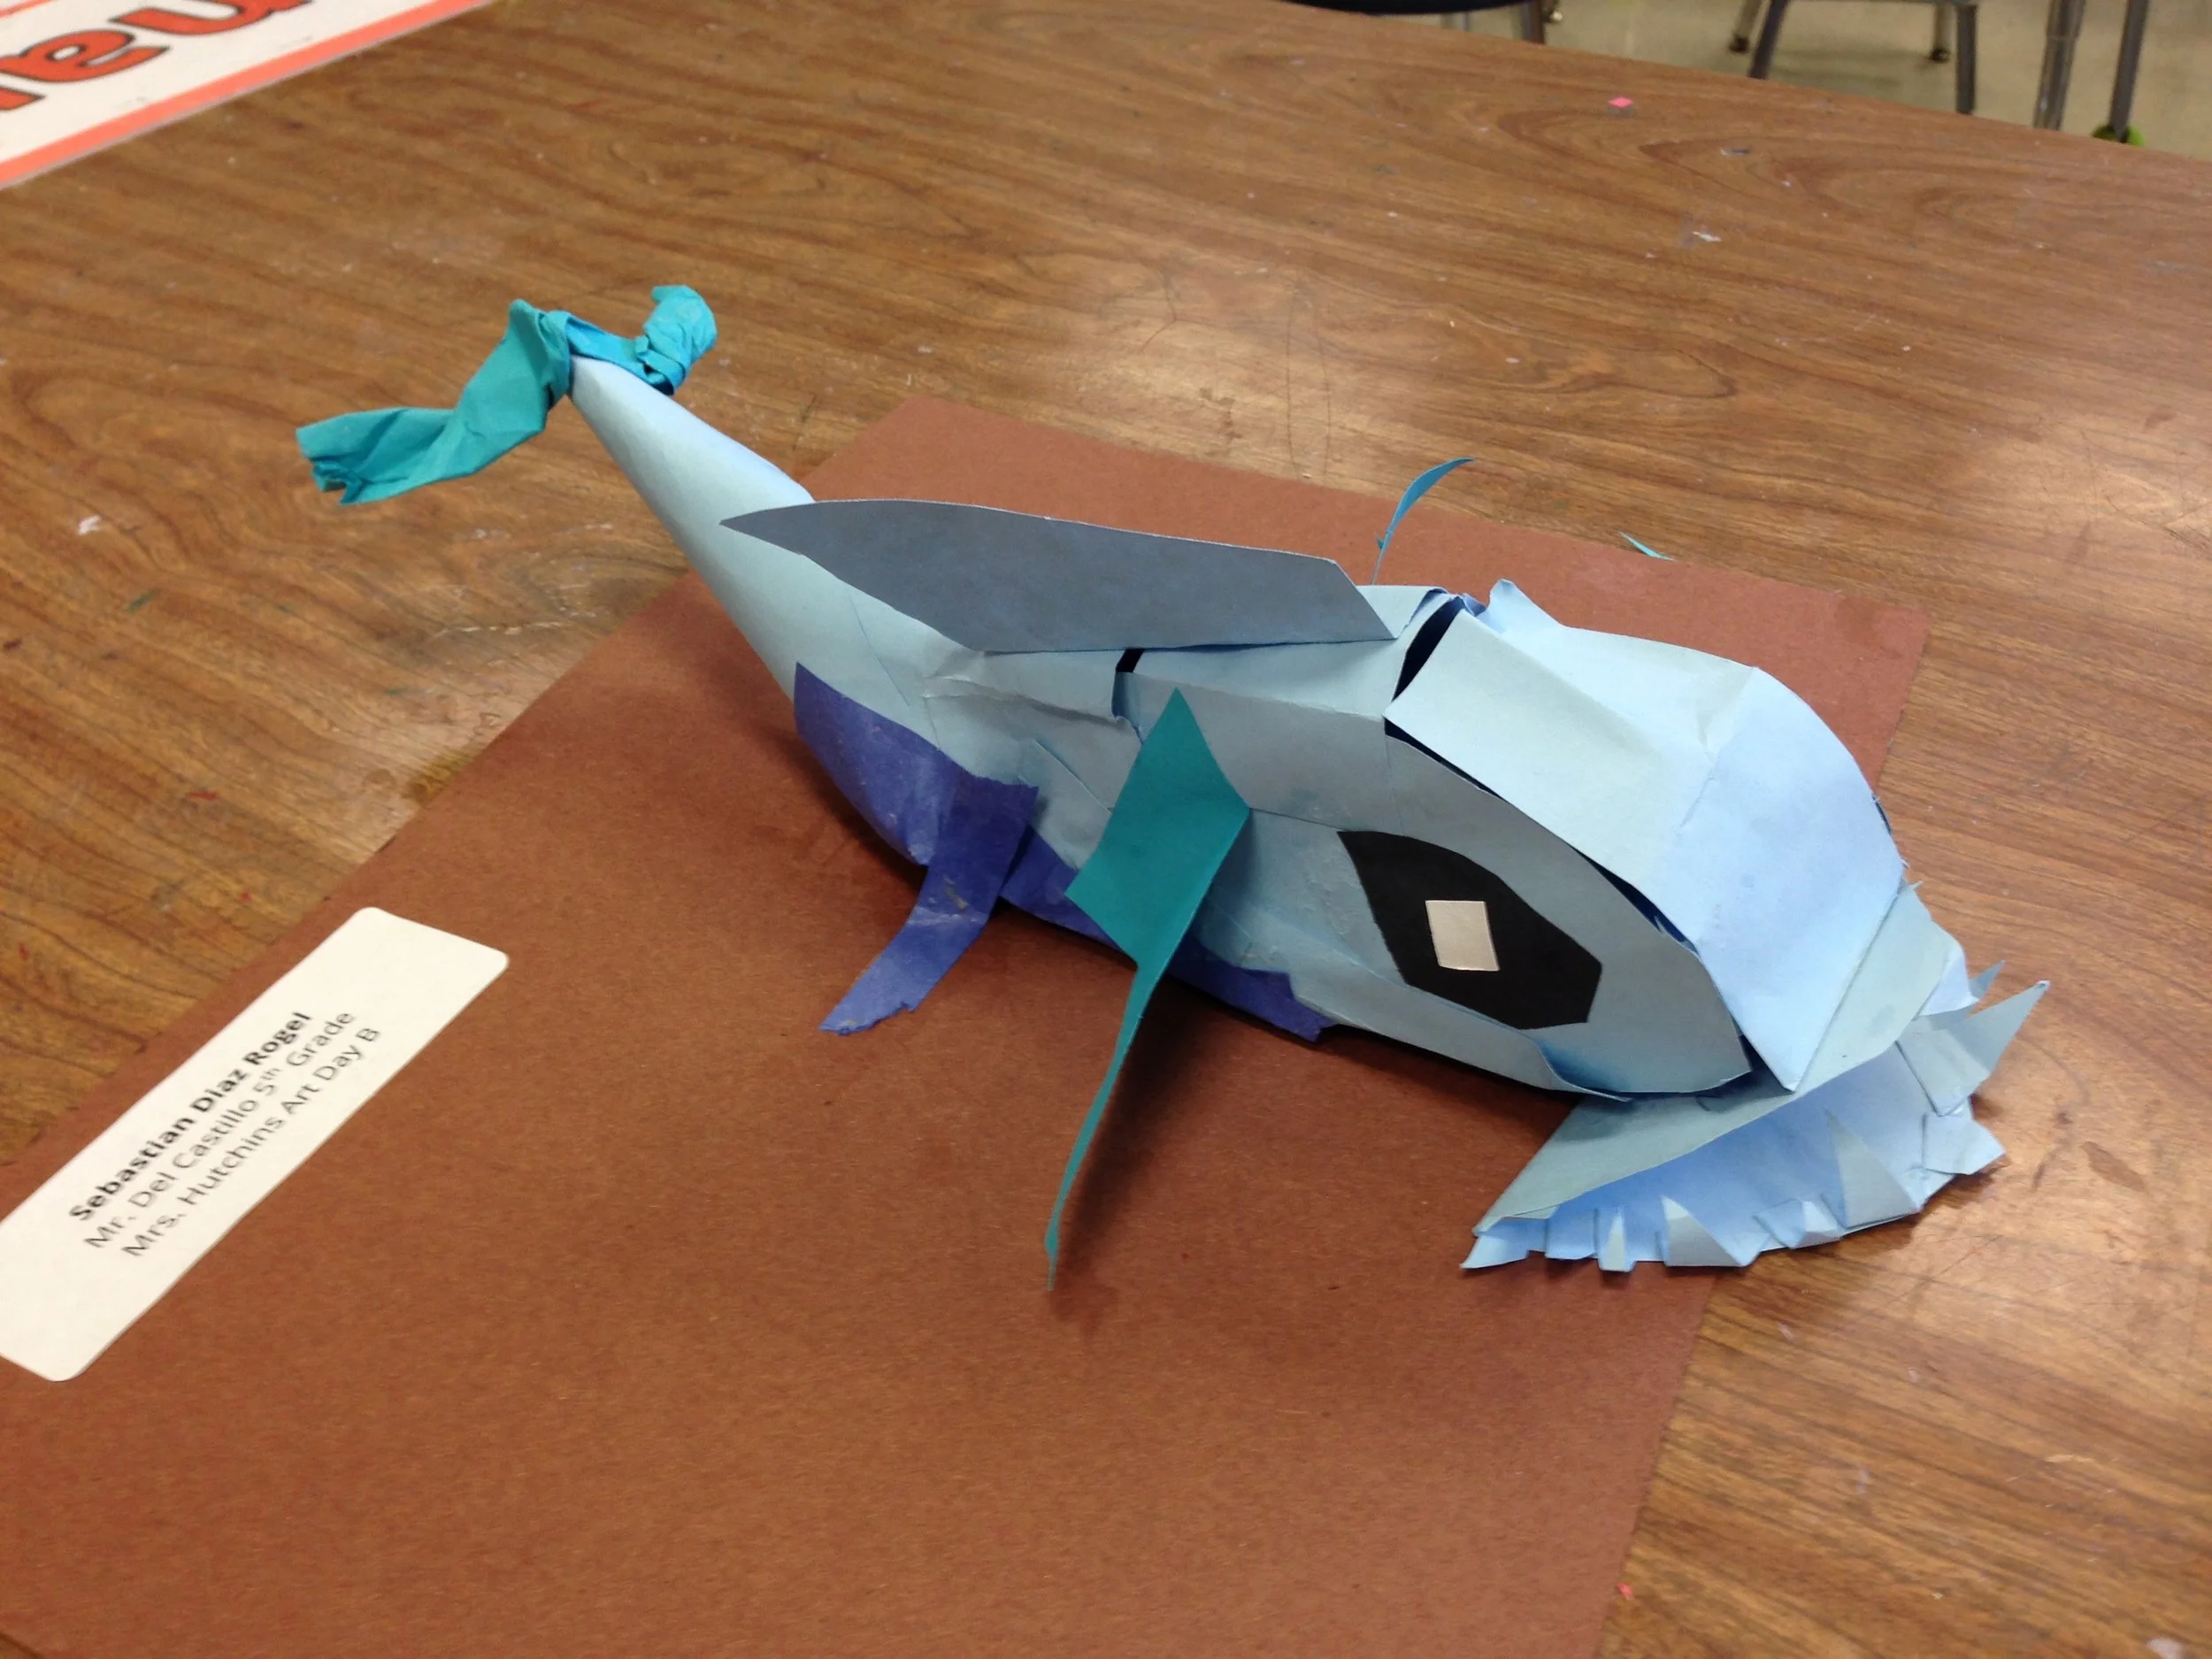
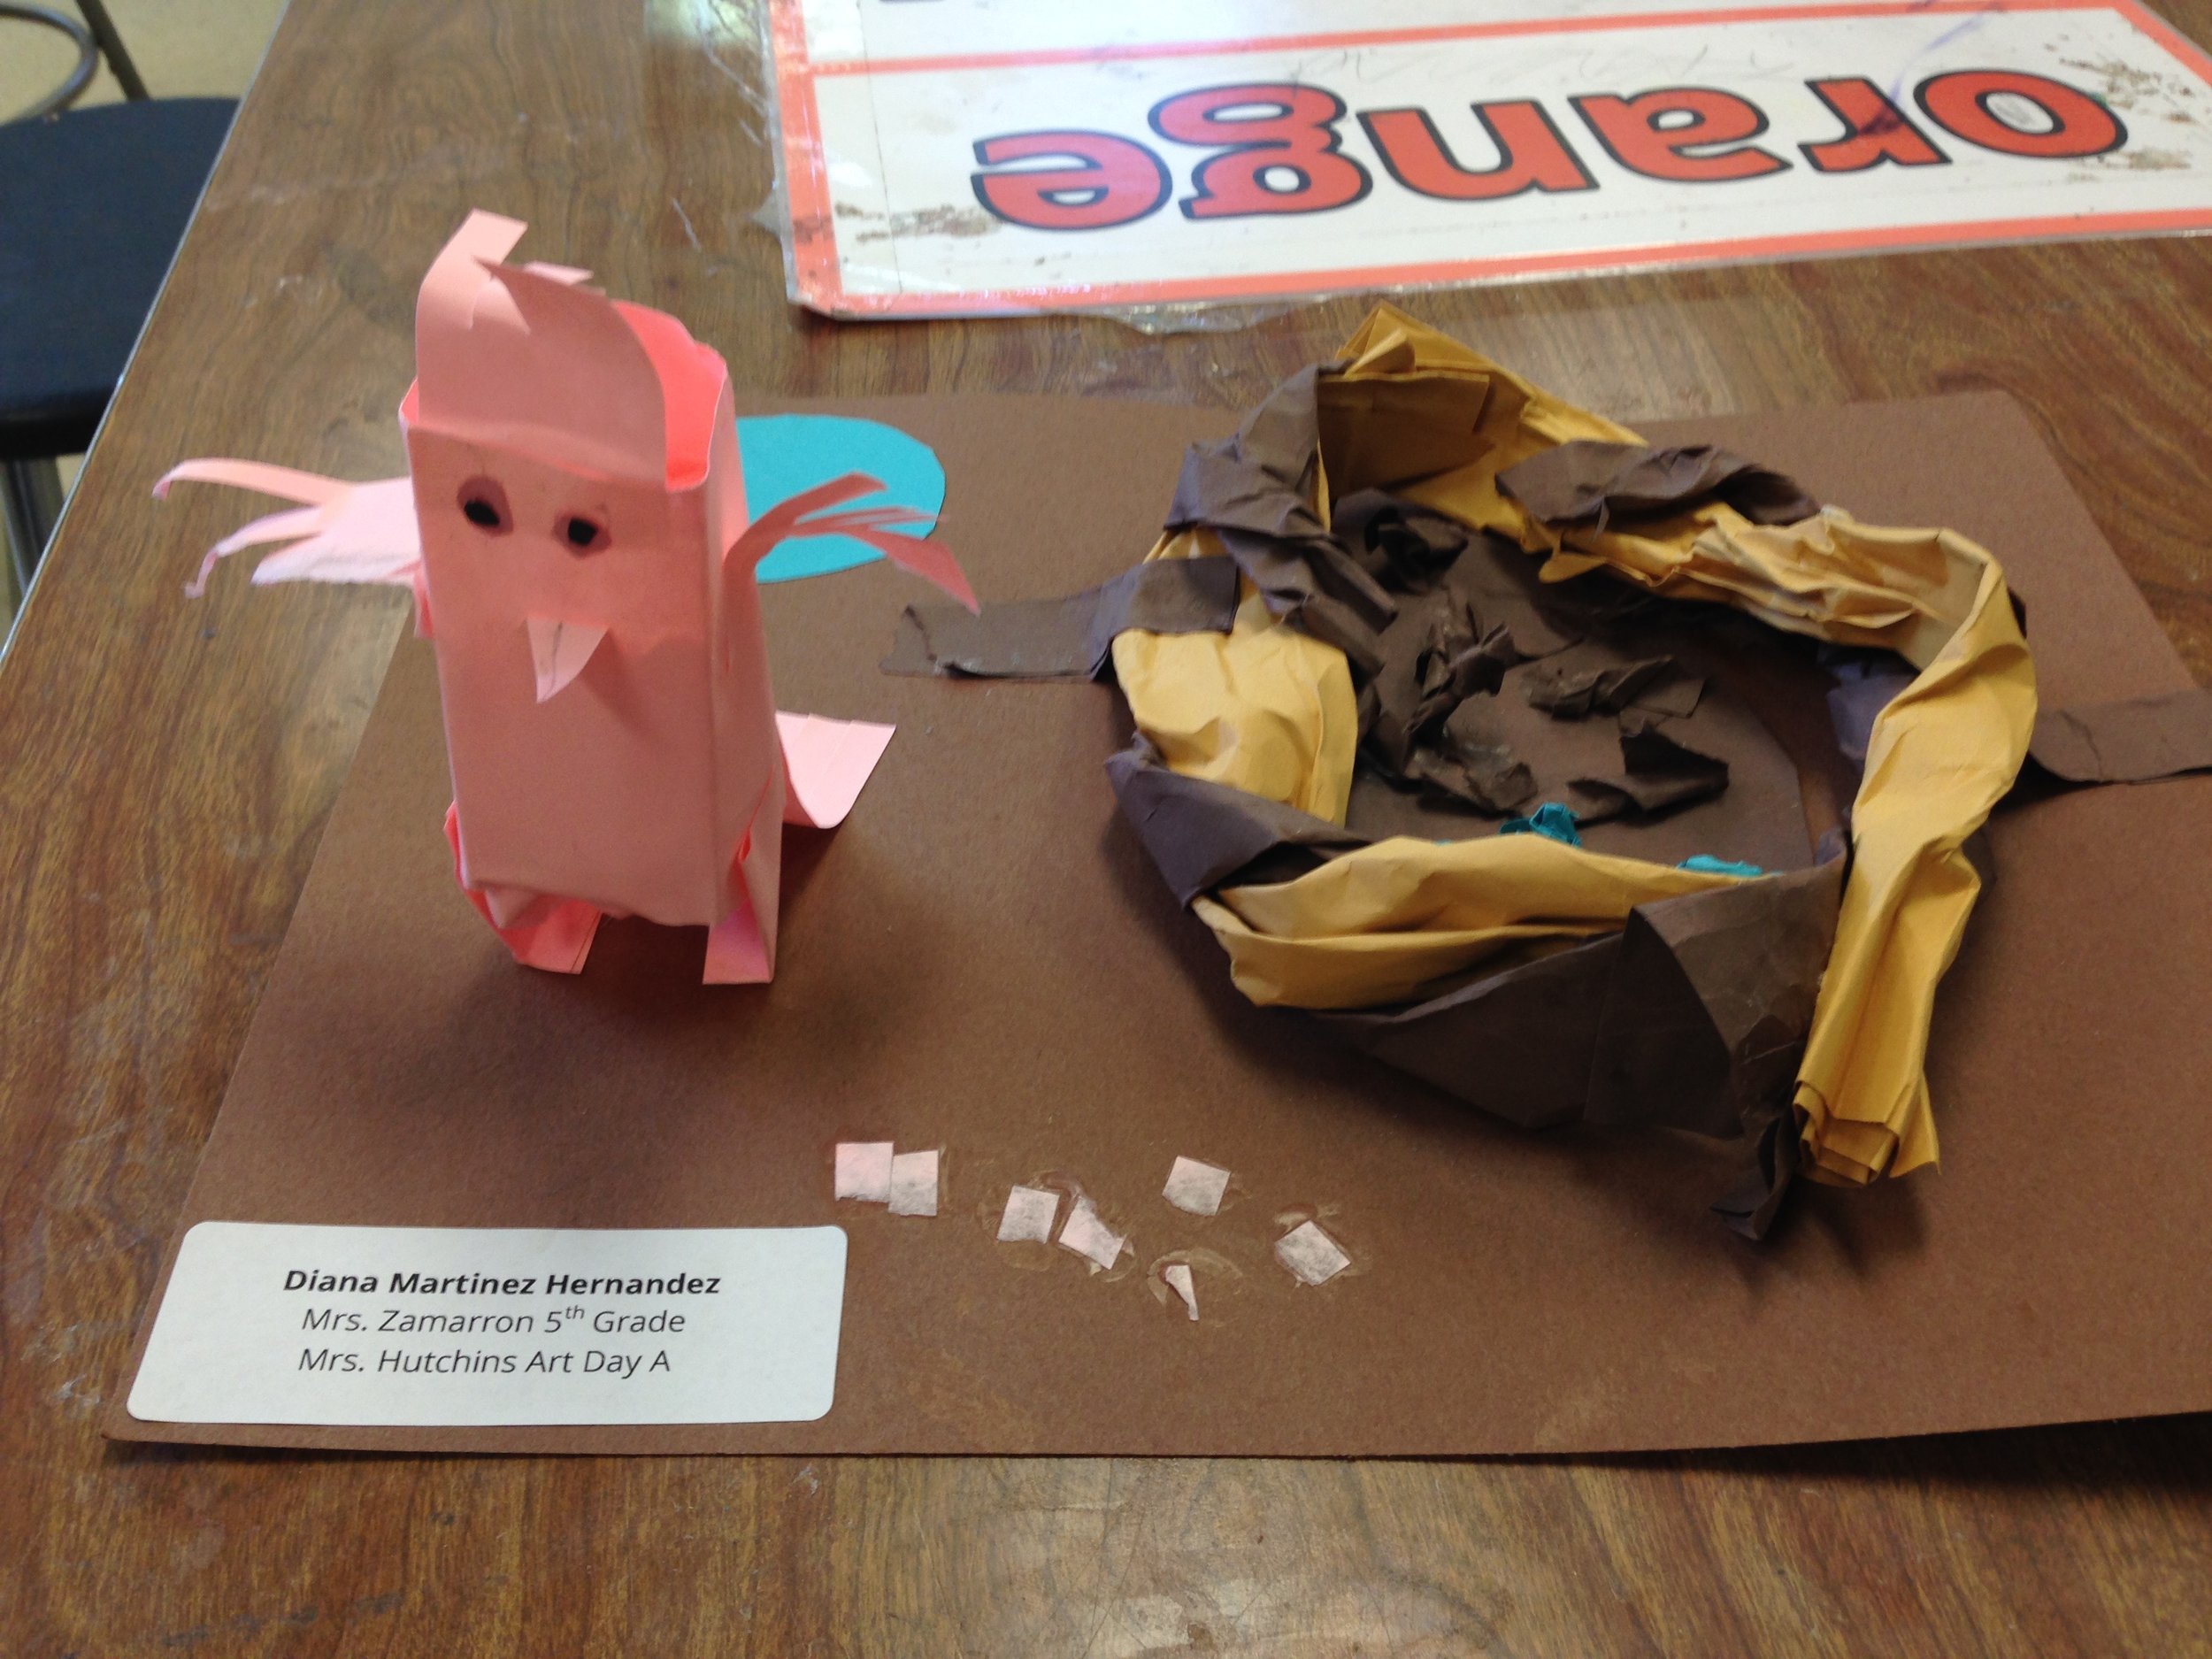
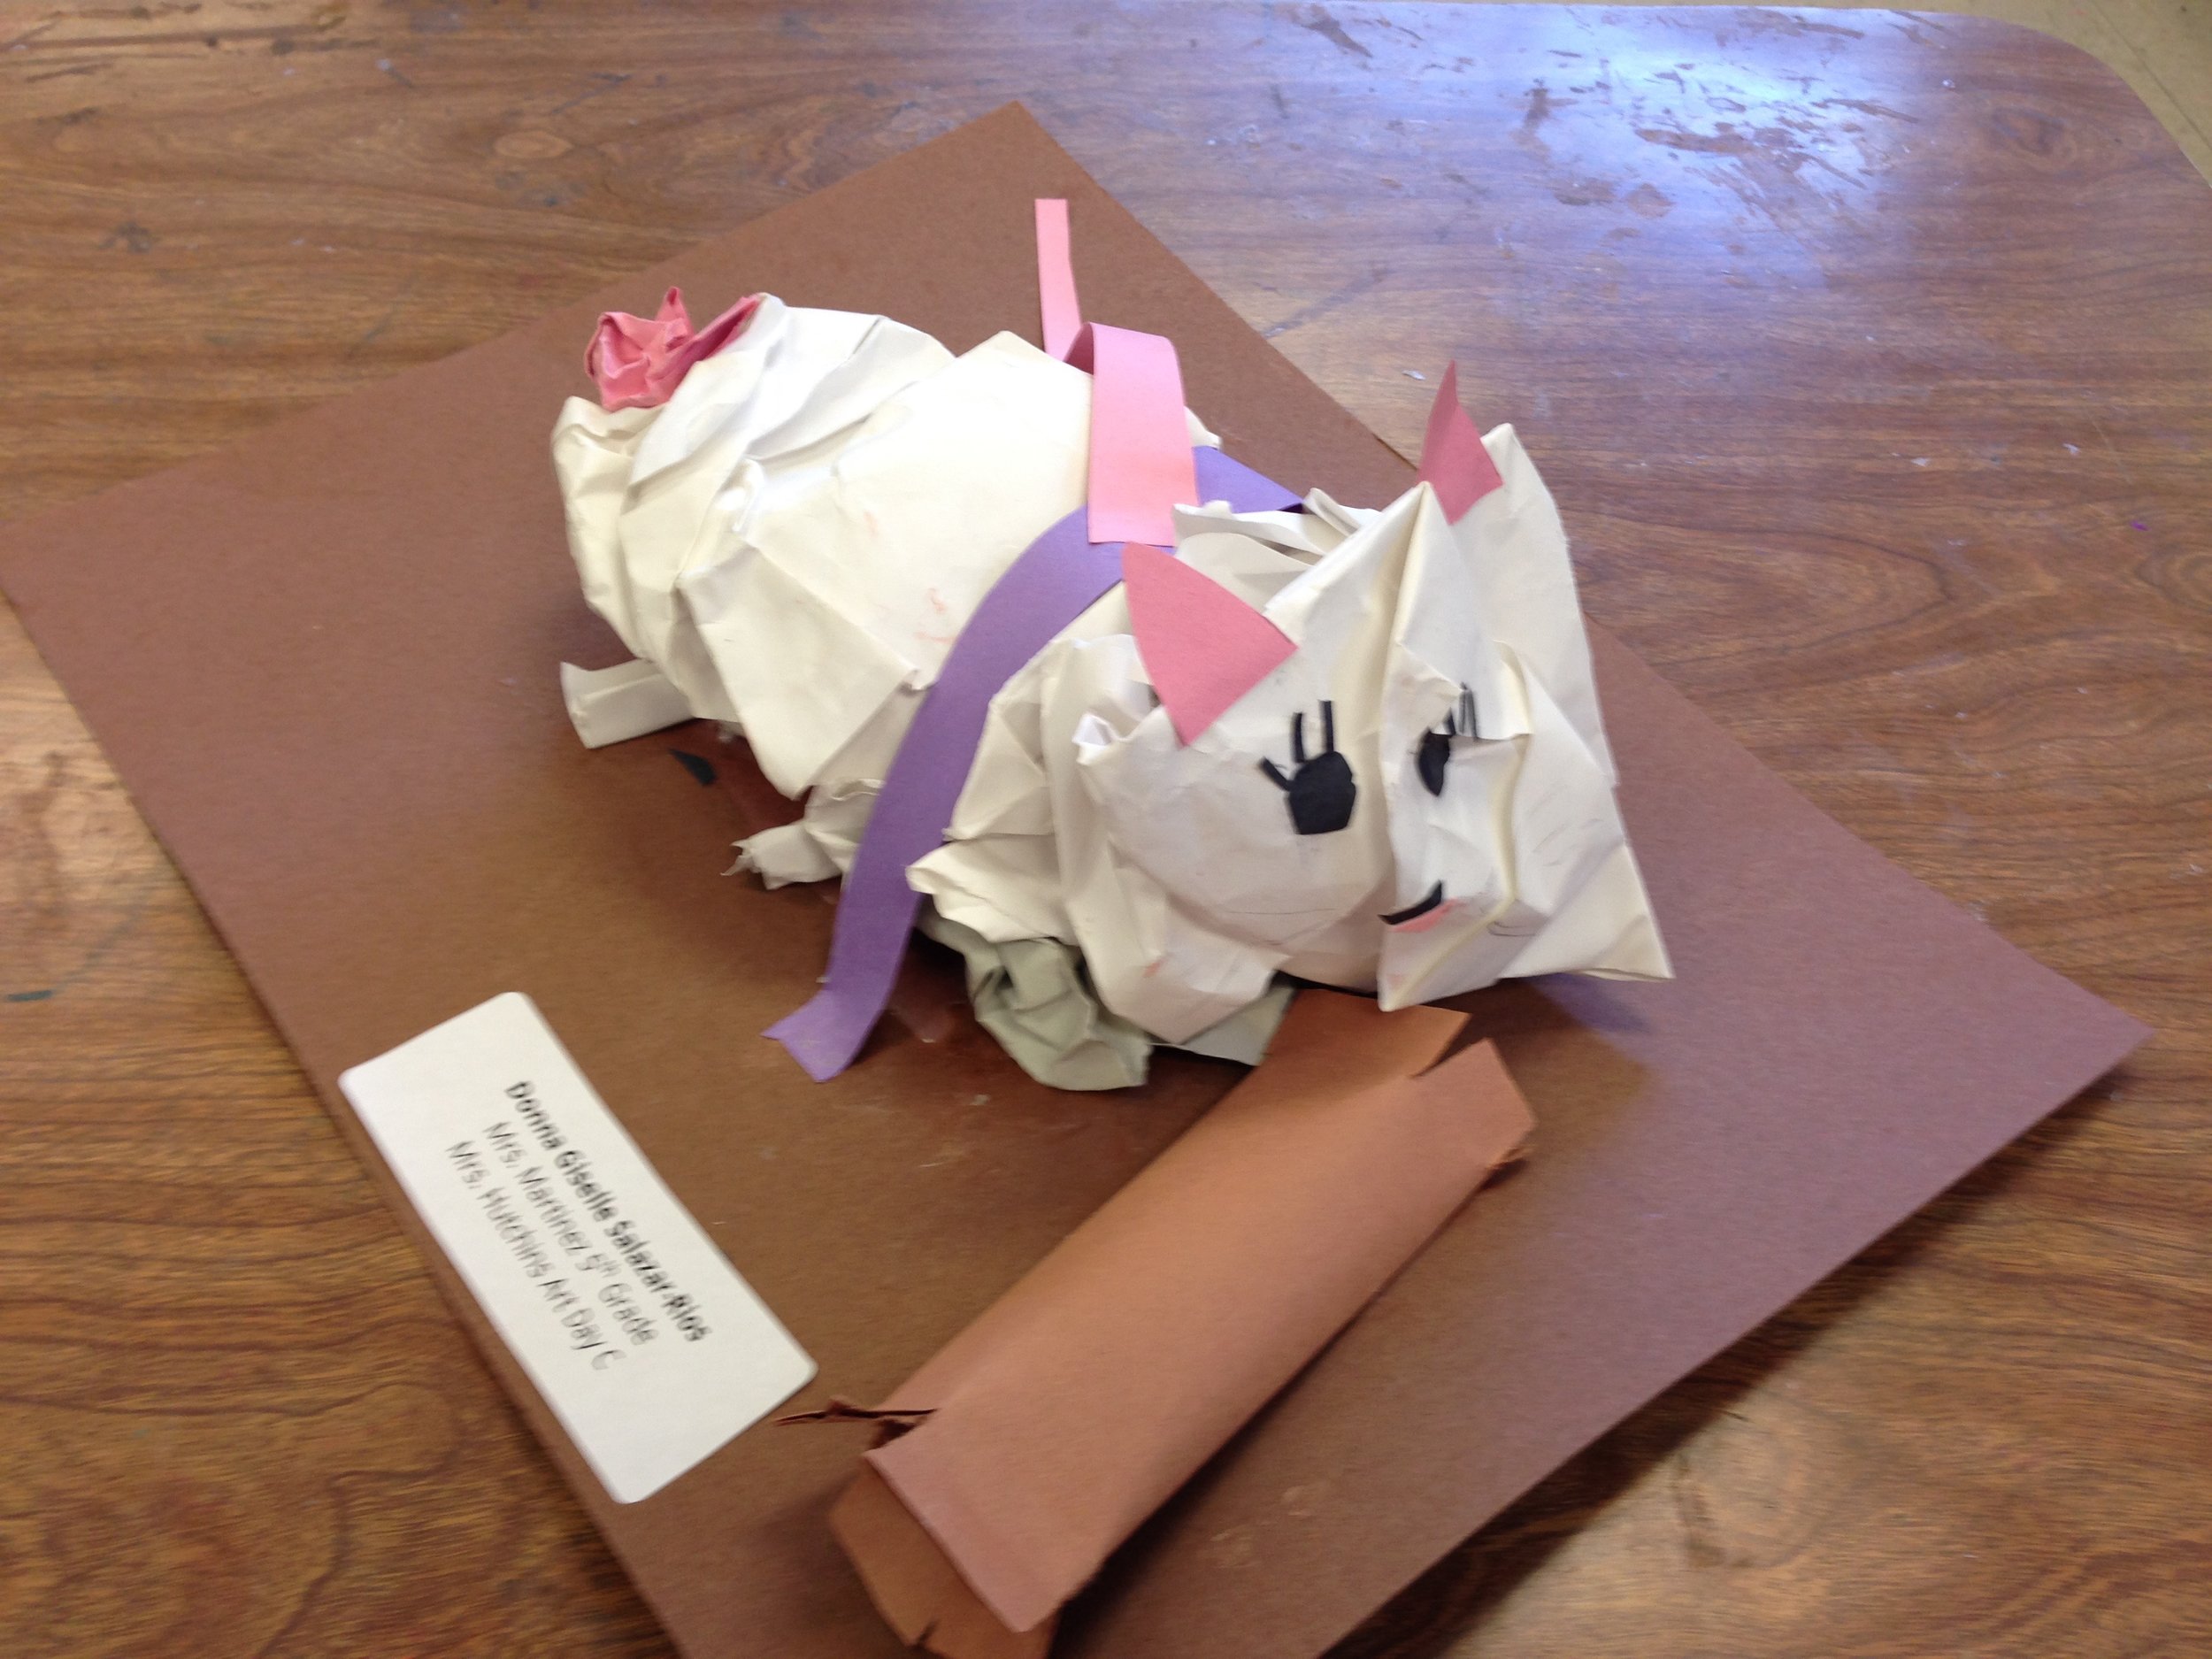
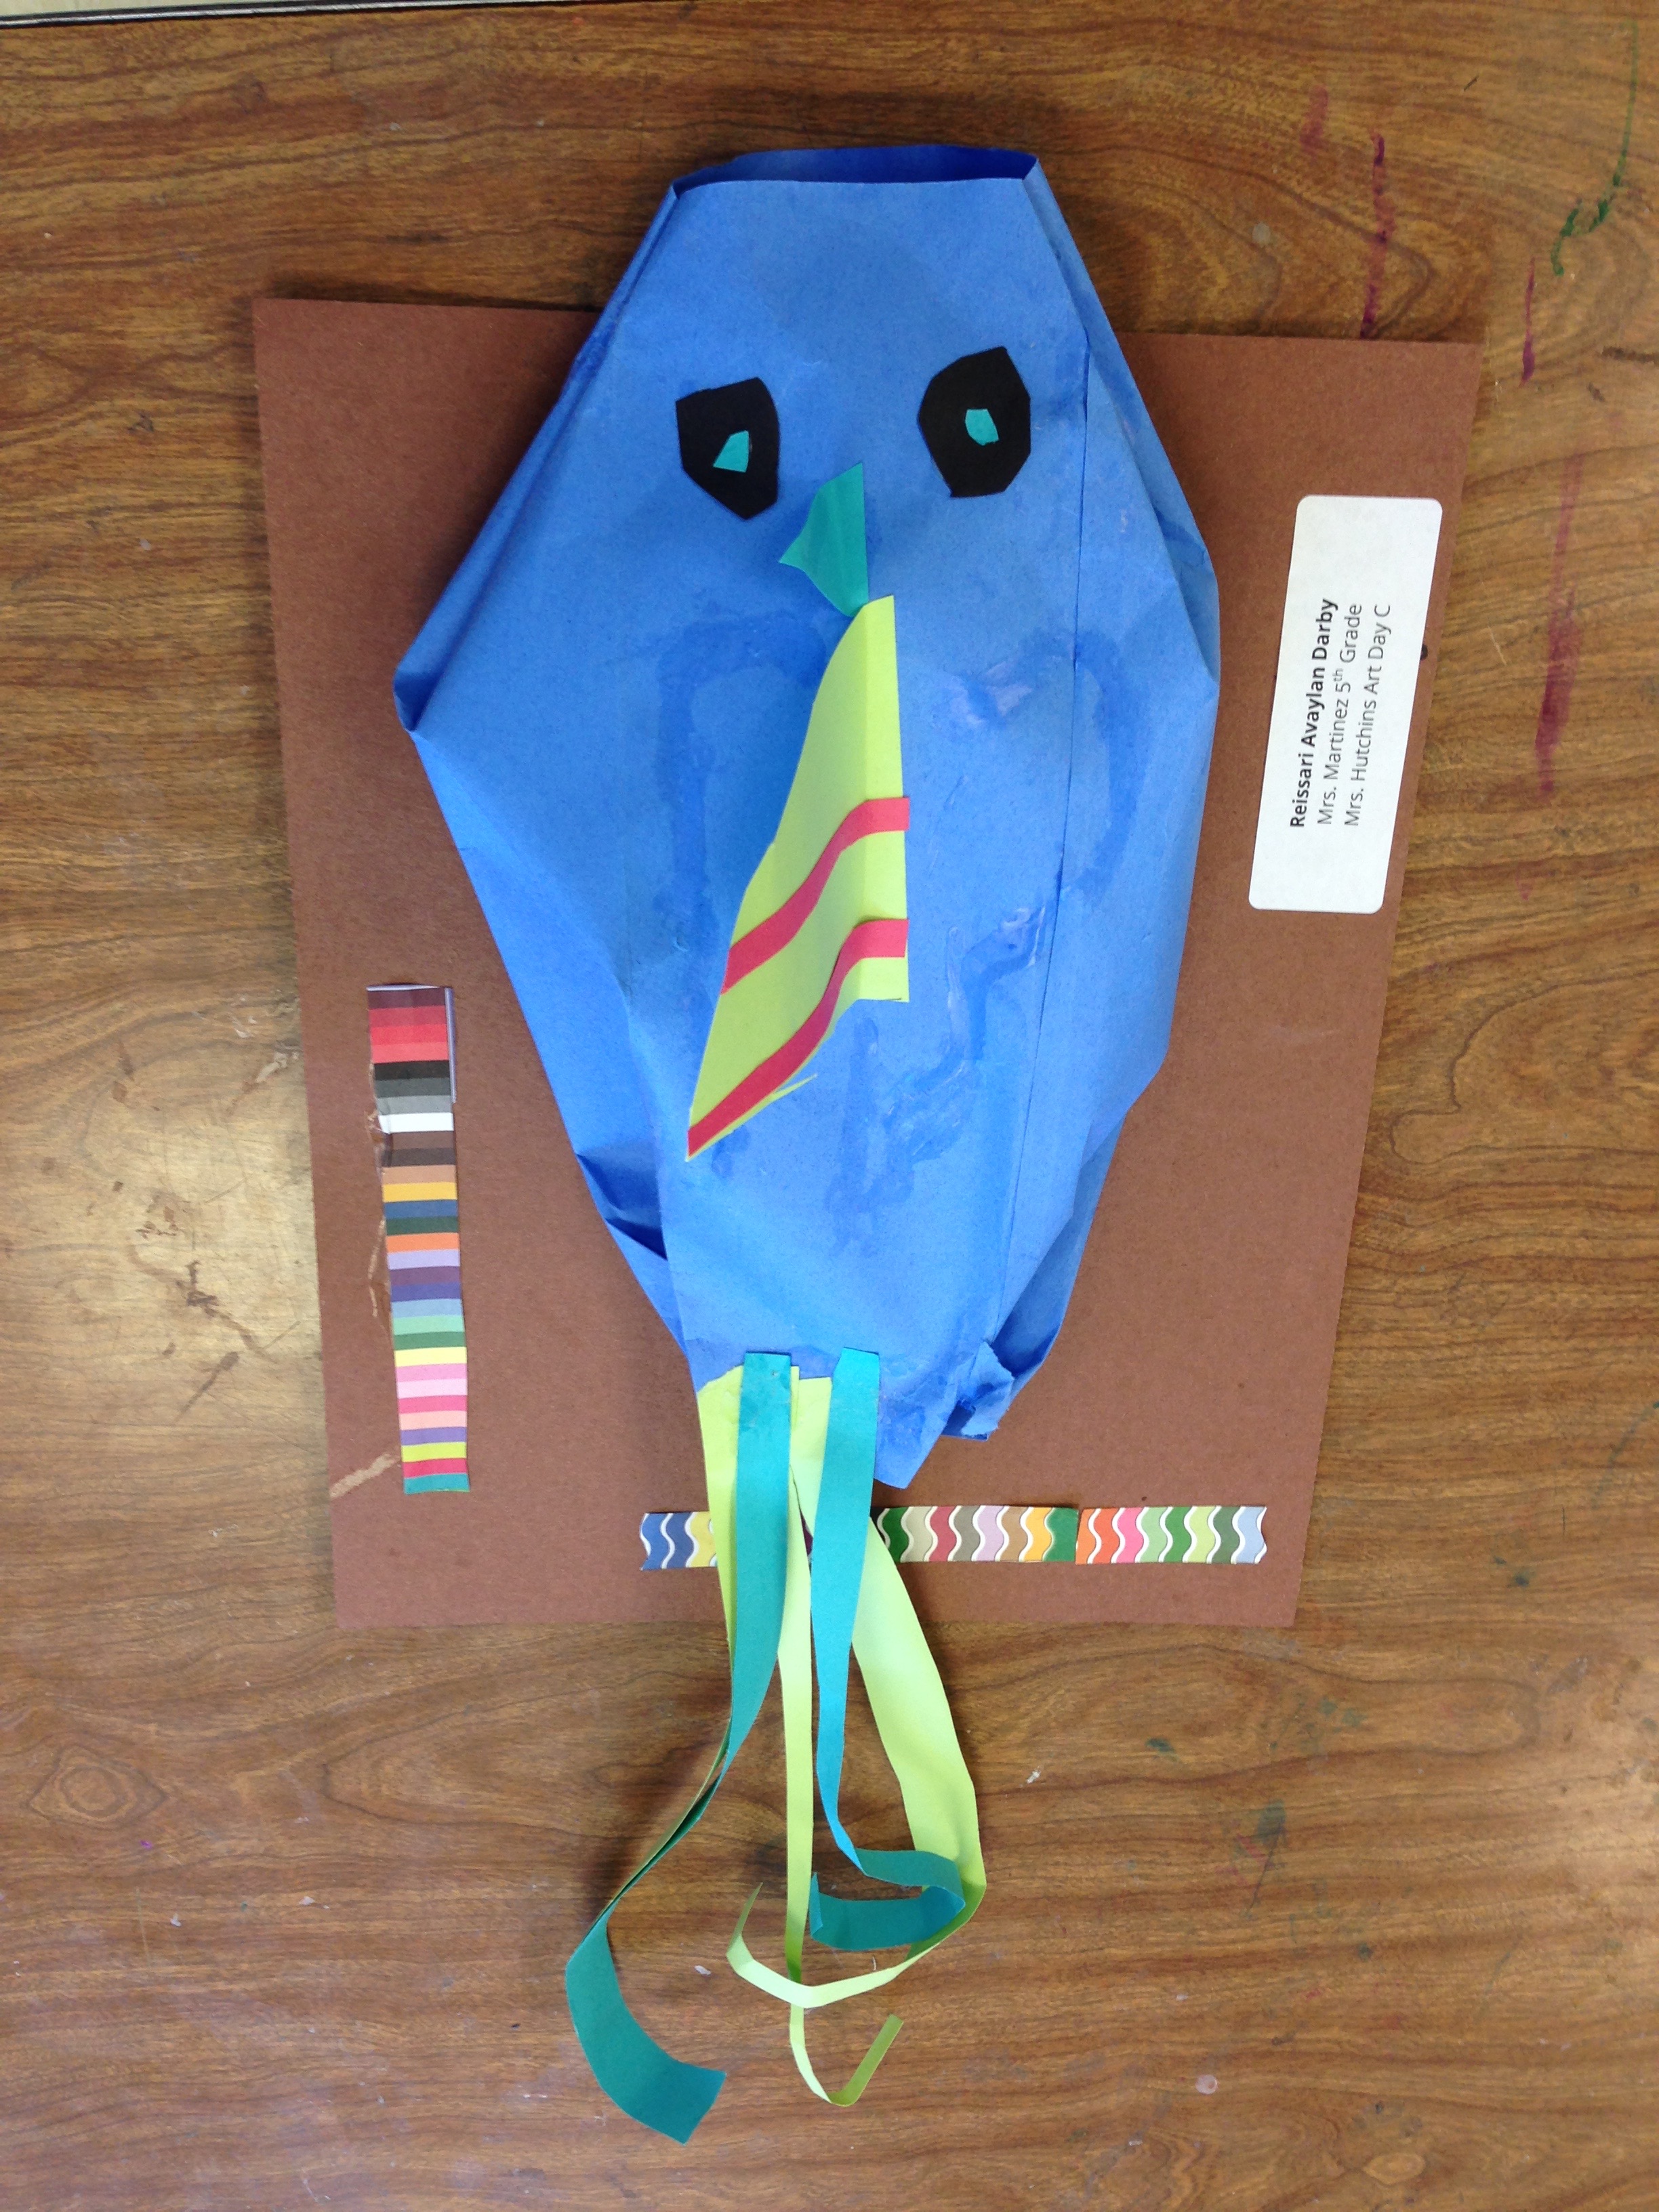
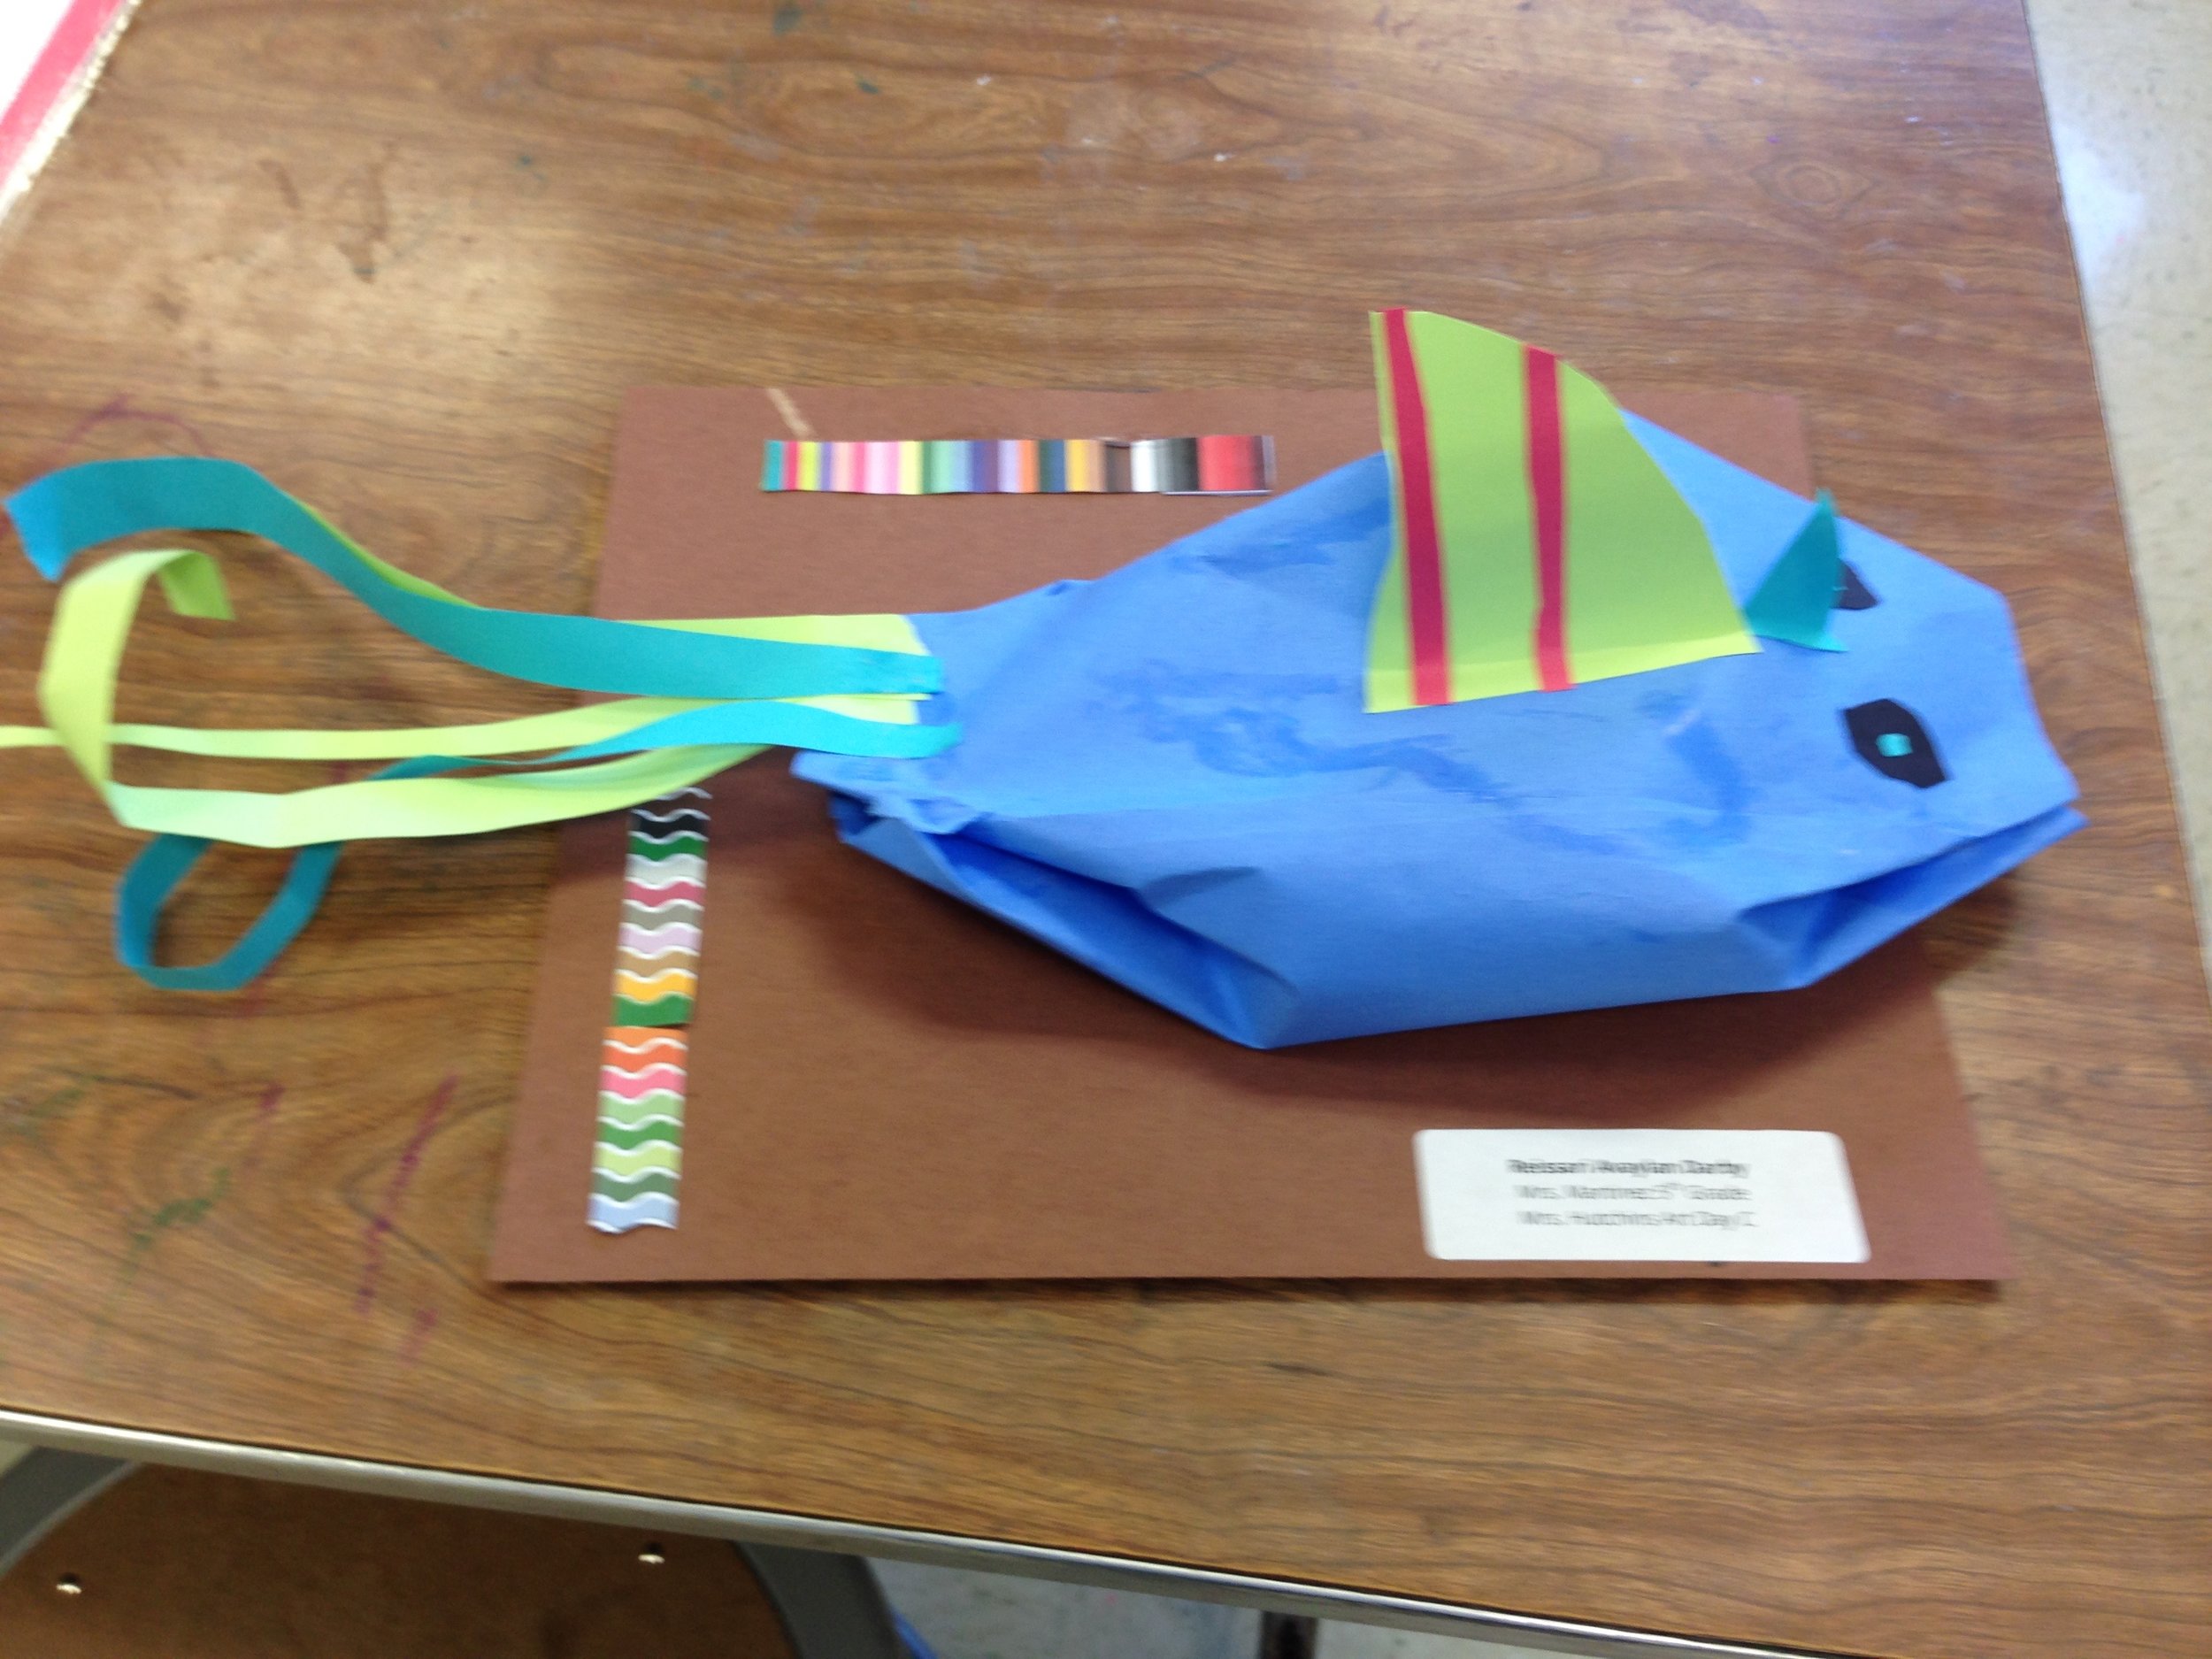
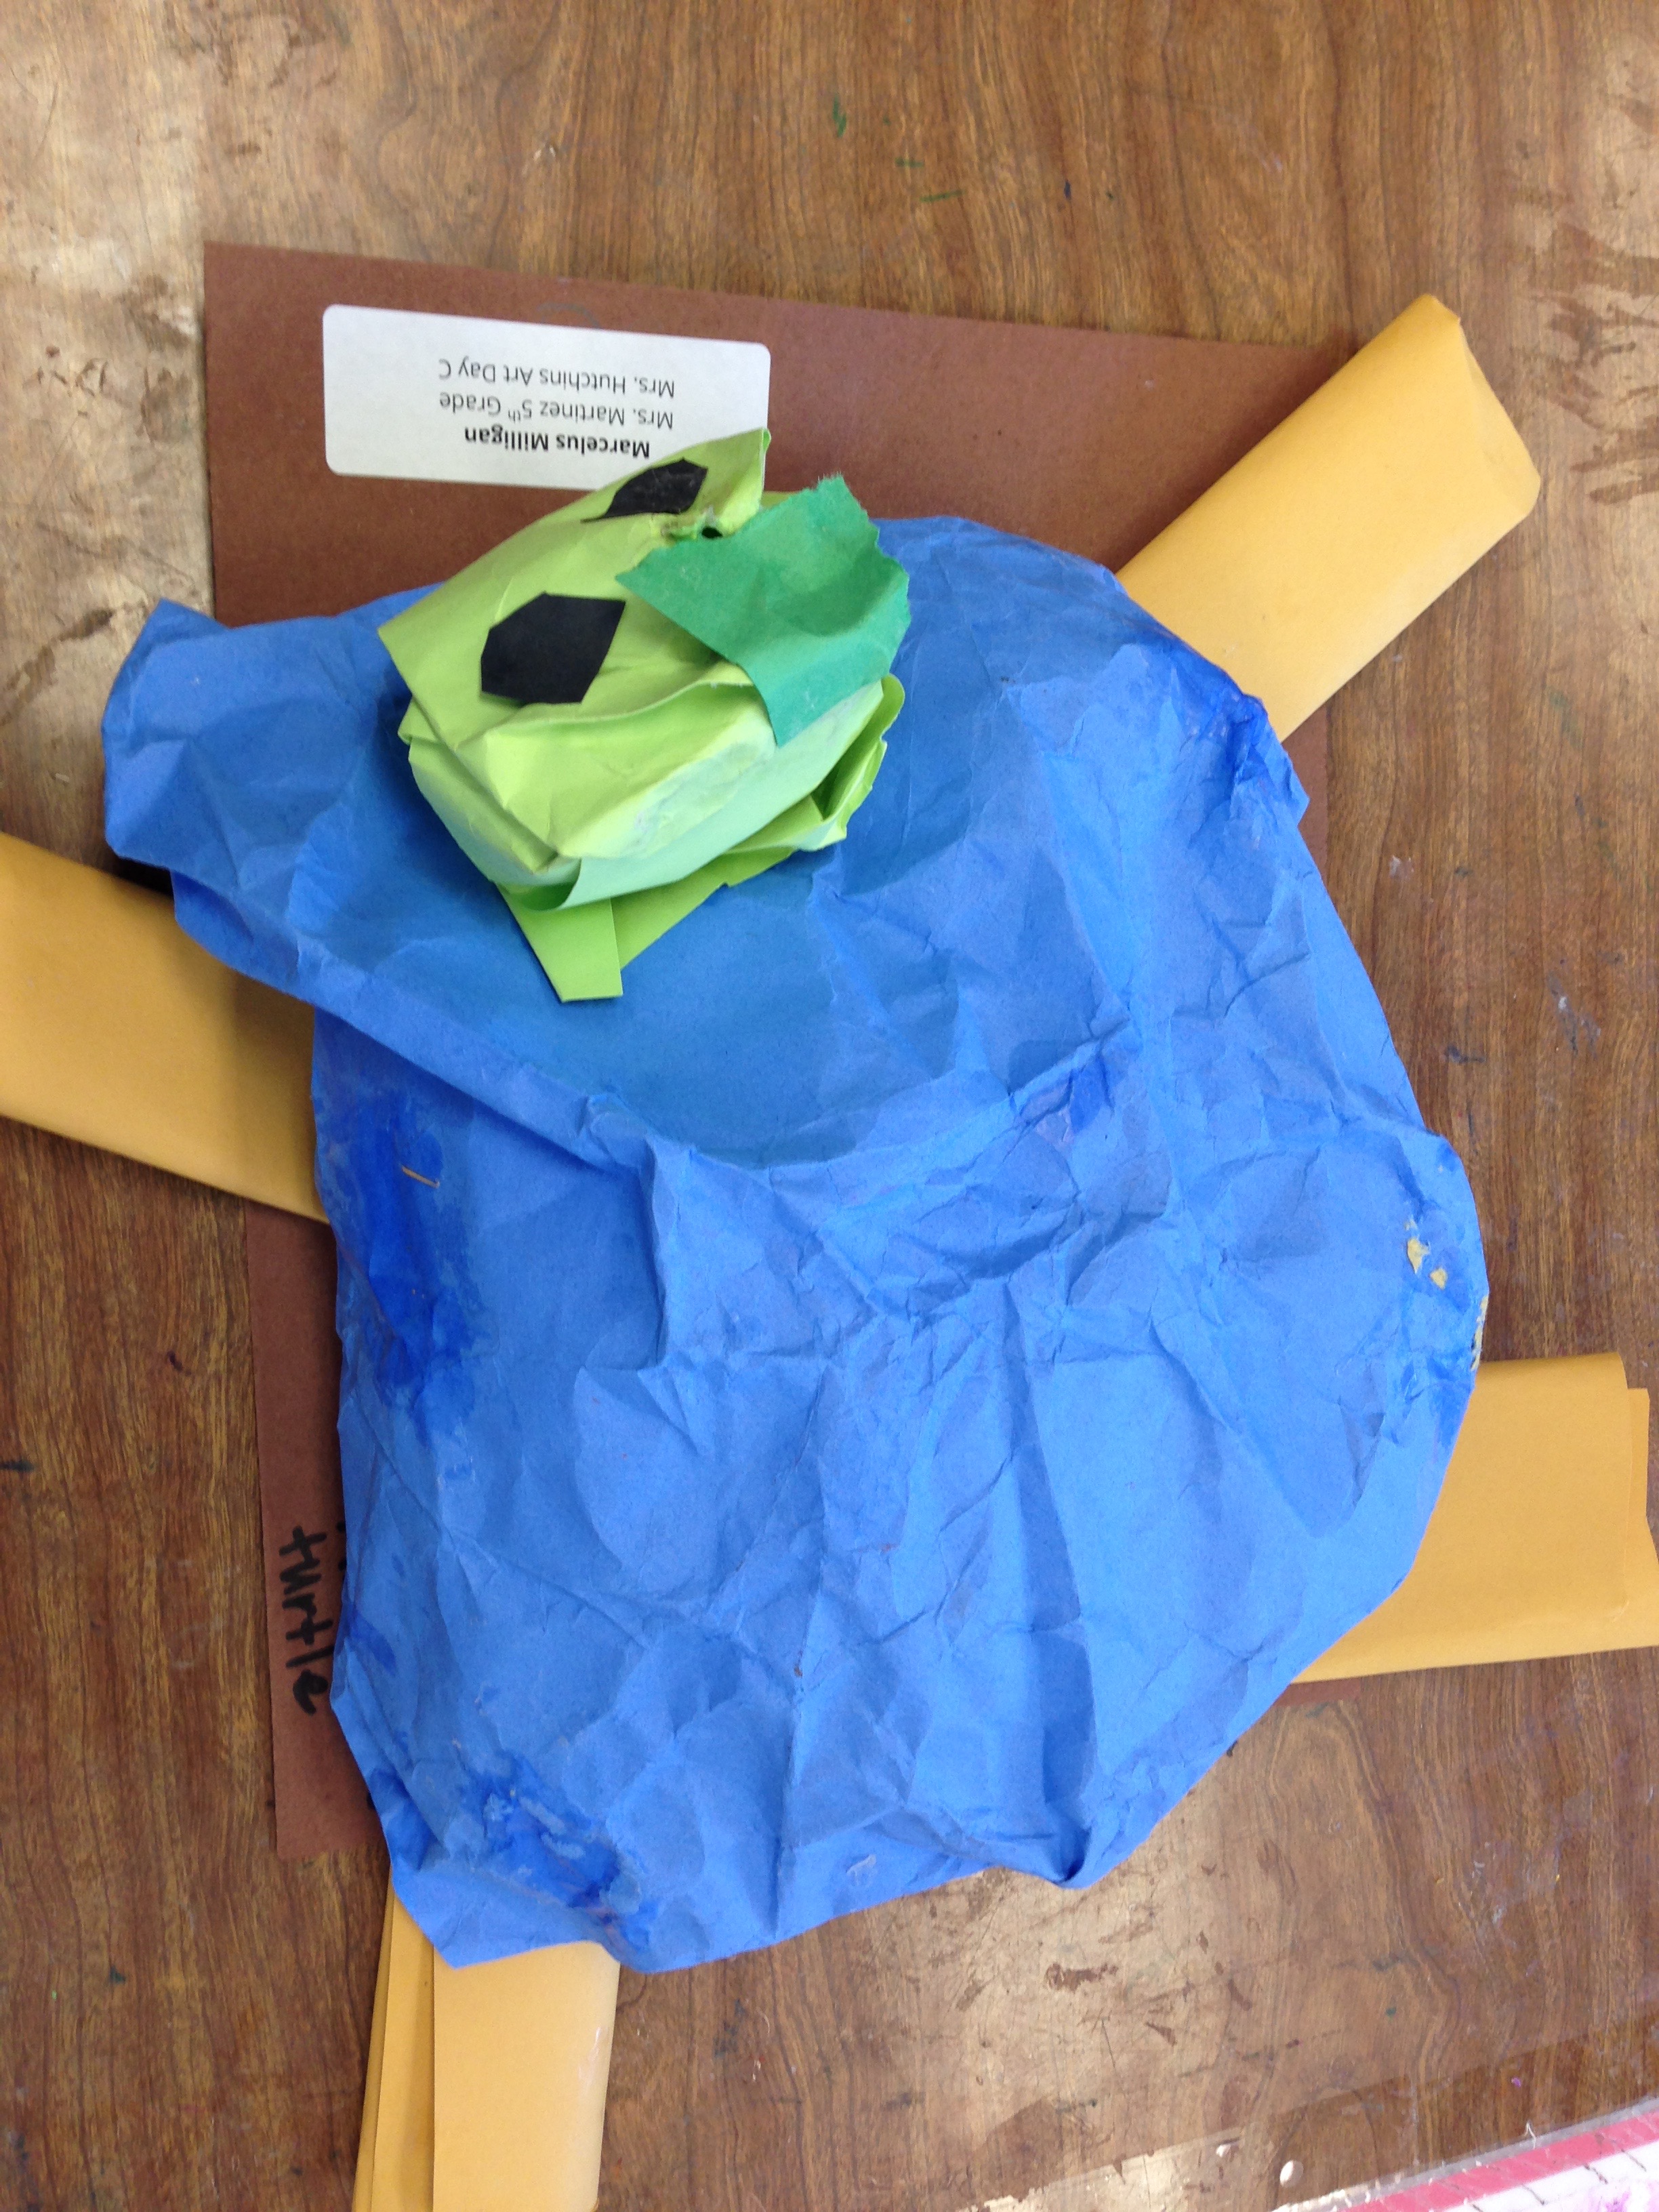
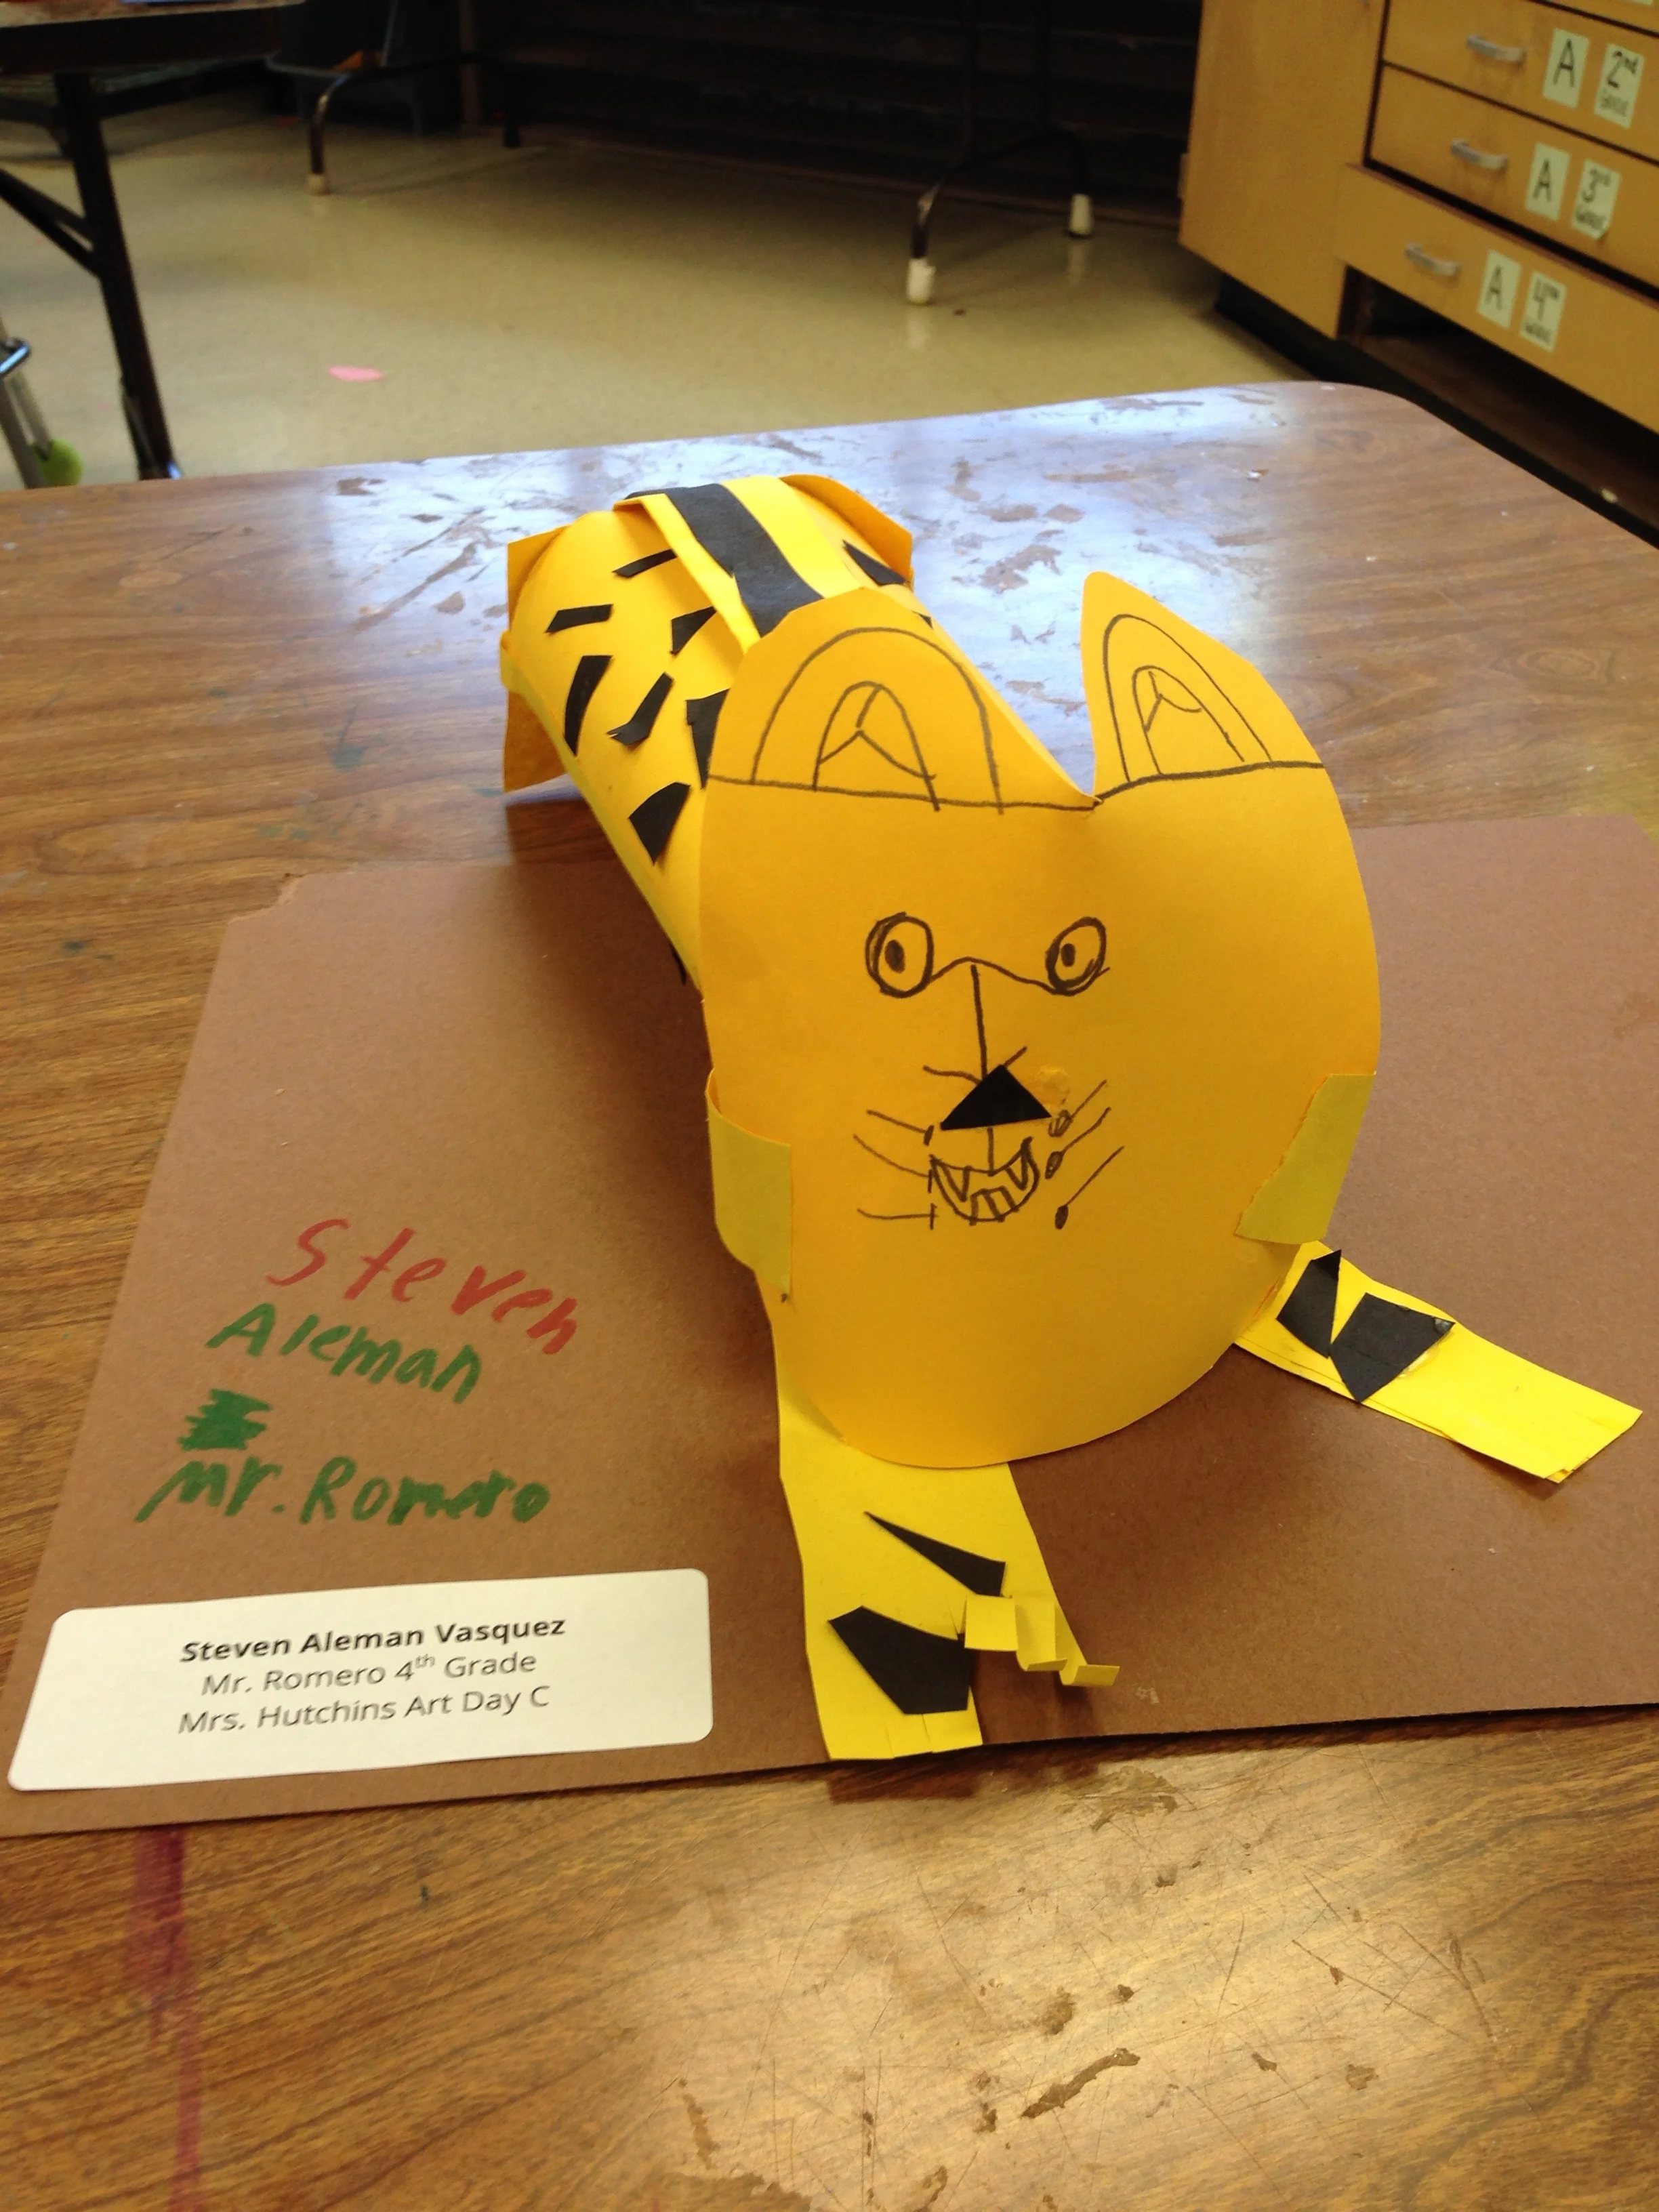
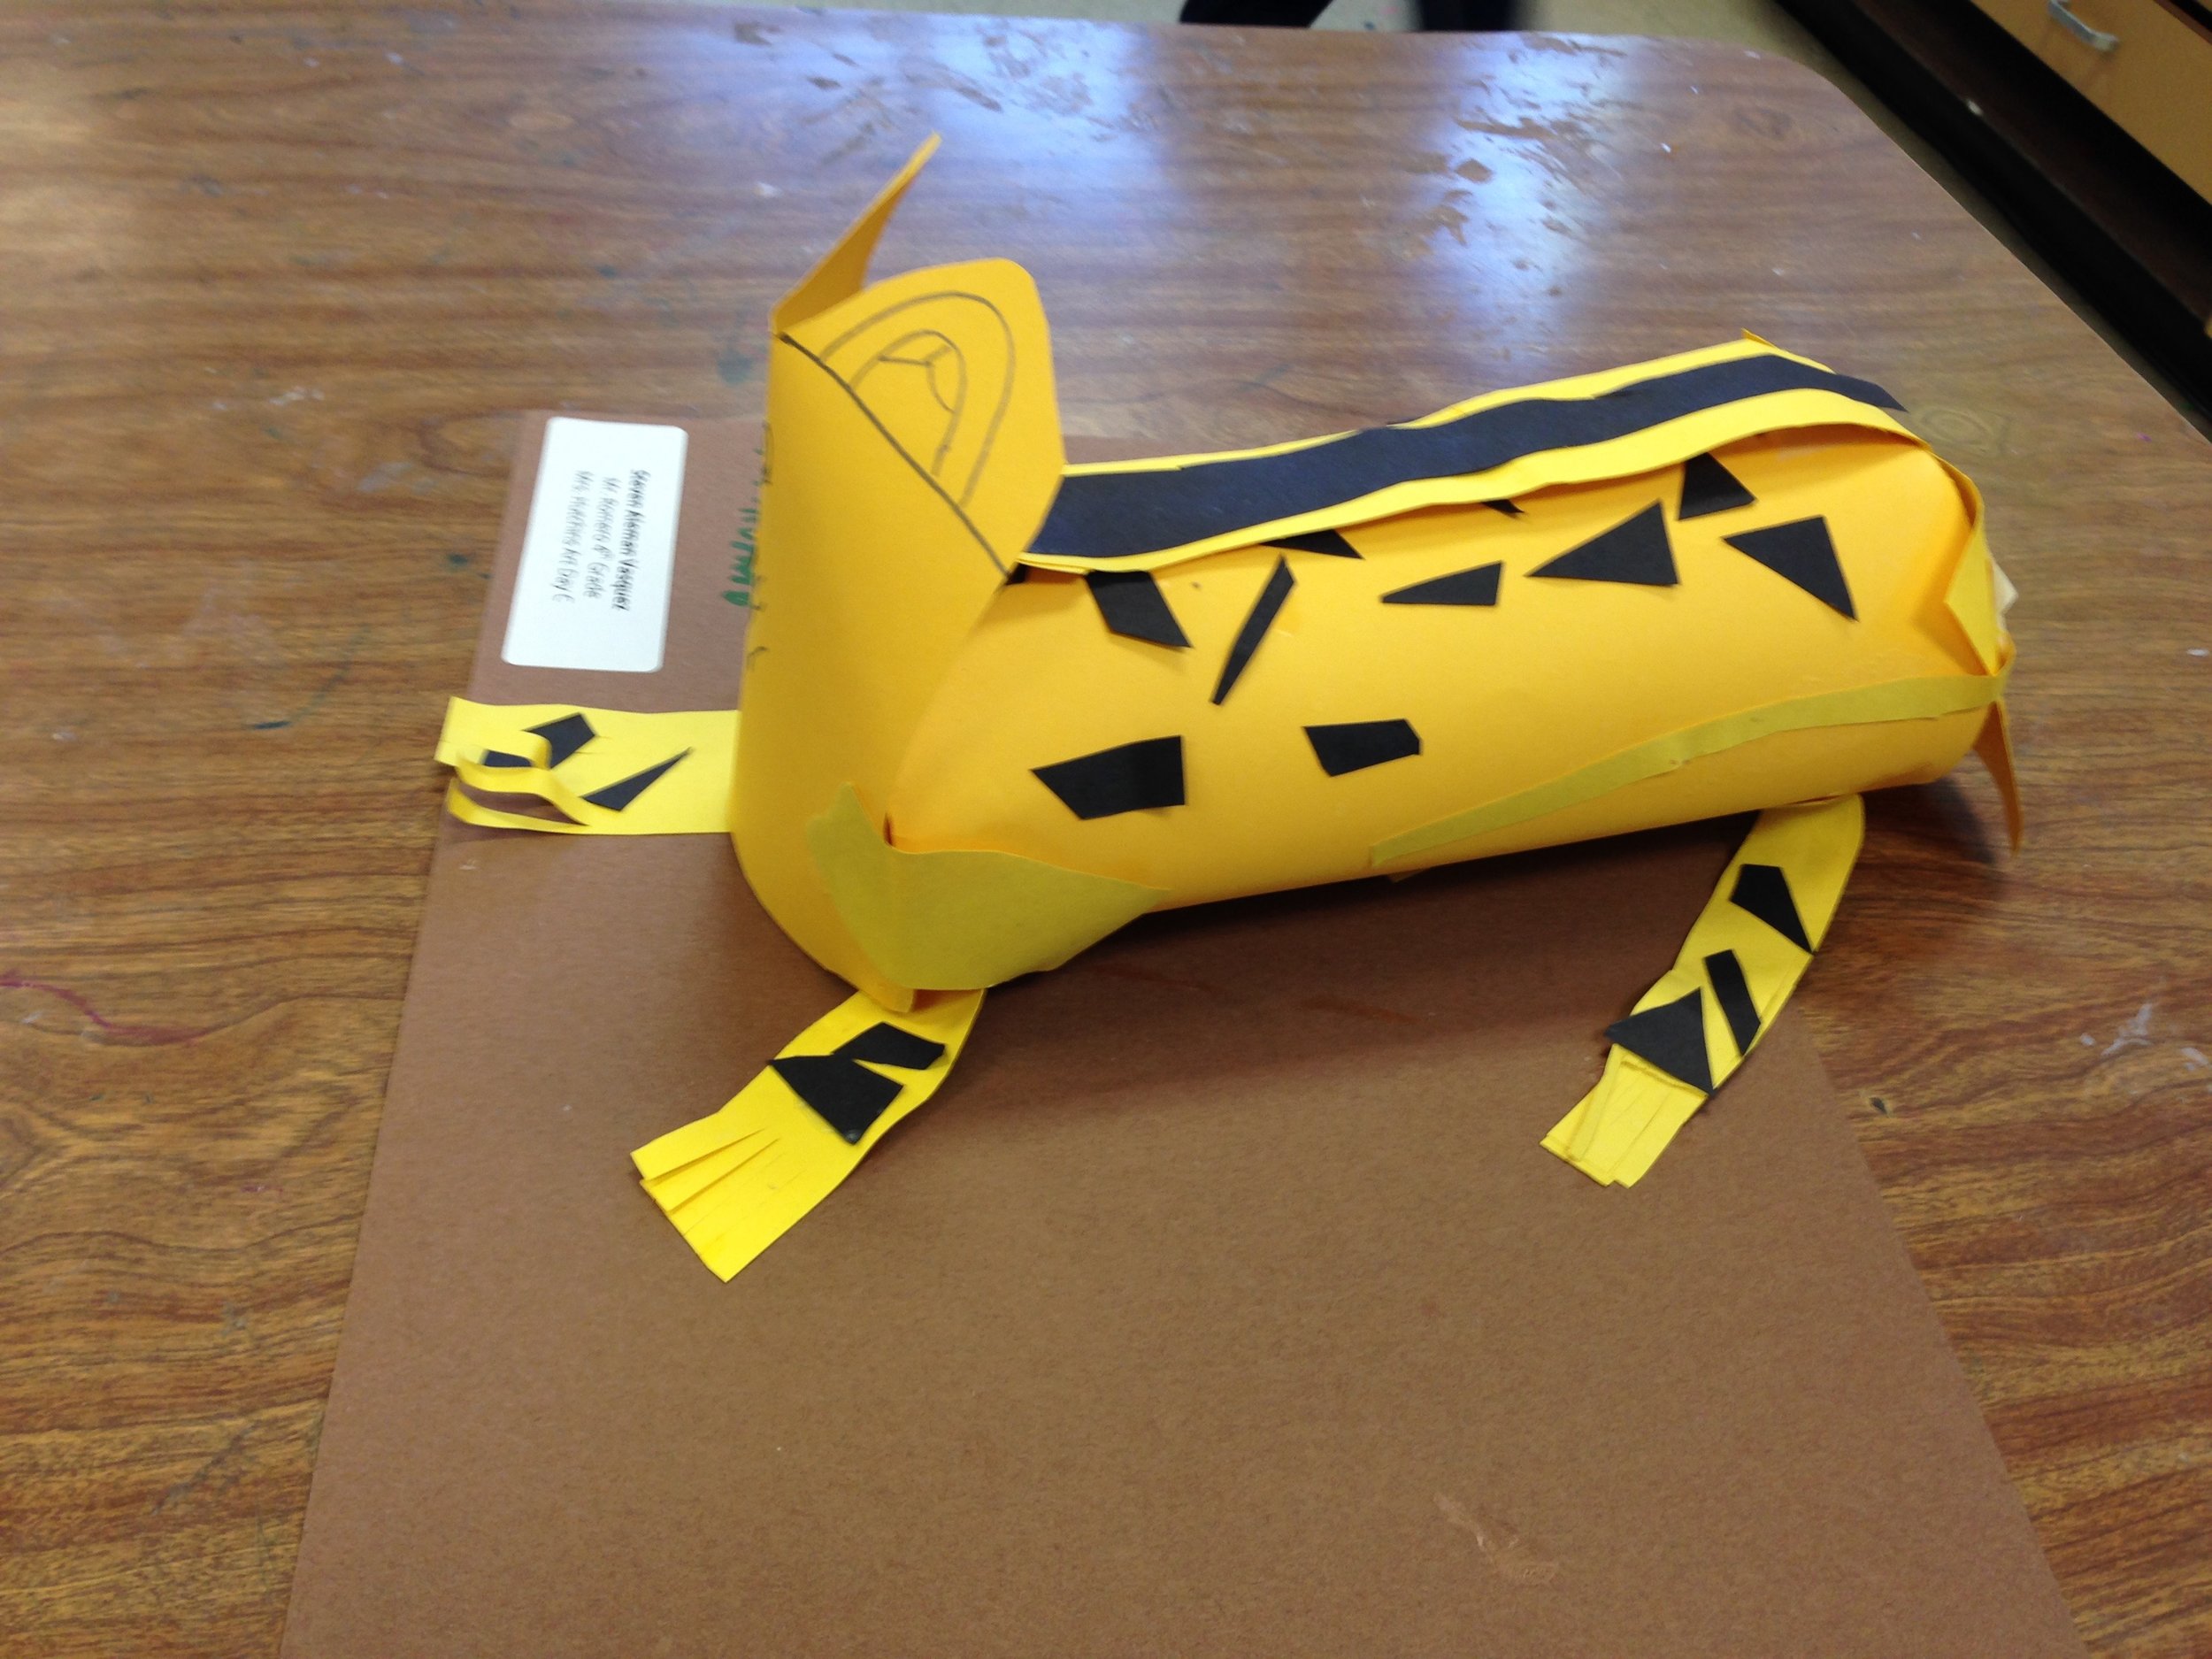
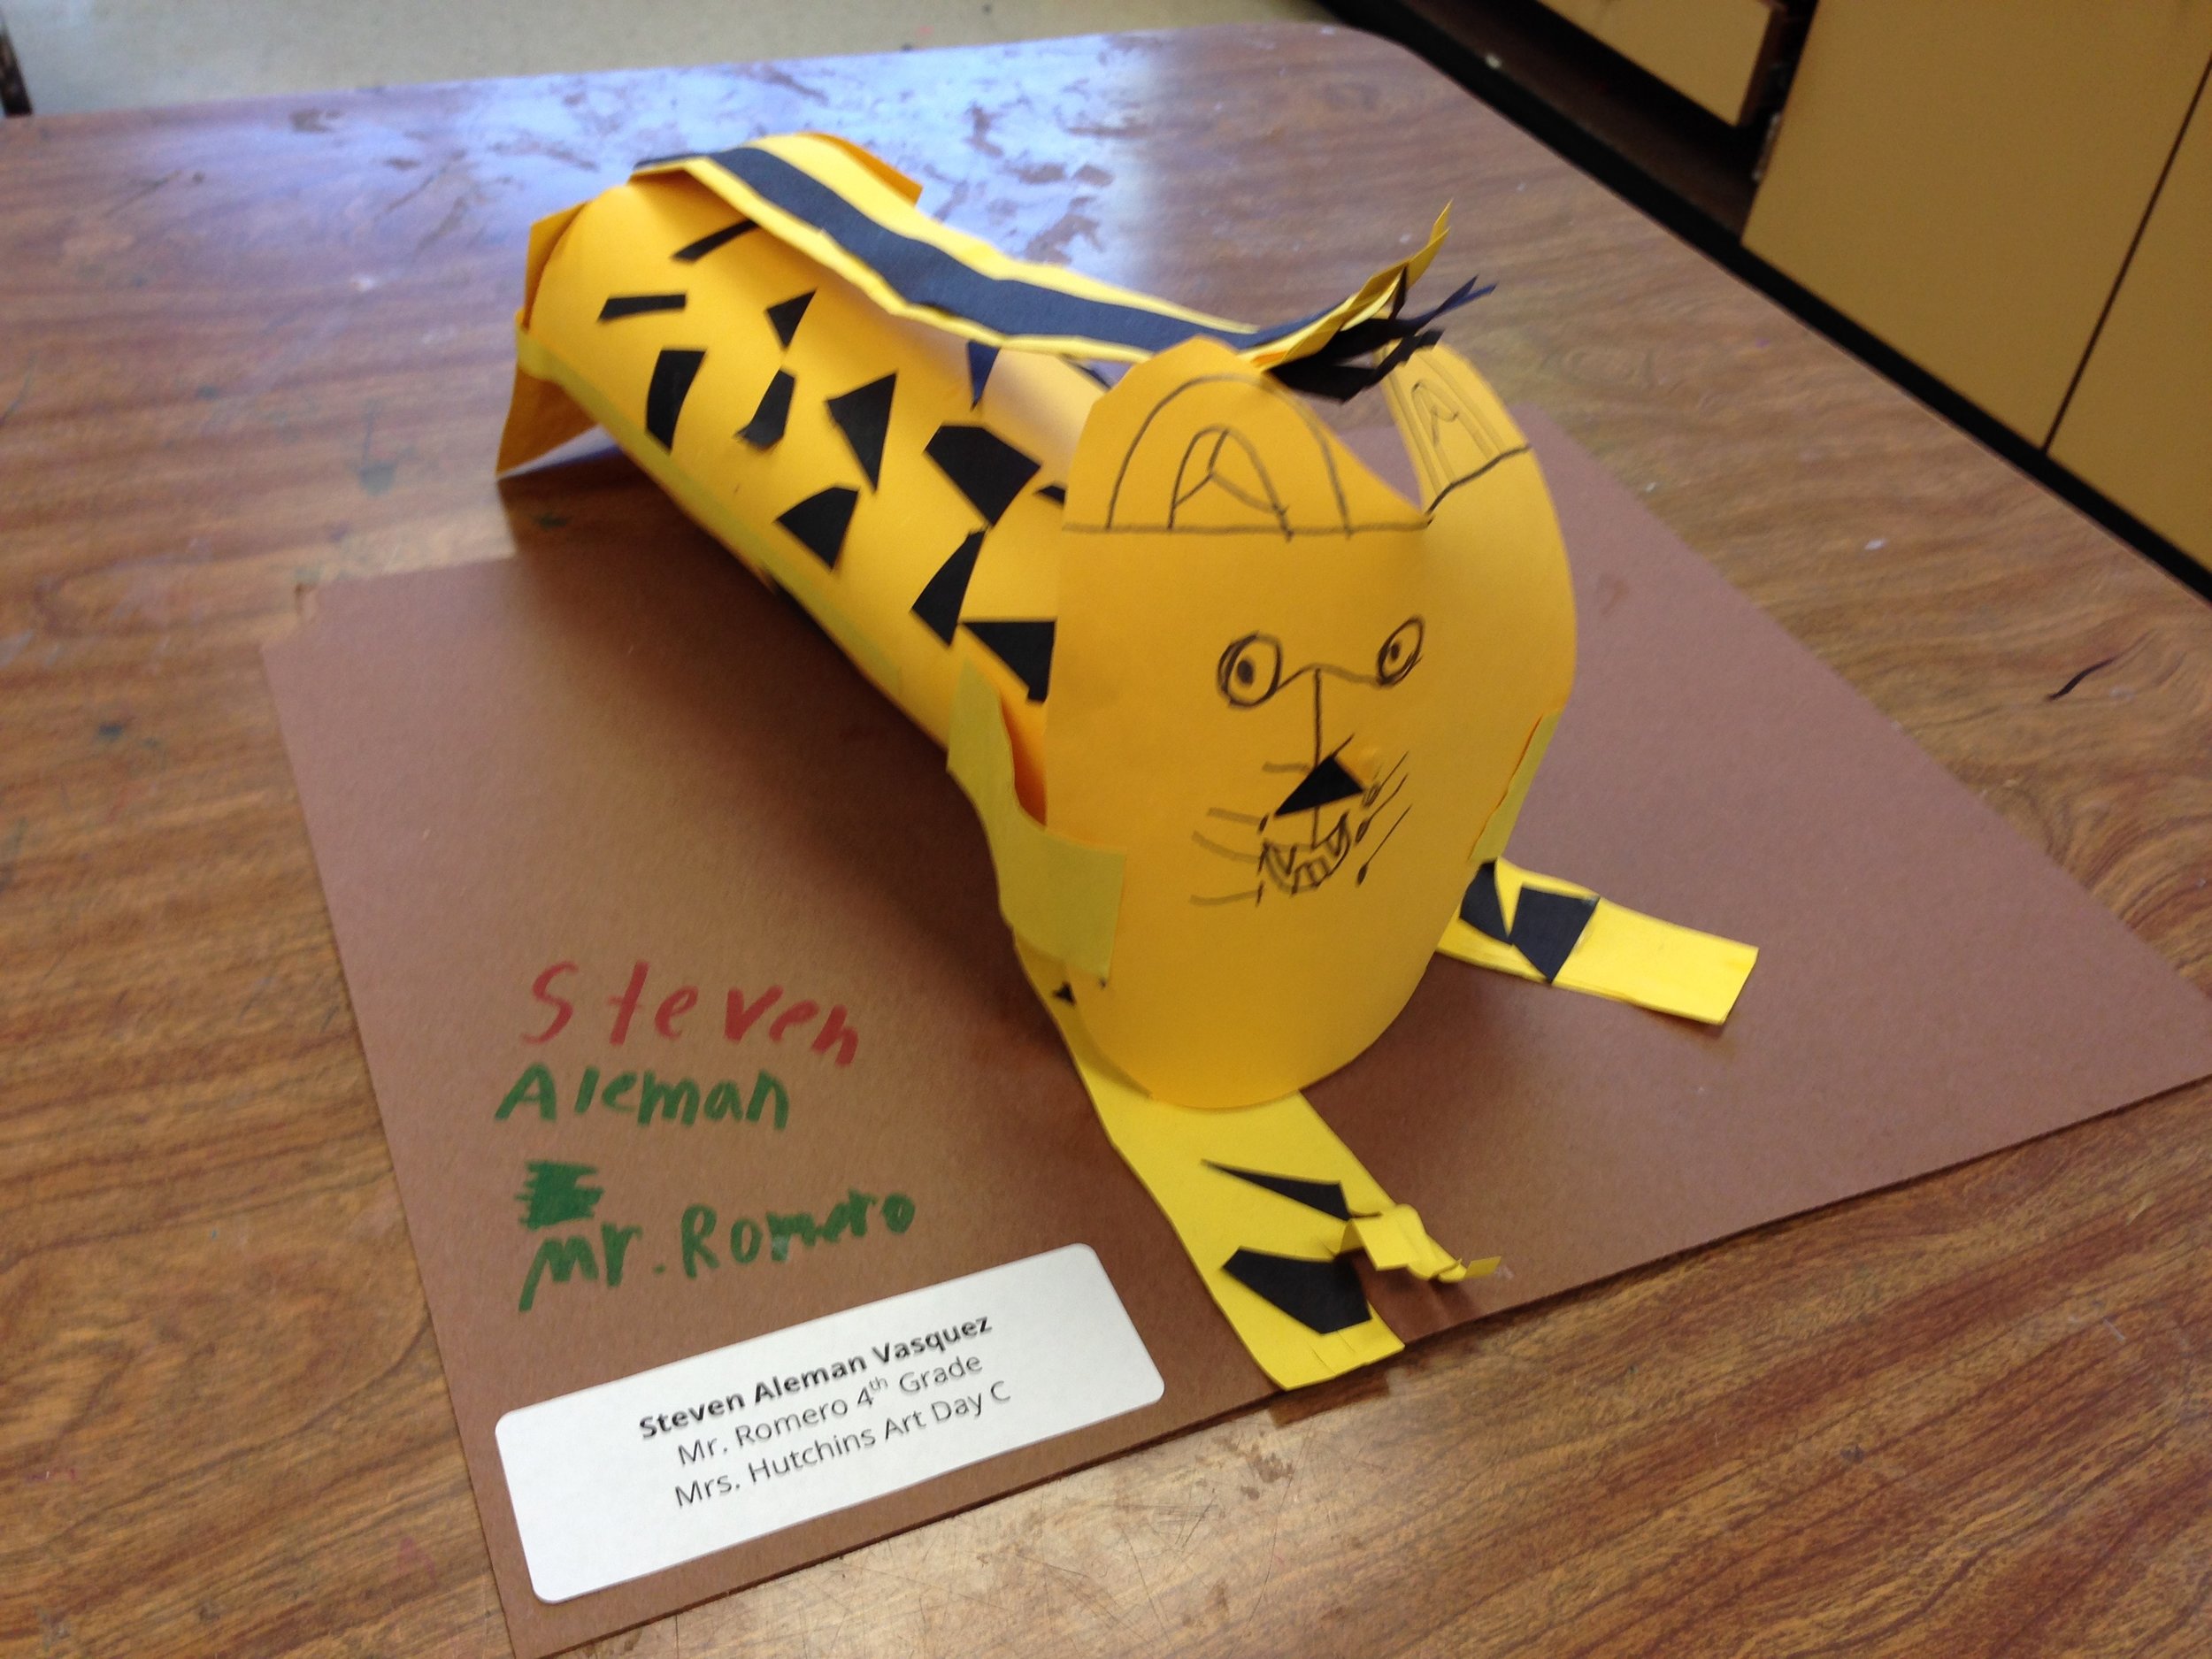
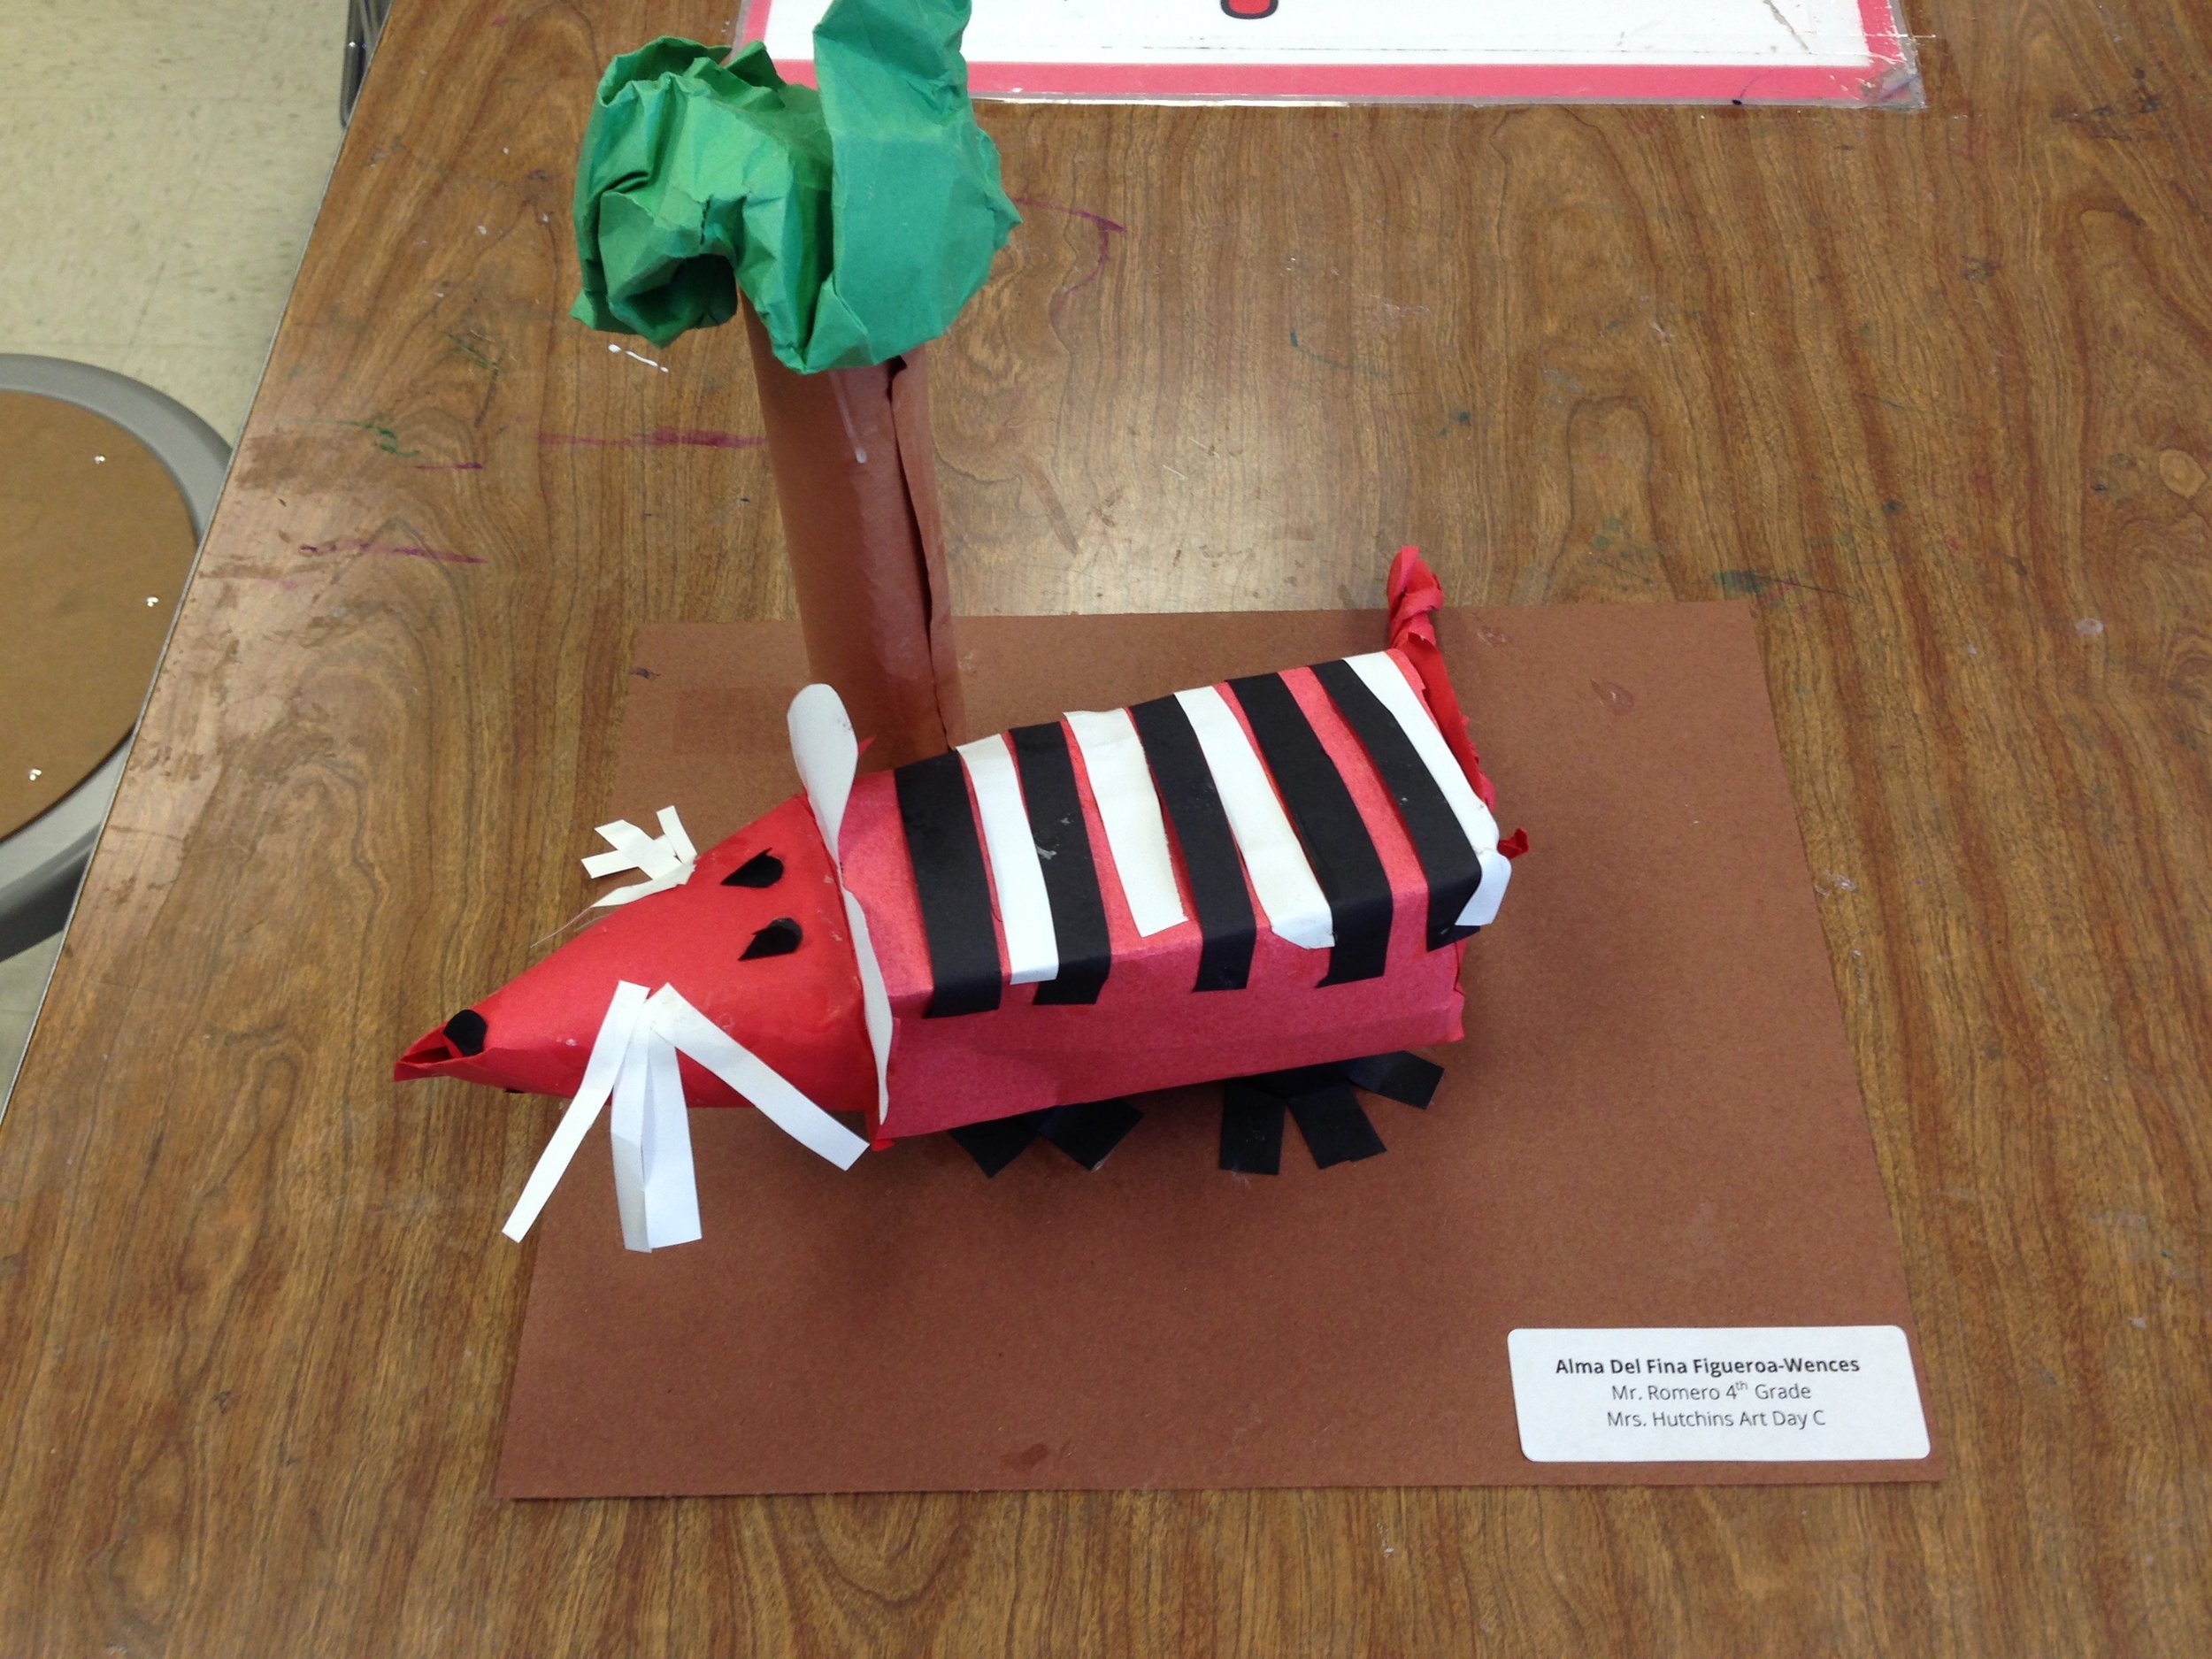
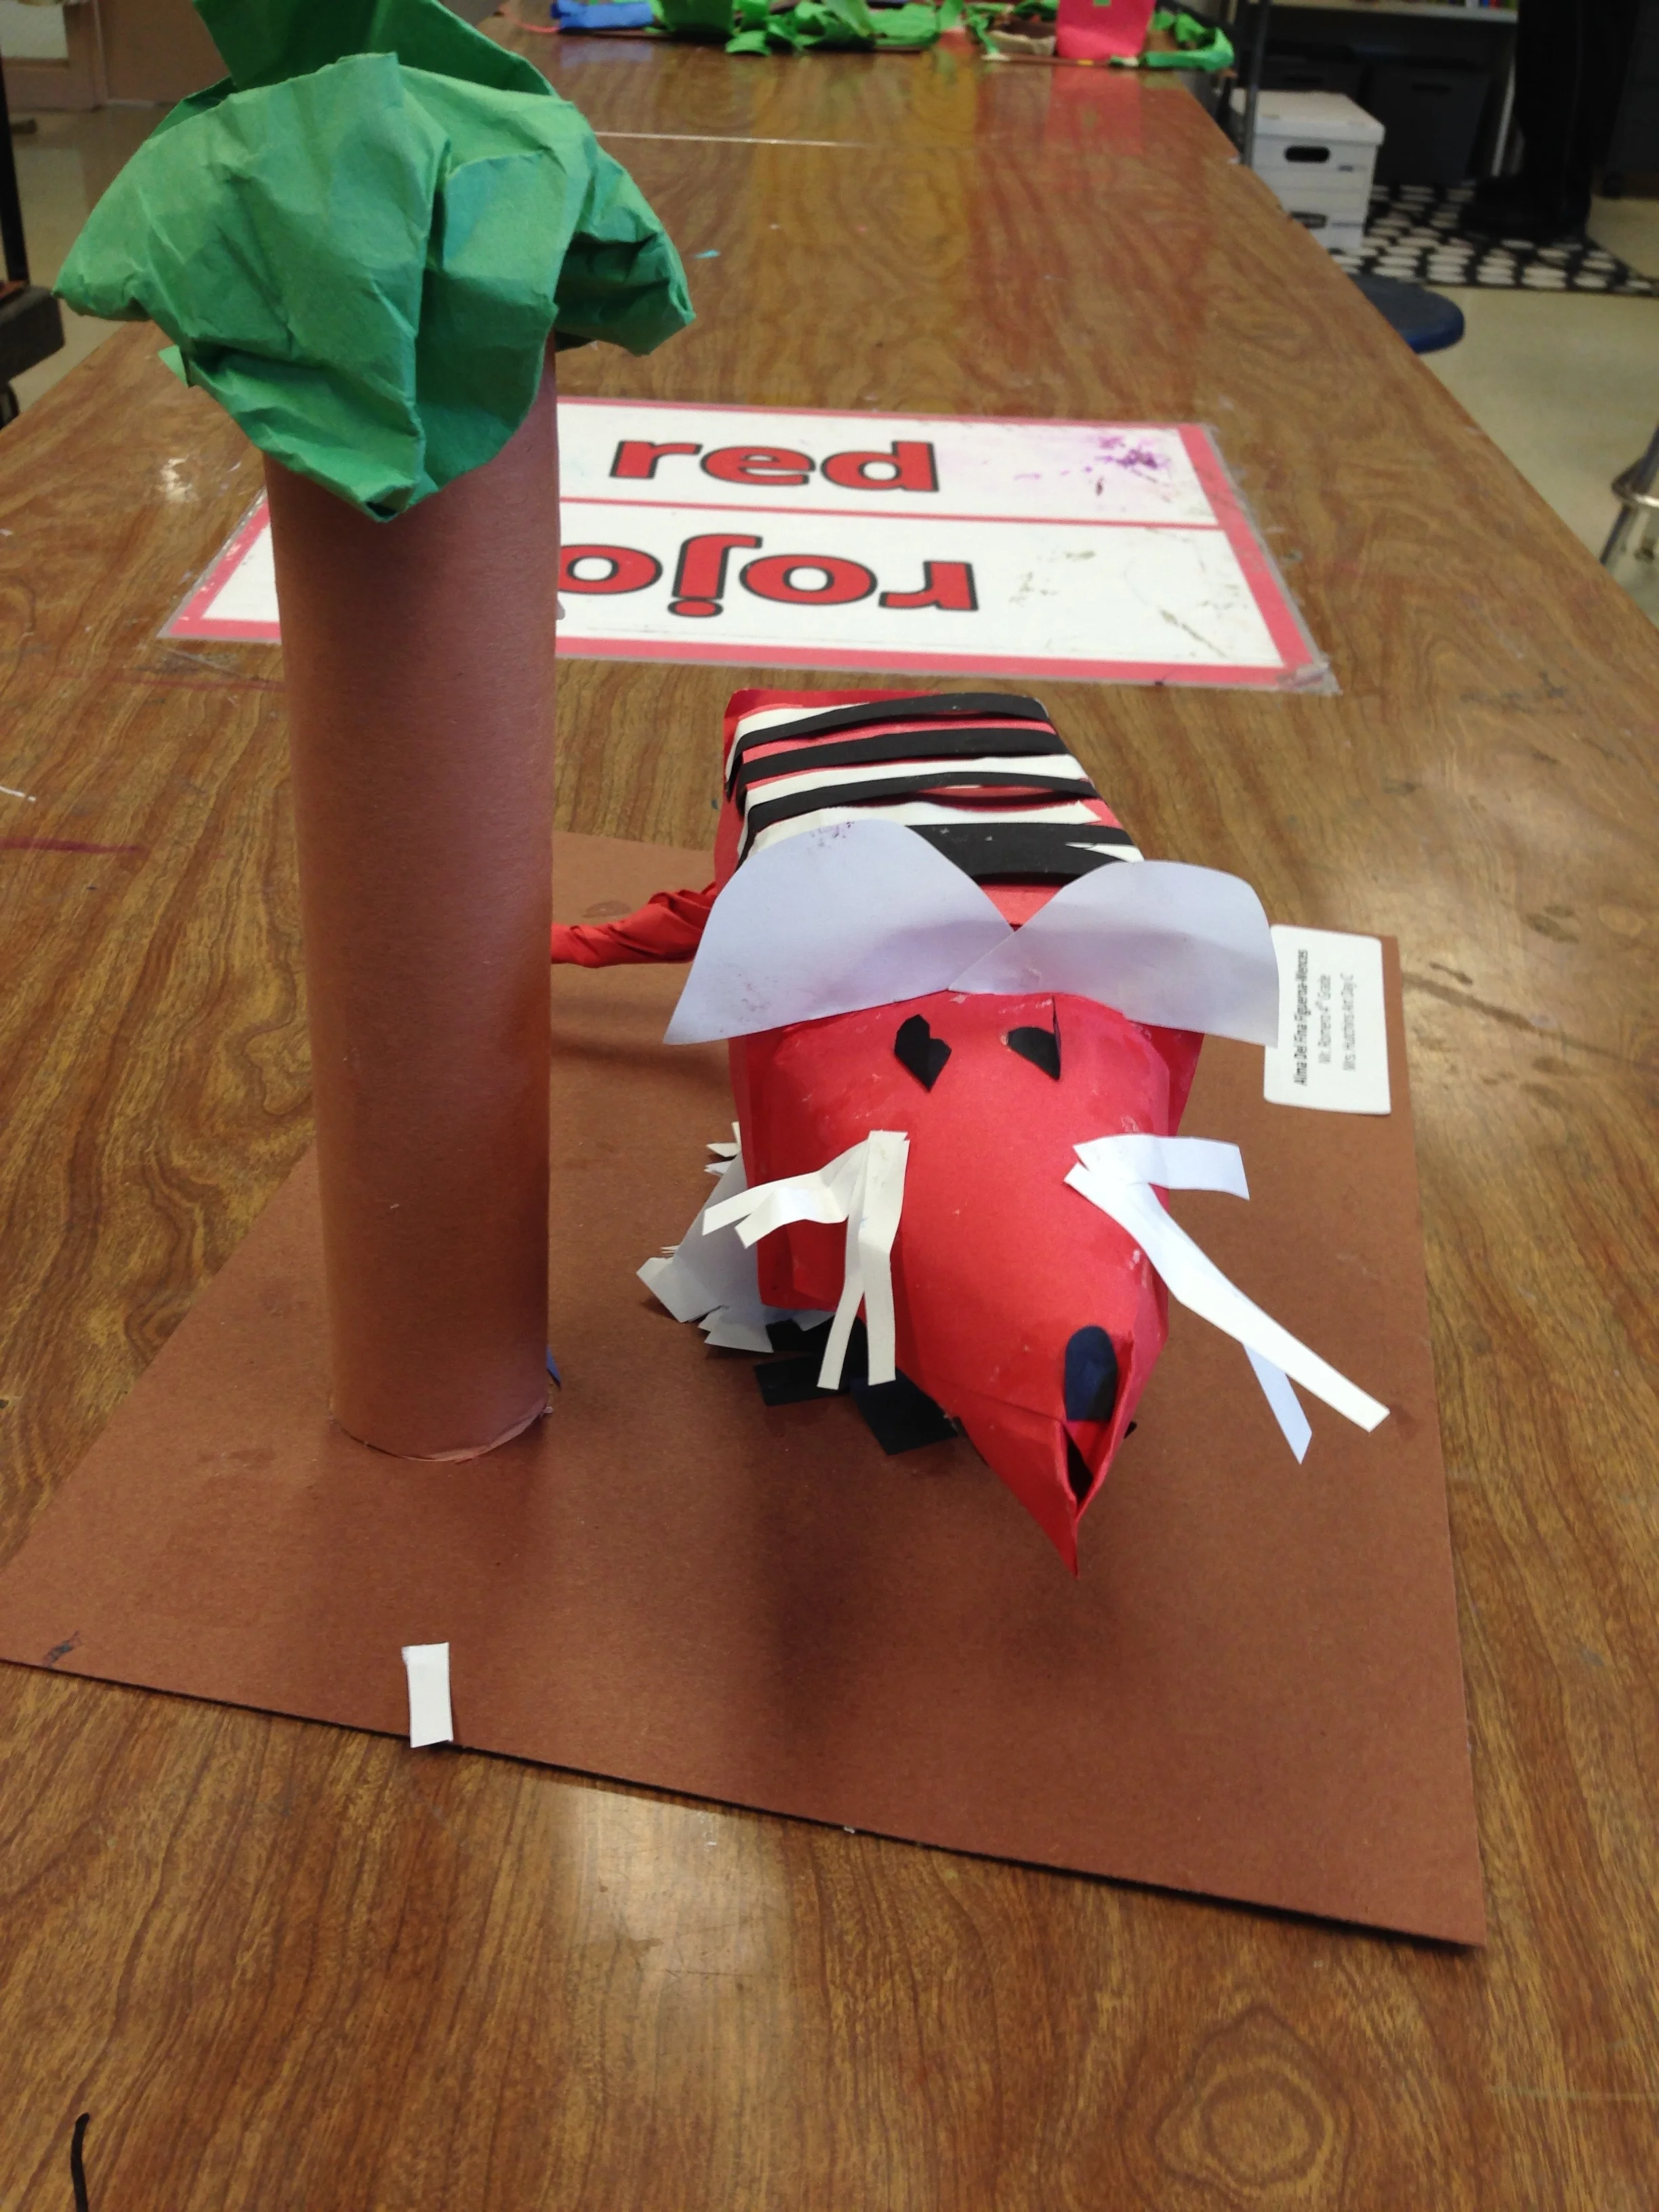
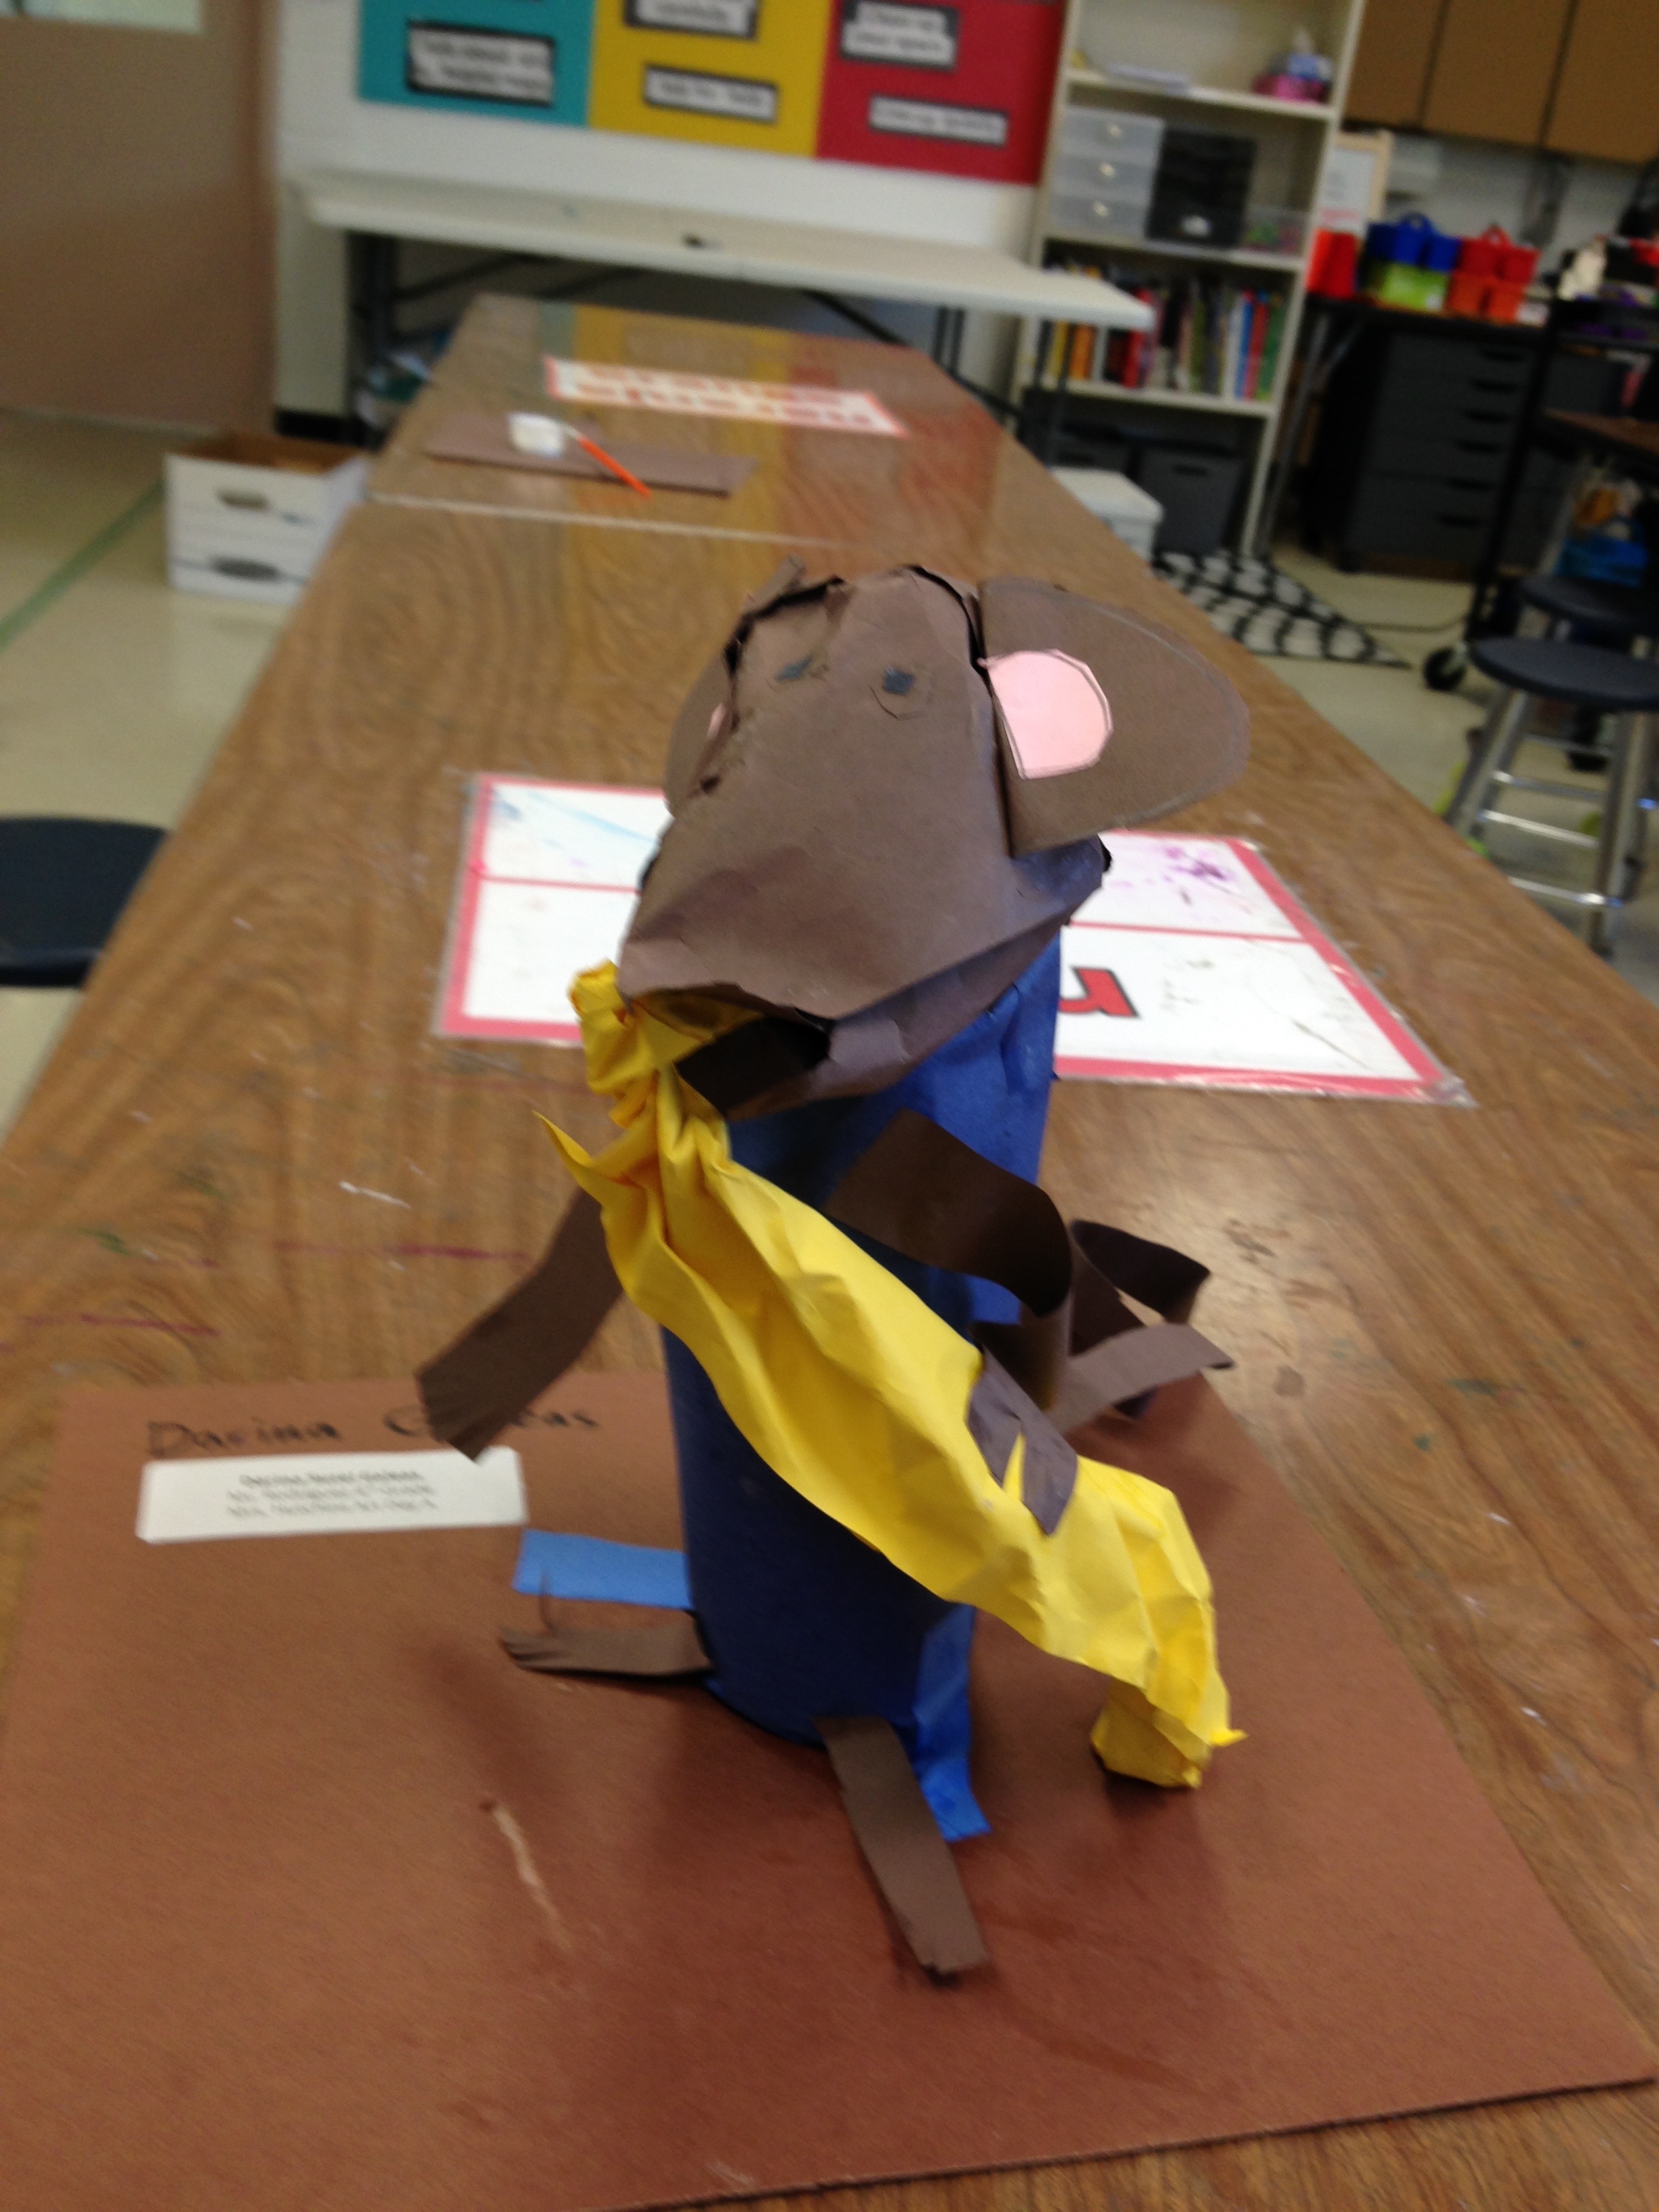
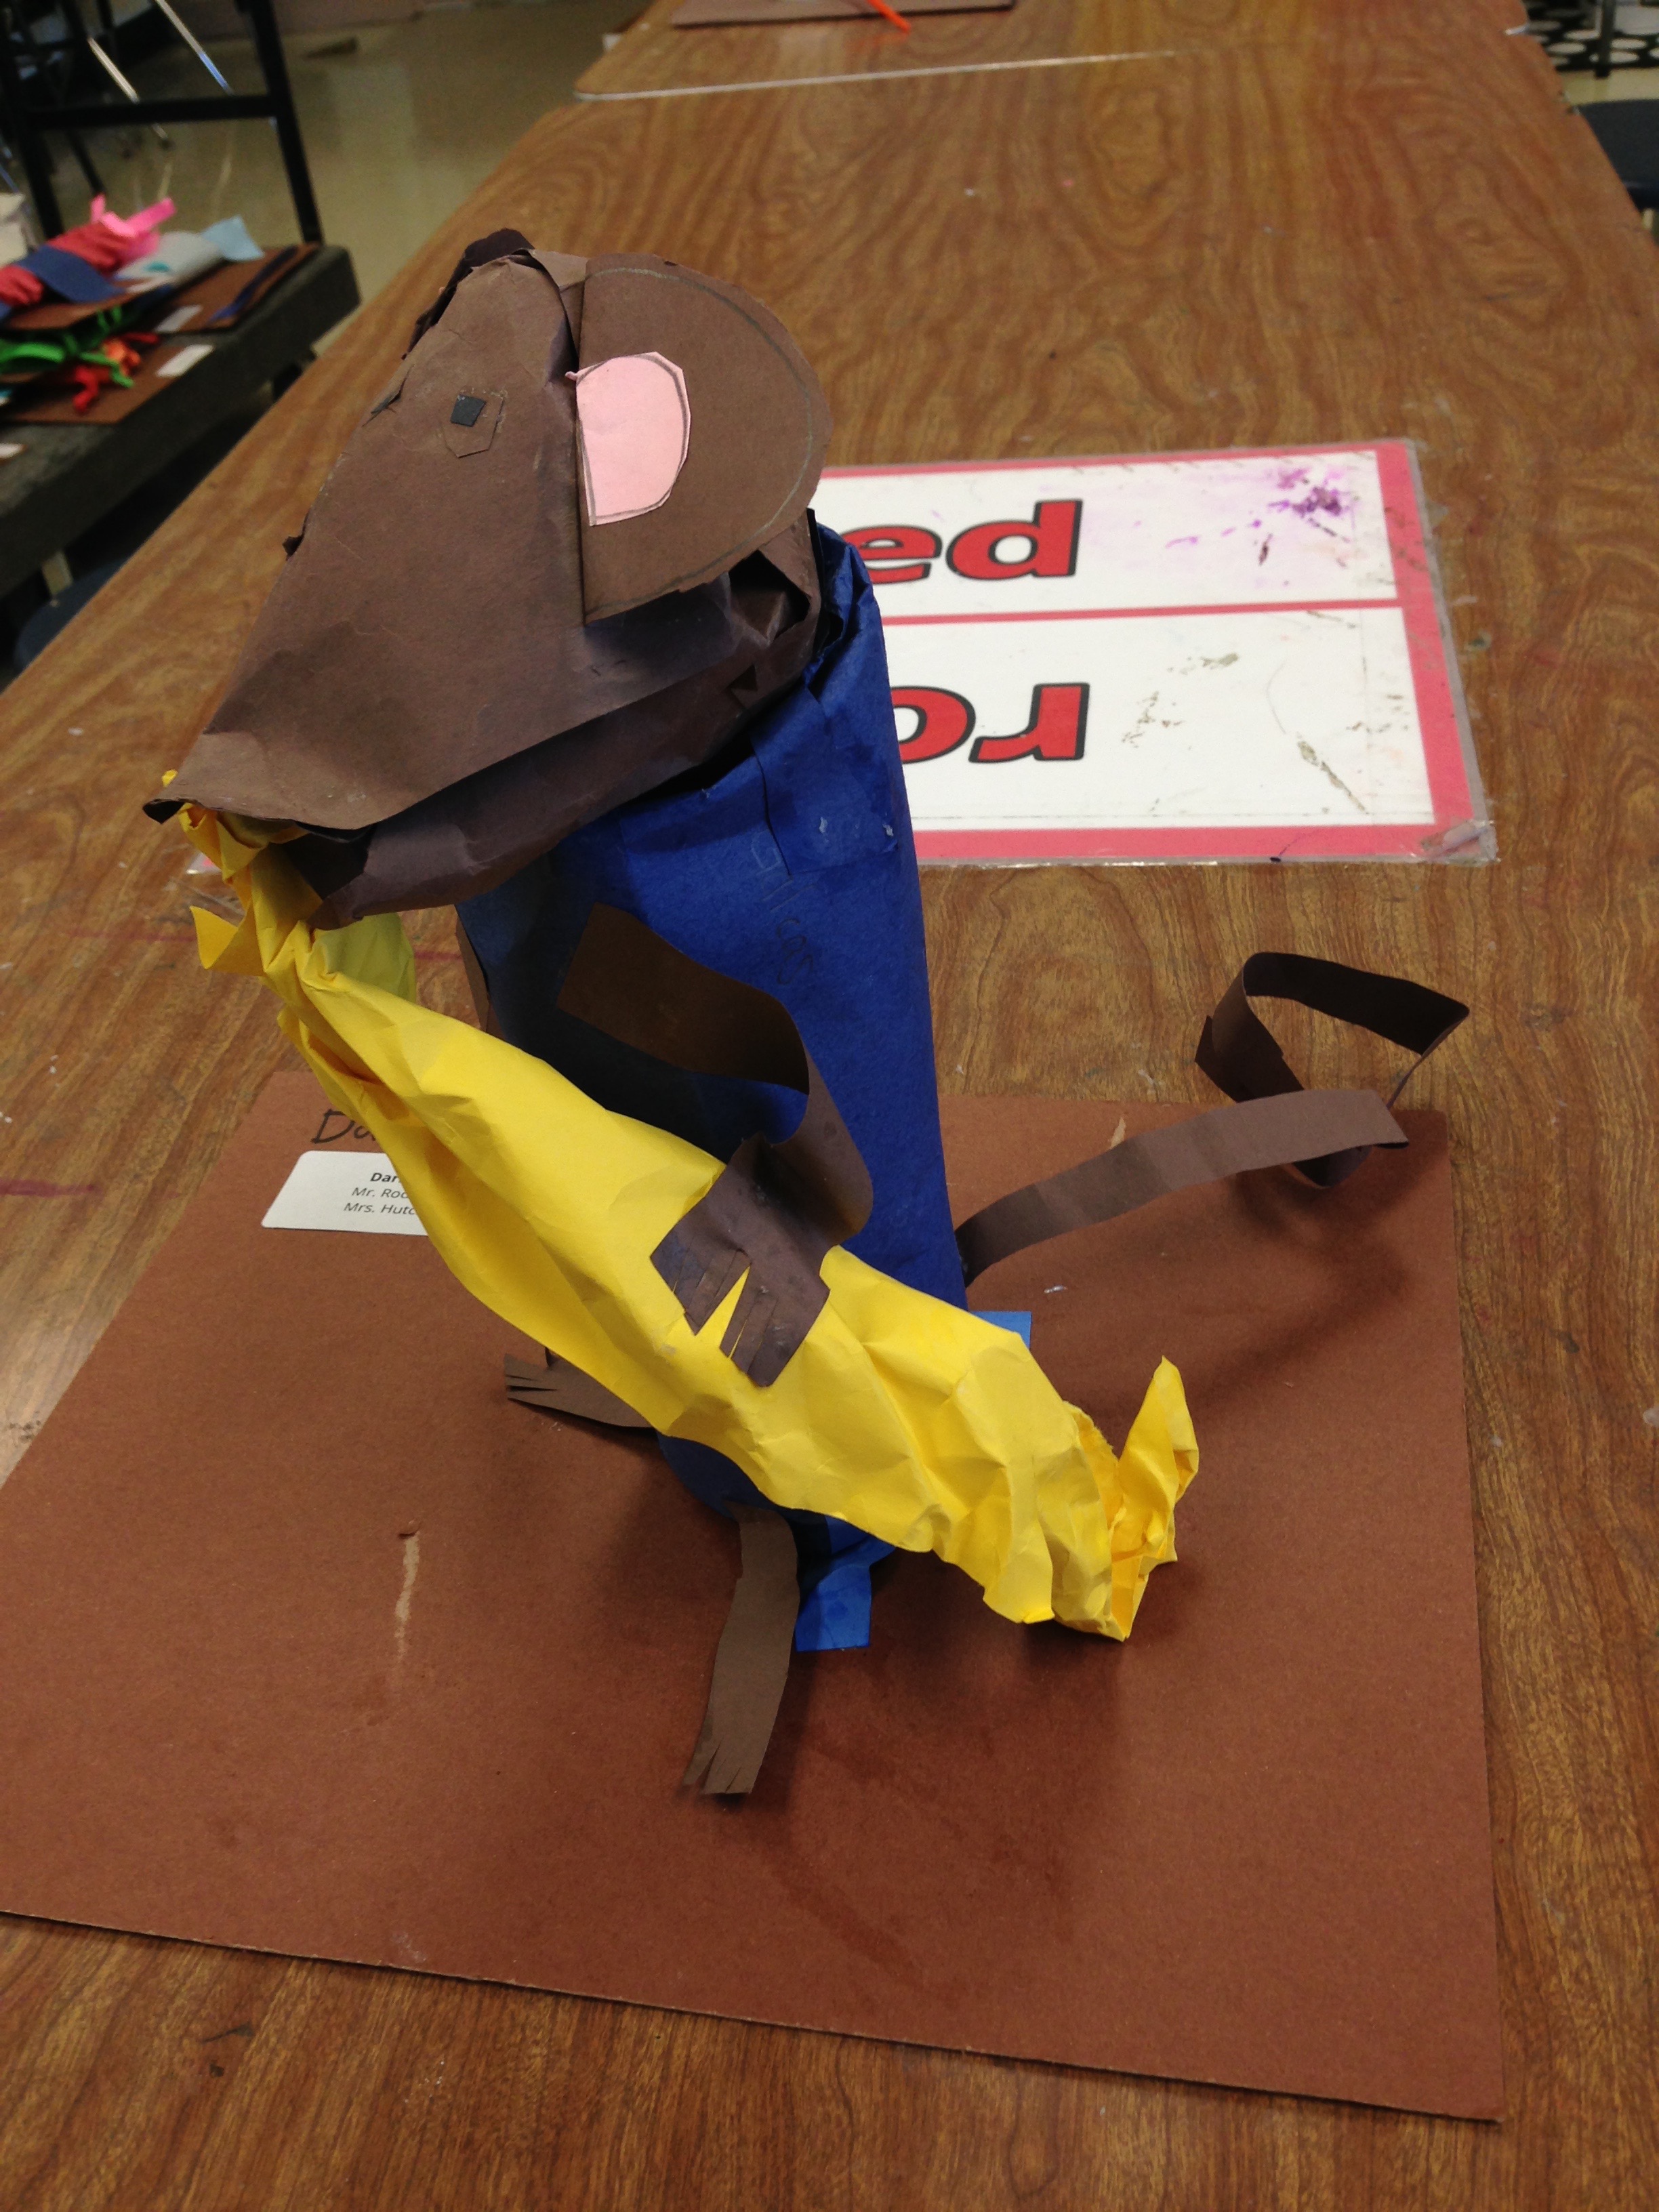
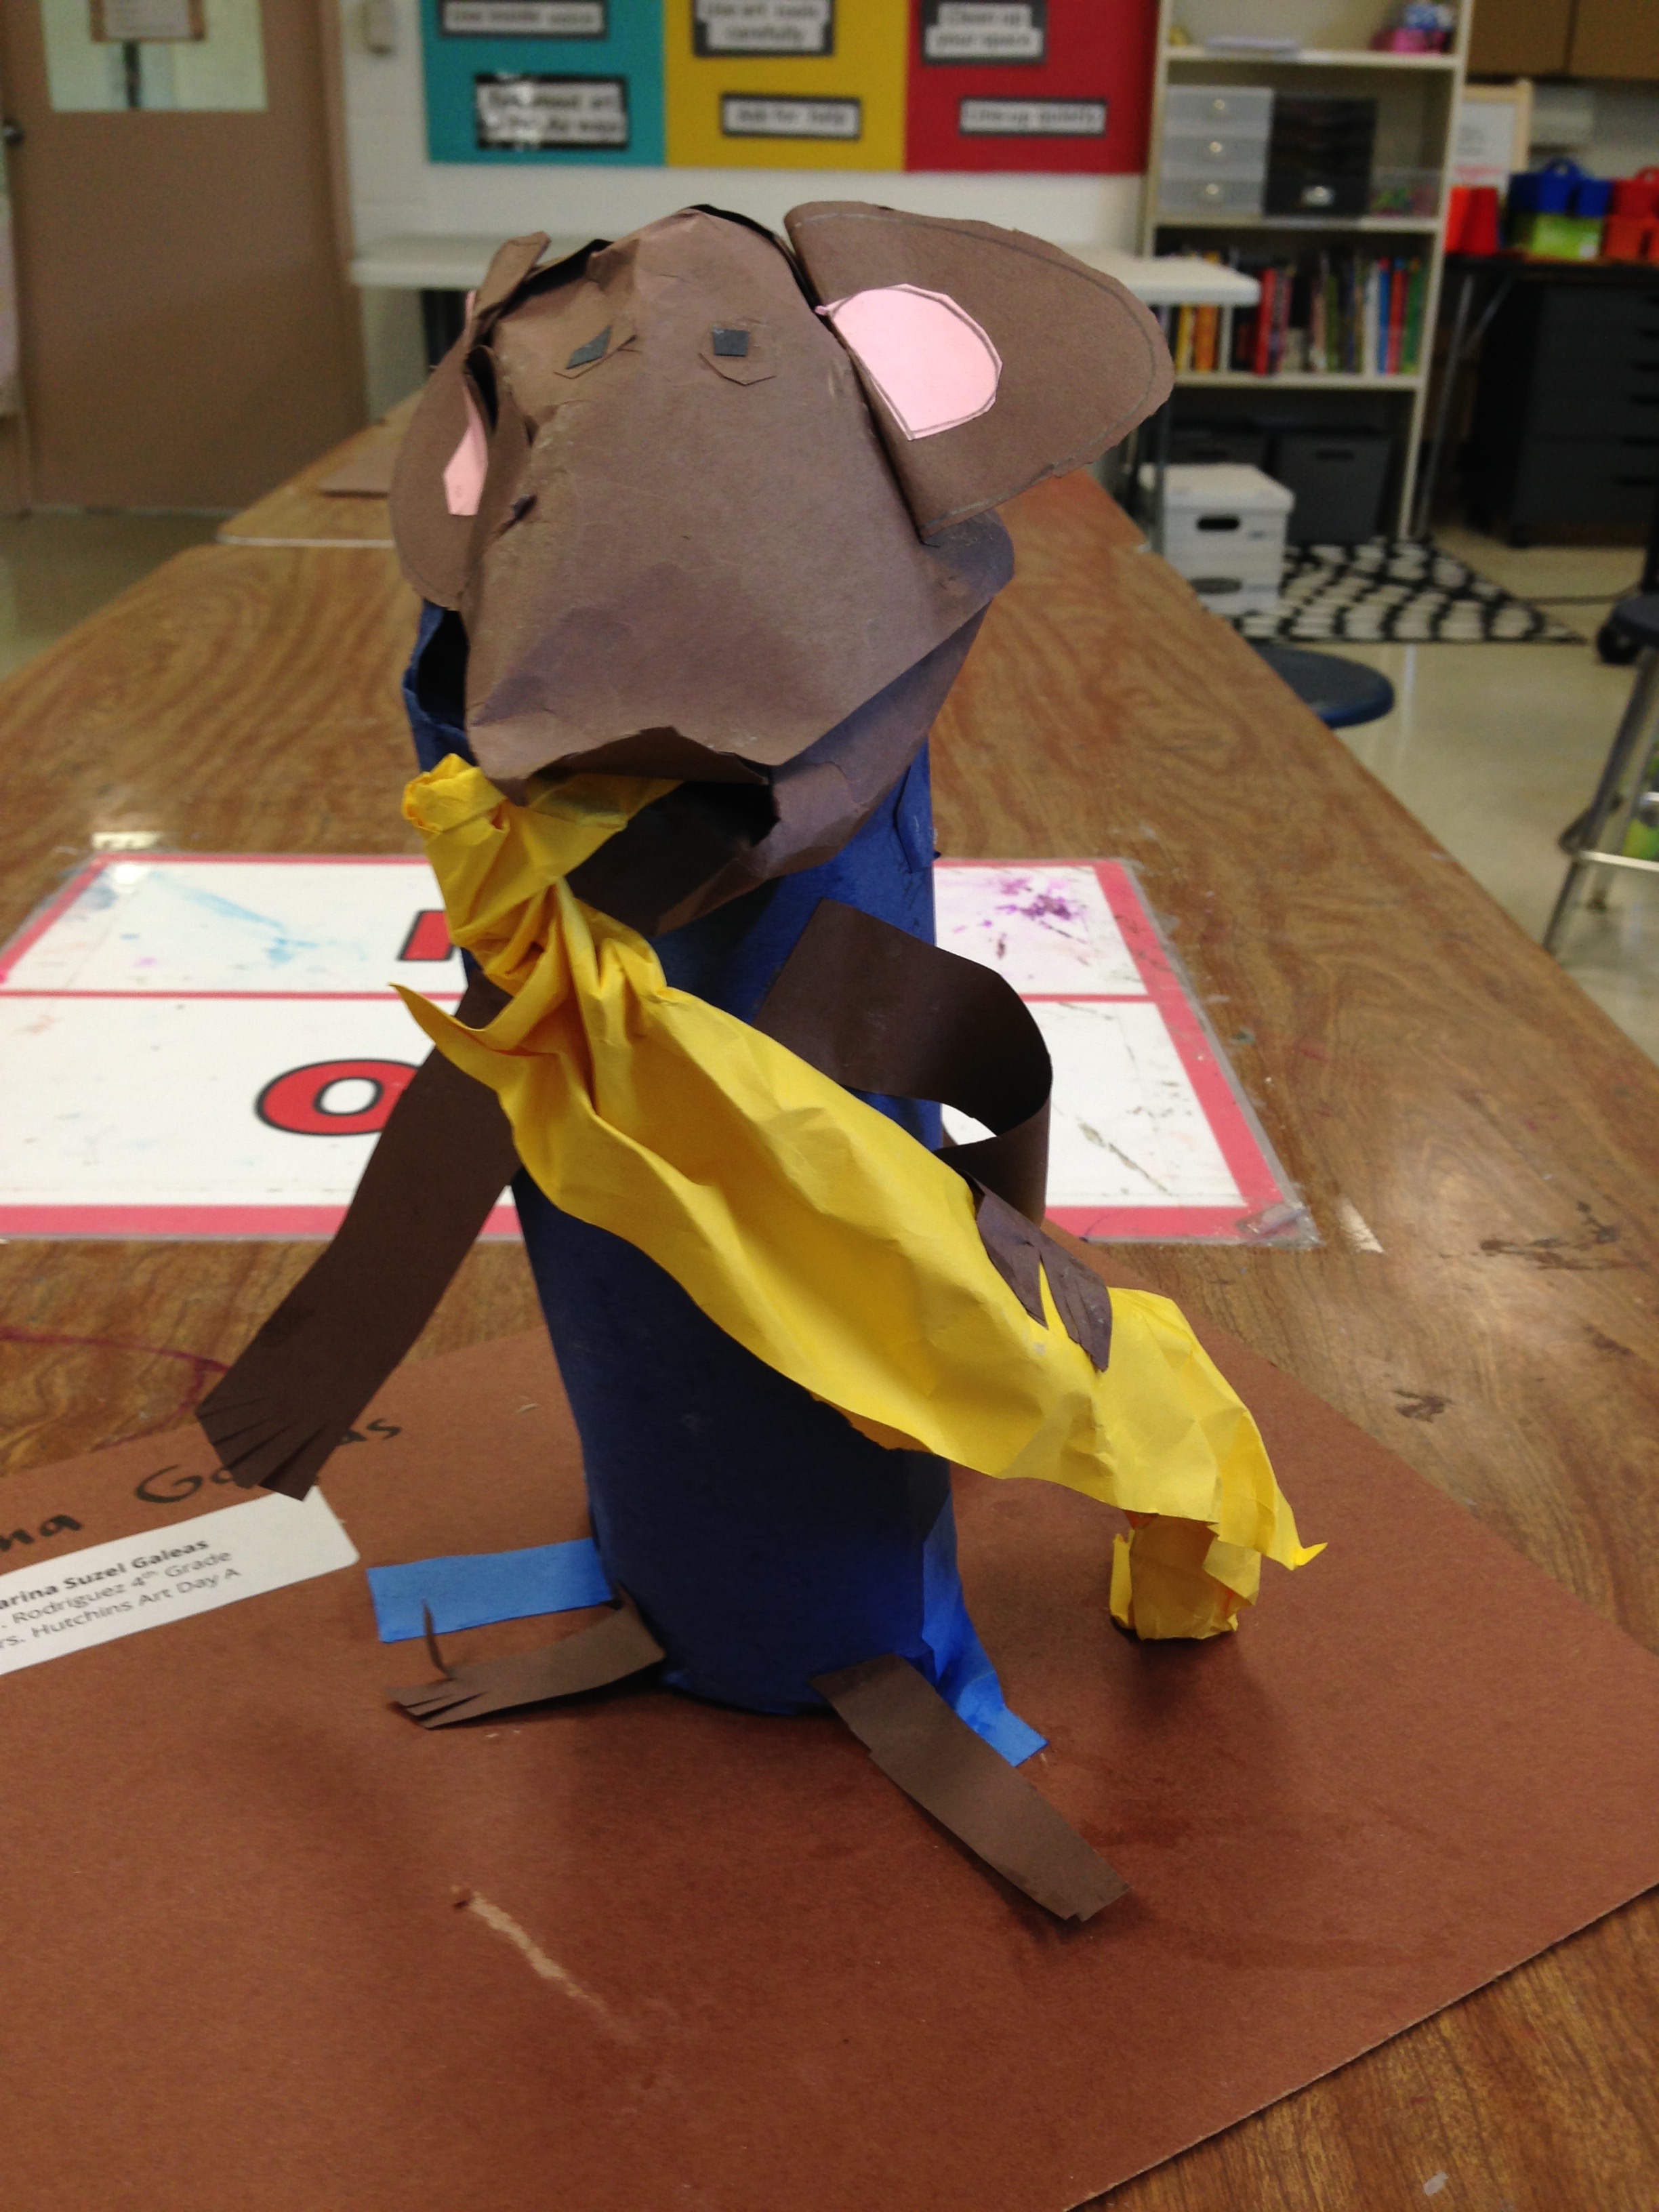
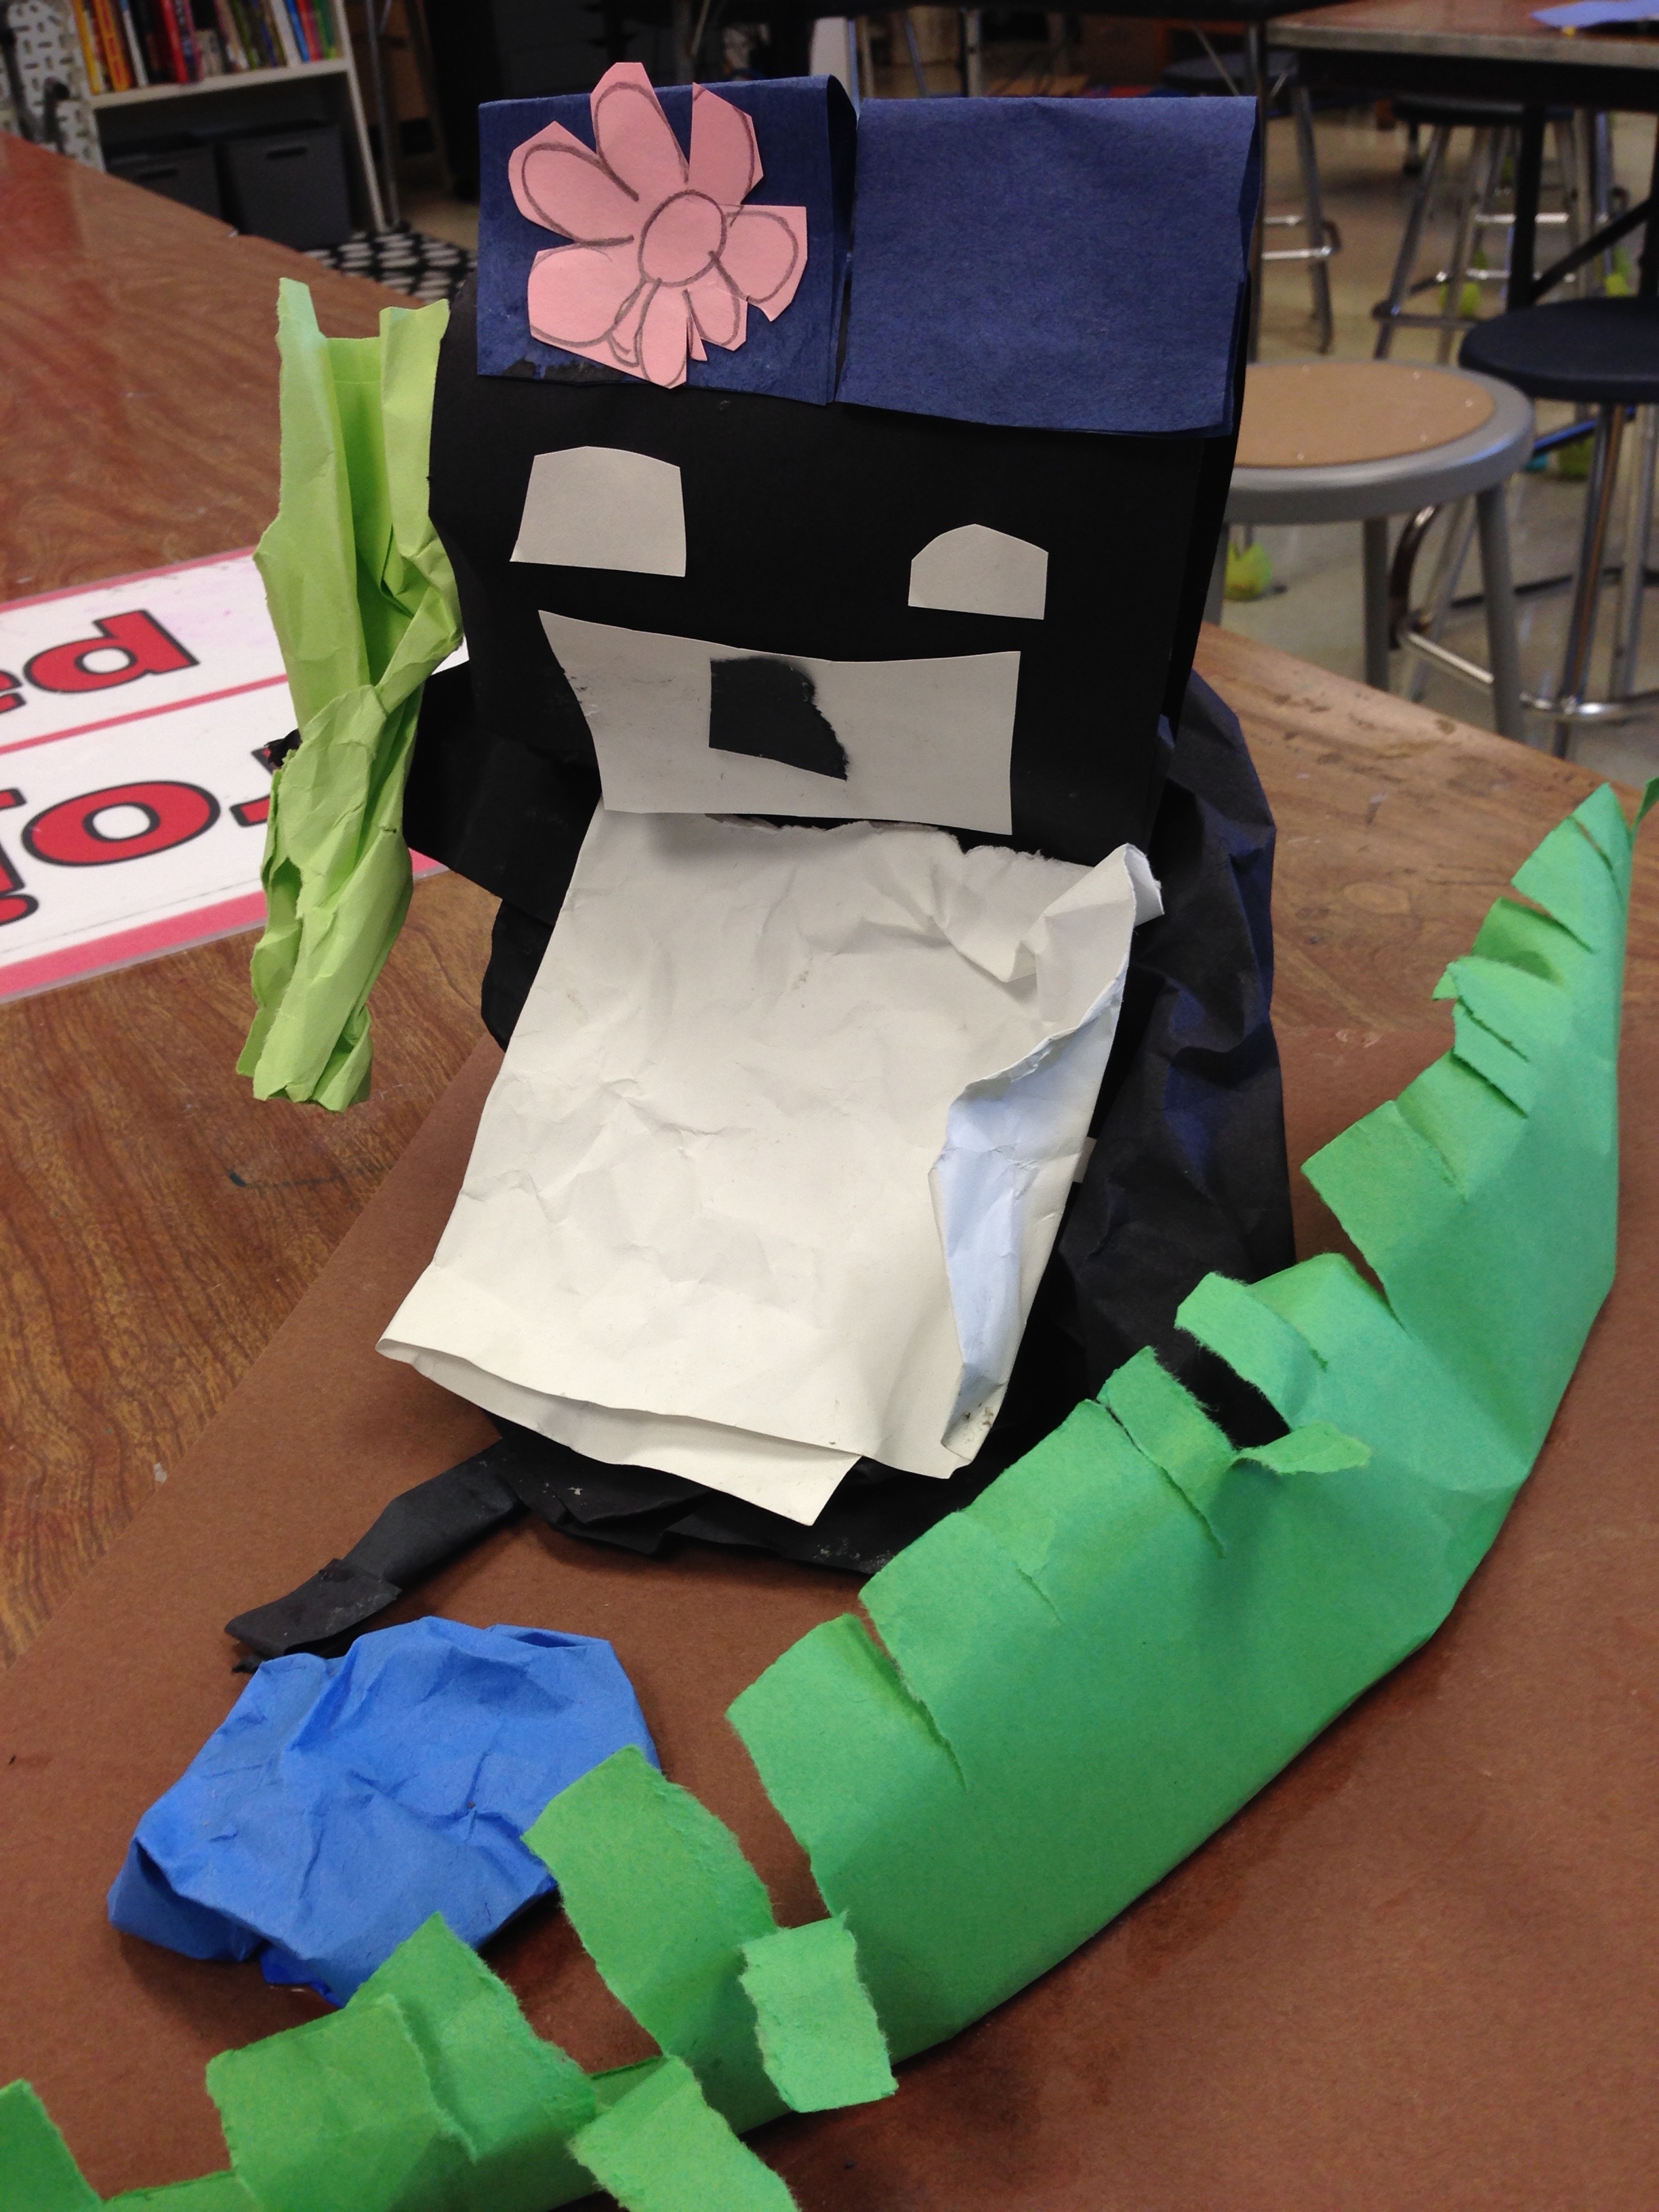
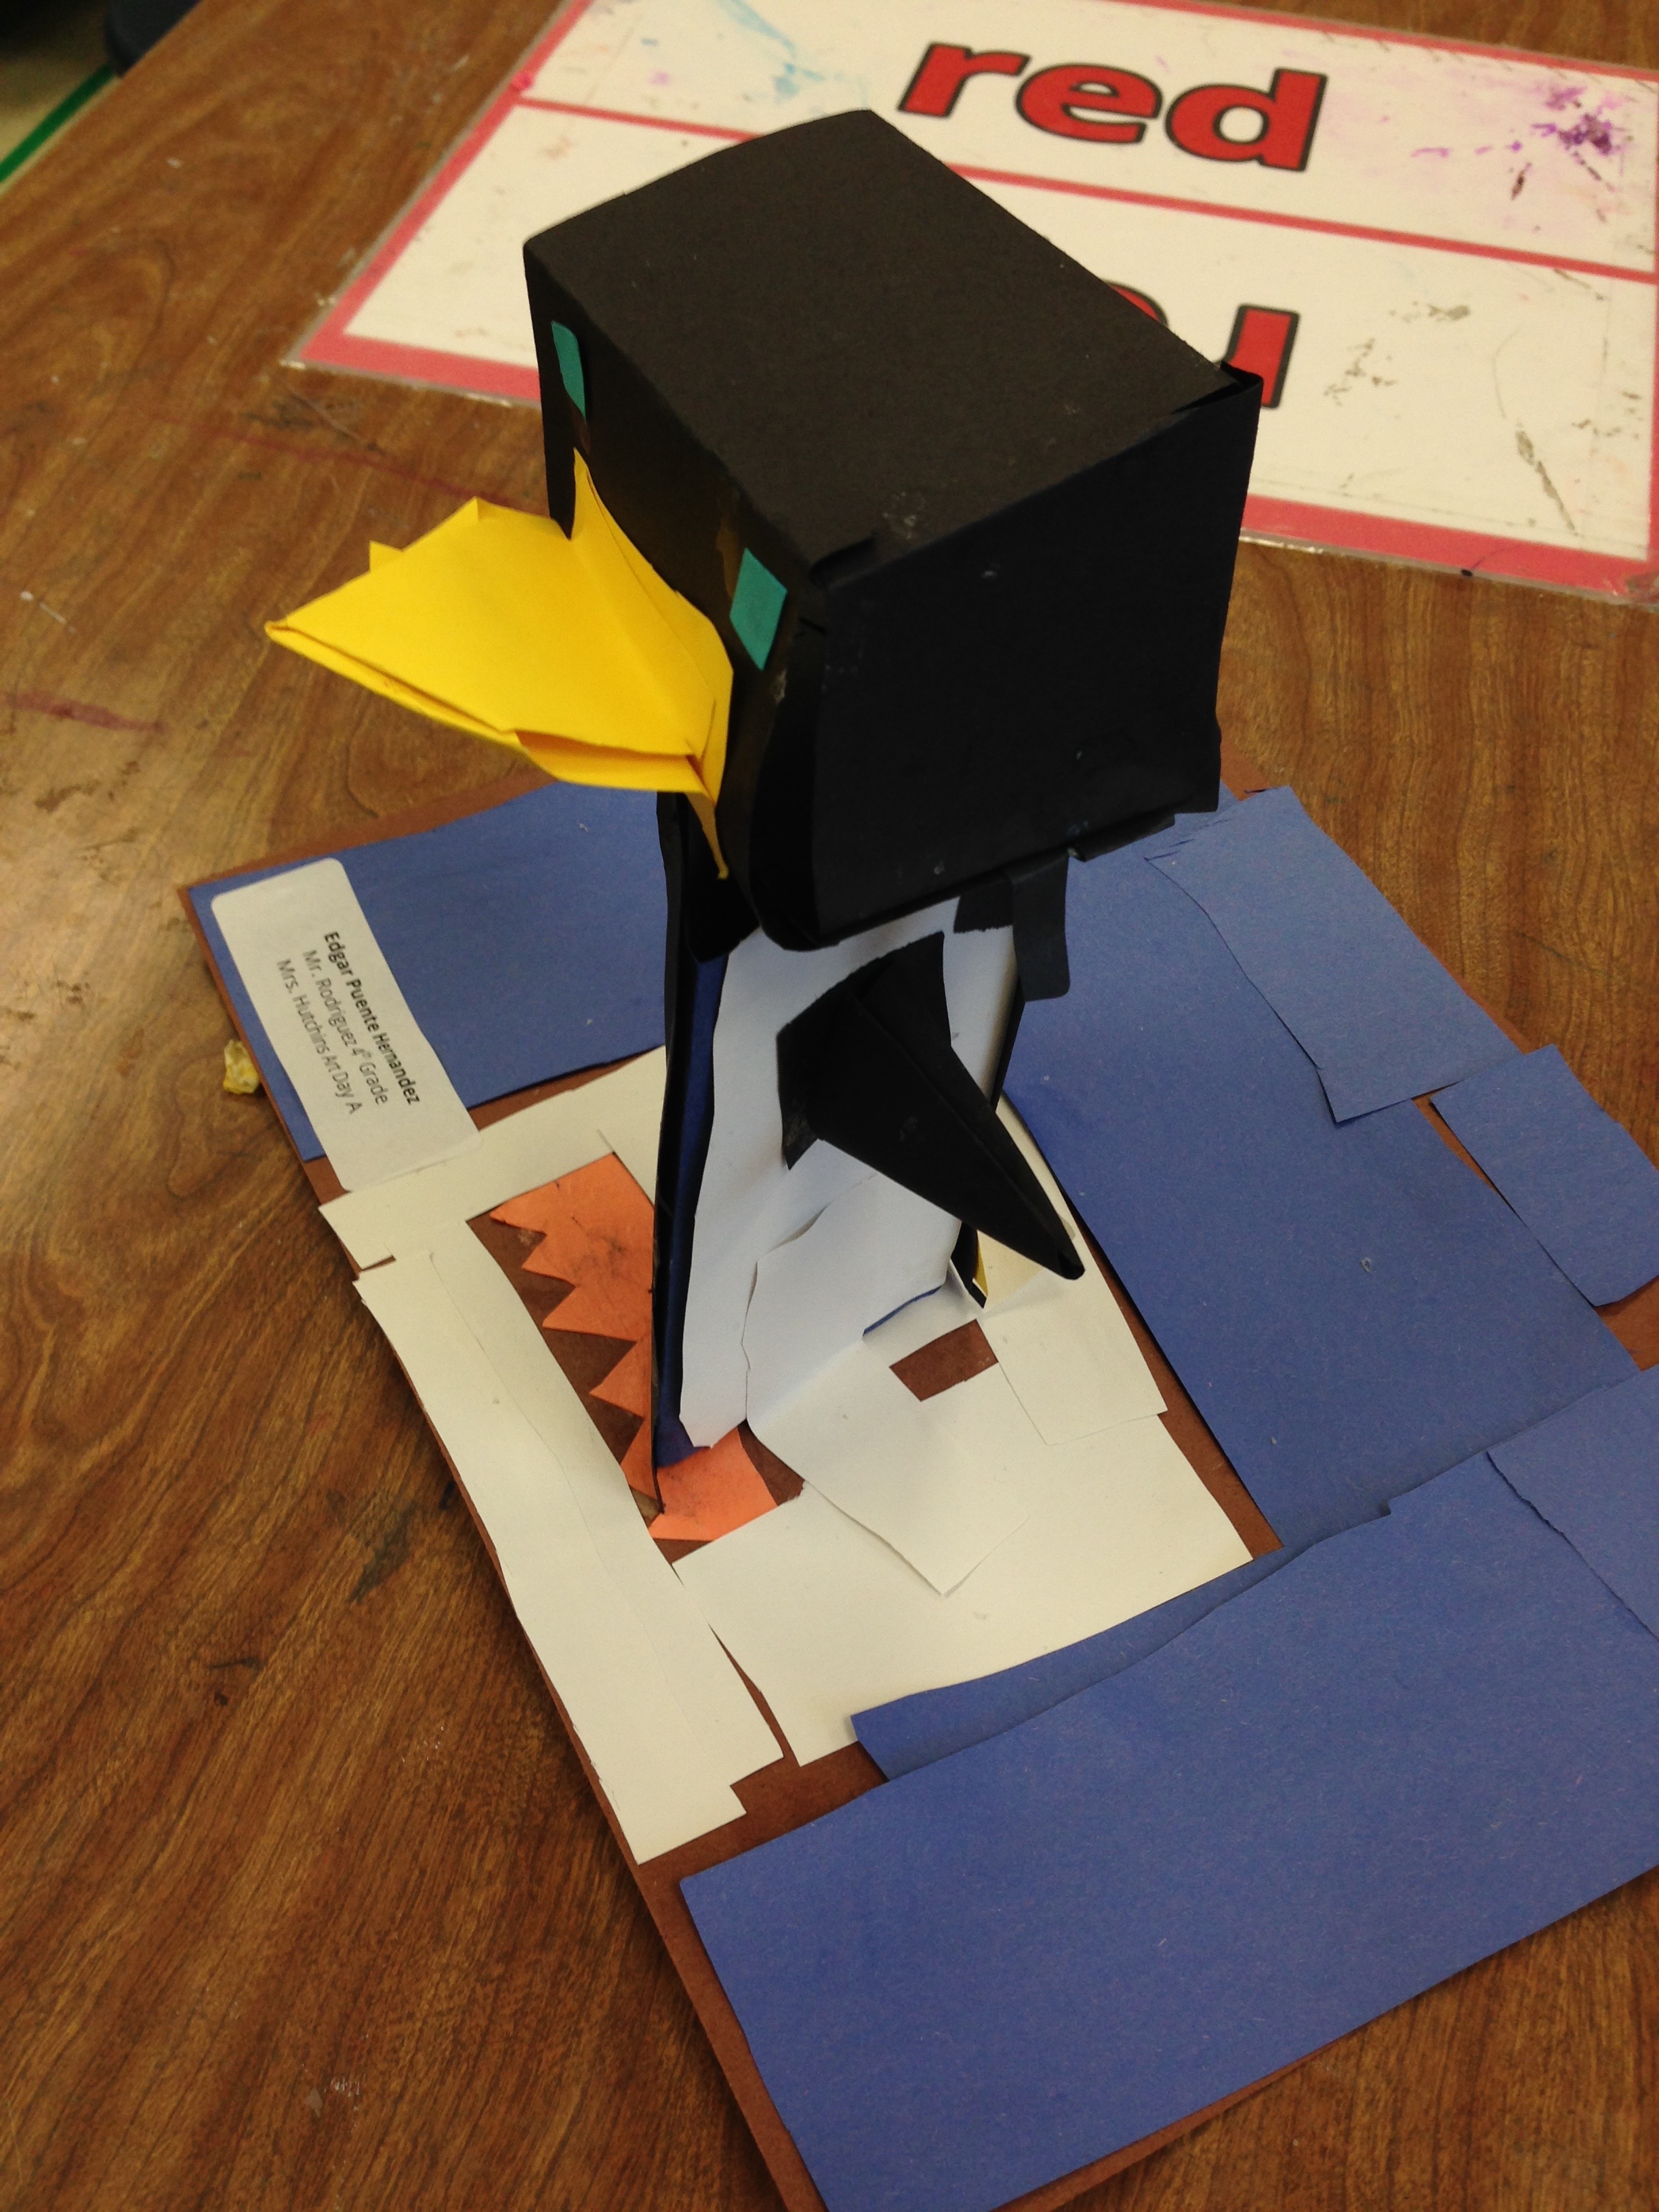
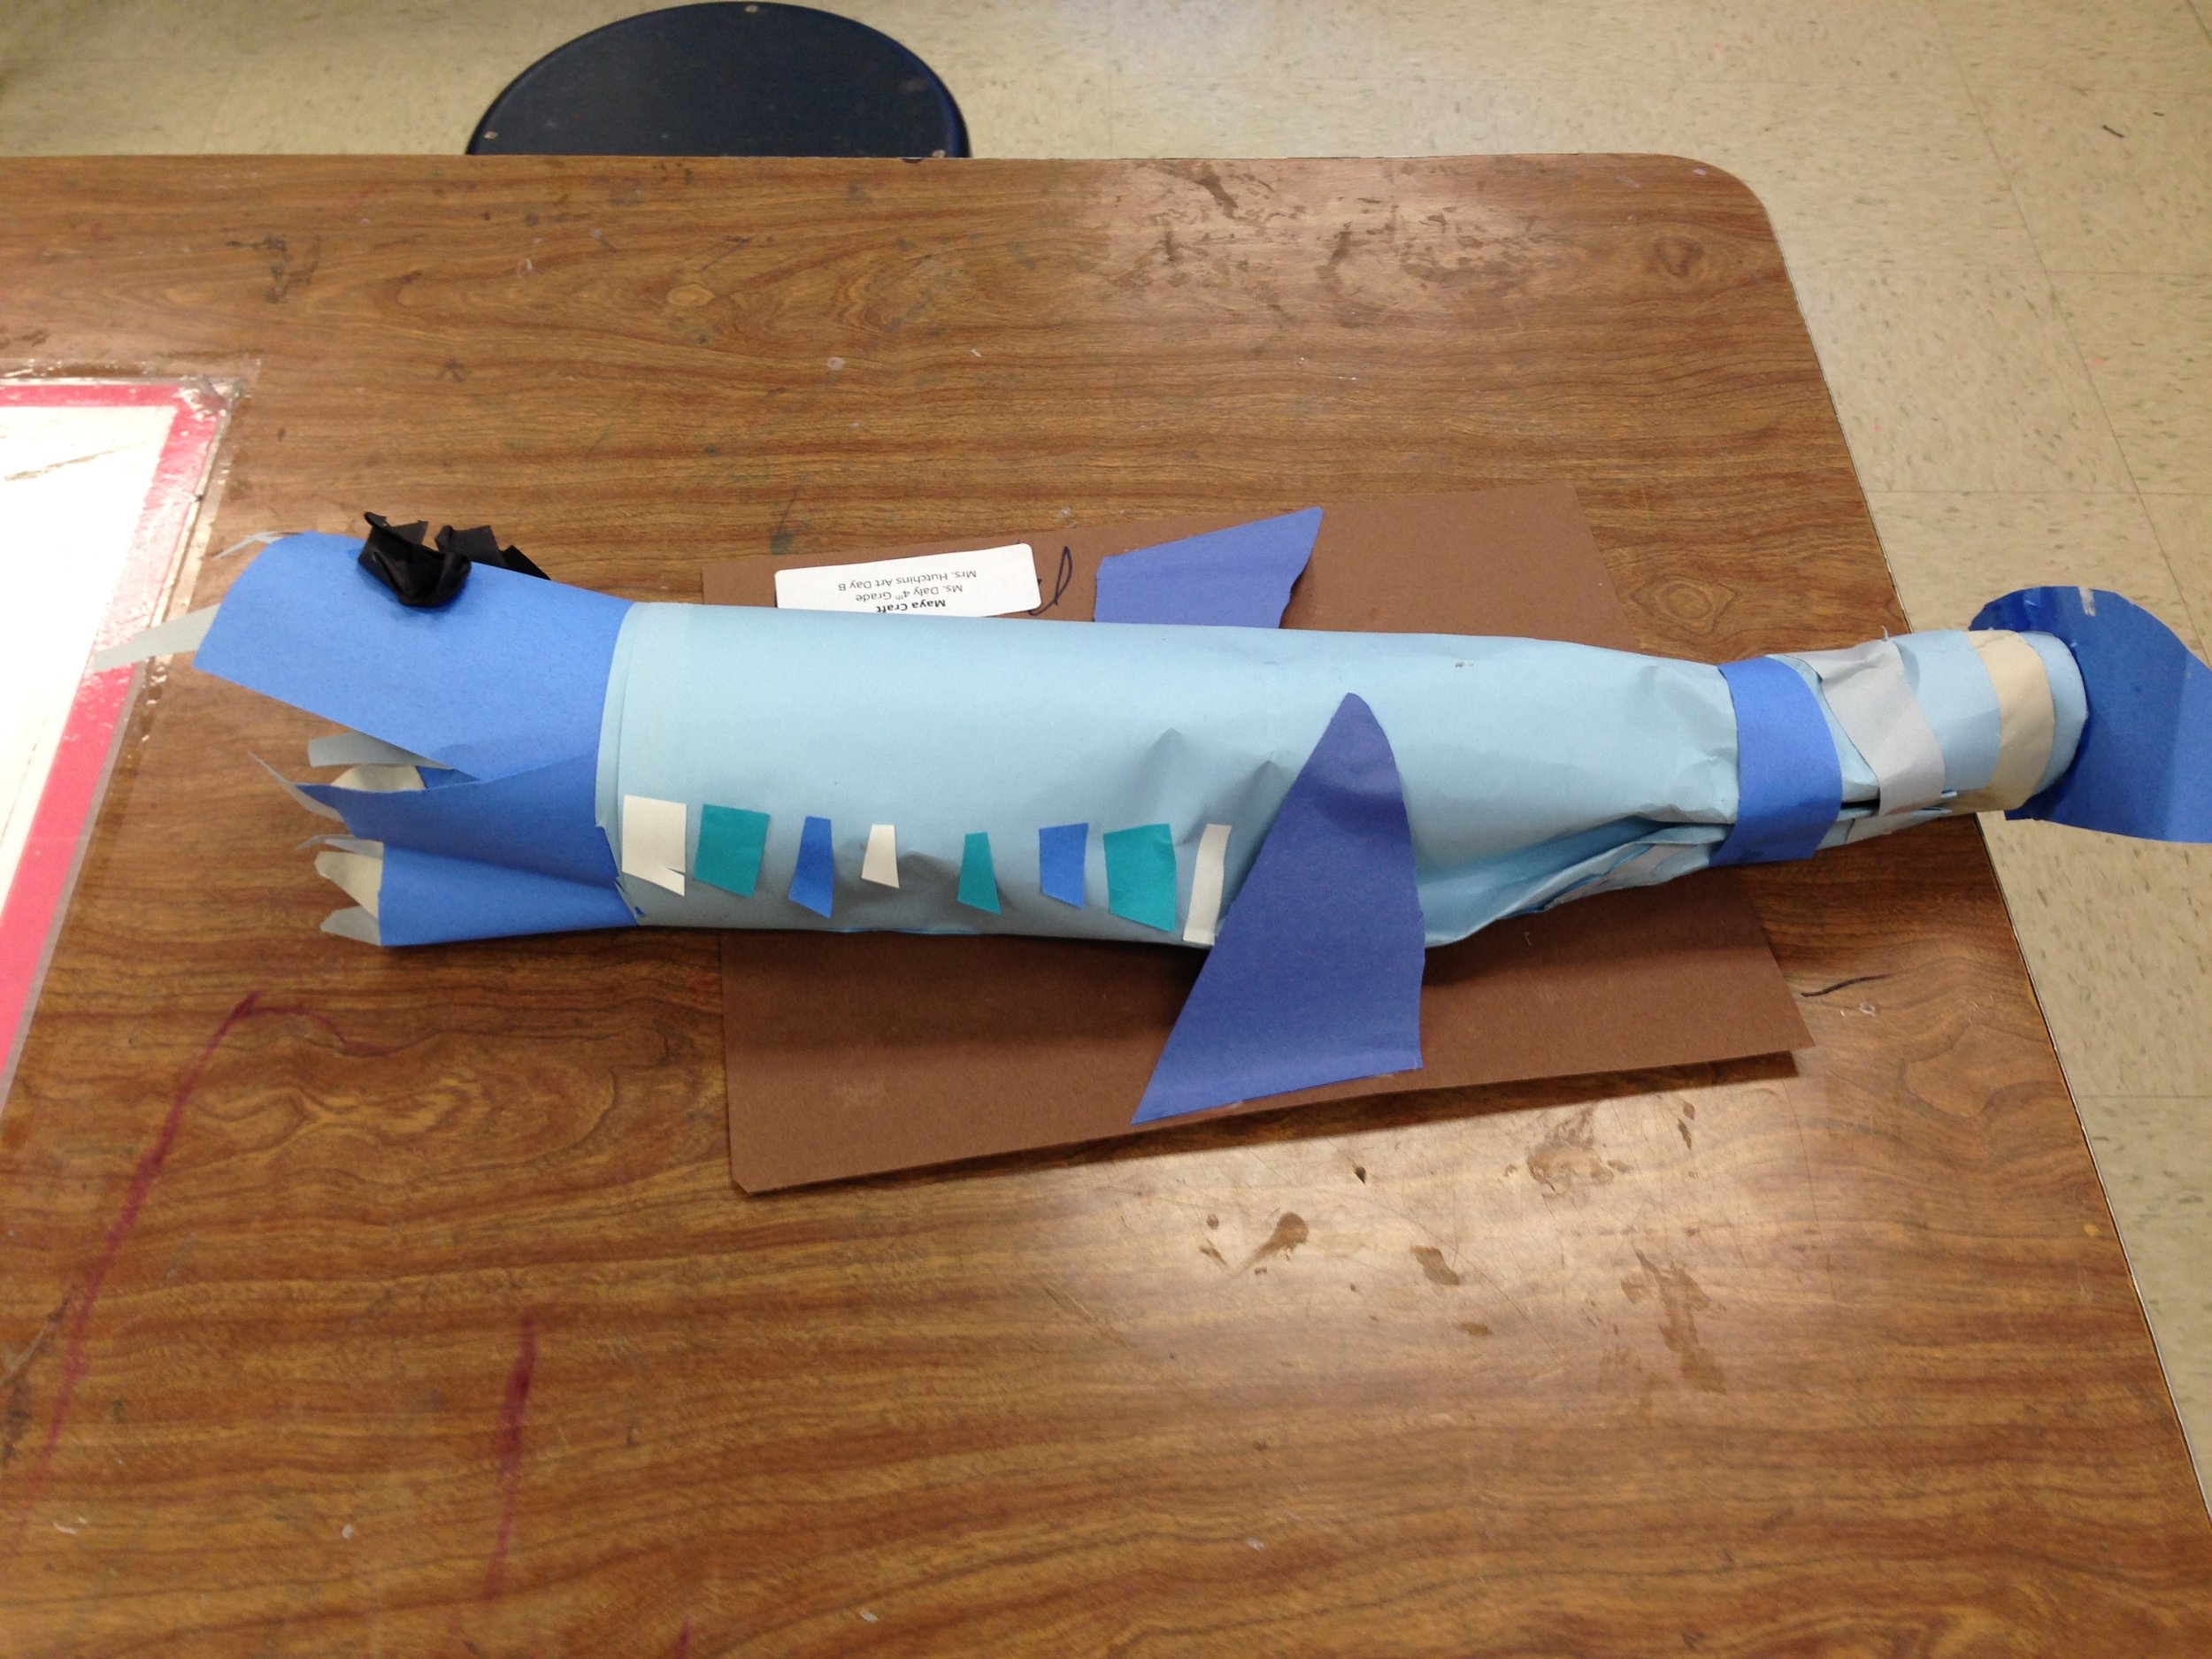
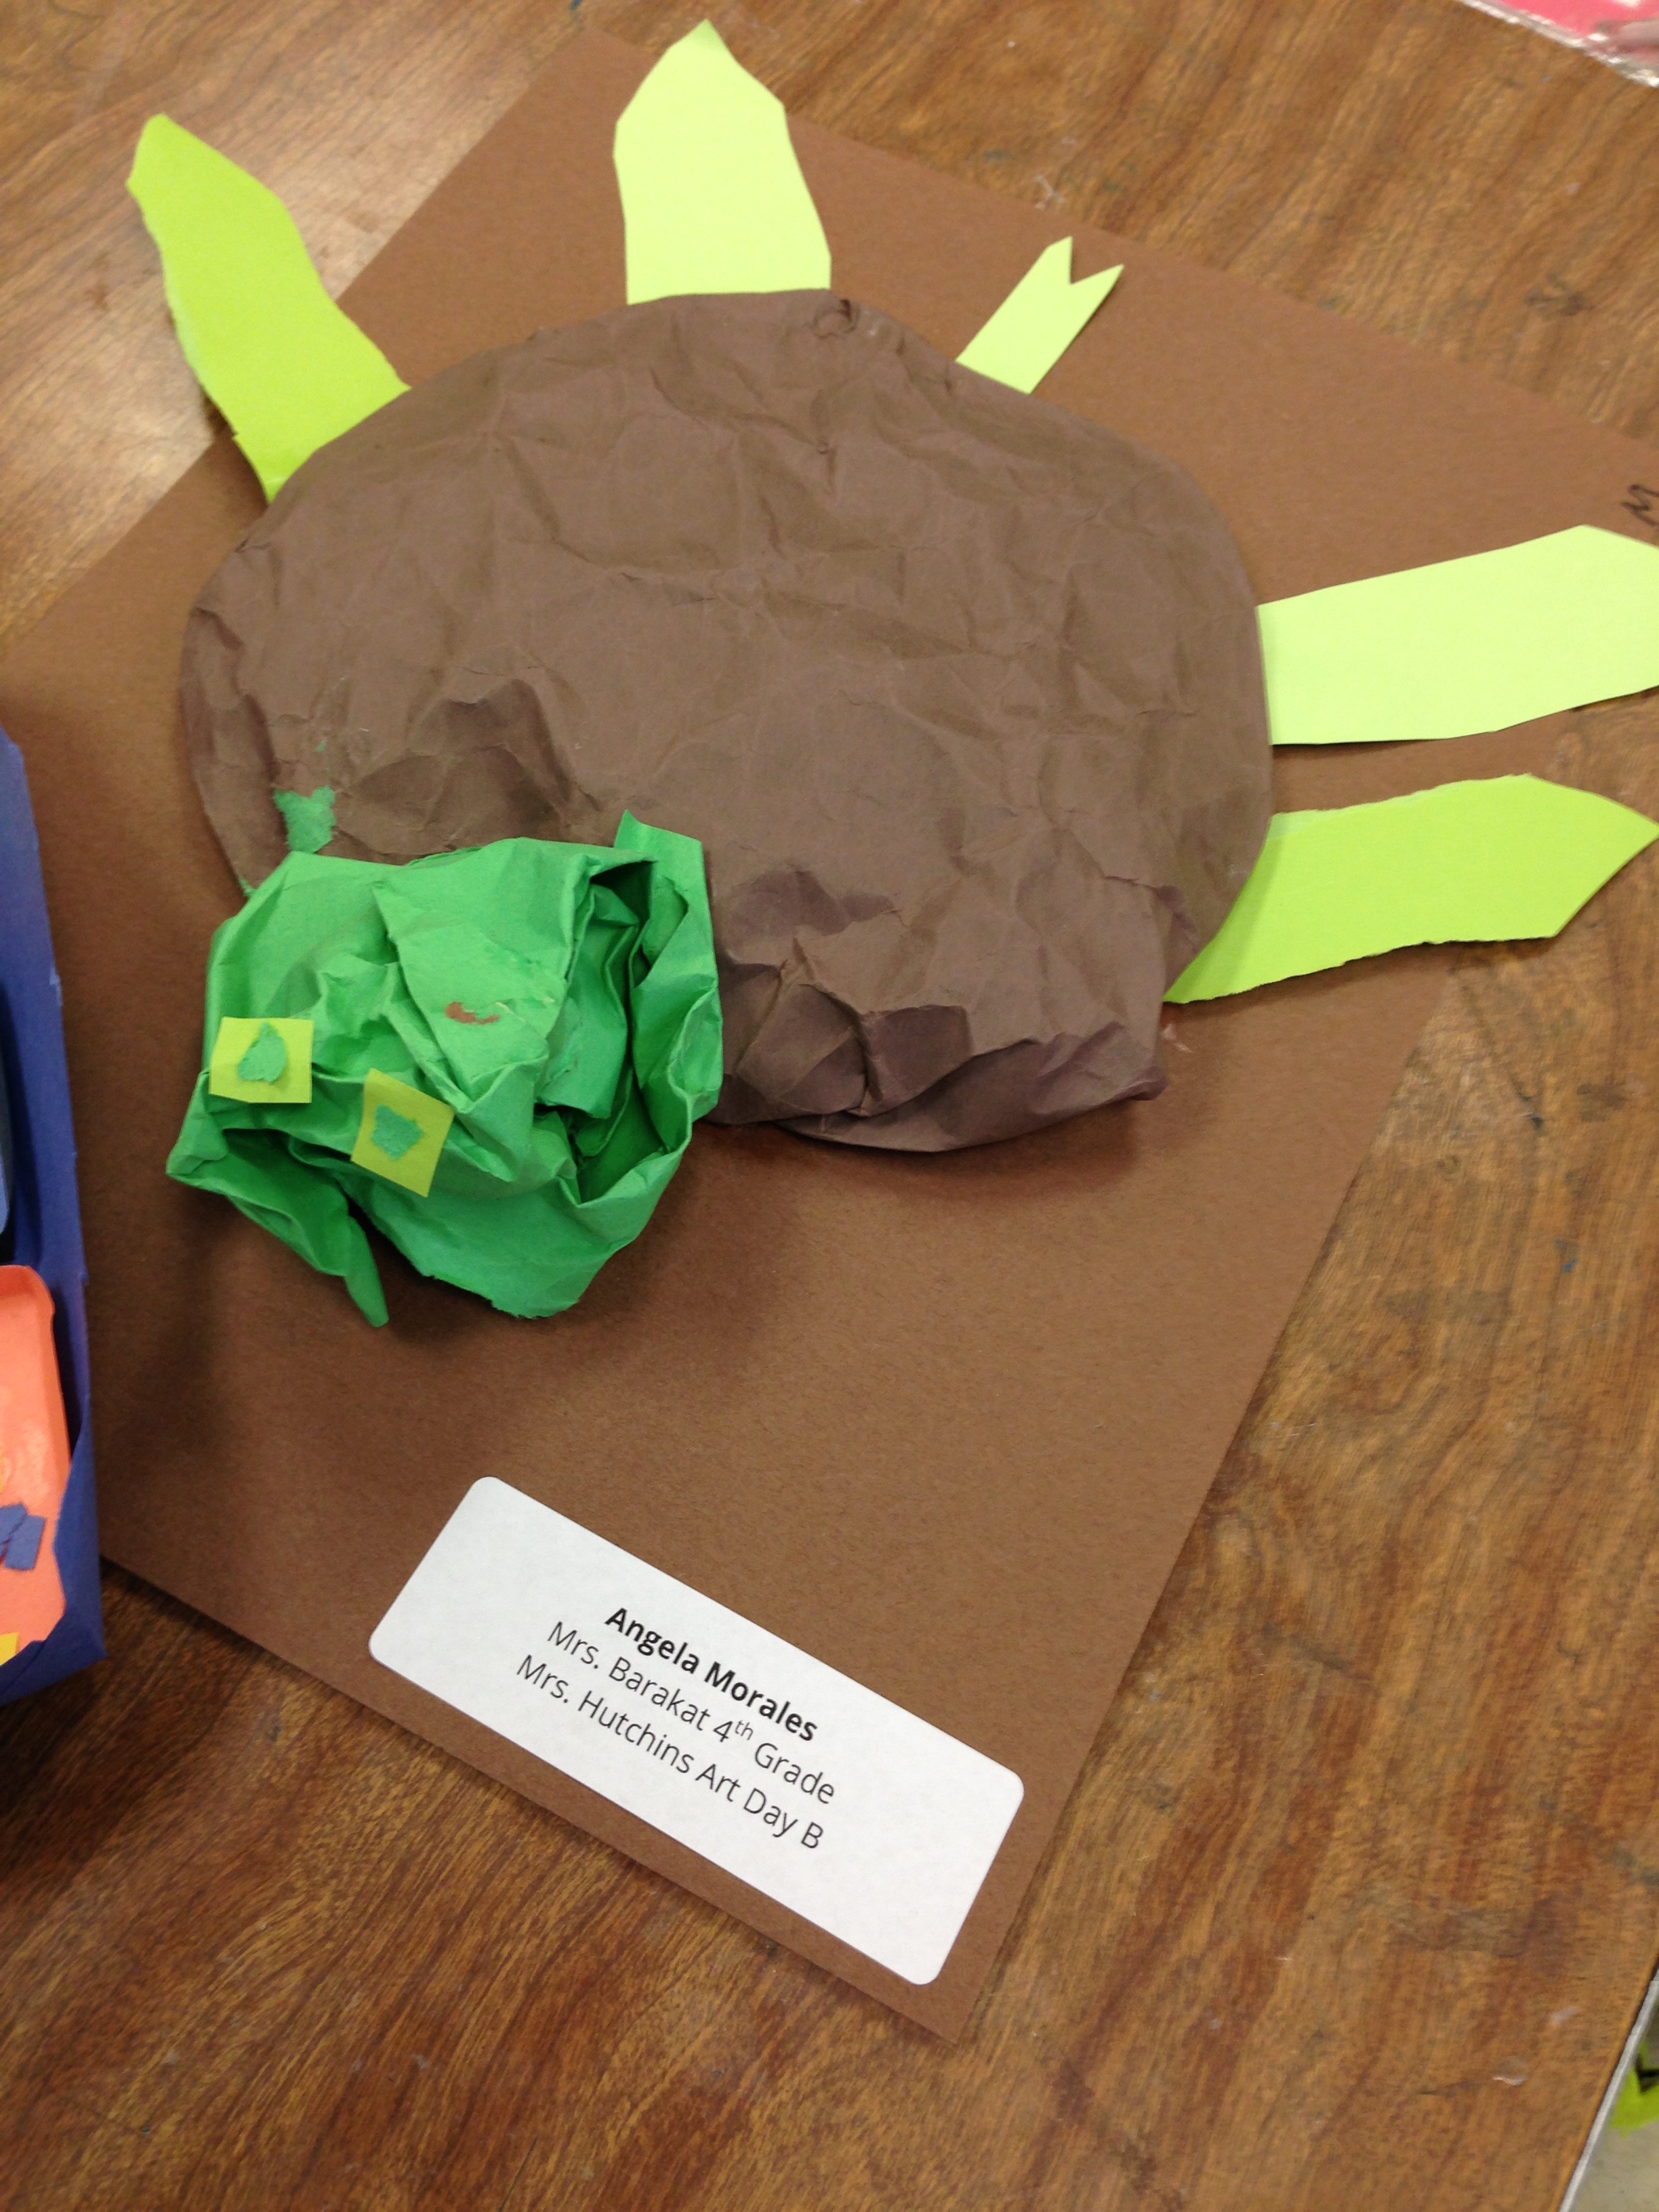
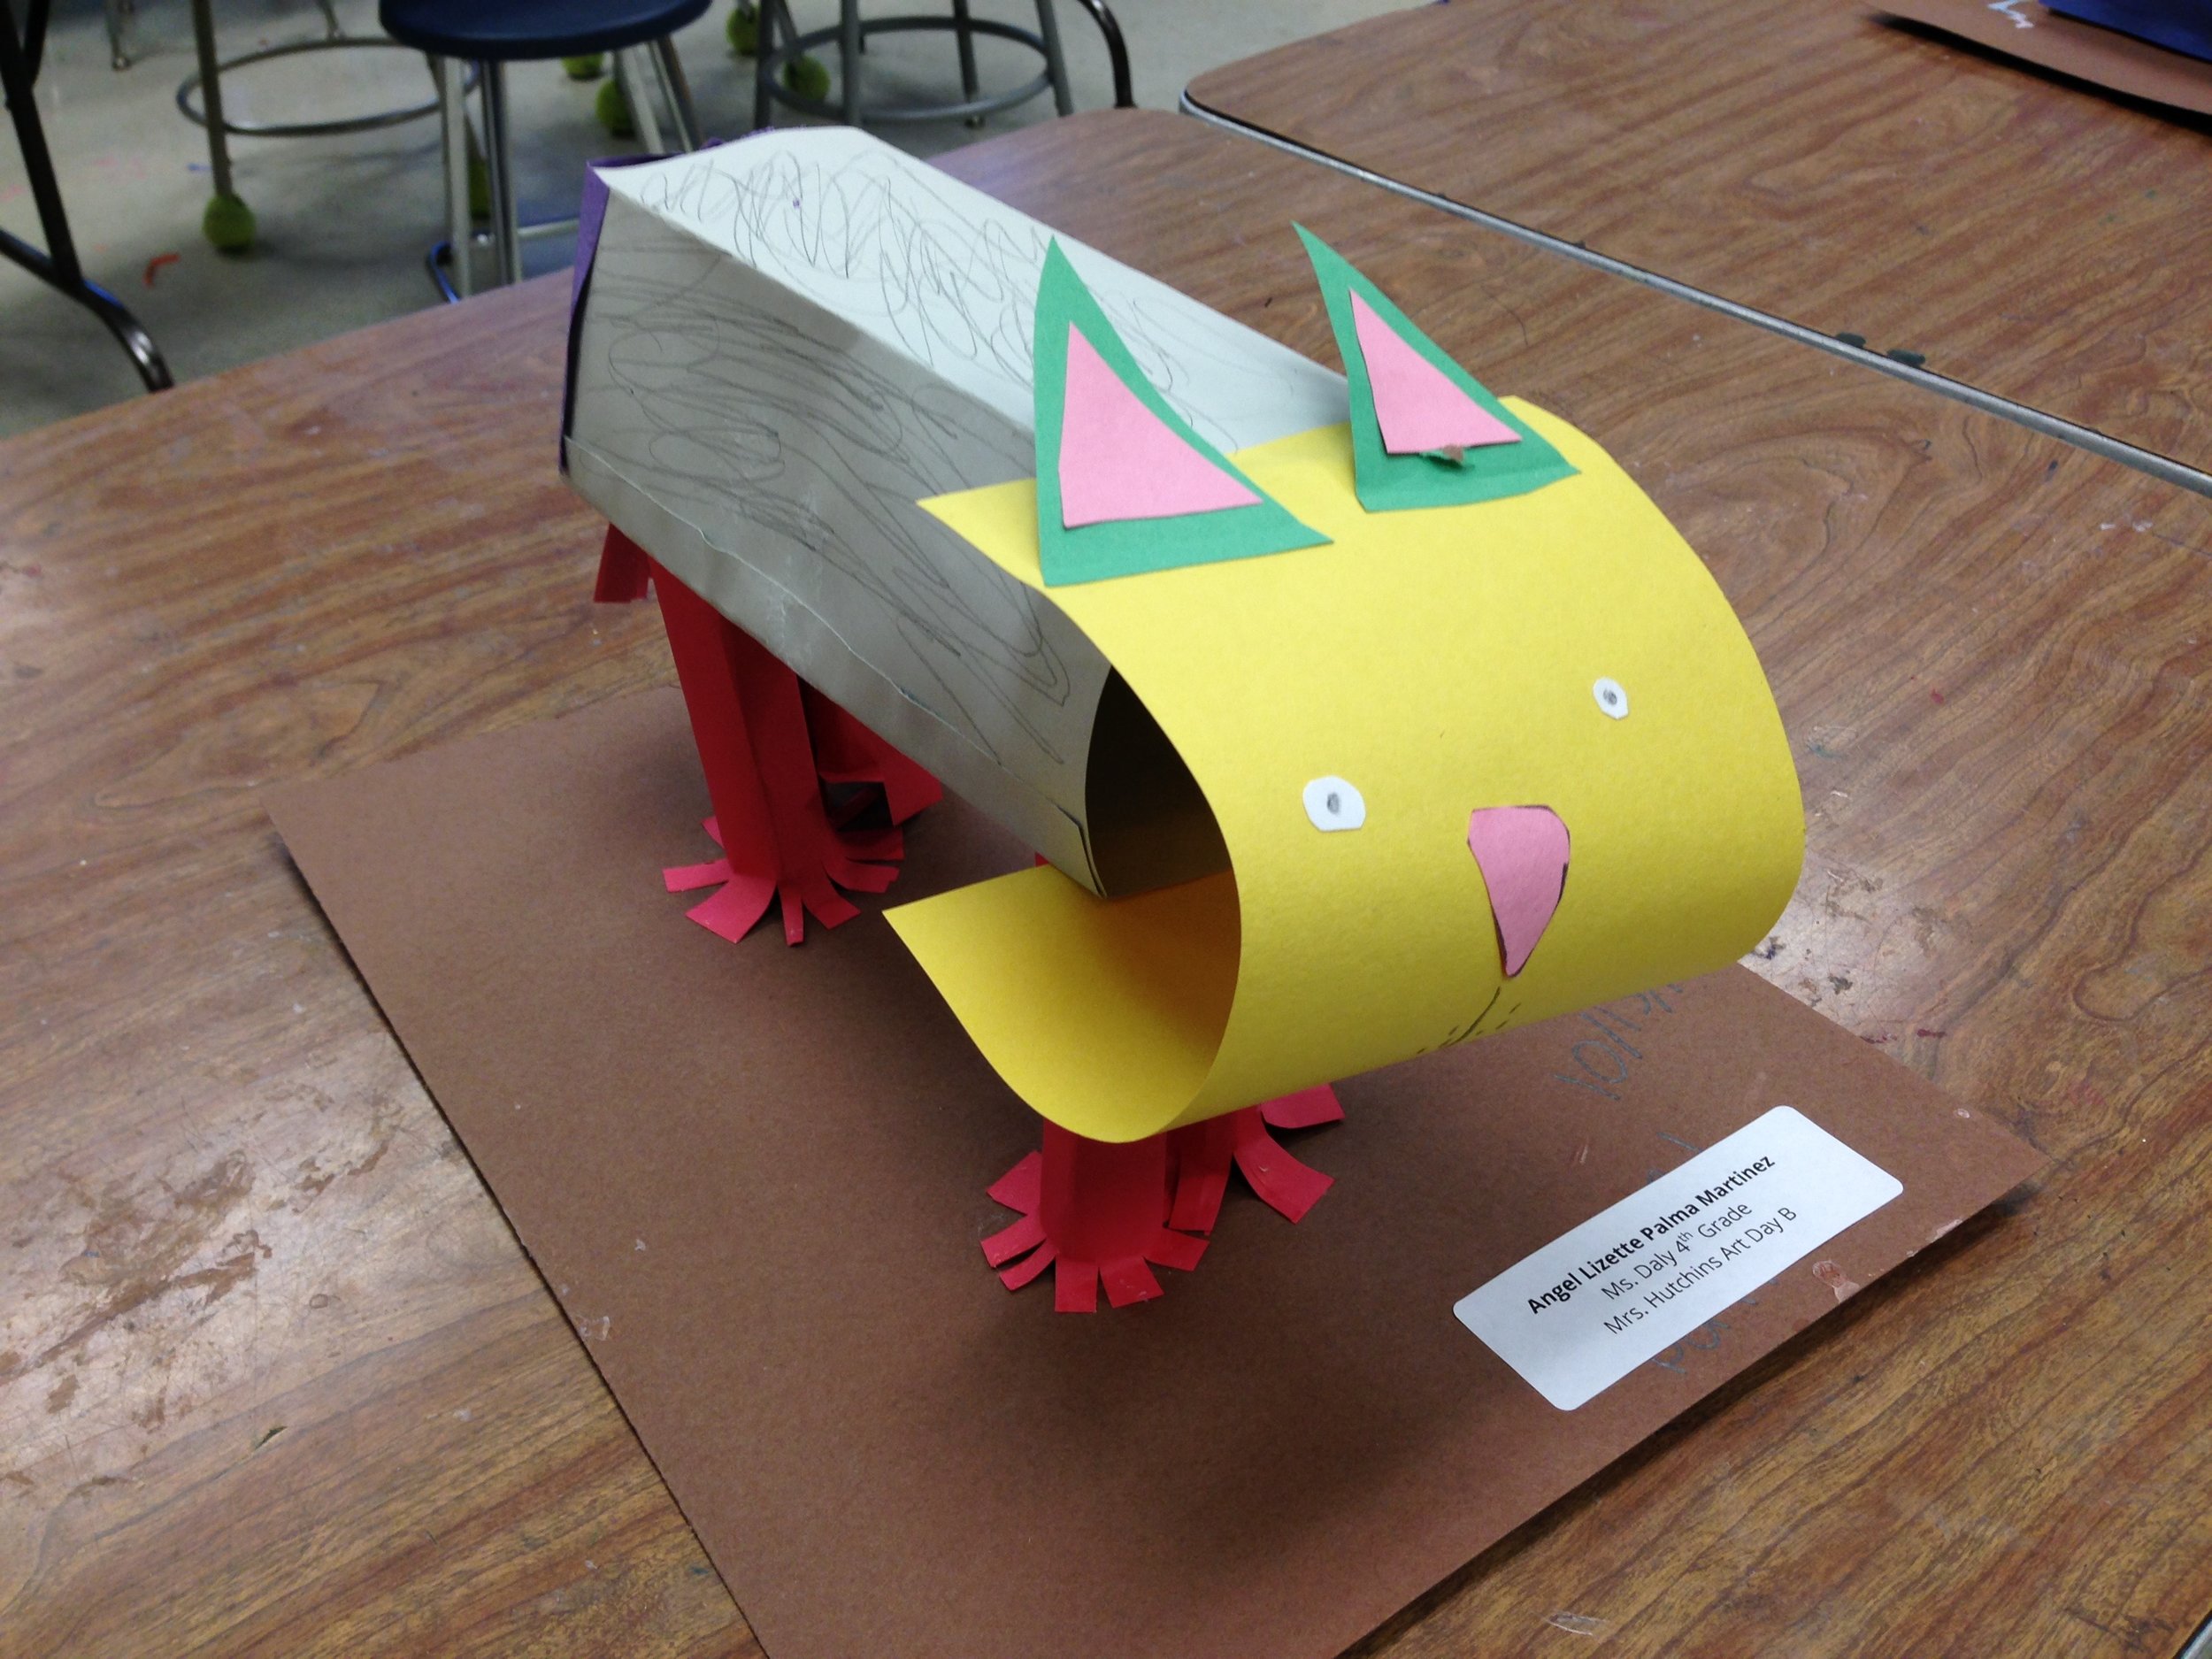
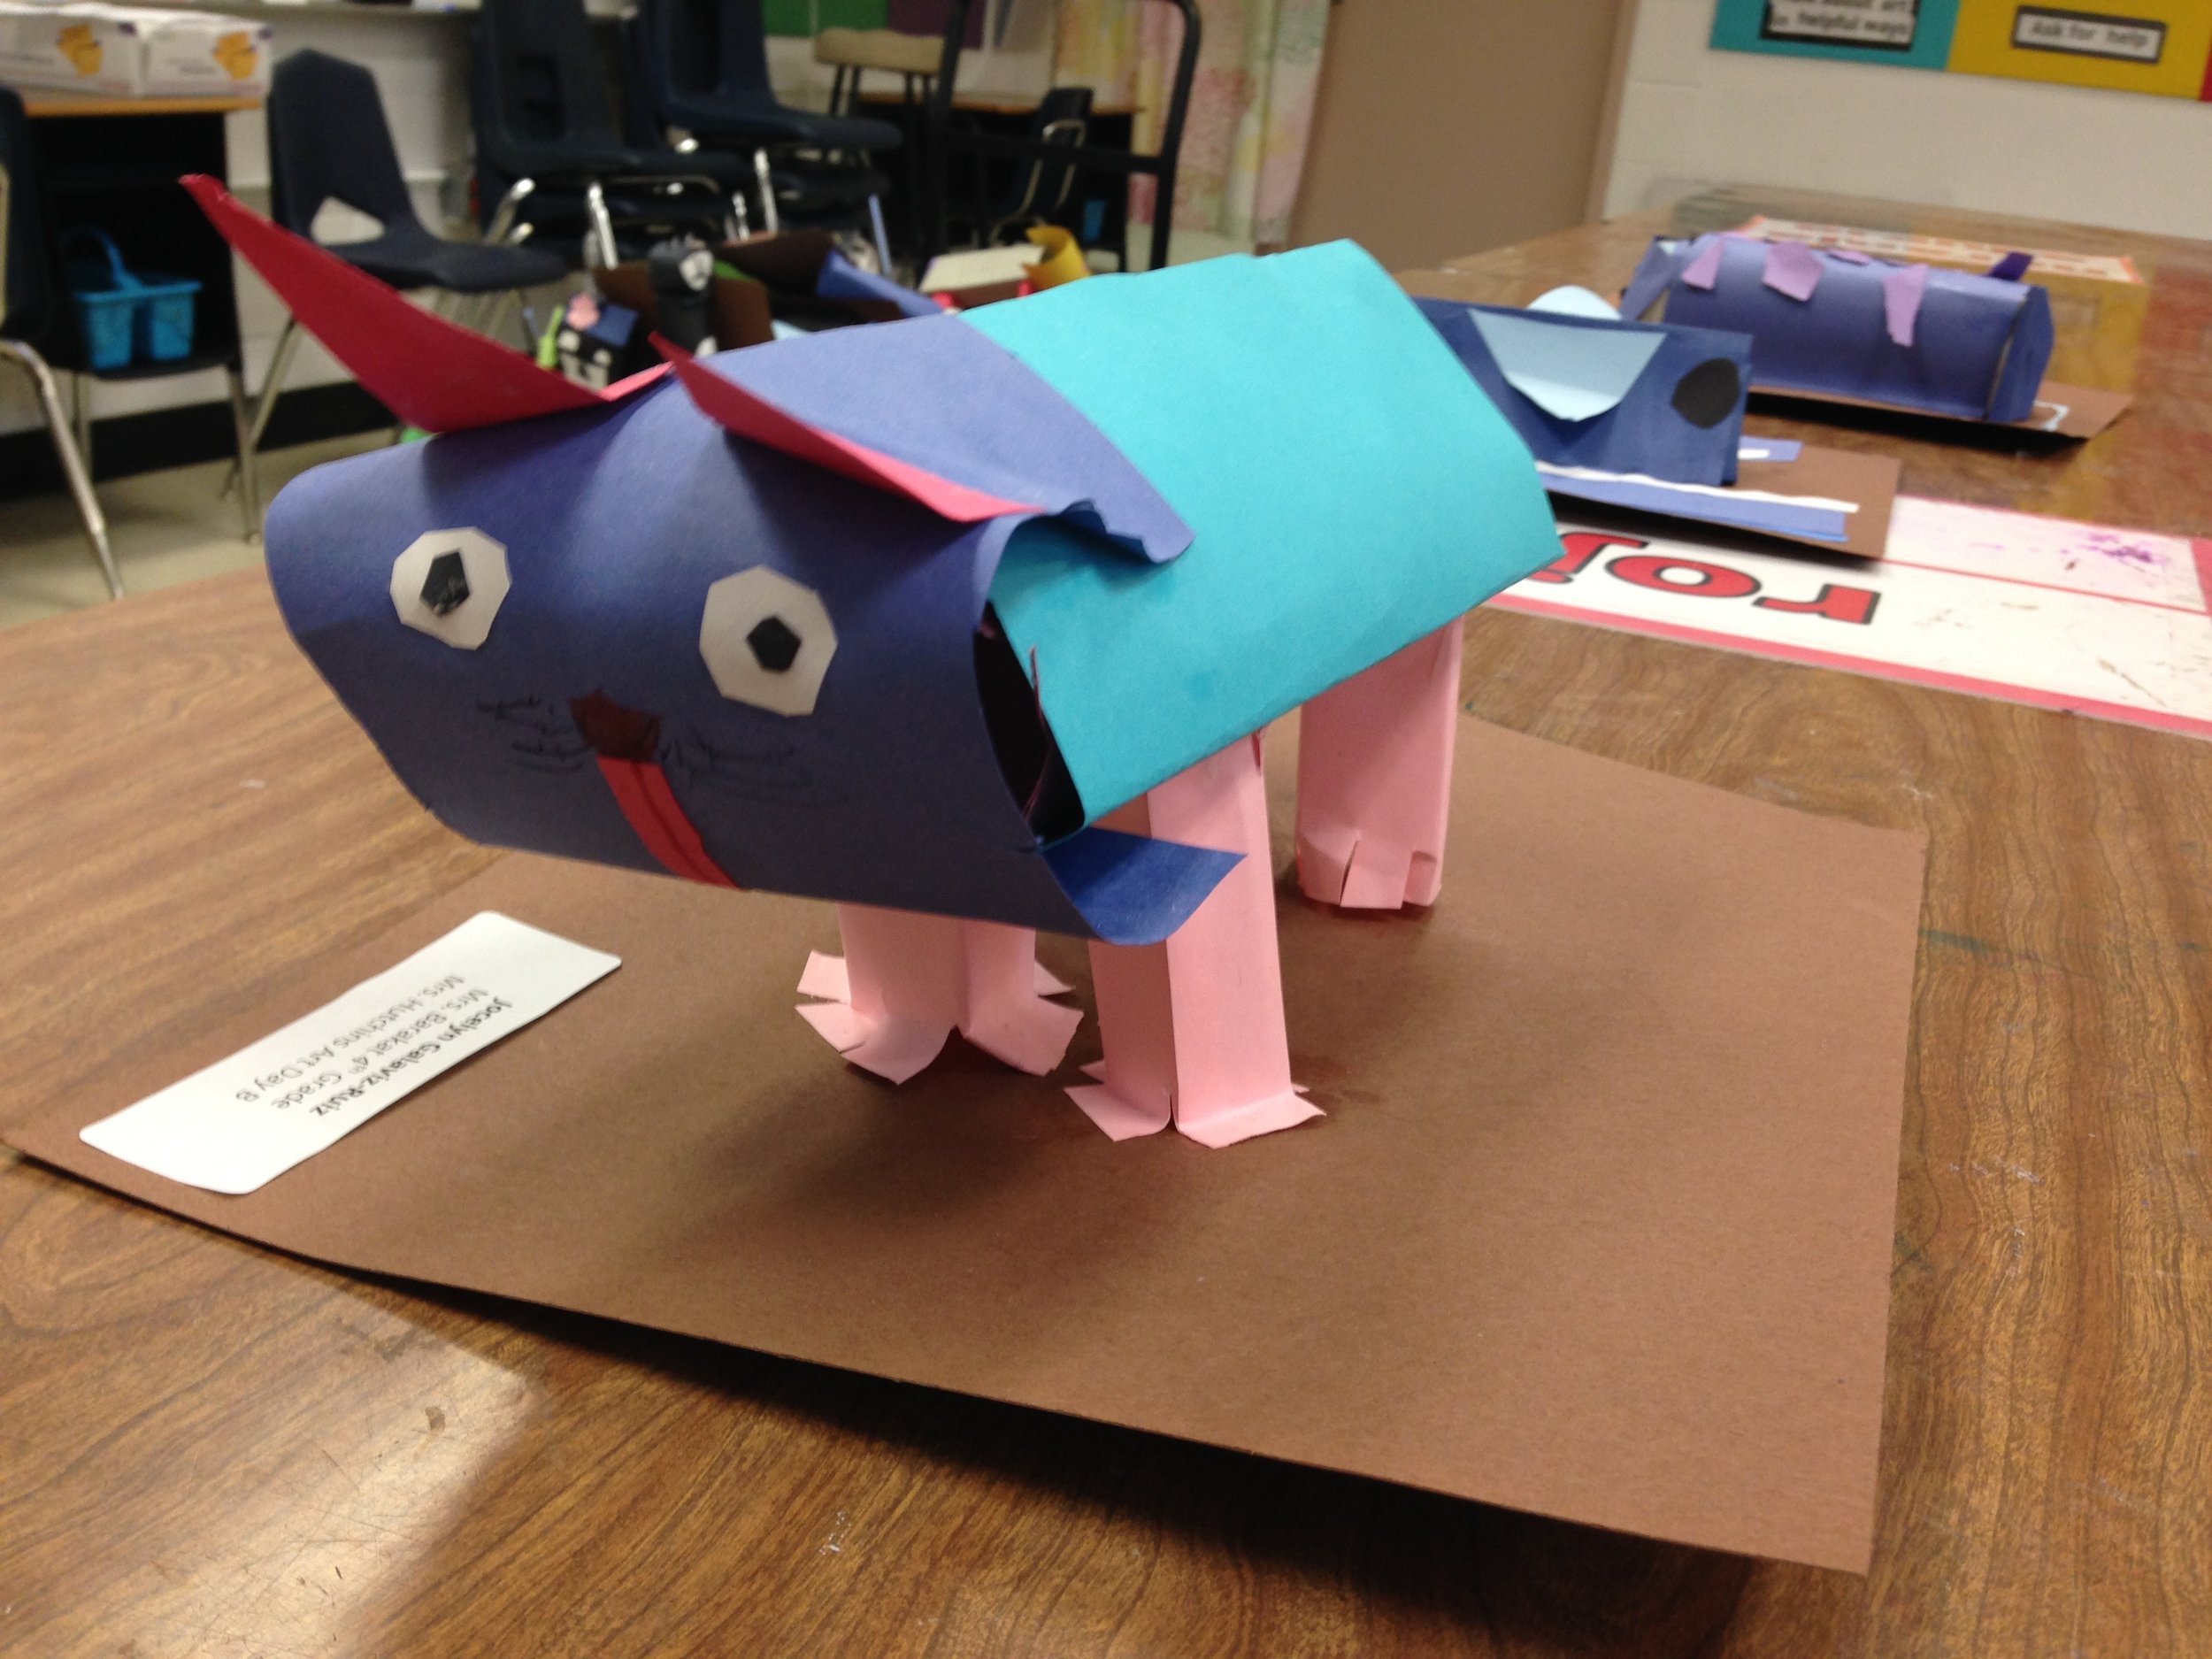
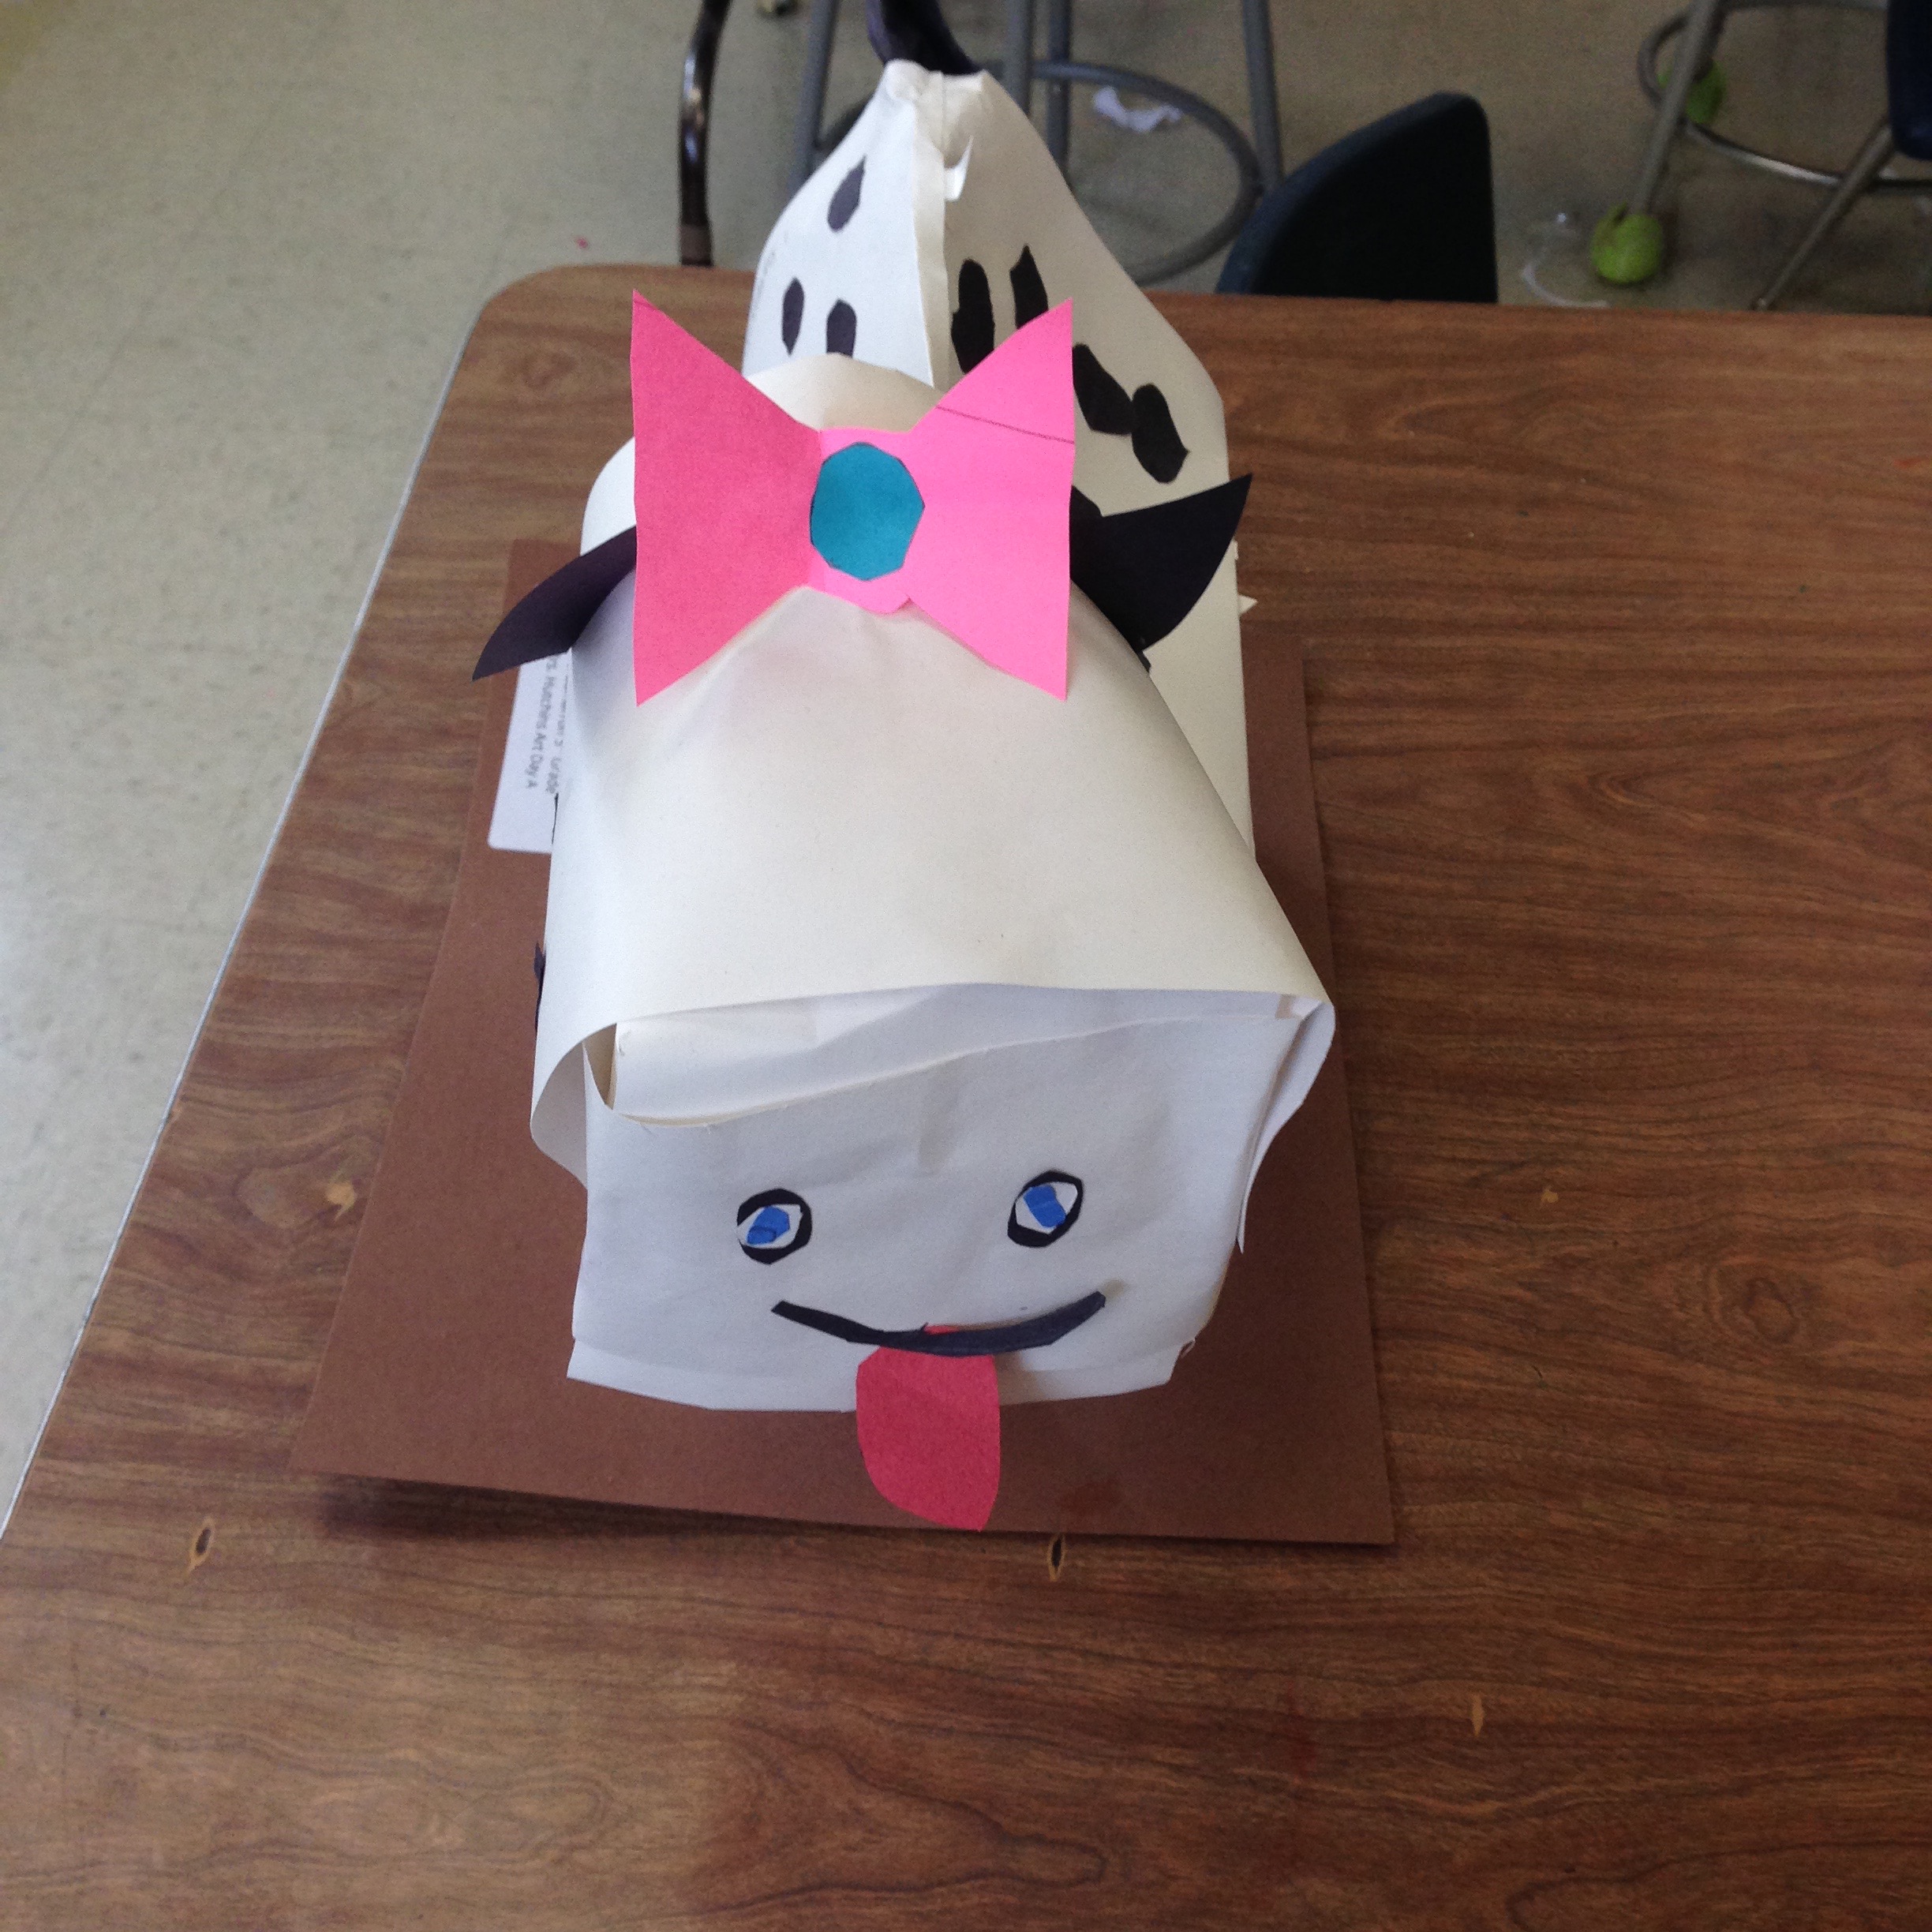
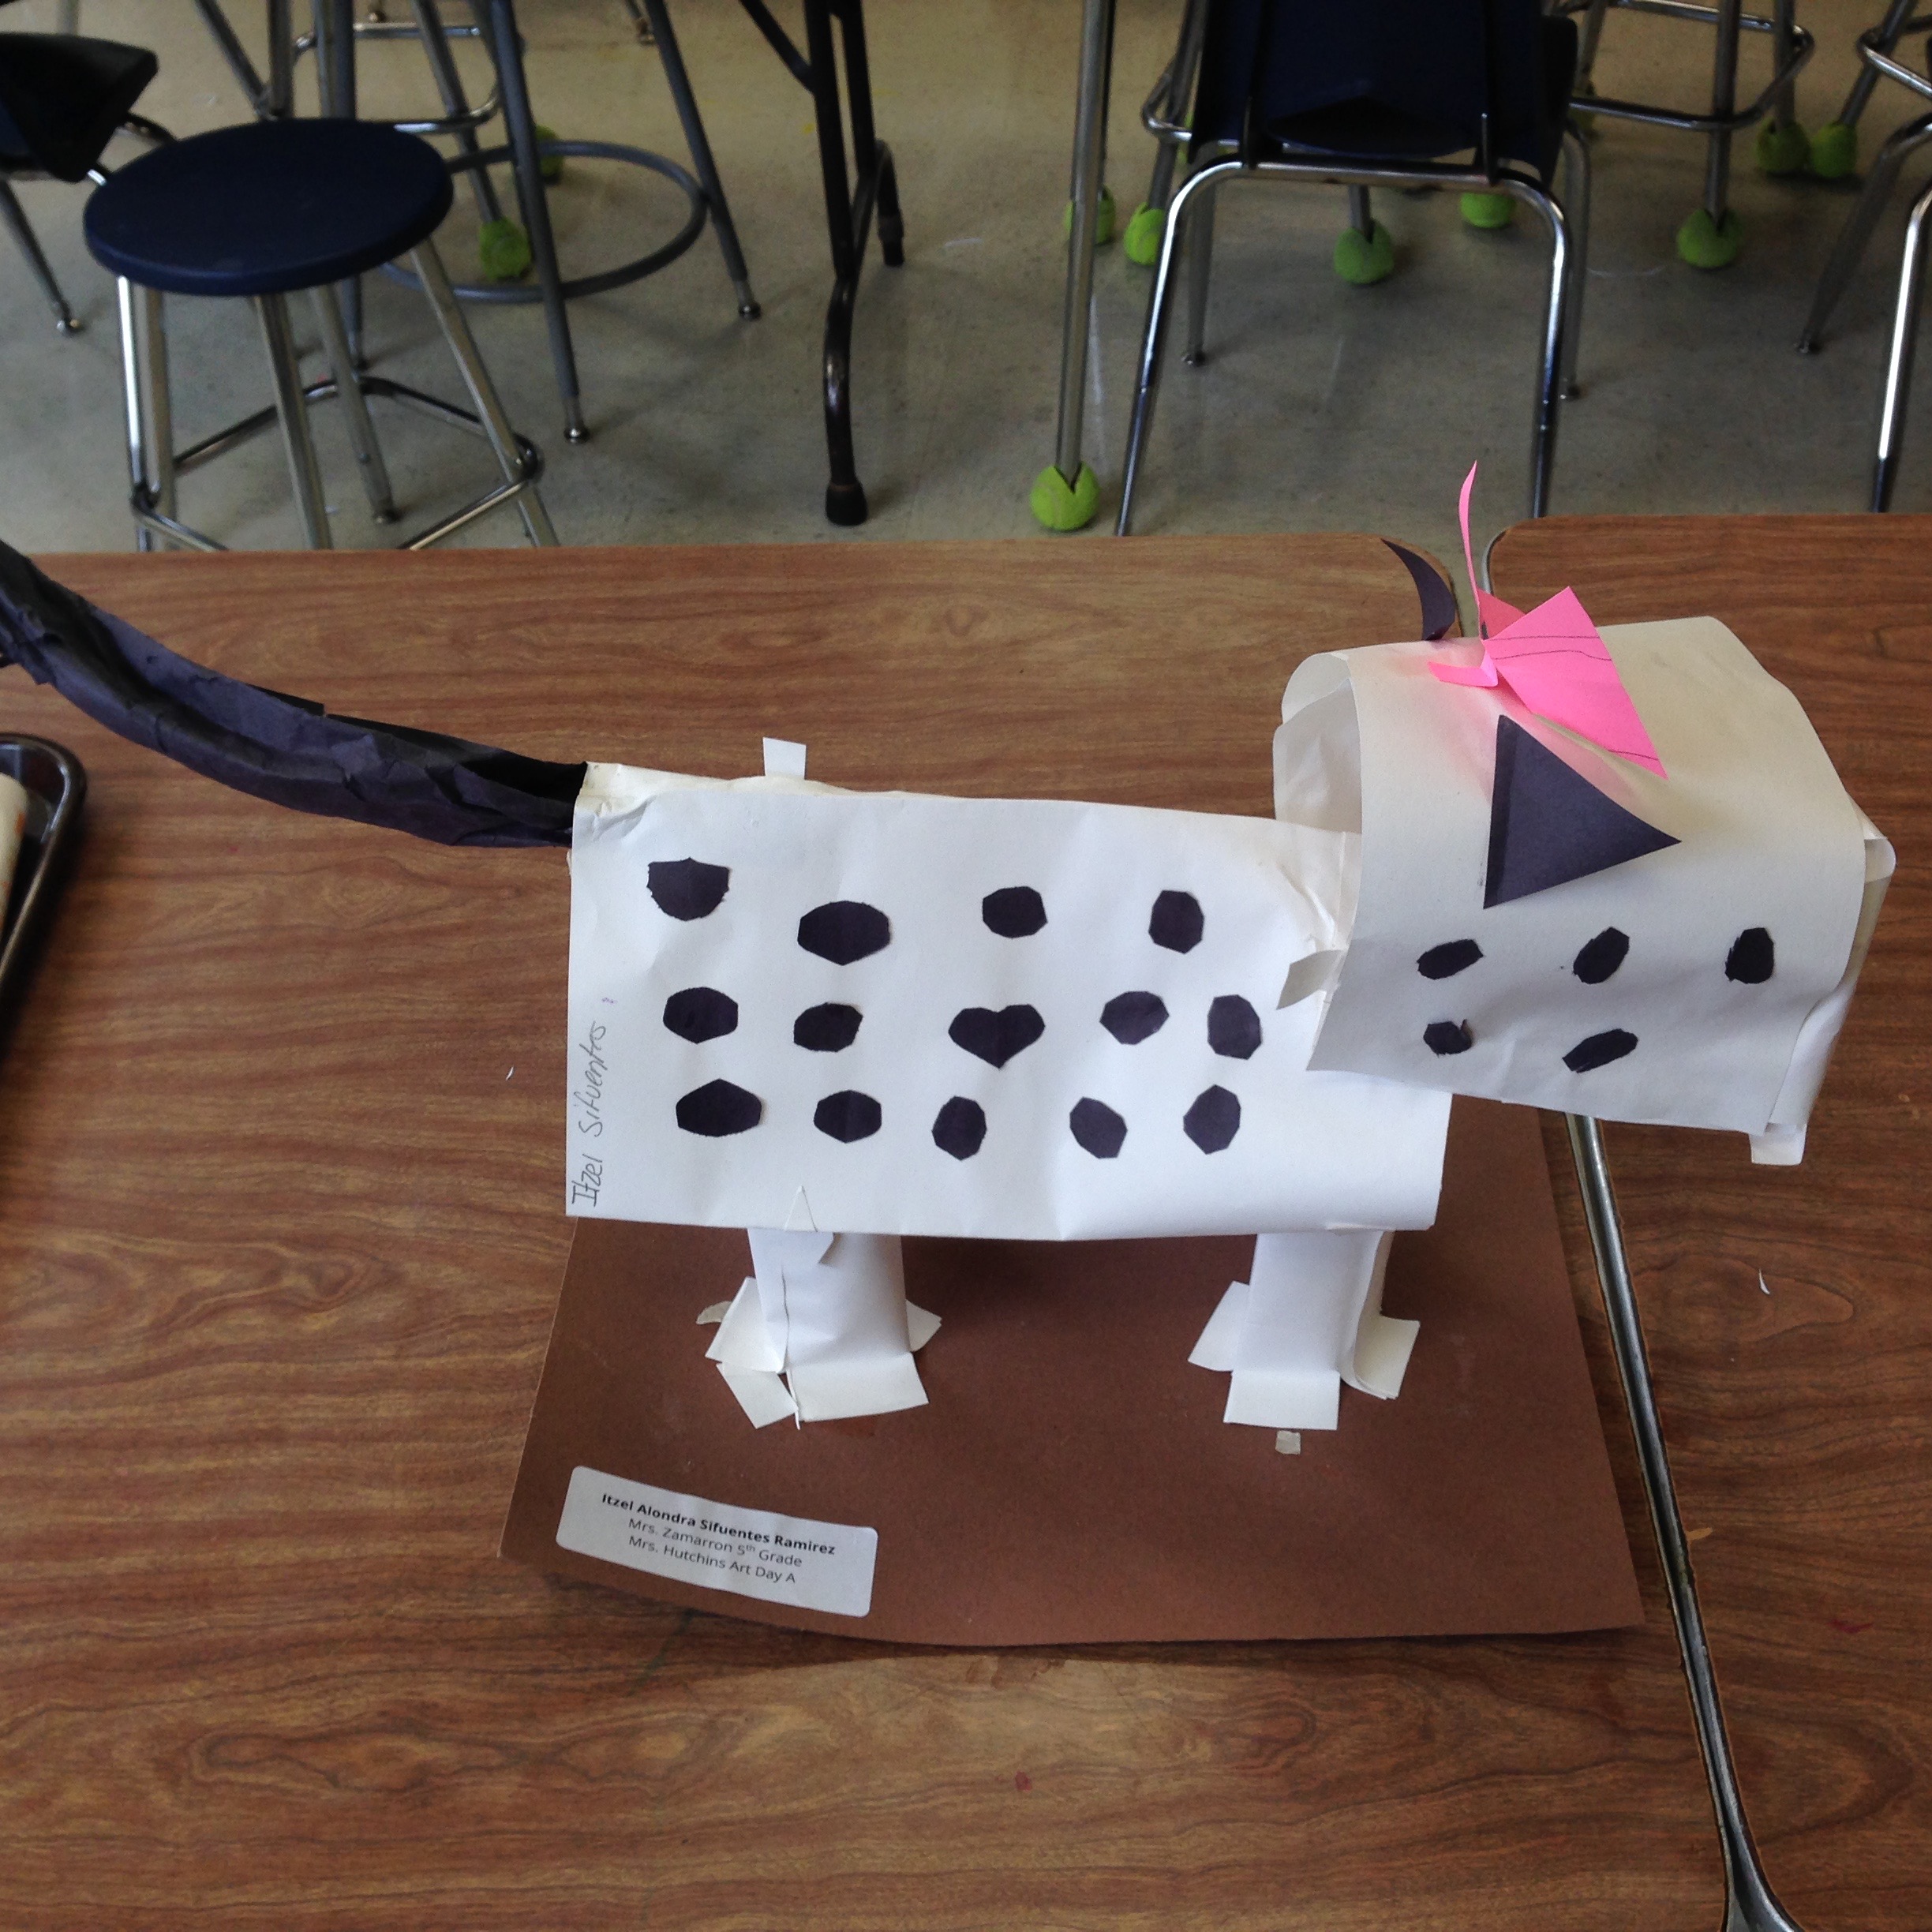
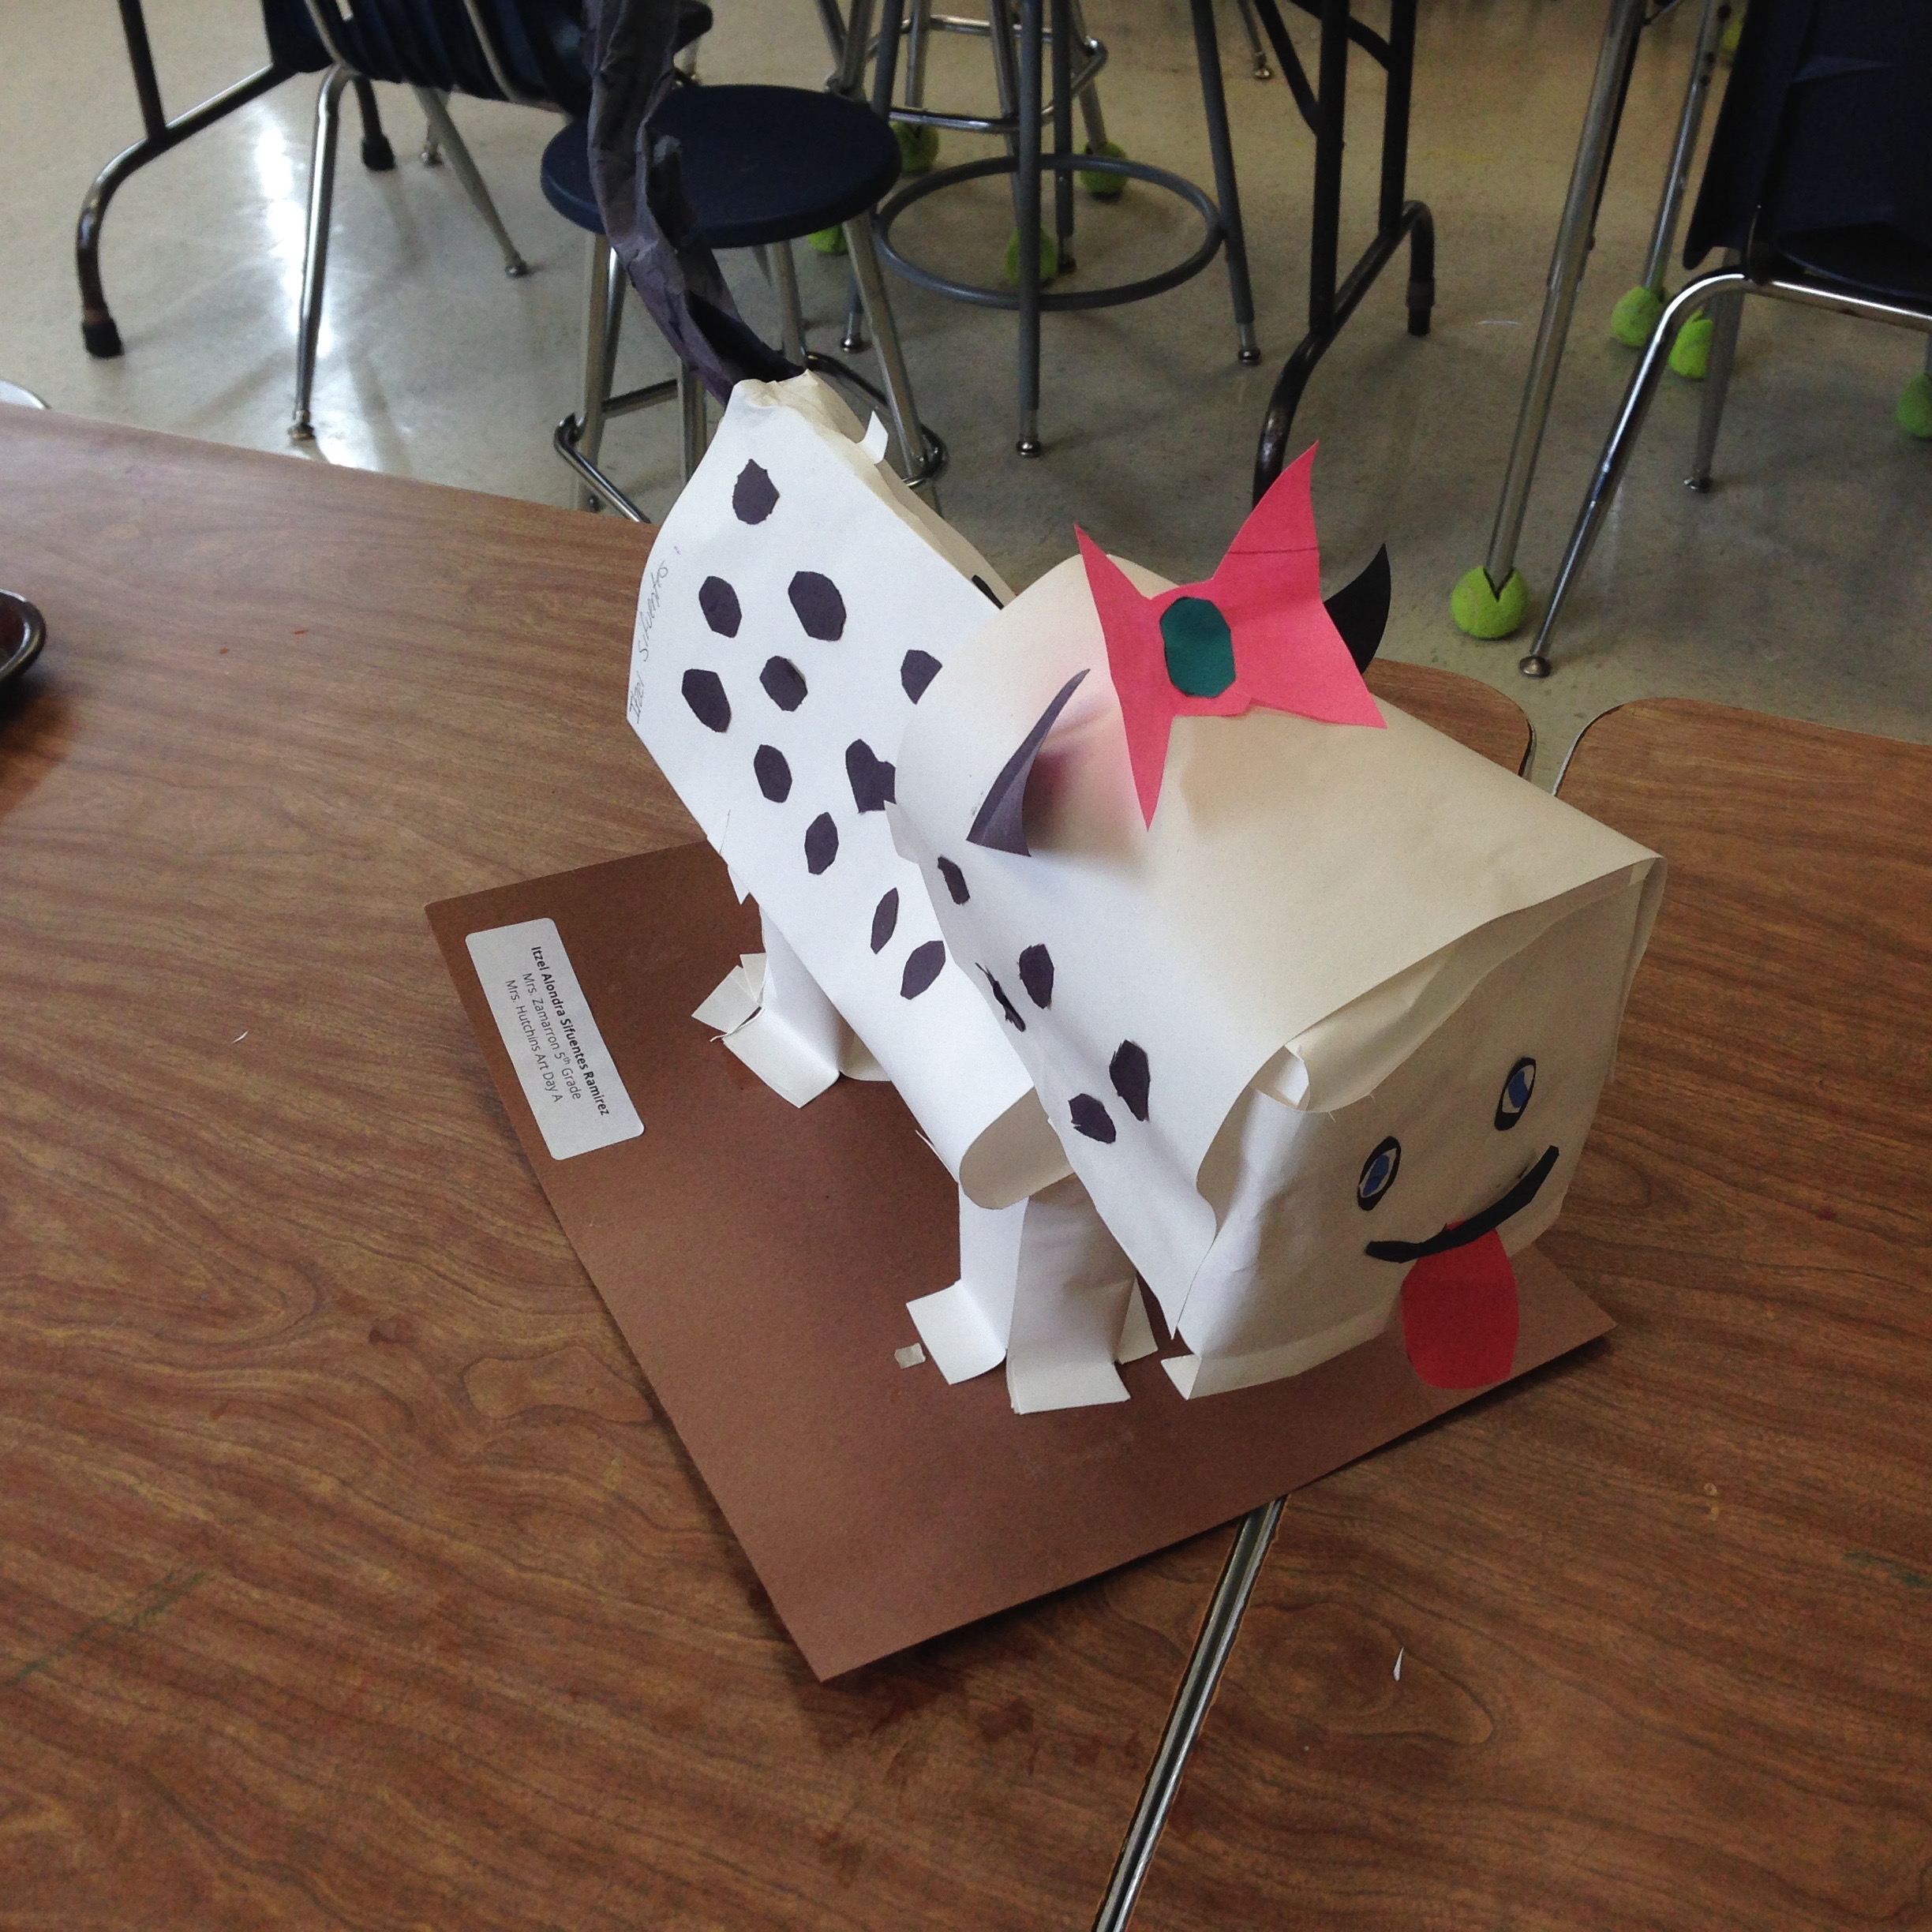
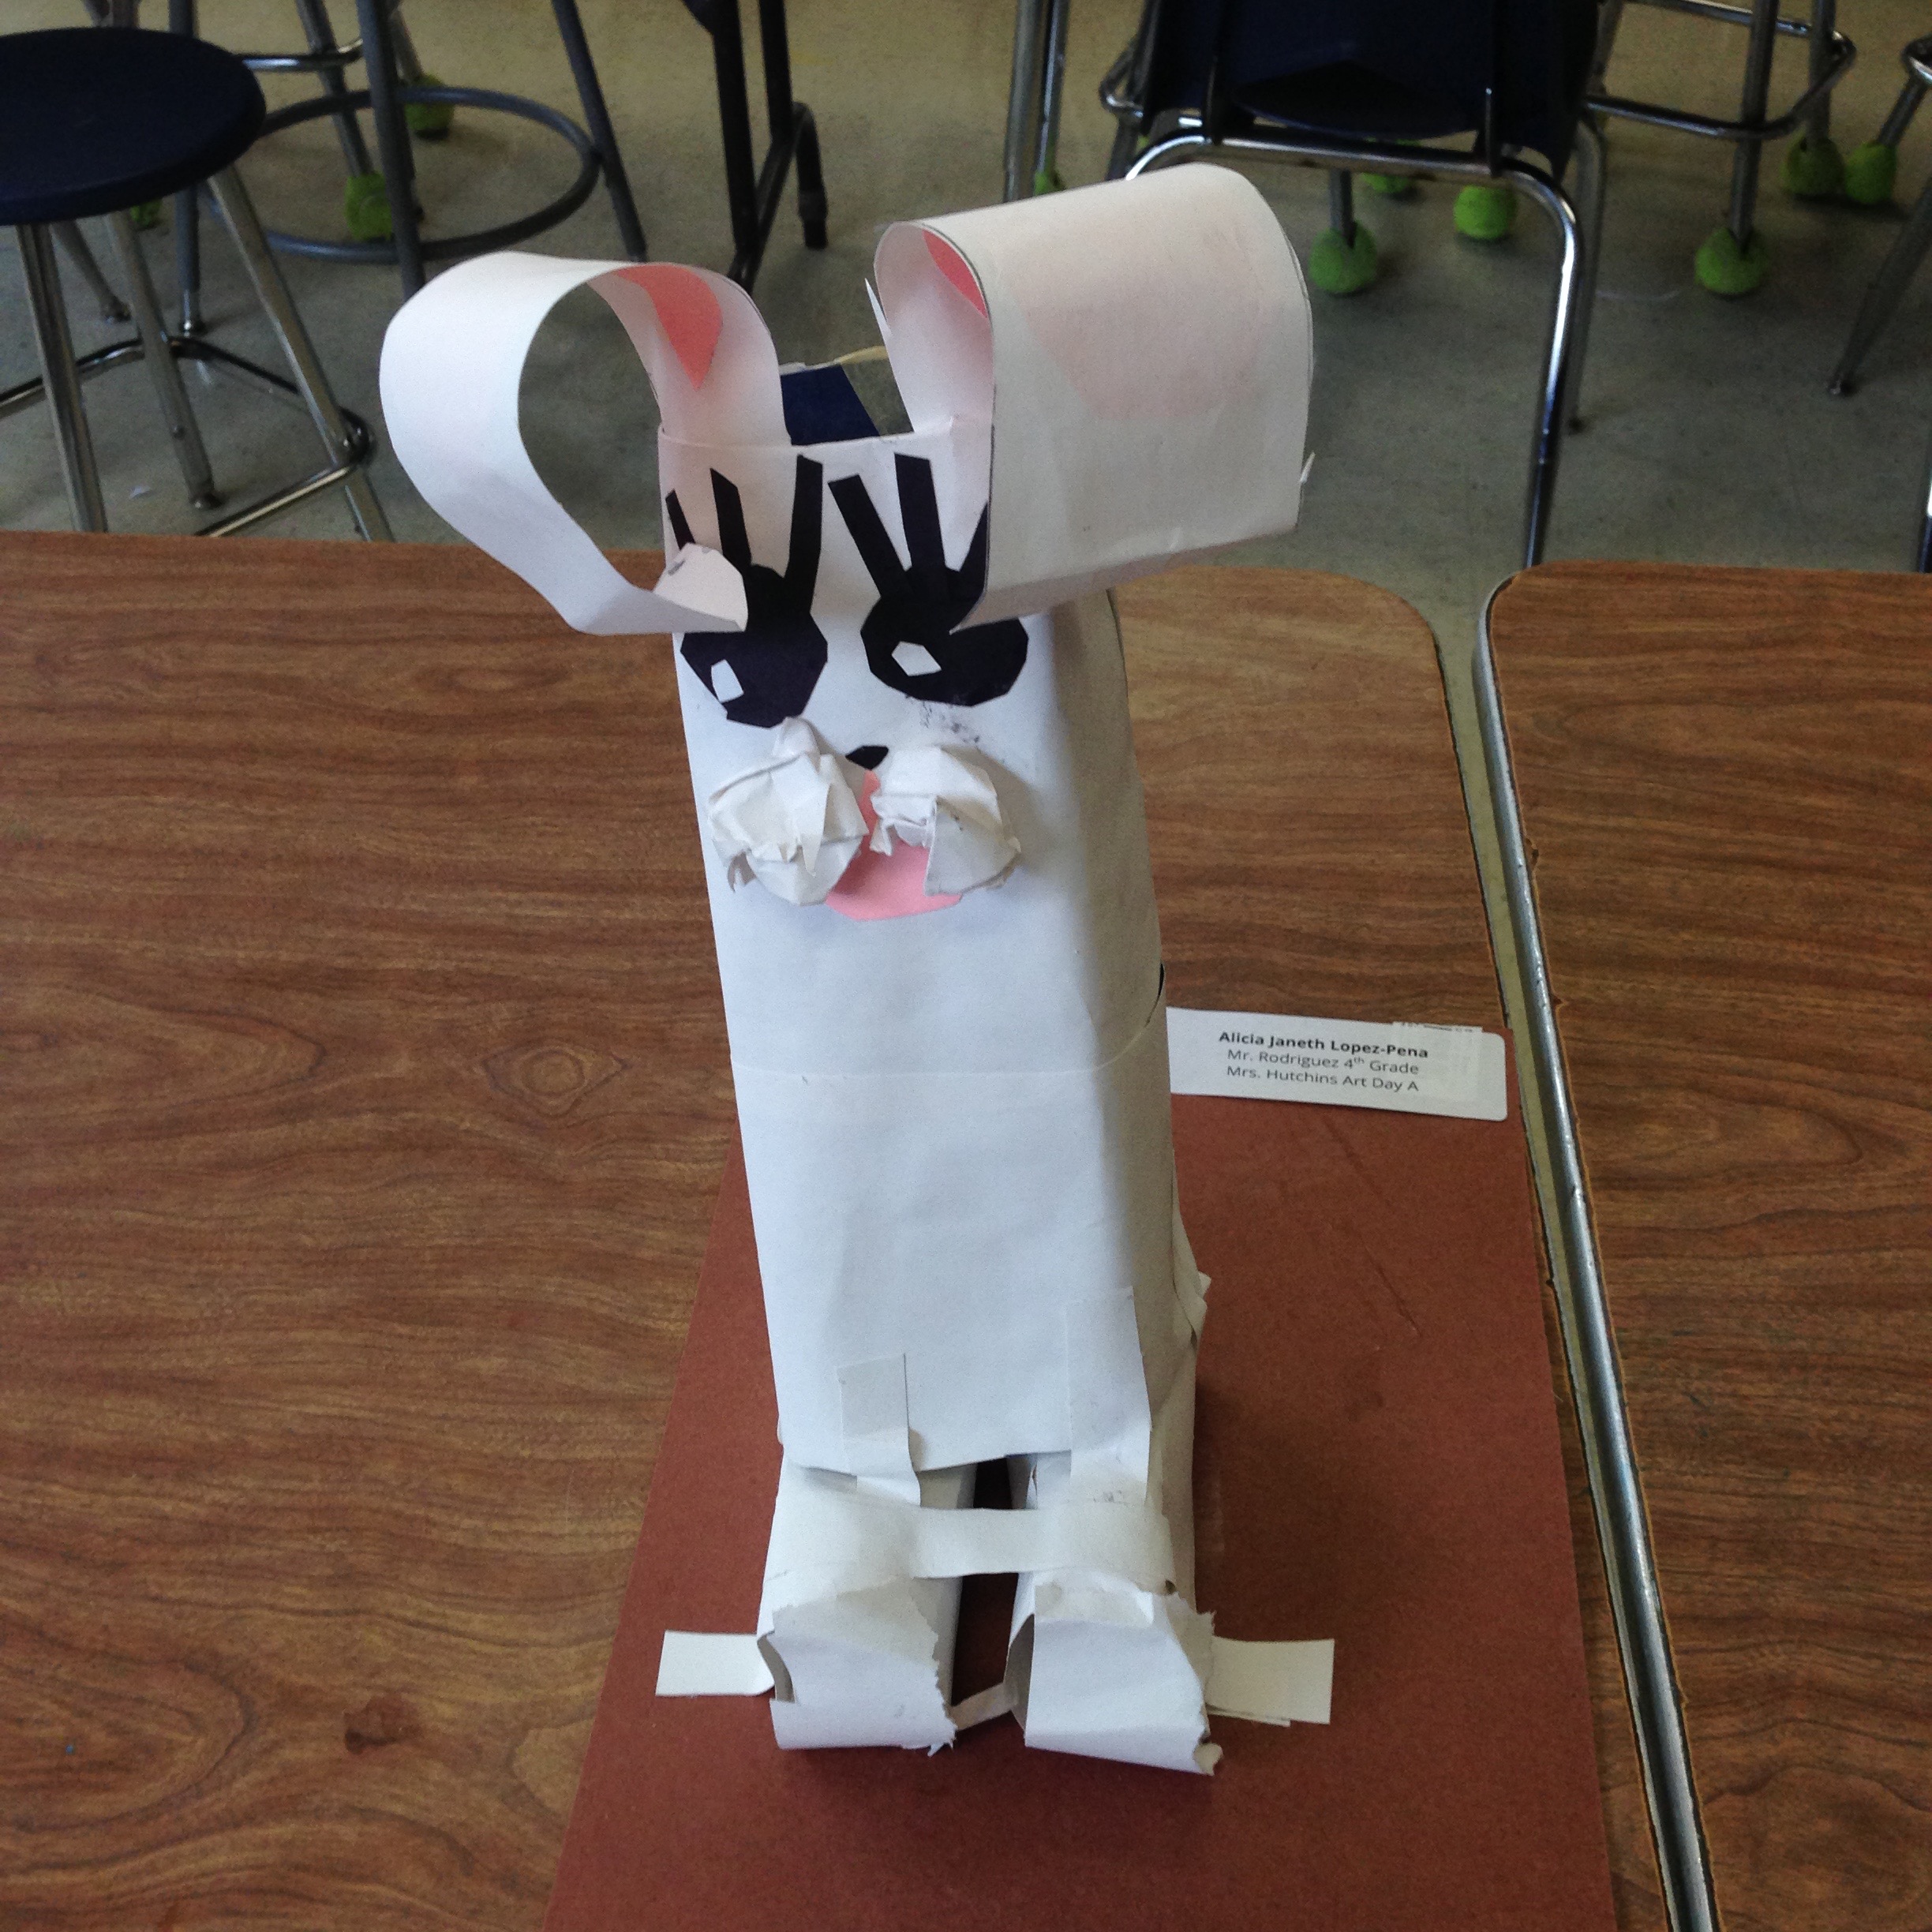
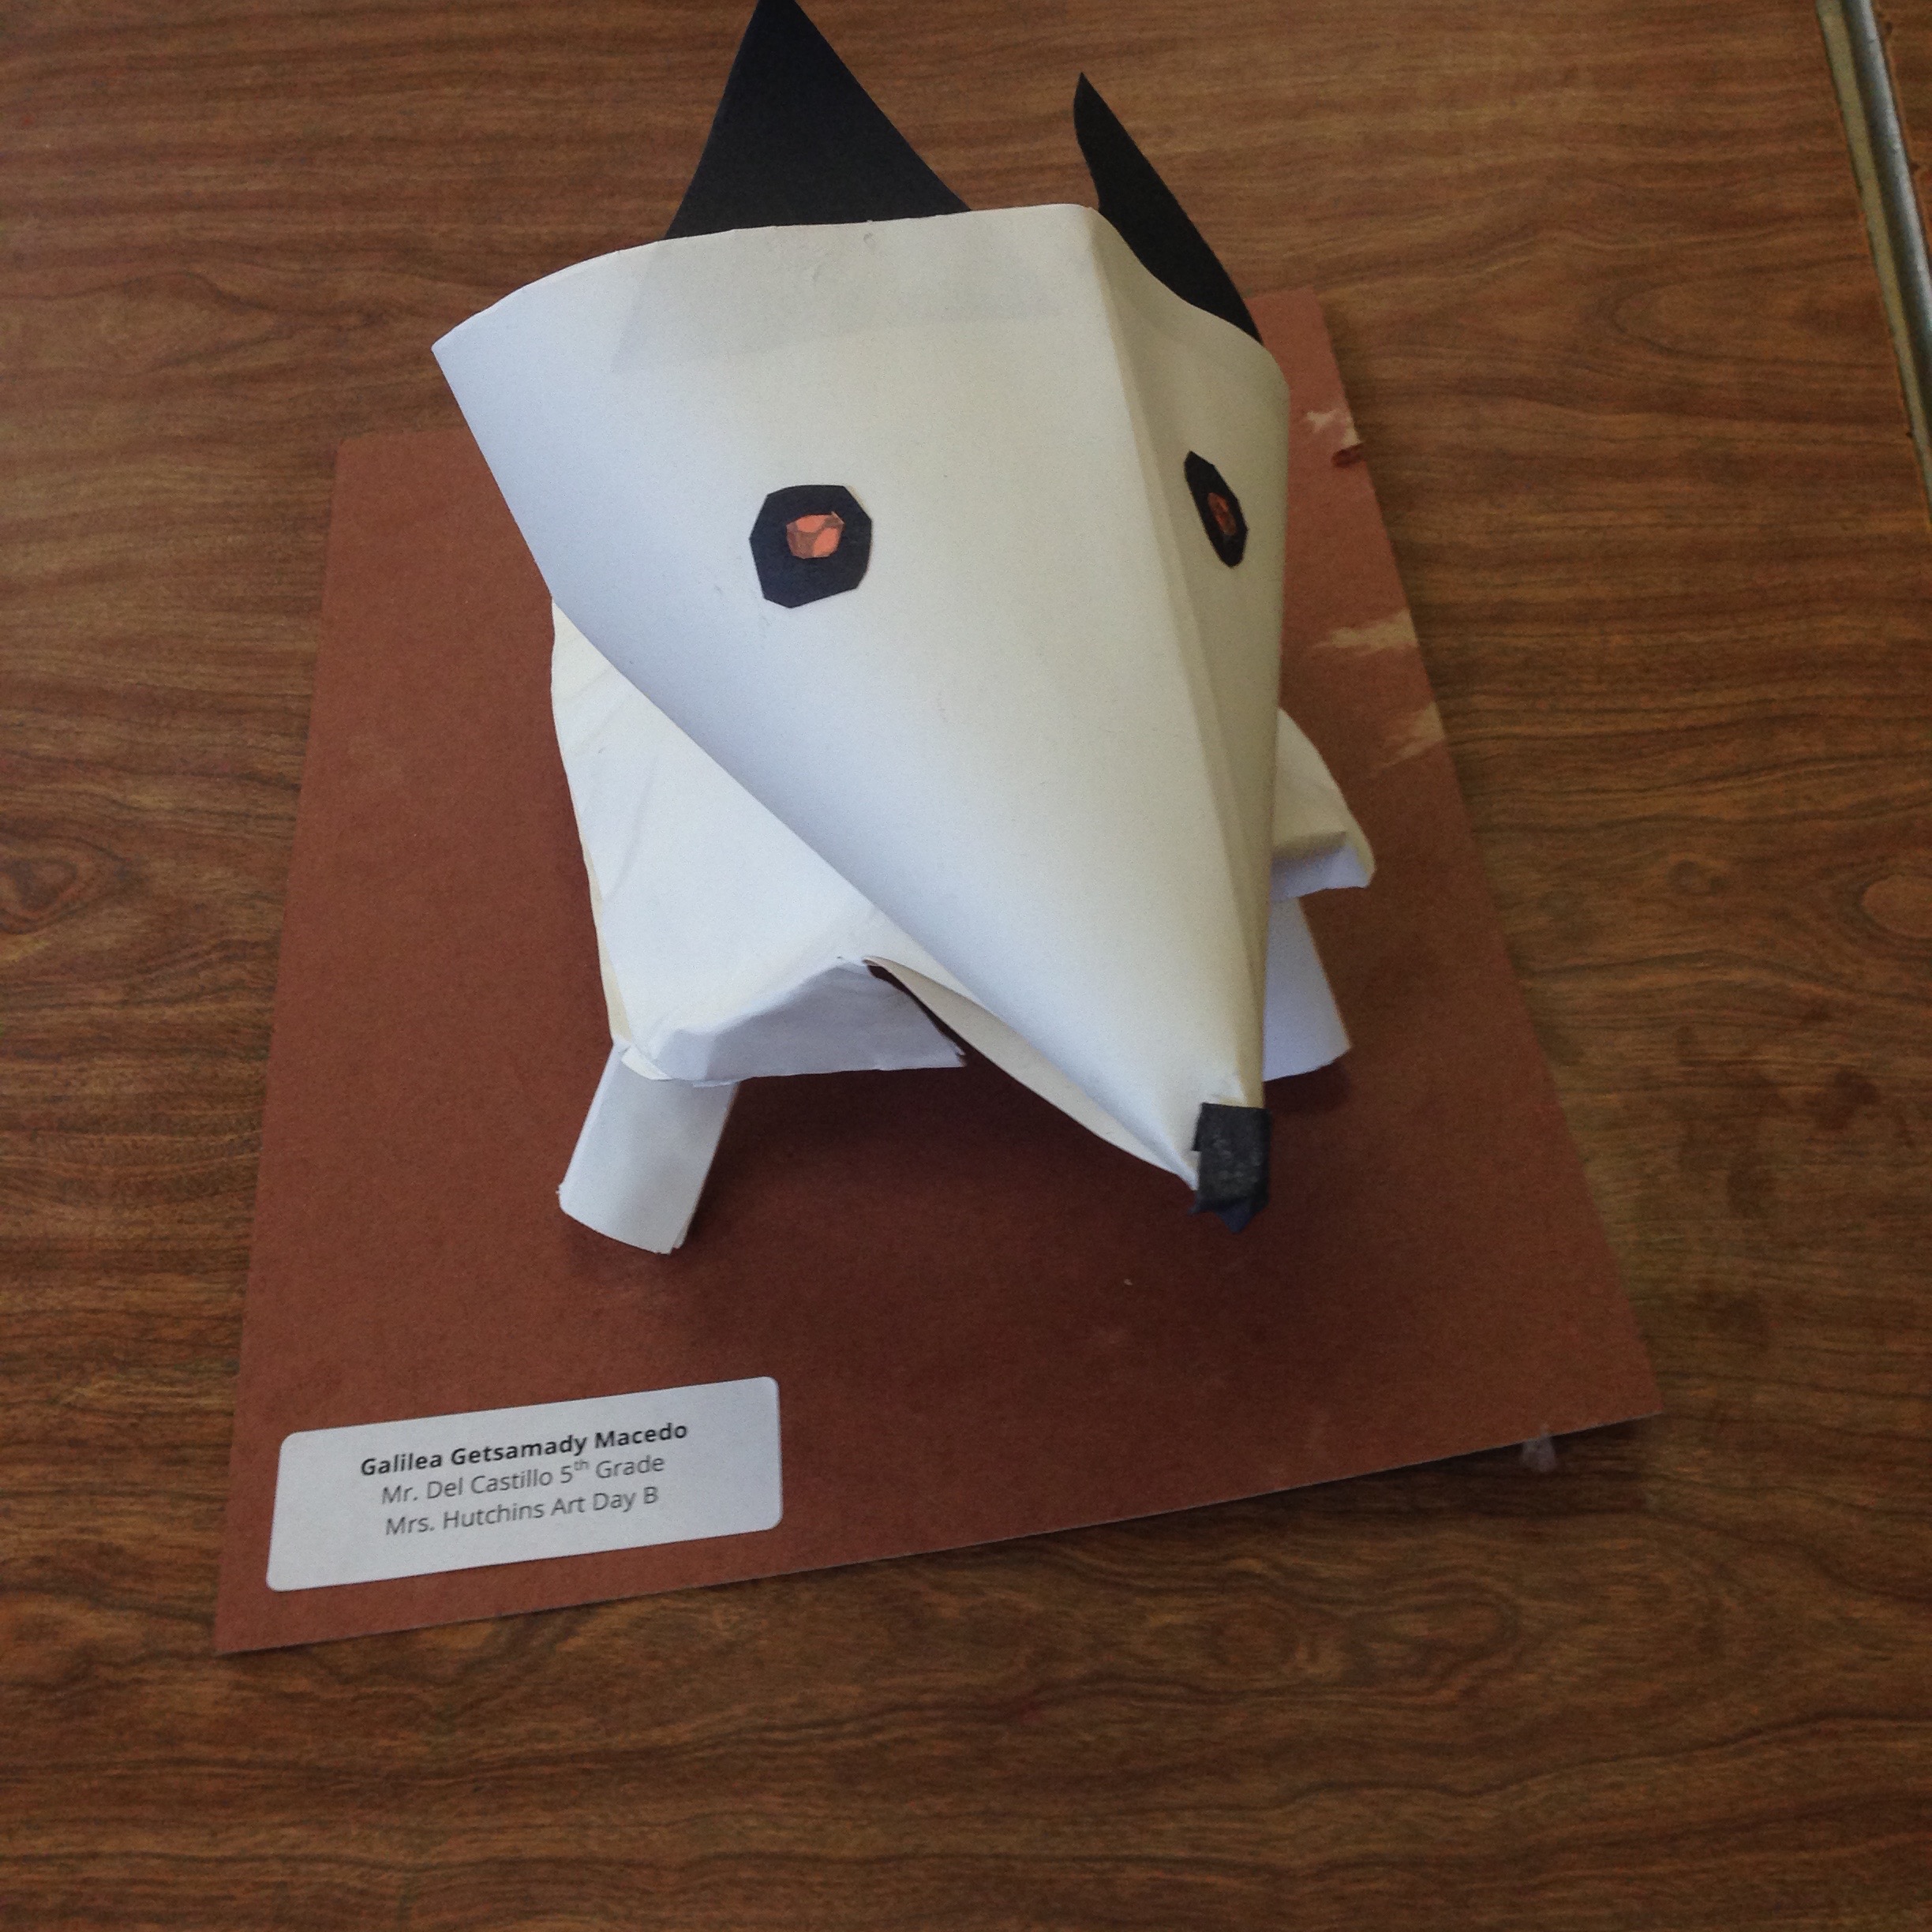
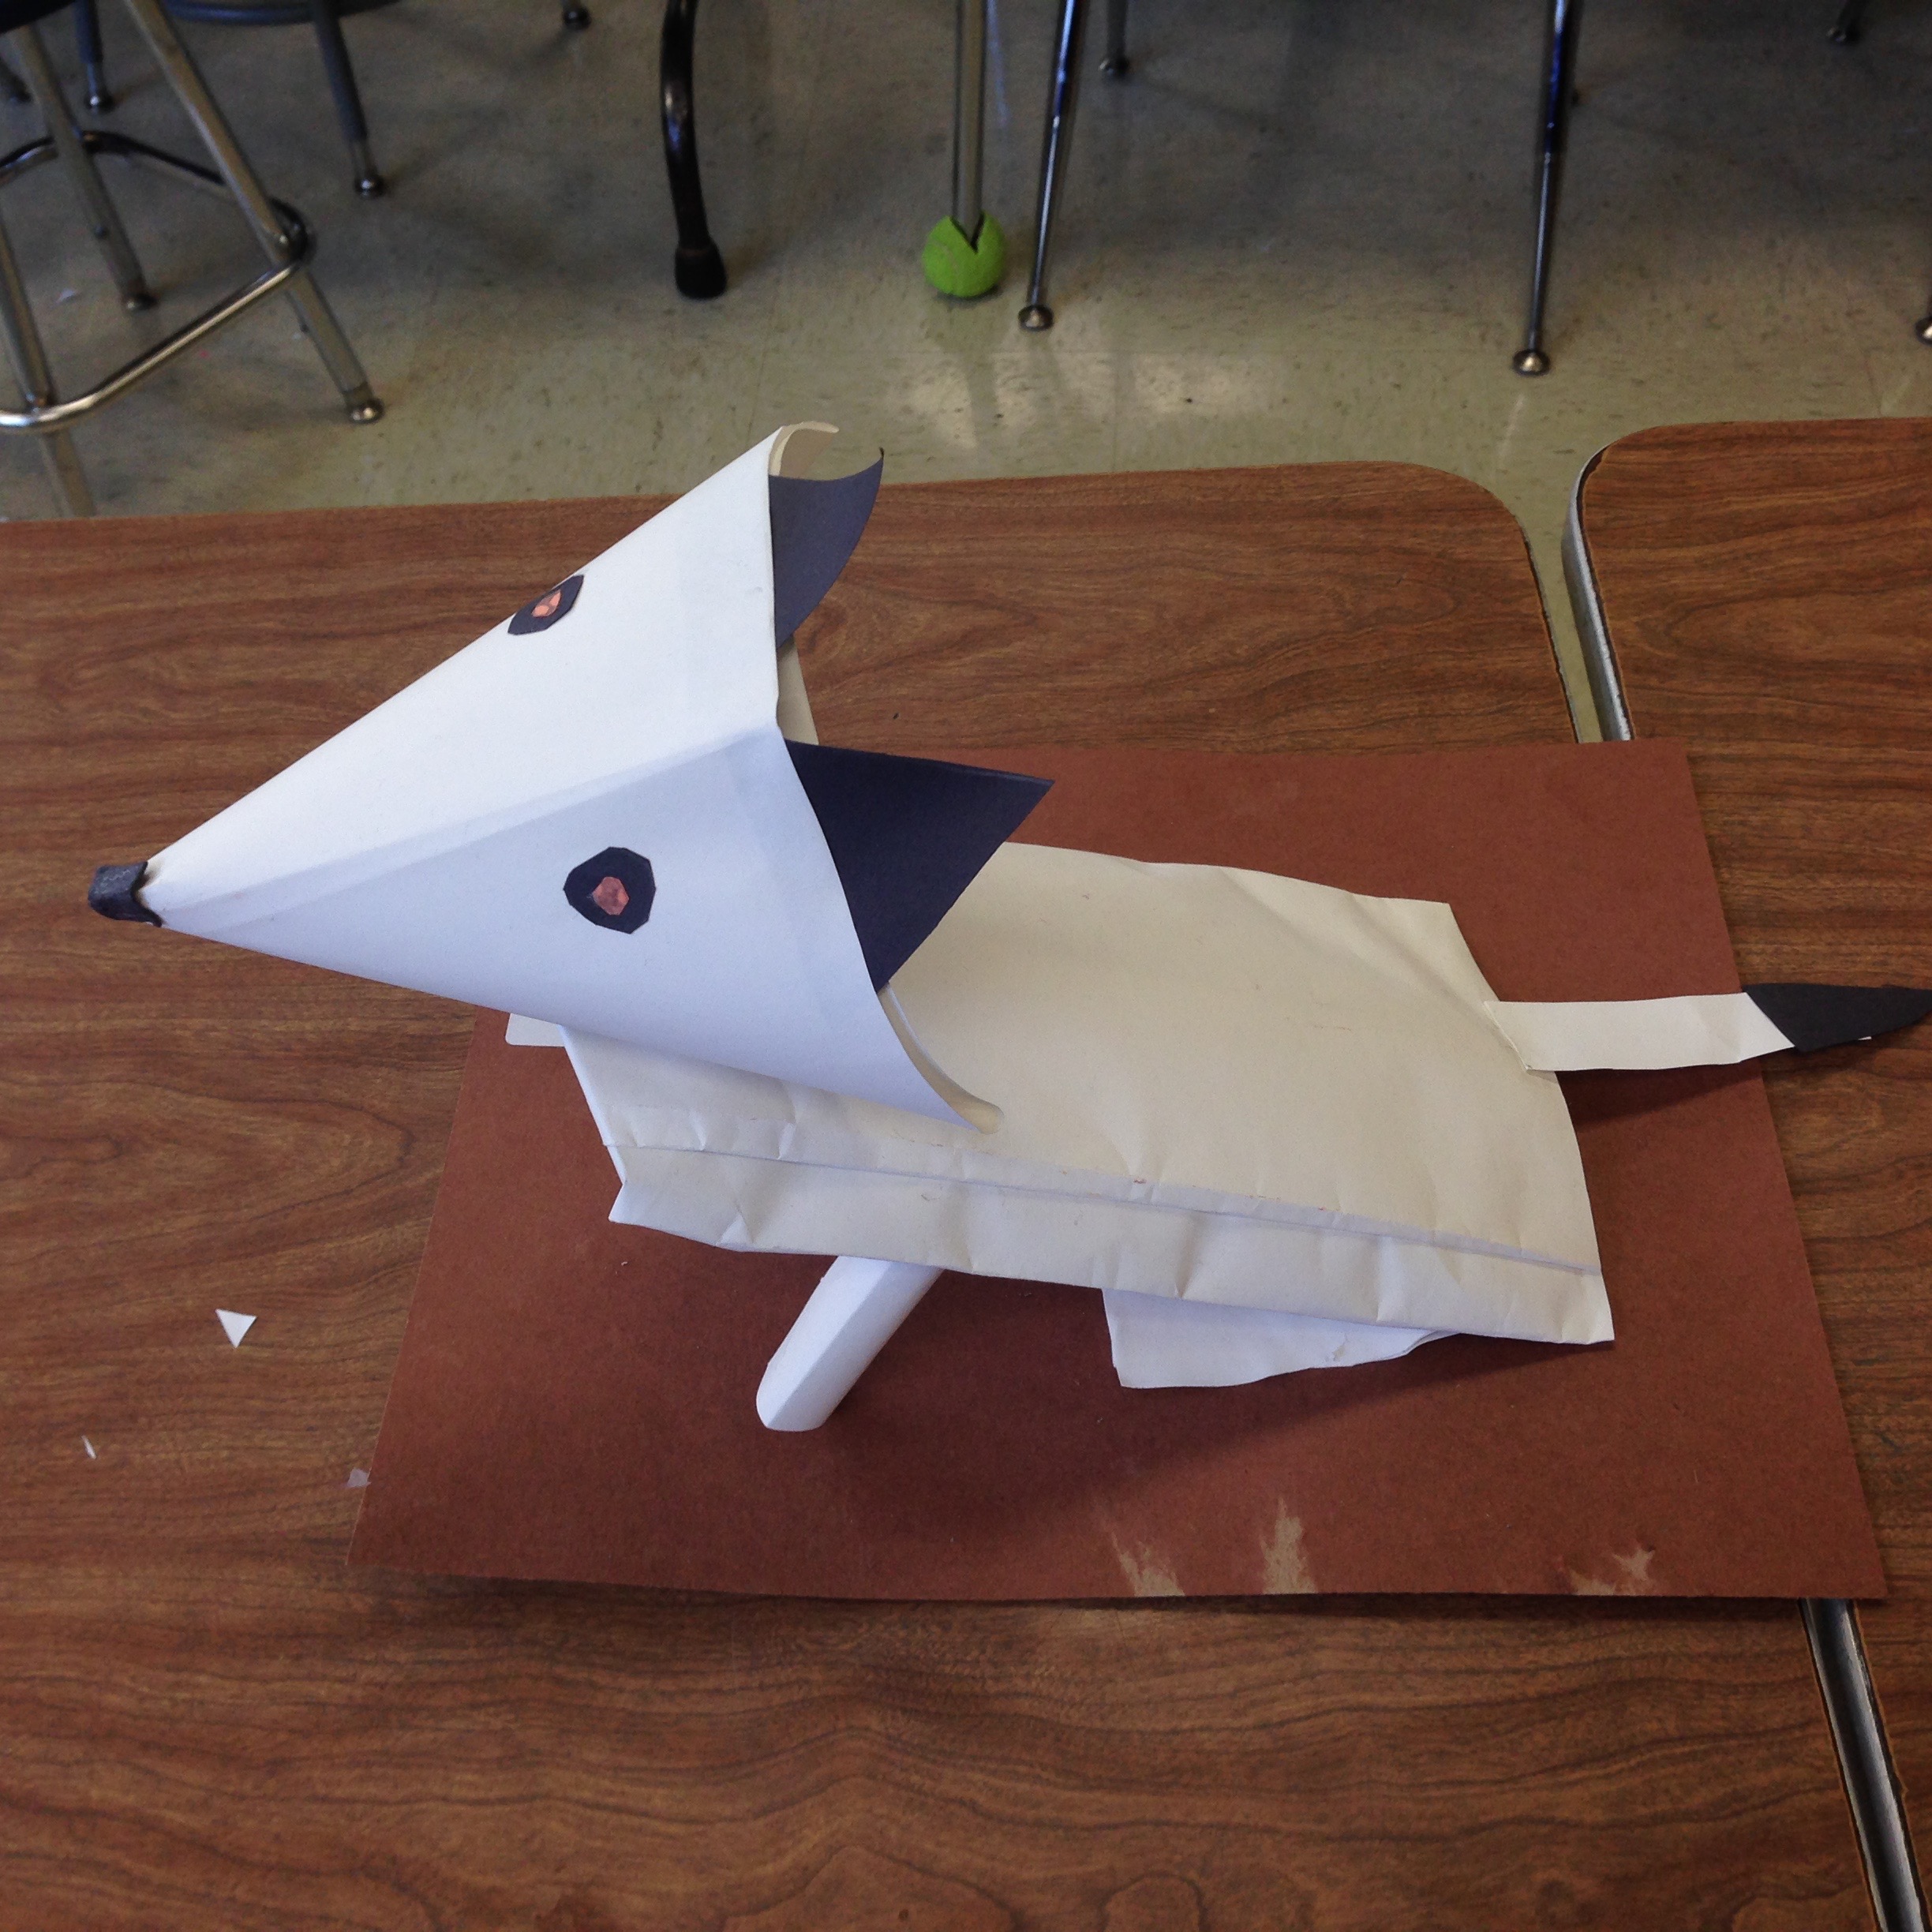
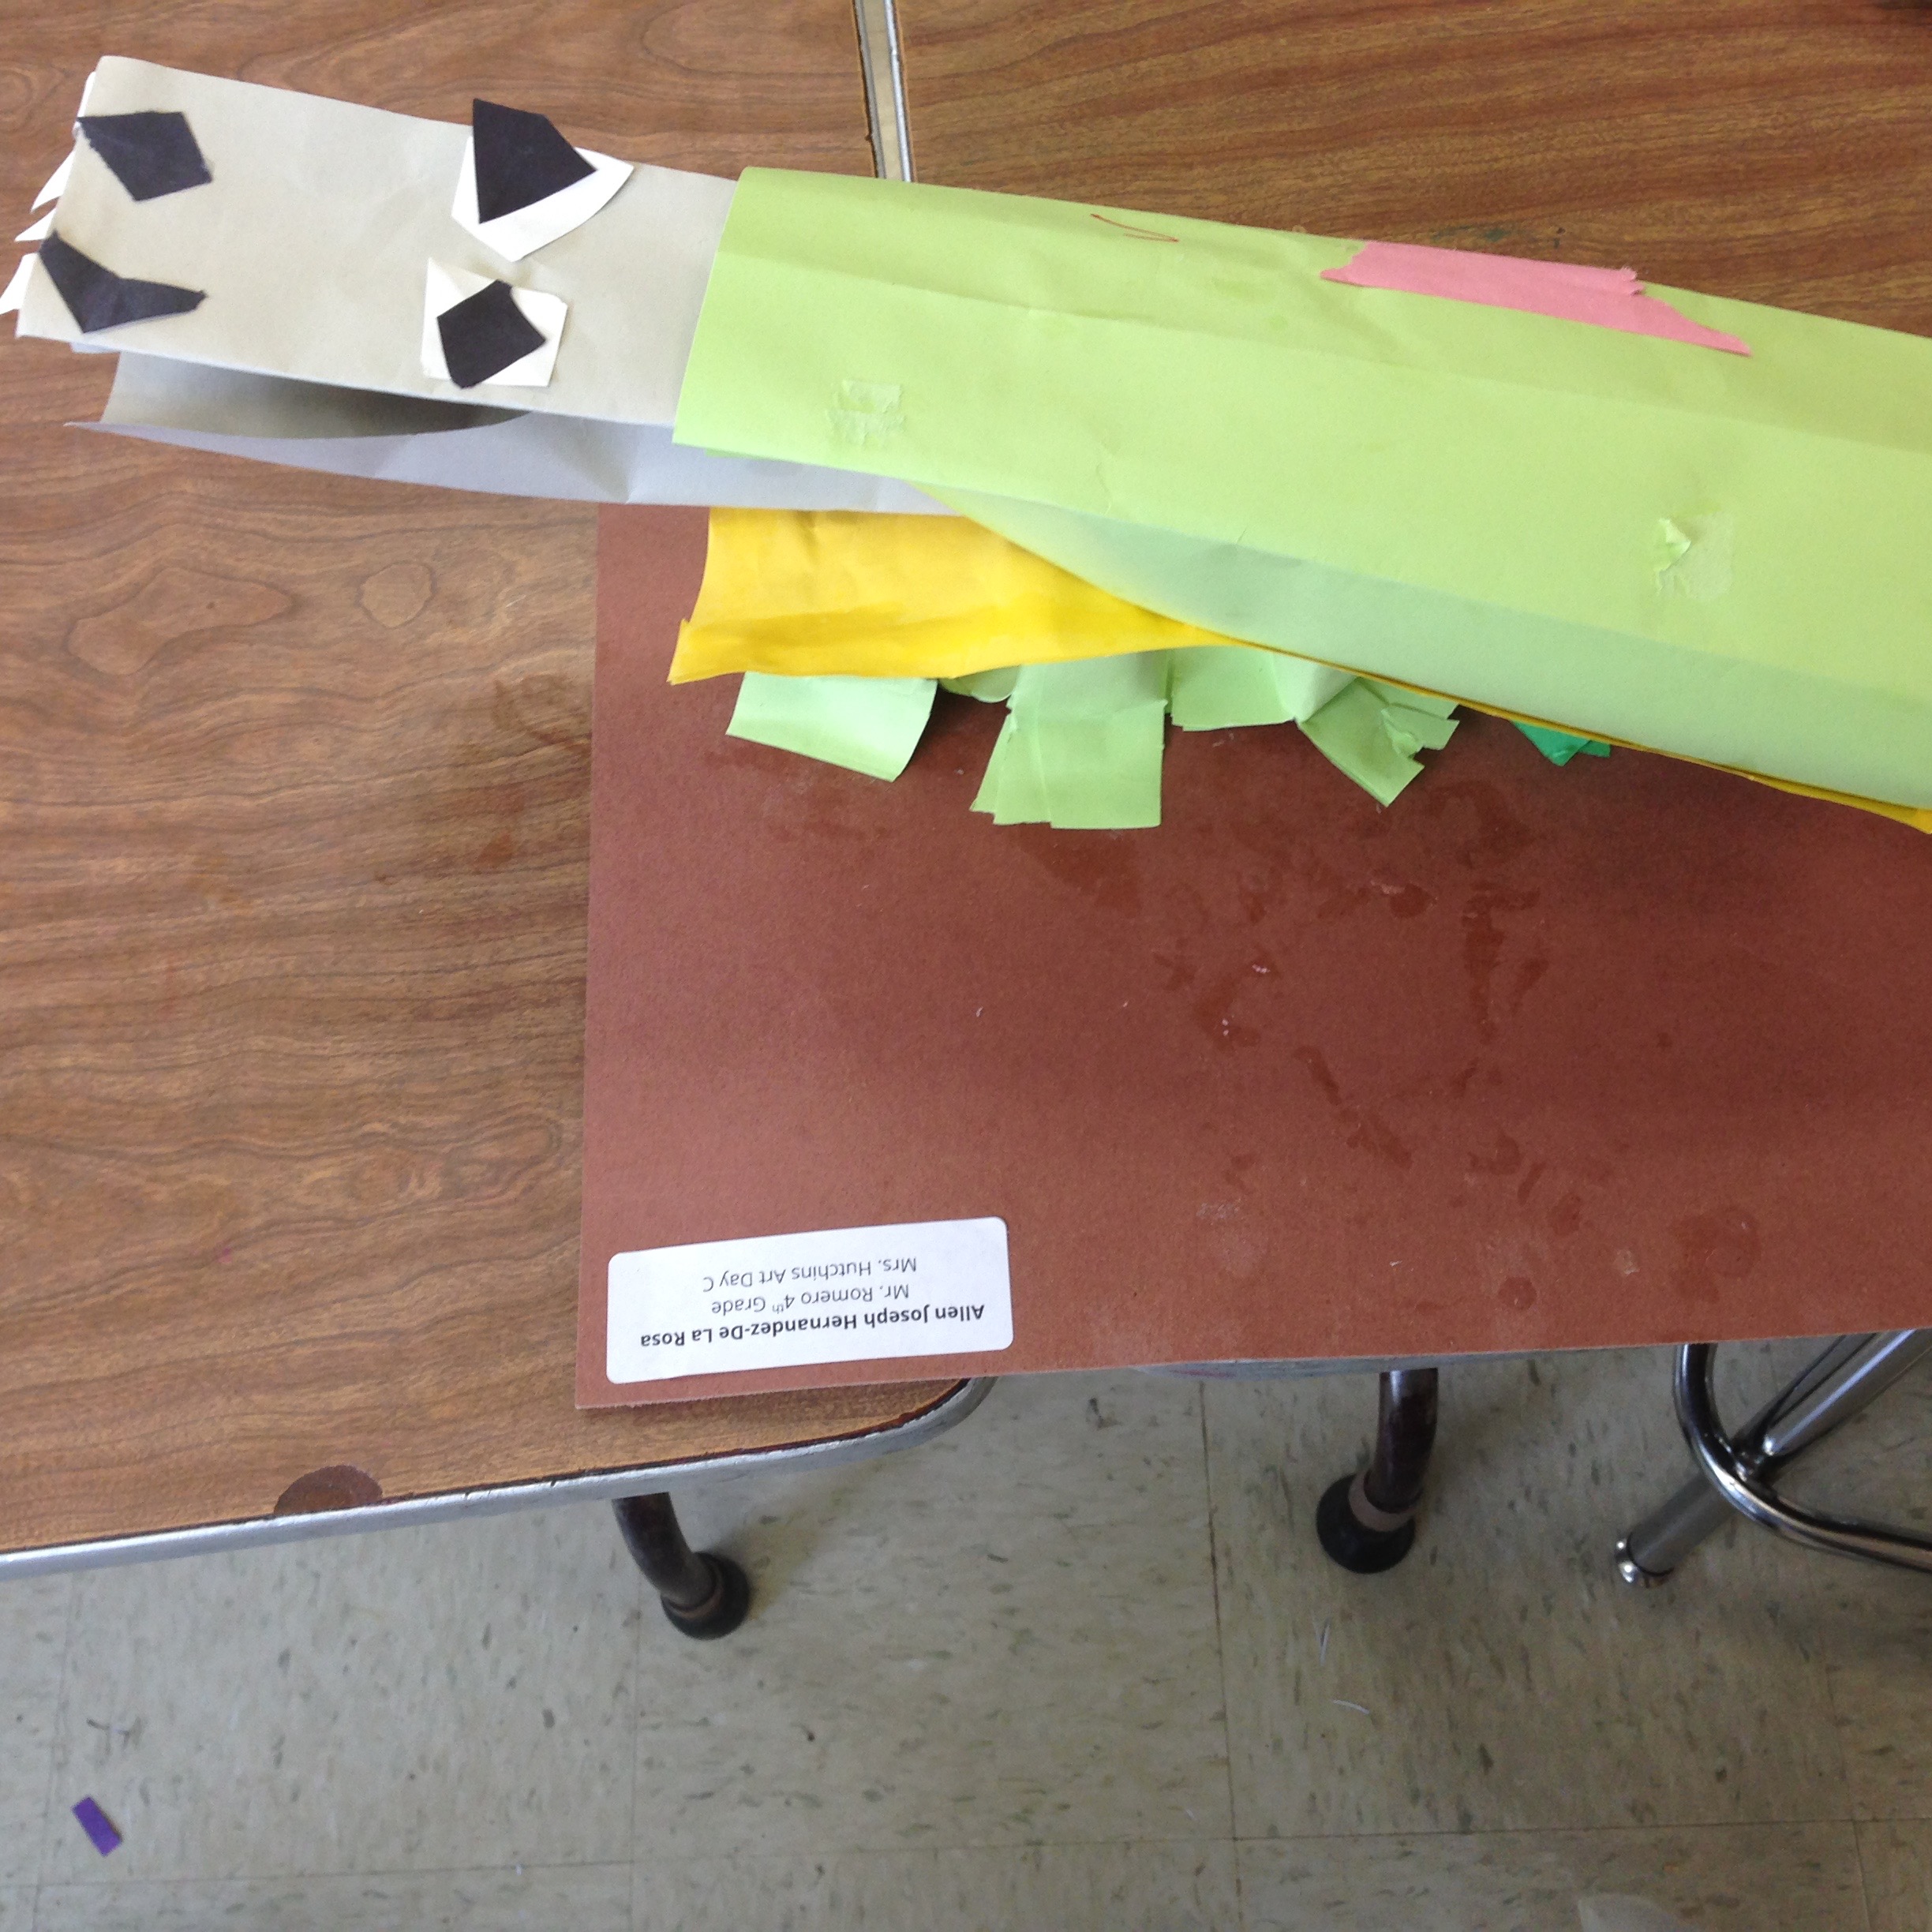
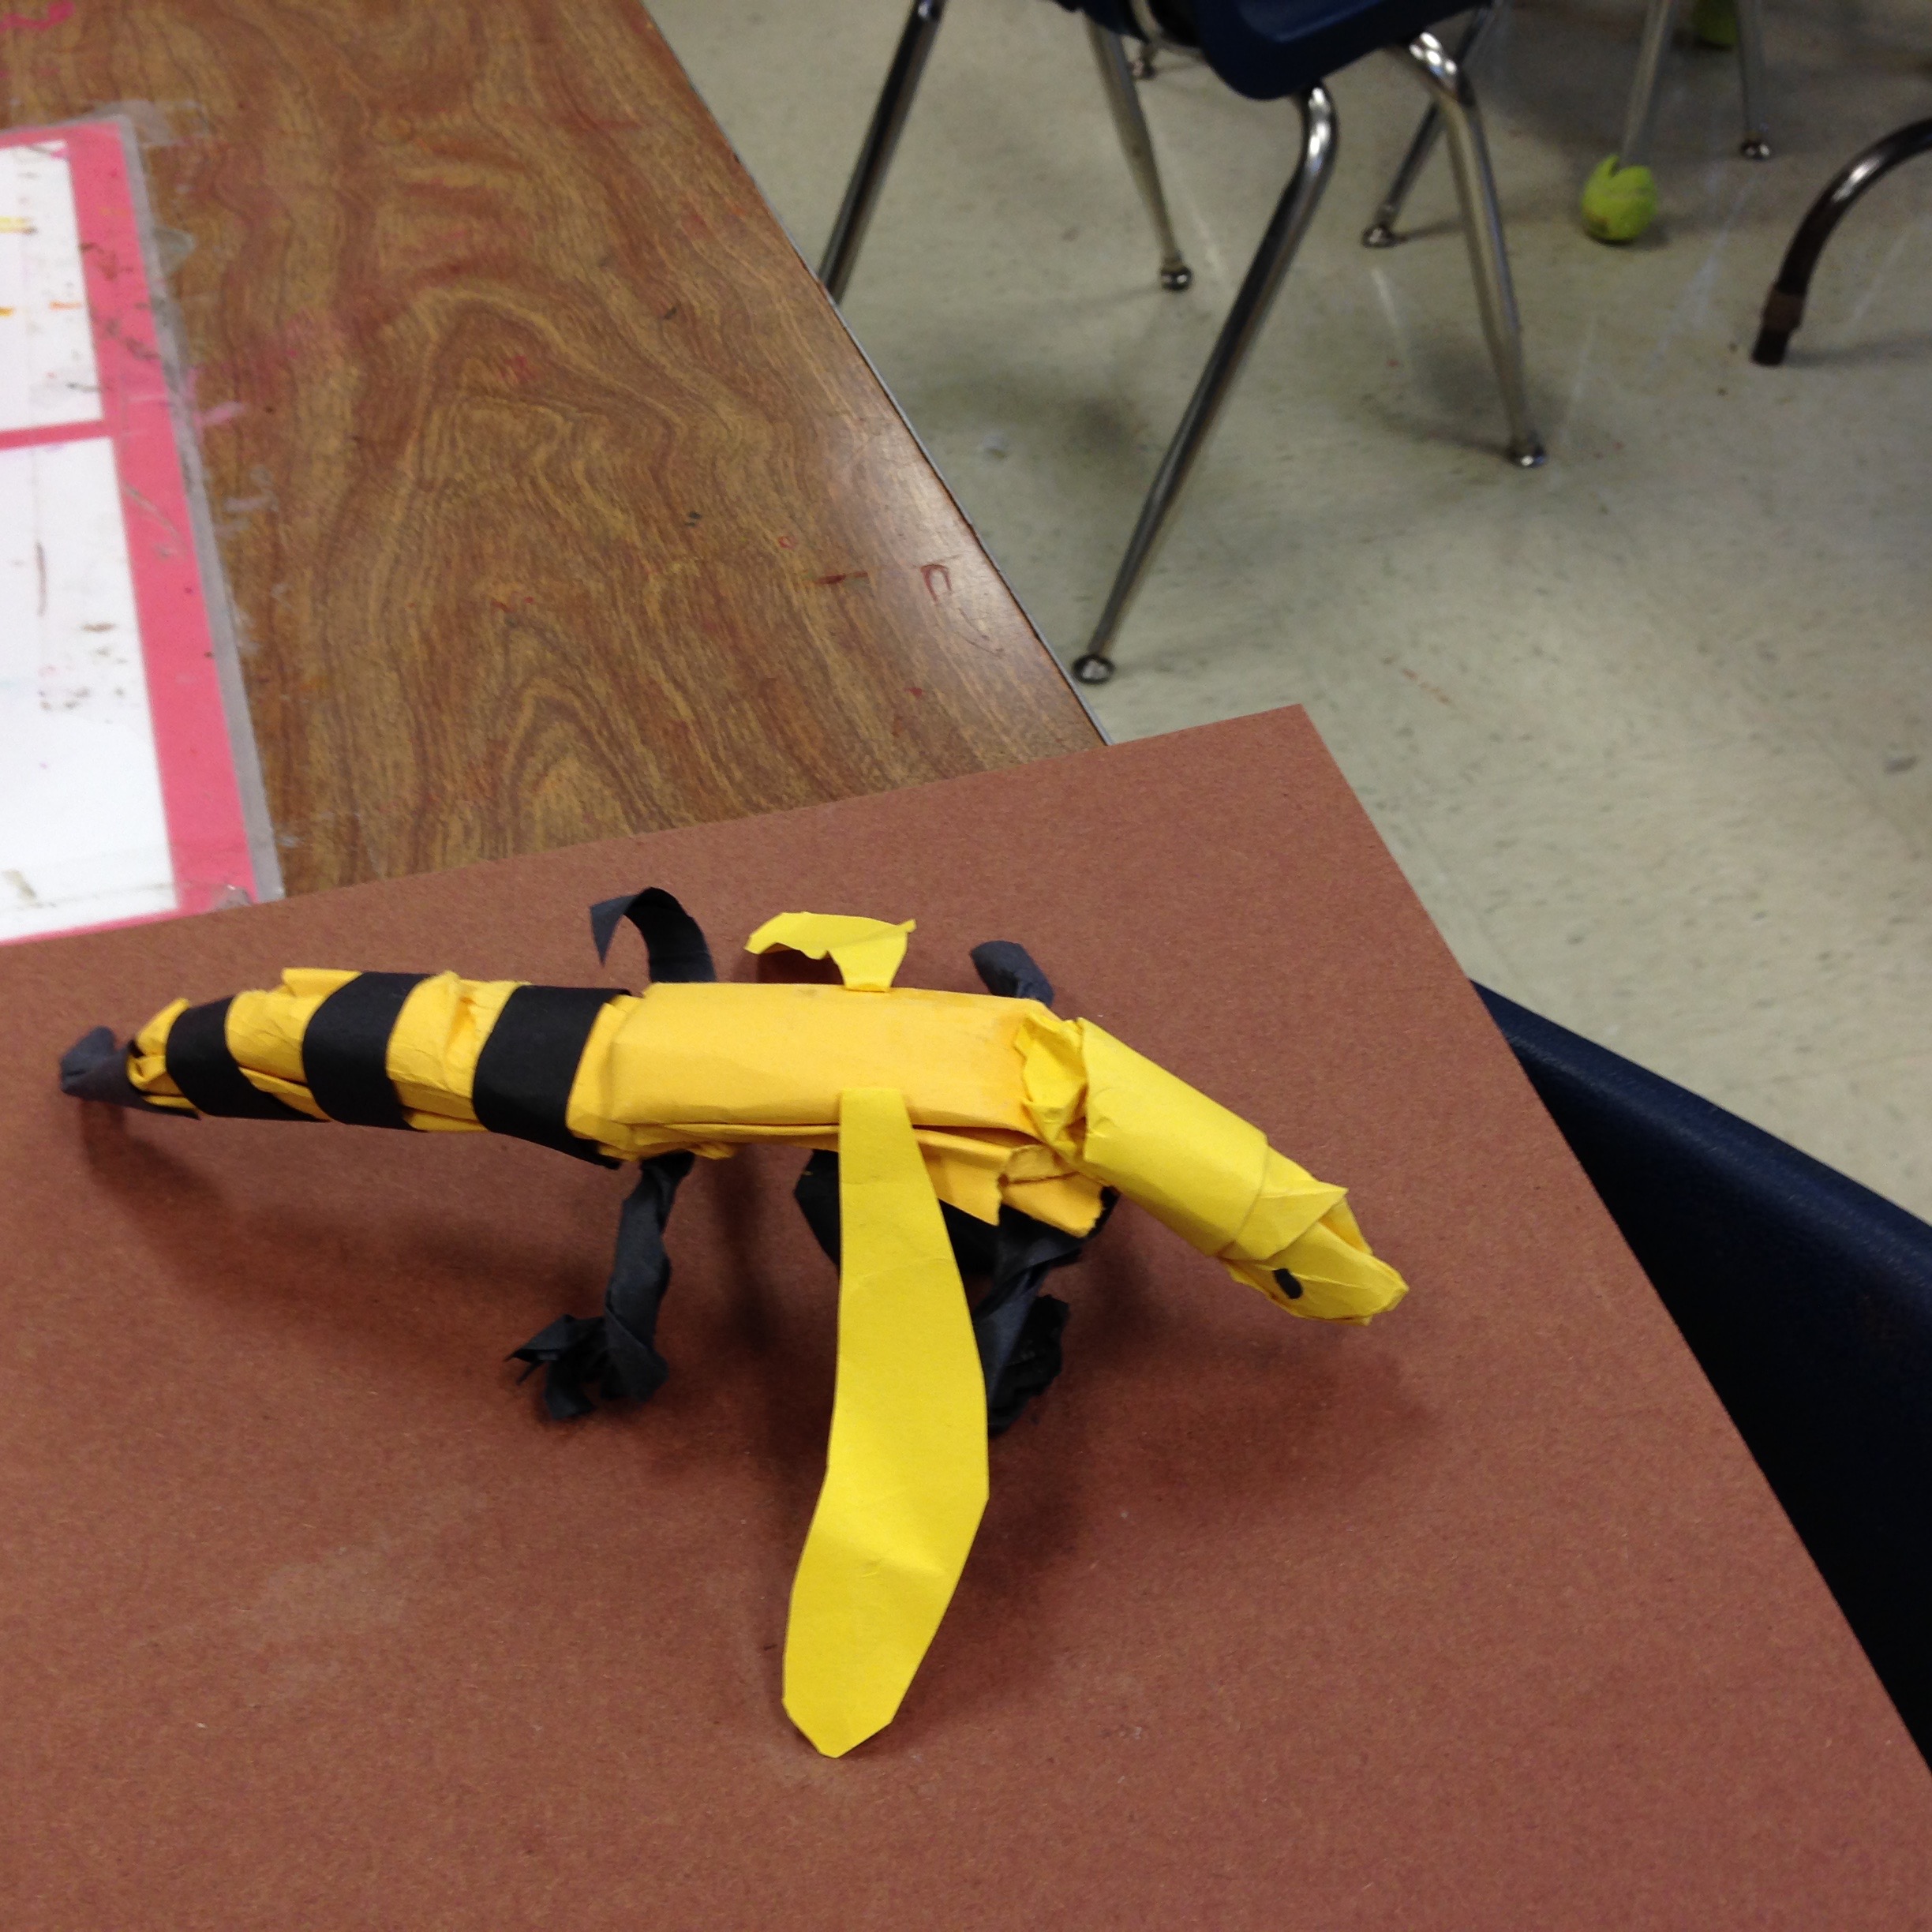
In my first few months as a teacher I delivered a unit I had learned and evaluated in grad school, called “Fierce and Friendly Animals.” I had previously taught this unit within the setting of a small-group workshop. The unit is in line with a highly student-centered philosophy; it is designed to put students in charge of their own learning and making. It tends to result in drastically different and individualized products by each child. Below, I journal about what each lesson looked like with my kiddos.
Lesson 1: Motivation to Explore the Material
At the start of Lesson 1, I asked students as a class if they could come up with at least ten different Ways to Change Paper. Open-ended questions like this, with many possible correct answers, always get my kids going. “Color (draw/mark), fold, and cut” were typically the first answers I got out of a class. If the class was stumped for more than 10 seconds, I would ask follow up questions like “What if you want to cut but you don’t have scissors?” Students eventually gave answers like: rip/tear, attach (glue, staple, tape, hole-punch, fasten), poke, wet, burn, twist, crumple, roll, fringe, and braid. Instead of being shown different ways to use the material, students opened up and arrived to different possibilities on their own.
Next up, a Builder’s Challenge would prompt them to work sculpturally with paper in teams. We looked at our Ways to Change Paper list, and I crossed out any actions that were not allowed (e.g. wet, burn, cut, glue). Then, I revealed the prompt: Use paper to build something tall that can stand on its own. How High can you make it go?
It was made clear that students must change paper in at least 5 different ways from their list, to complete the challenge. I've had students try the challenge without any tape at all before; this time I allowed up to 5 pieces of tape per team. After answering any questions about the prompt, I gave a very quick demo for two building techniques: (1) how to fold a rectangular prism, (2) how to use tape like an “L” strip, to connect two flat sides of paper at an angle.
And off they went! Teams worked together, and I observed my students. It gave me a chance to get to know them a bit and adjust seating before they started to work on their animal sculptures. To help with differentiation, I tried to mix together students based on artistic experience, risk-taking/confidence, behavior, and (particularly in dual language settings) their communication skills.
After about 10-15 minutes, I called time, and then sculptures were measured to see which was tallest. Students had to point out examples of at least 5 different ways they changed paper, or the team would be disqualified. They talked about what worked and what was difficult. There was joy and laughter. This challenge was like a game taken lightly by the students, and they learned a lot about how to use limited materials to reach a goal. There was teamwork and quick, creative, problem-solving. They gained experience with the sculptural limitations and possibilities of paper. I have since then found out that this same activity is popular with middle school science and math classes. Students are learning about the physical properties of paper and how to make physical changes. Plus the geometric prisms and engineering involved, it’s a great STEAM component of the unit.
If we had extra time before the kids had to line up, I would show them this TedEd video about How Folding Paper Can Get You to the Moon. I told them that we would soon use paper to make an animal sculpture, and they left excited for the next lesson.
Lesson 2: Brainstorm and “Visualization” Image Search
E.g. Writing descriptive search terms "lion" vs. "roaring lion"
To start, we reviewed how we changed paper last class, and I asked the class to define “sculpture” and “three-dimensional.” Using a PPT slide with an image of a flat paper next to images of their own sculptures from the Builders’ Challenge, I typed in their definitions into the PPT. I reminded students that in this project they would make a paper sculpture of an animal, and introduced our brainstorming activity.
Students used this worksheet to brainstorm a list of fierce and friendly animals. We defined “fierce” and “friendly”, informally, and as a group went through the front page of the worksheet with examples of how to complete each part. Afterward, I walked the class over to the computer lab, worksheets in hand. They were prompted to print images for up to 5 animals of choice, using their worksheet as a checklist. The goal of this lesson was to get students to think of unique animal choices for their art, and to think of the animal in terms of an expressive character. Students also practiced digital citizenship by using the search engines effectively and responsibly.
I used dialogue (either 1-1 or with the whole class) to help students visualize different ways their animal could look. How would it act fierce or friendly? (Students would say growl, play, etc.) What do we see when it roars? Purrs? (E.g. sharp teeth, wagging tail, etc.). When I learned about this unit in grad school, my professor defined this sort of dialogue as “visualization,” a discussion that helps students elaborate on their own ideas and develop descriptive vocabulary. In this case, I tried to deliver the “visualization” within a tech lesson, so that students wrote search criteria to successfully find images.
Lesson 3: Creative Expression and Anchors
Students started with a 3-Minute Do-Now Prompt: “Change this flat paper into a 3D prism. Try your best, work on your own.” It was a quick review of the demo they did with me in Lesson 1 before the Builder’s Challenge. About 5 kids per class forgot how to make the prism, and I stepped in 1-1 with reminders.
We quickly moved on to our Essential Question: How can we use paper to make a fierce or friendly animal sculpture?
Most students explained that they could use the prism as the body for their animal. This was a great start. With differentiation in mind, I wanted to provide a basic building block for students as an option, and also motivate them to use paper differently and creatively.
Sometimes, I find it helpful to show completed examples before the kids get started on a project. Other times it helps for them to work solely from imagination. I taught this unit once before without showing examples, and this time I heeded some mentor feedback and tried it differently. I showed the following images (note that neither shows a prism for the animal’s body):
- To guide their evaluation of these examples, I asked:
- What are some ways the artist changed the paper?
- Which animal do you think looks fierce or friendly, why?
- How do the materials show that the animal is friendly/fierce?
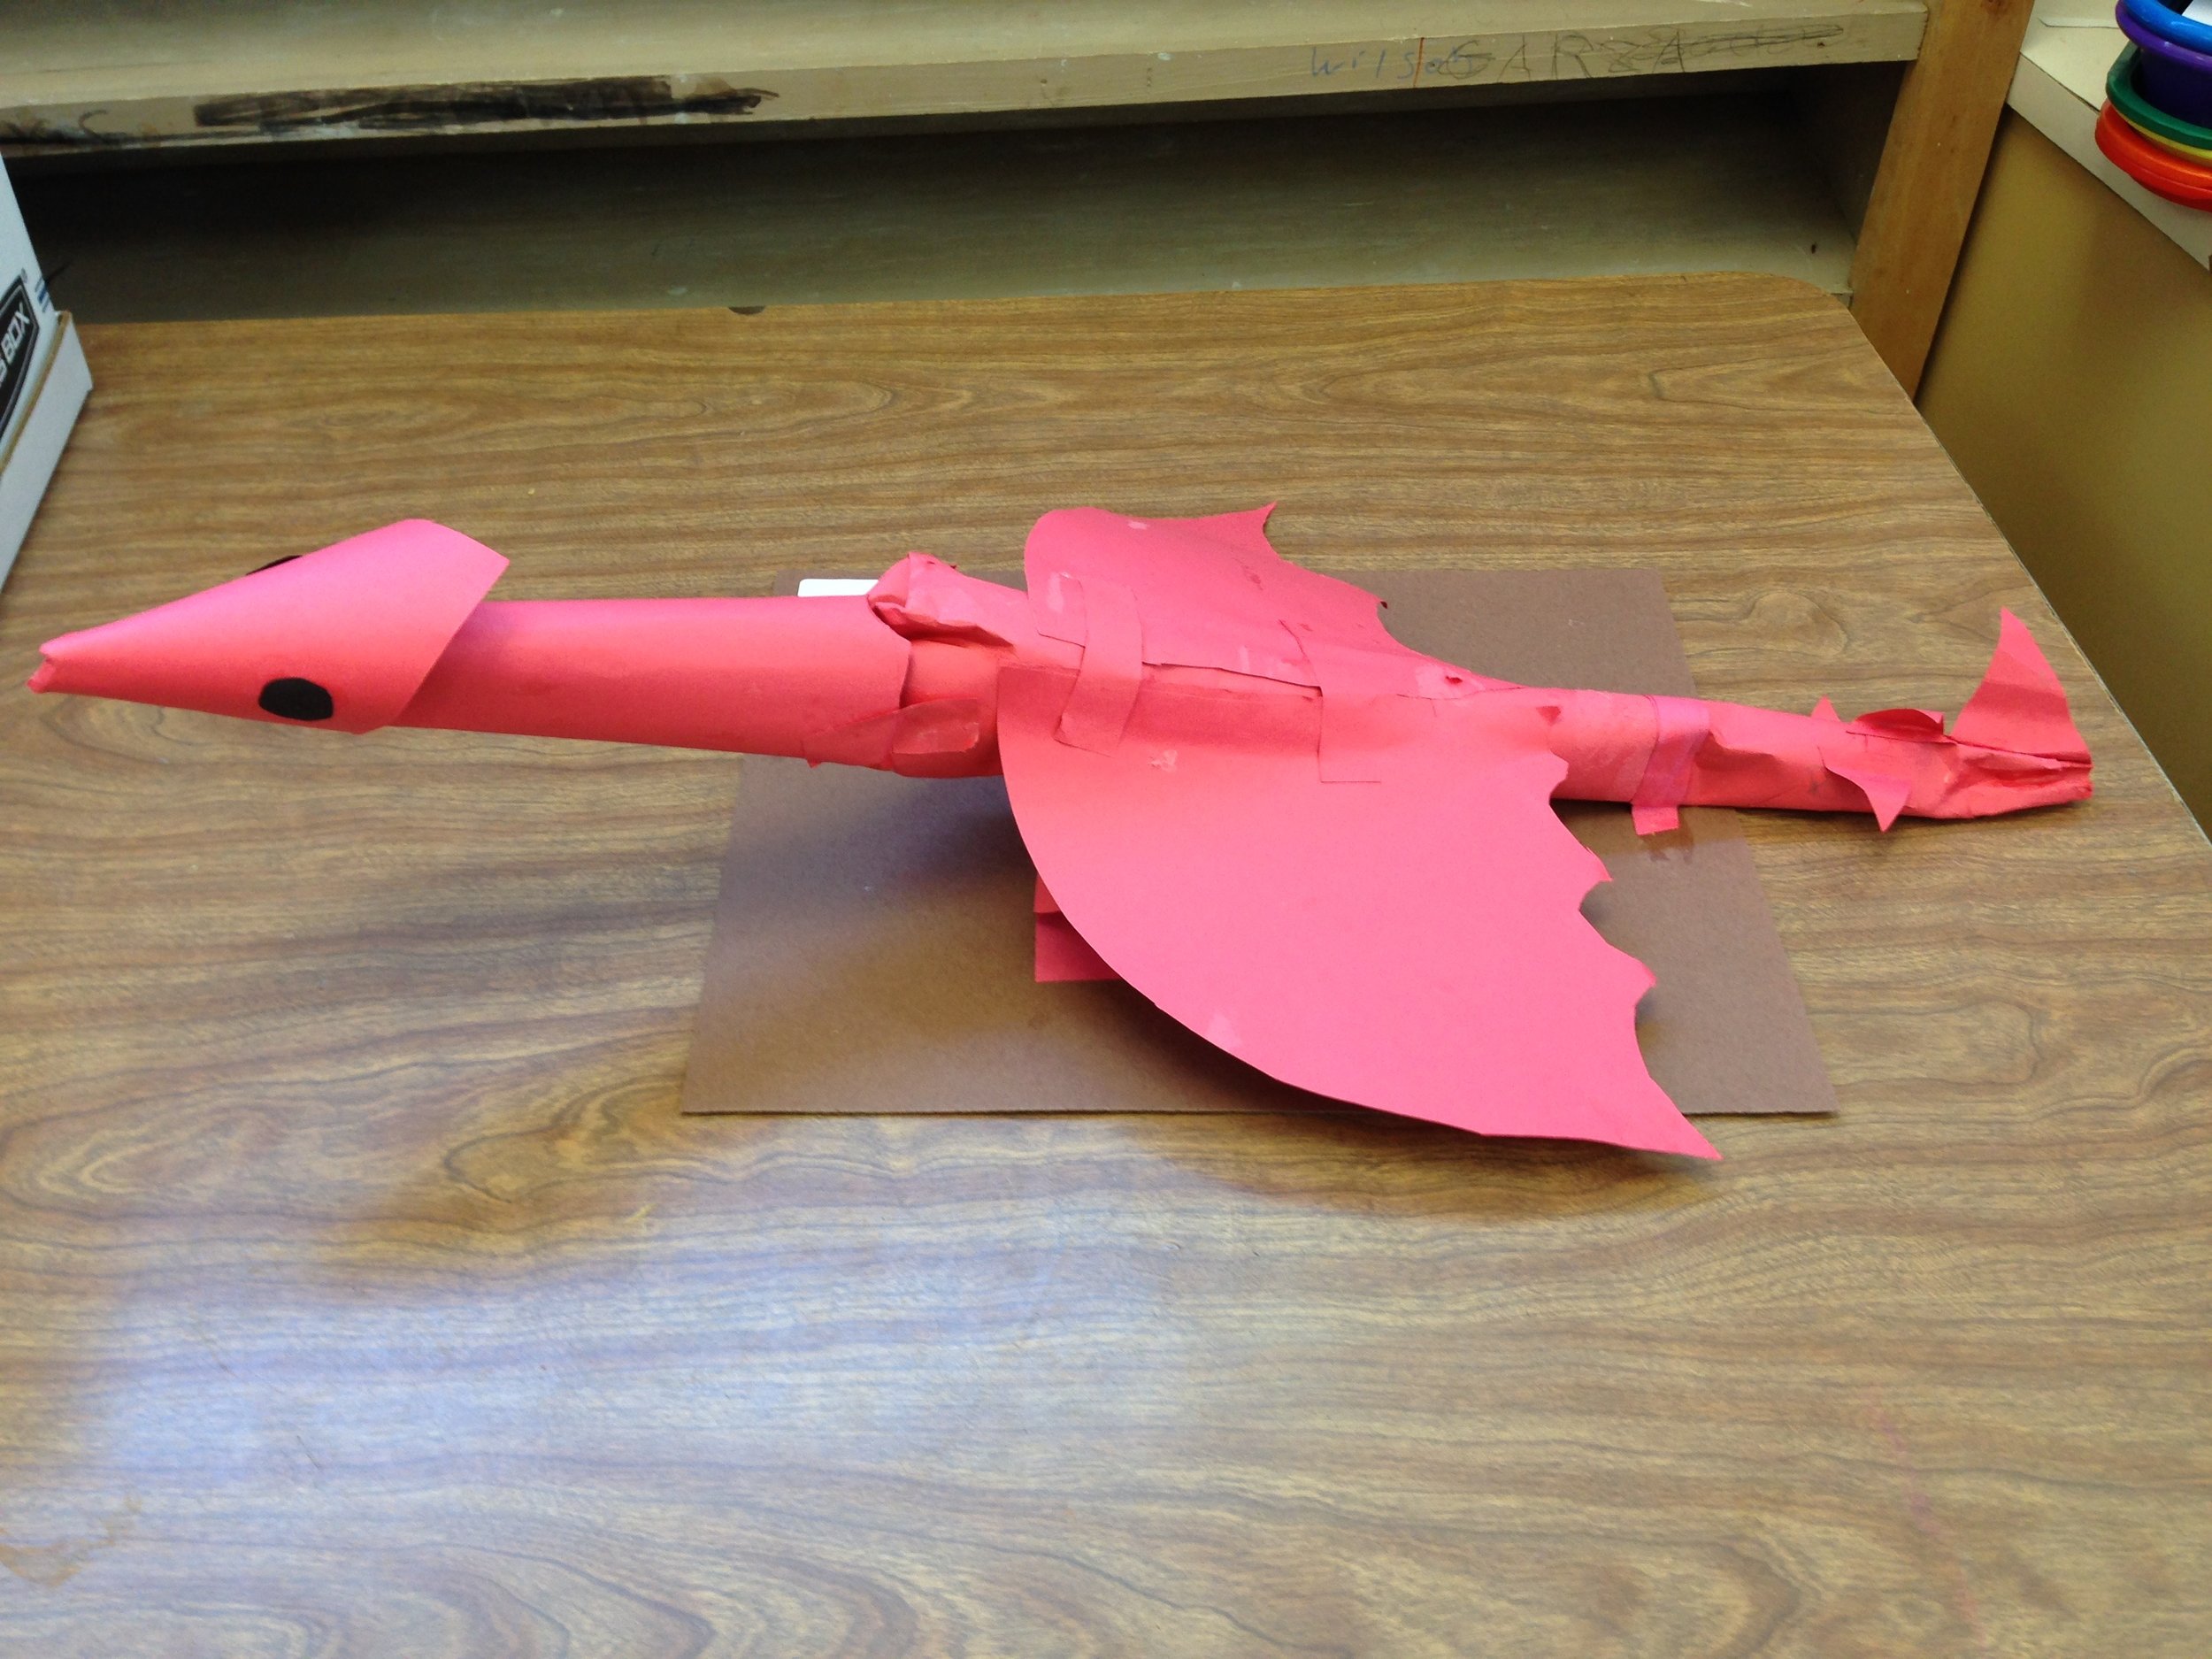
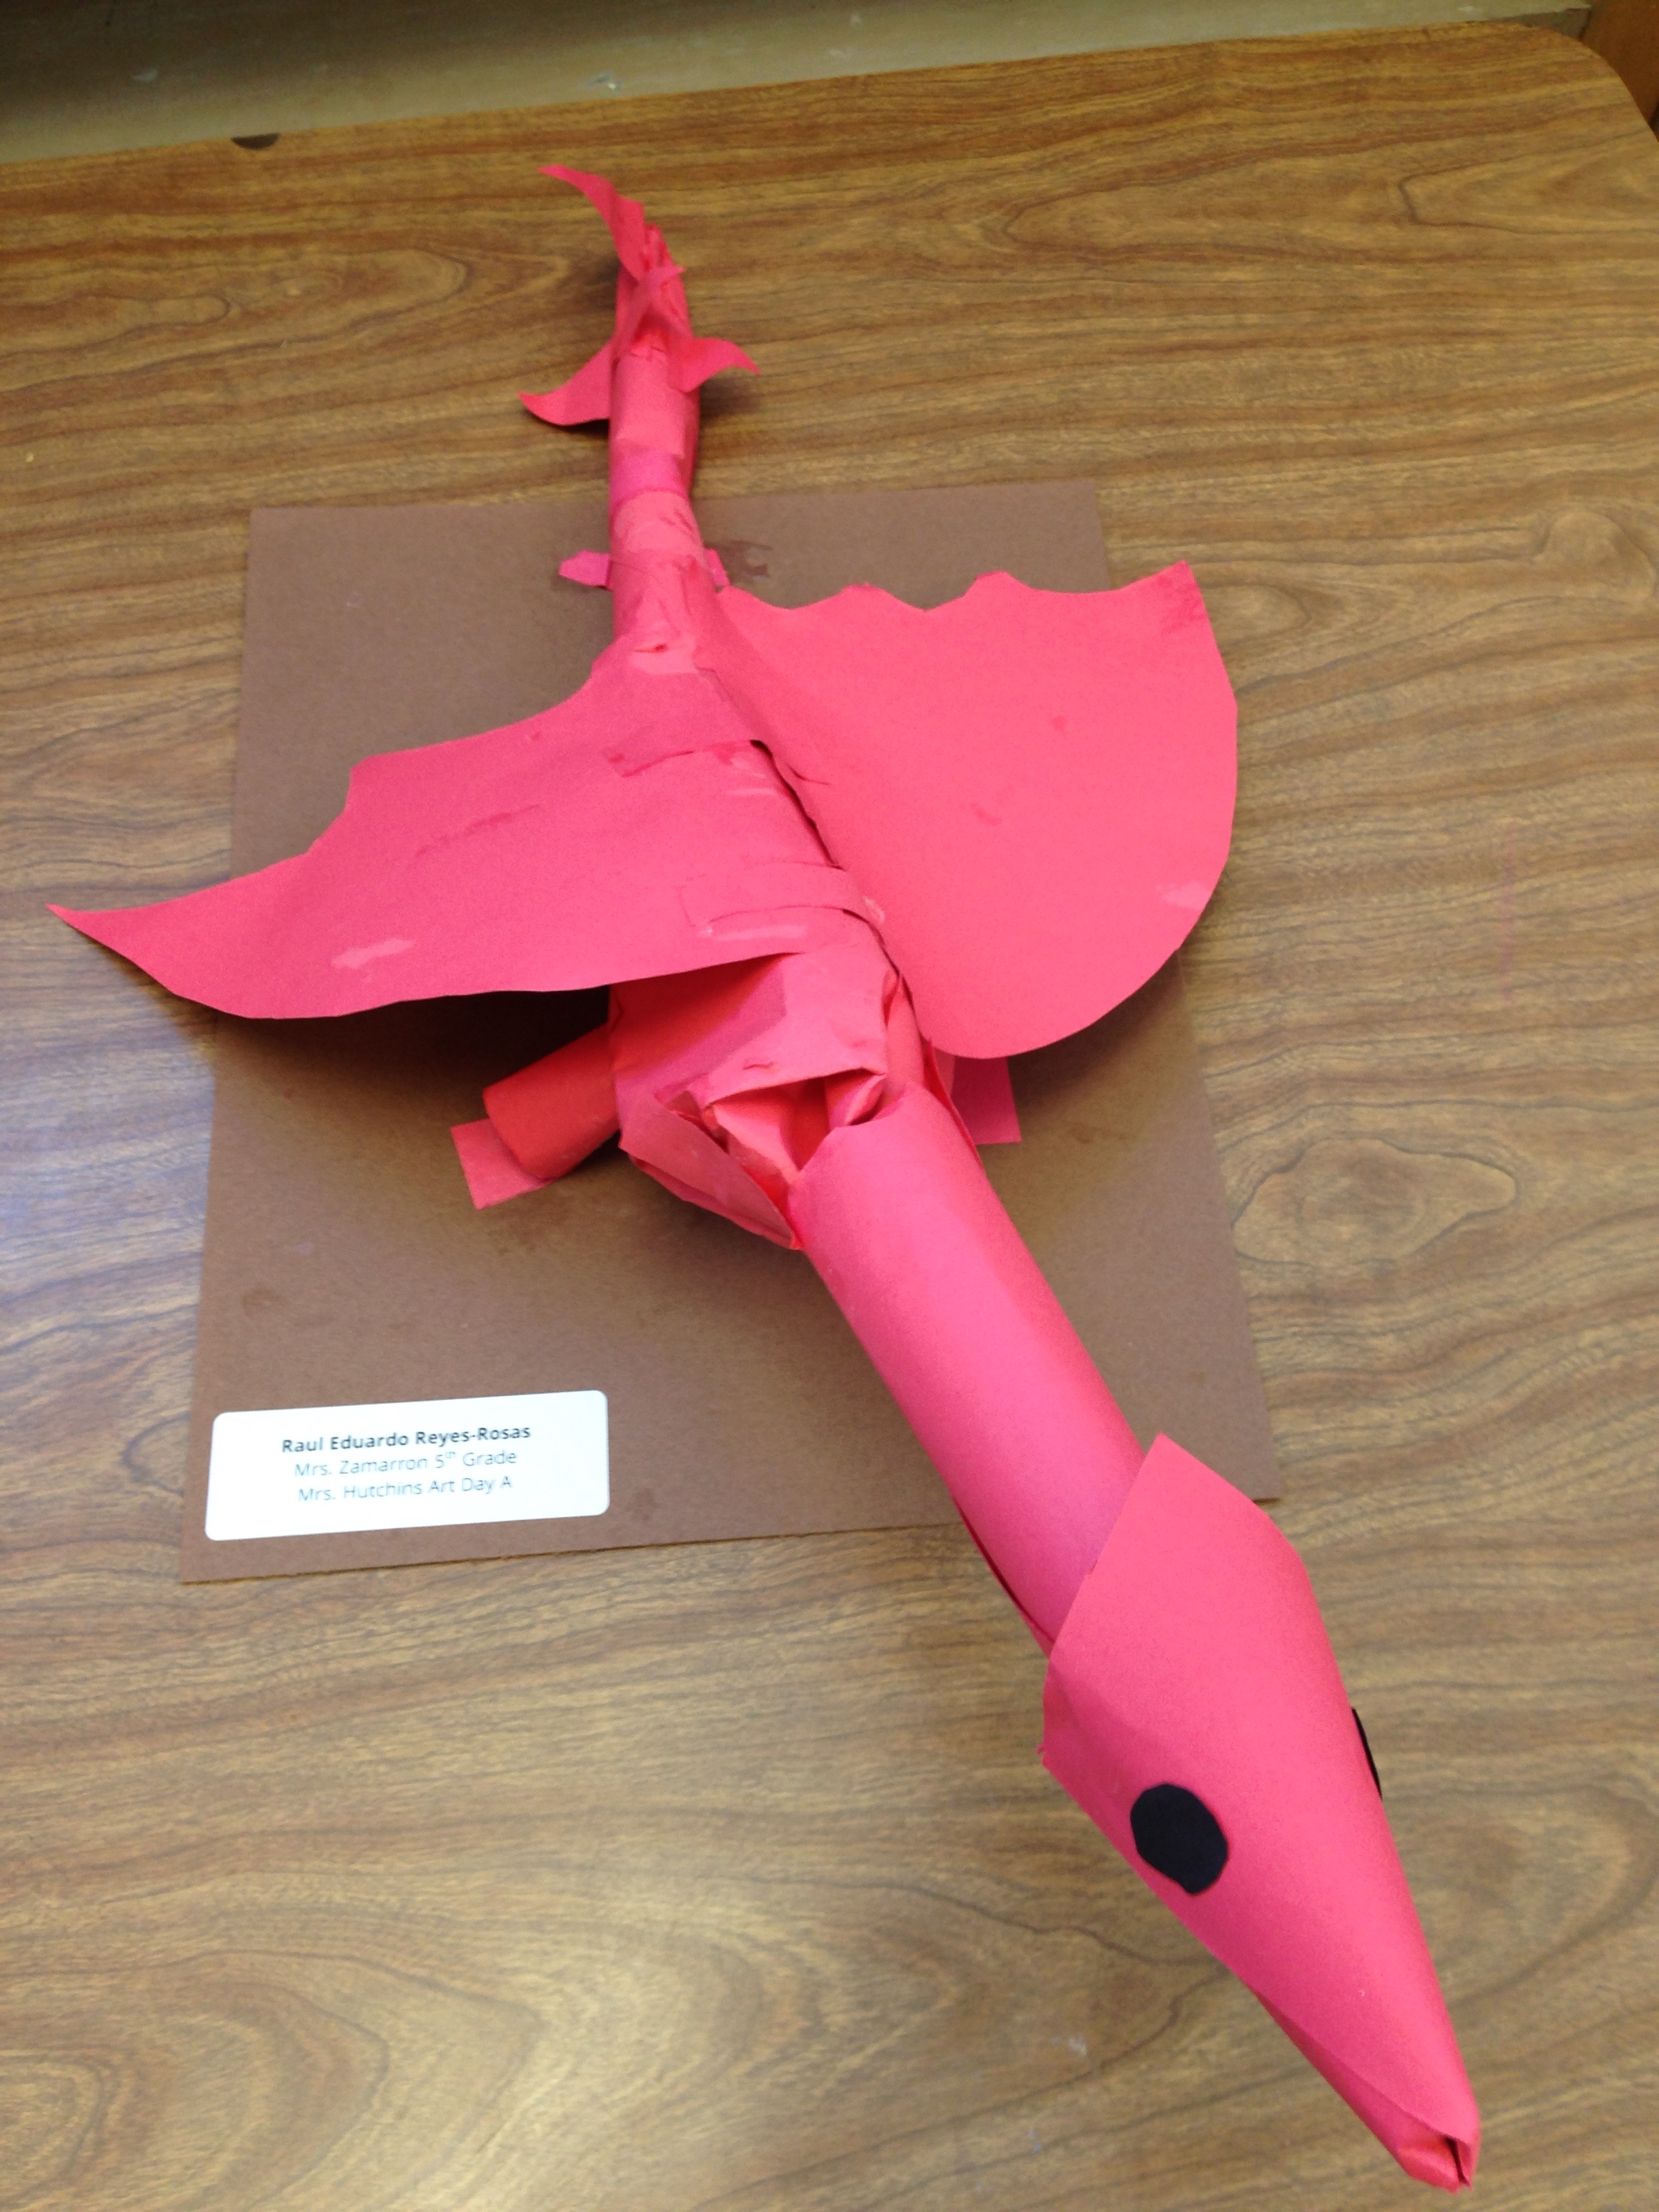
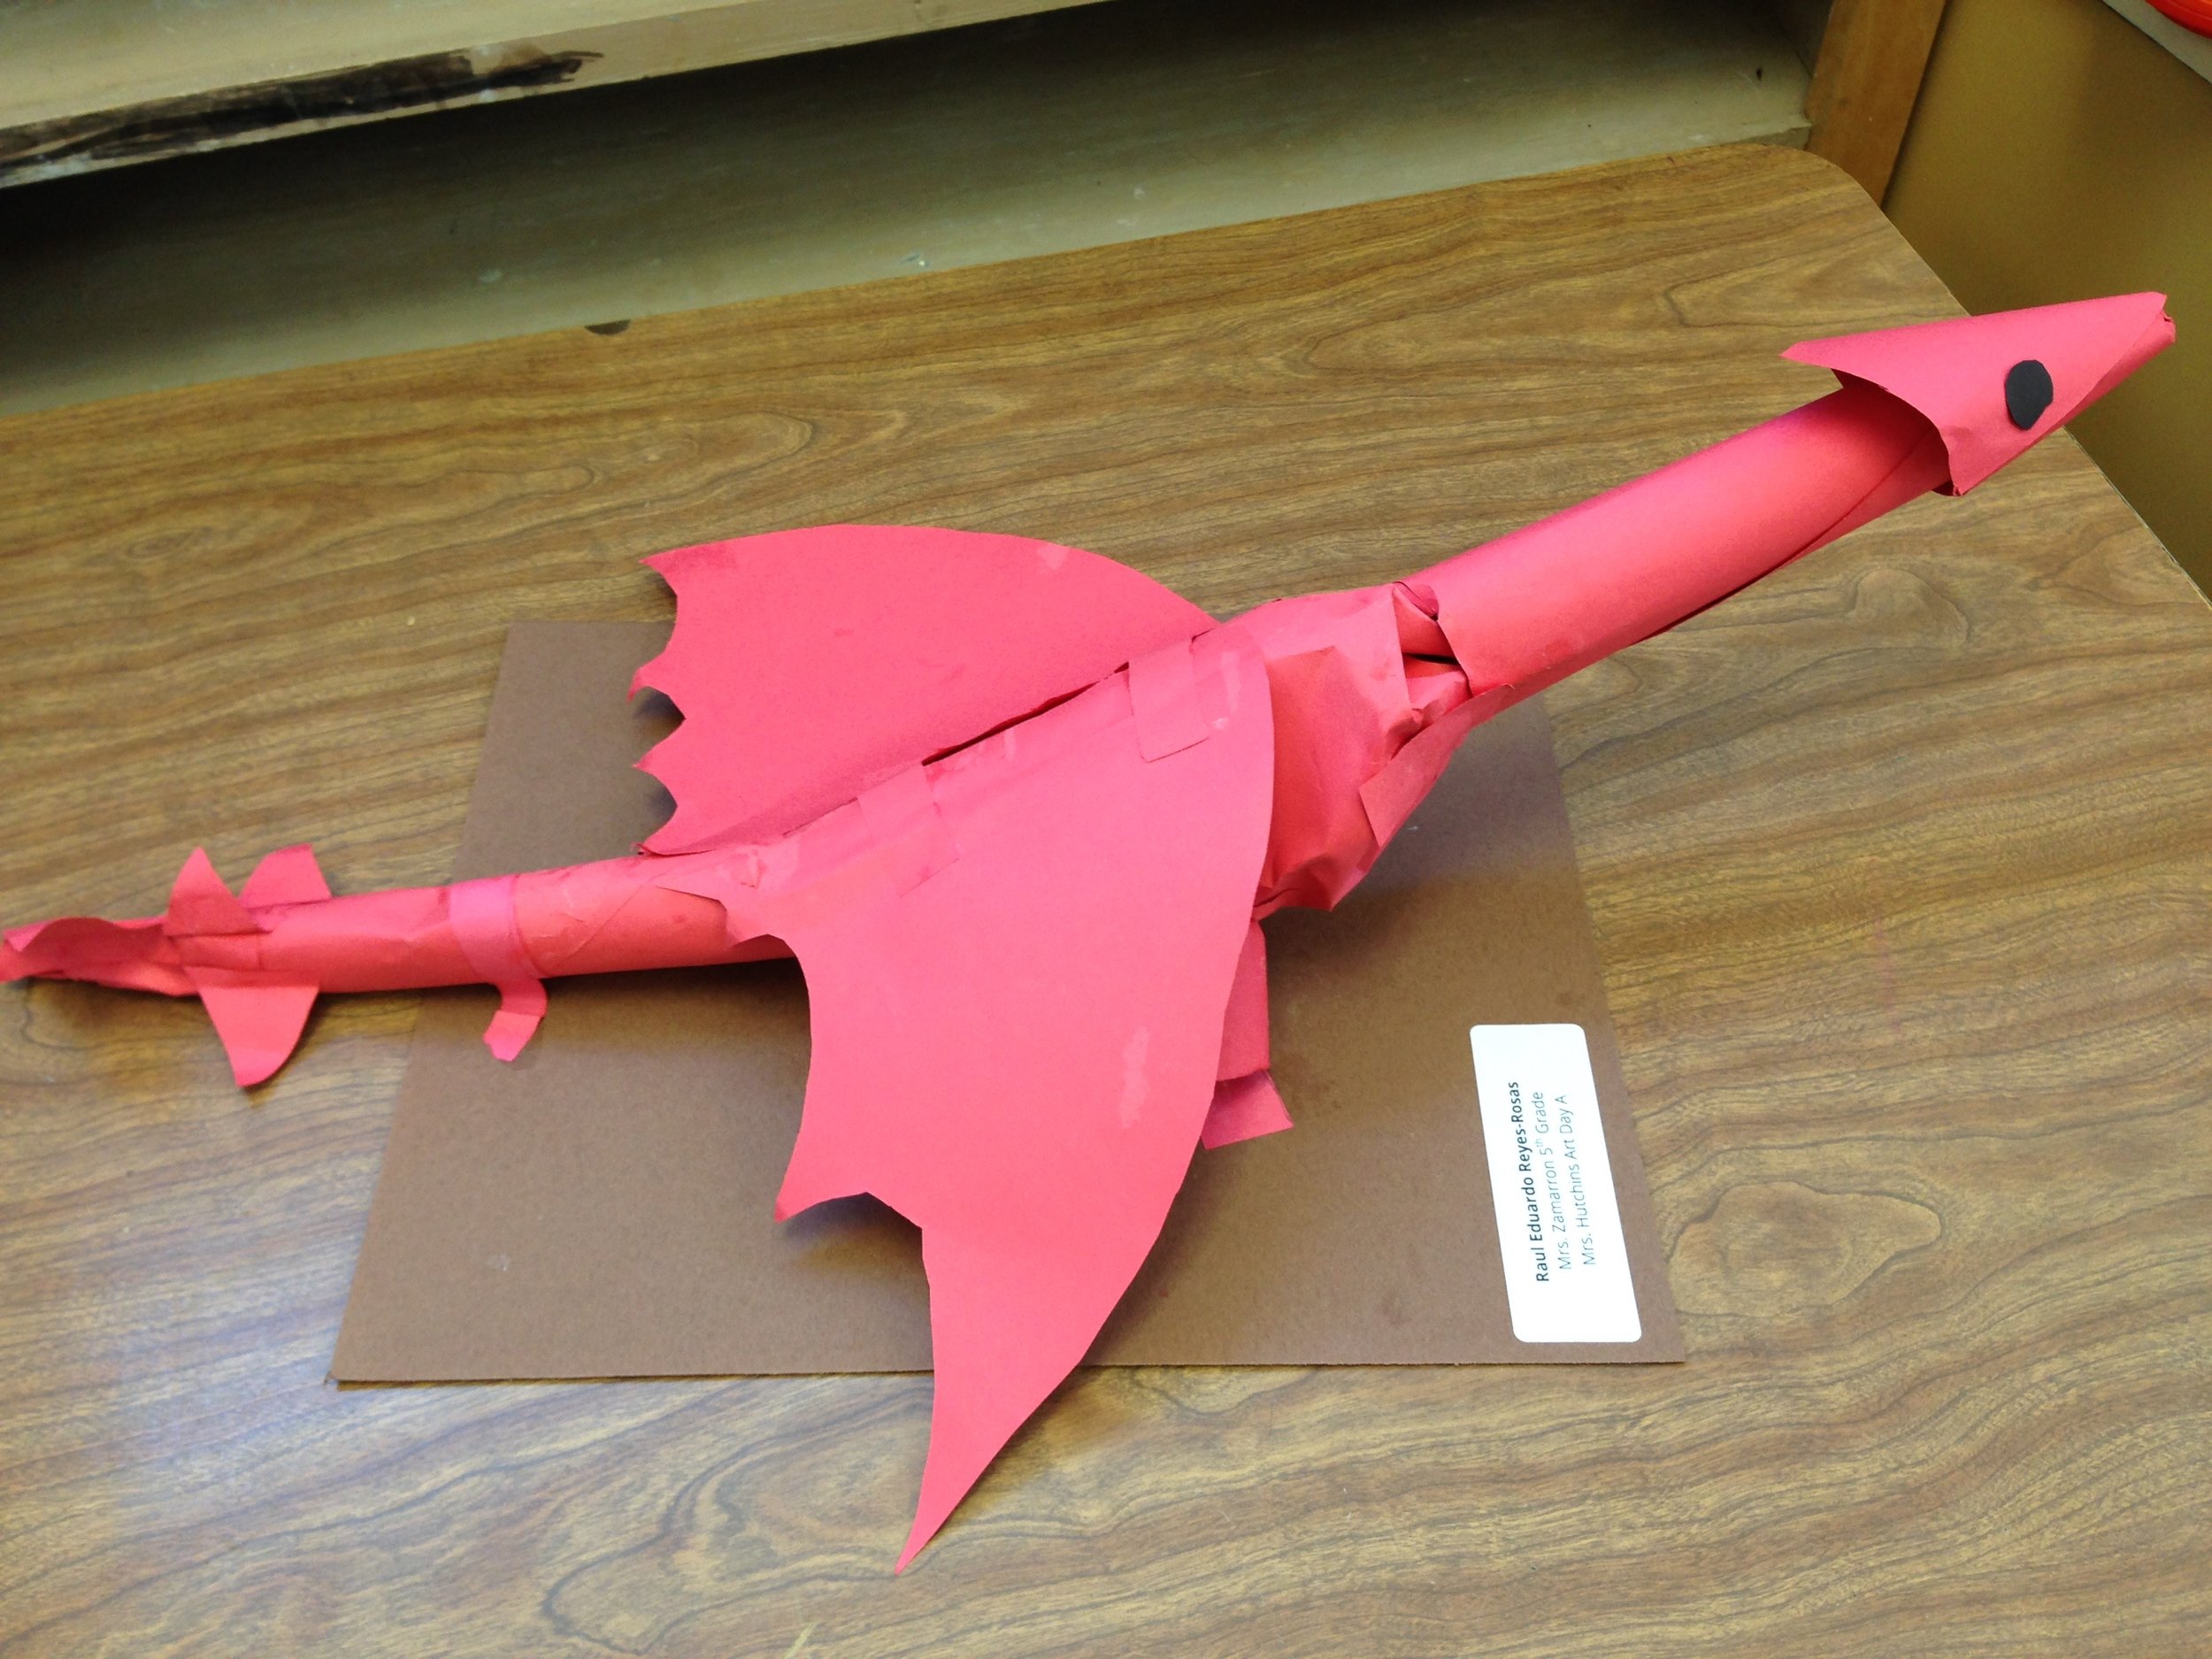
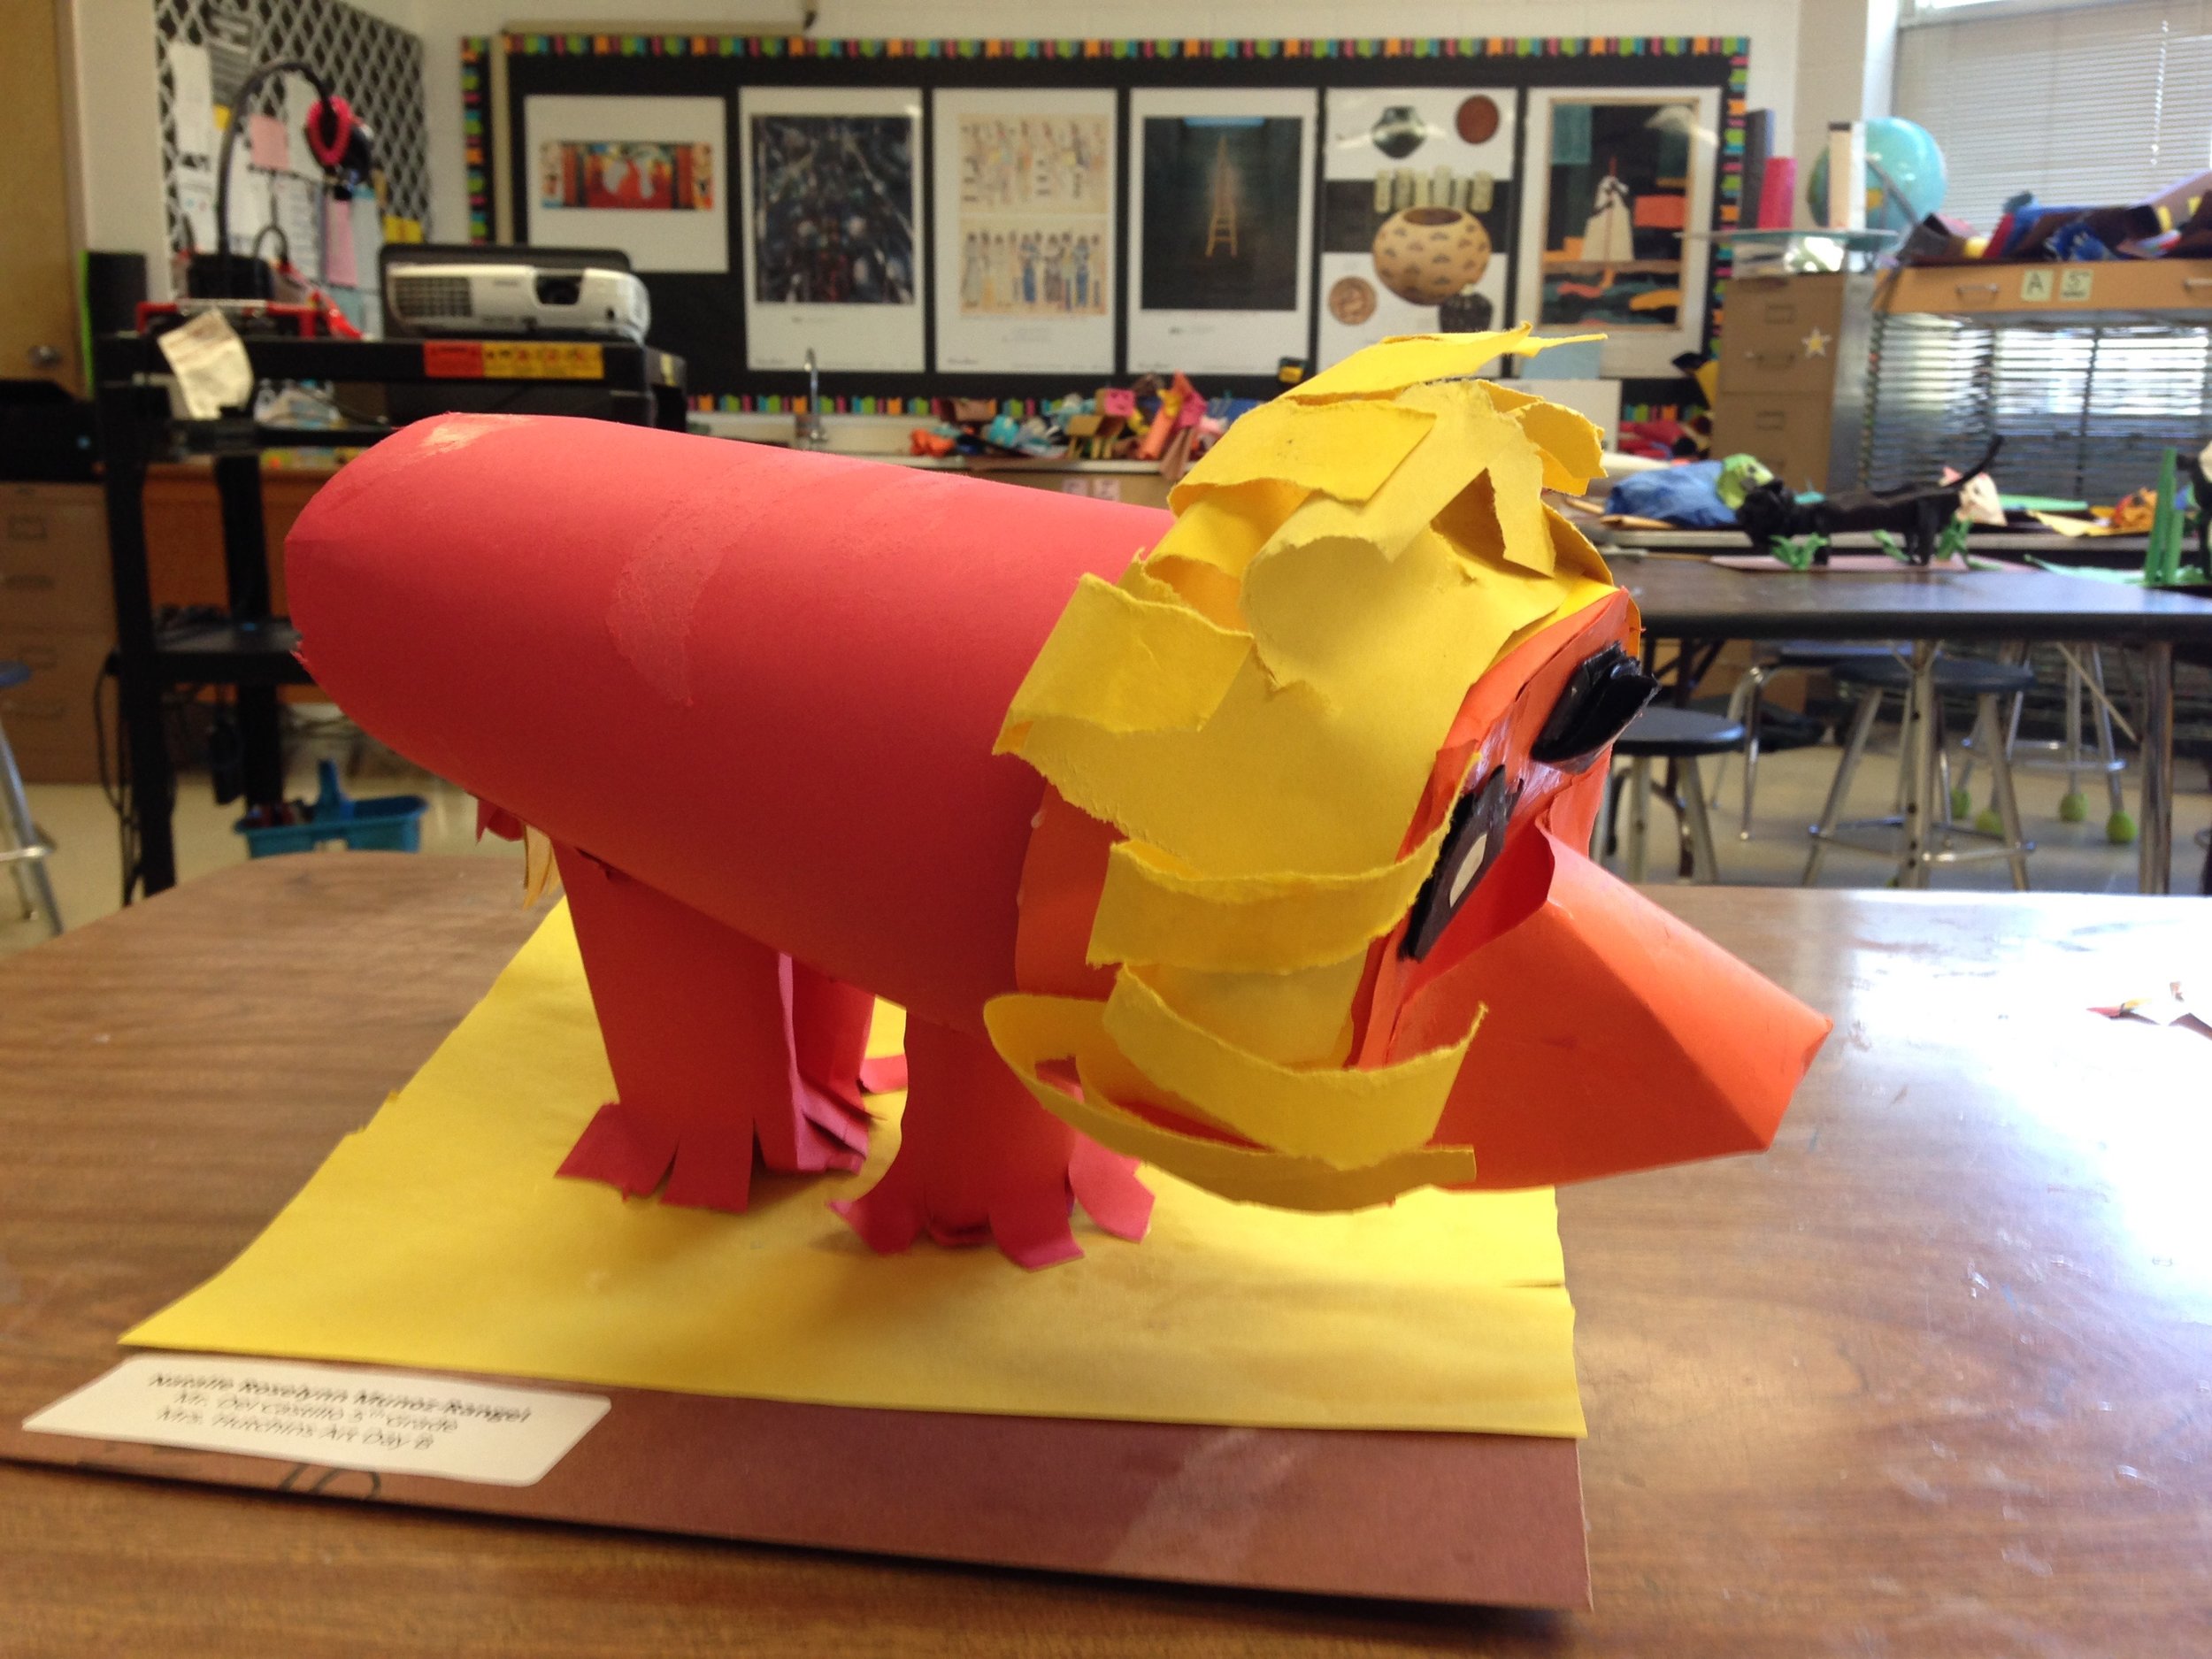
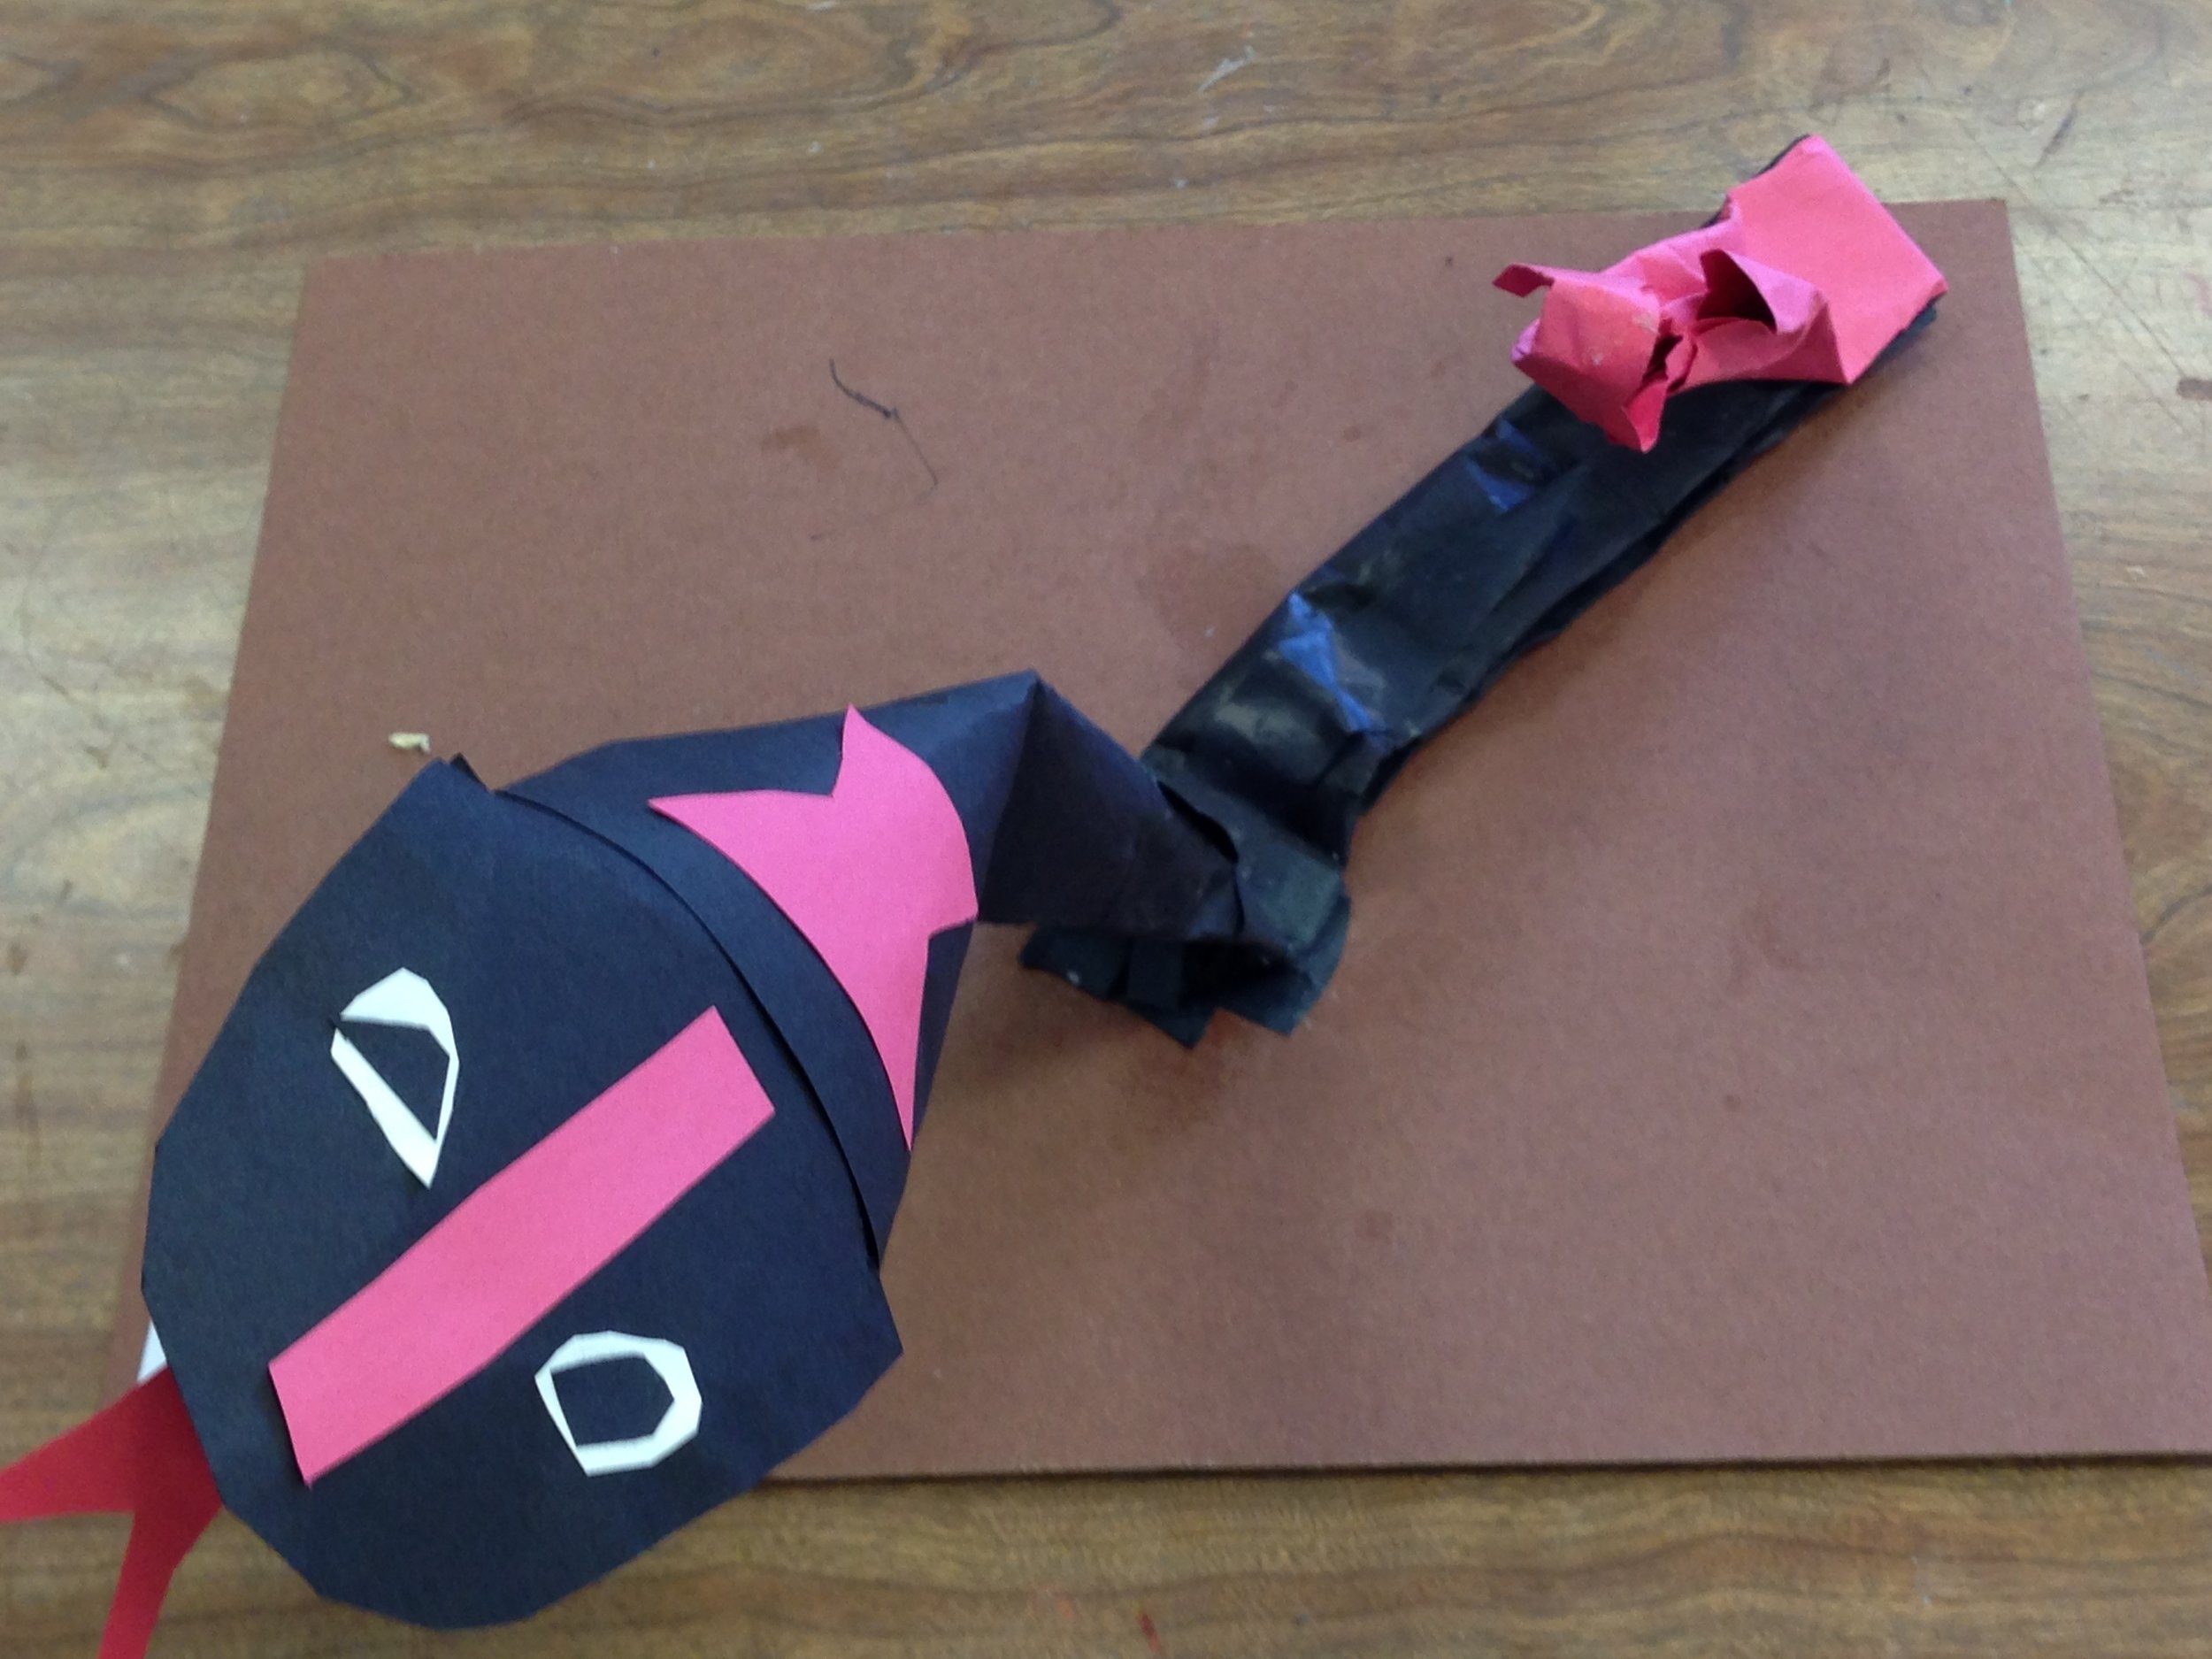
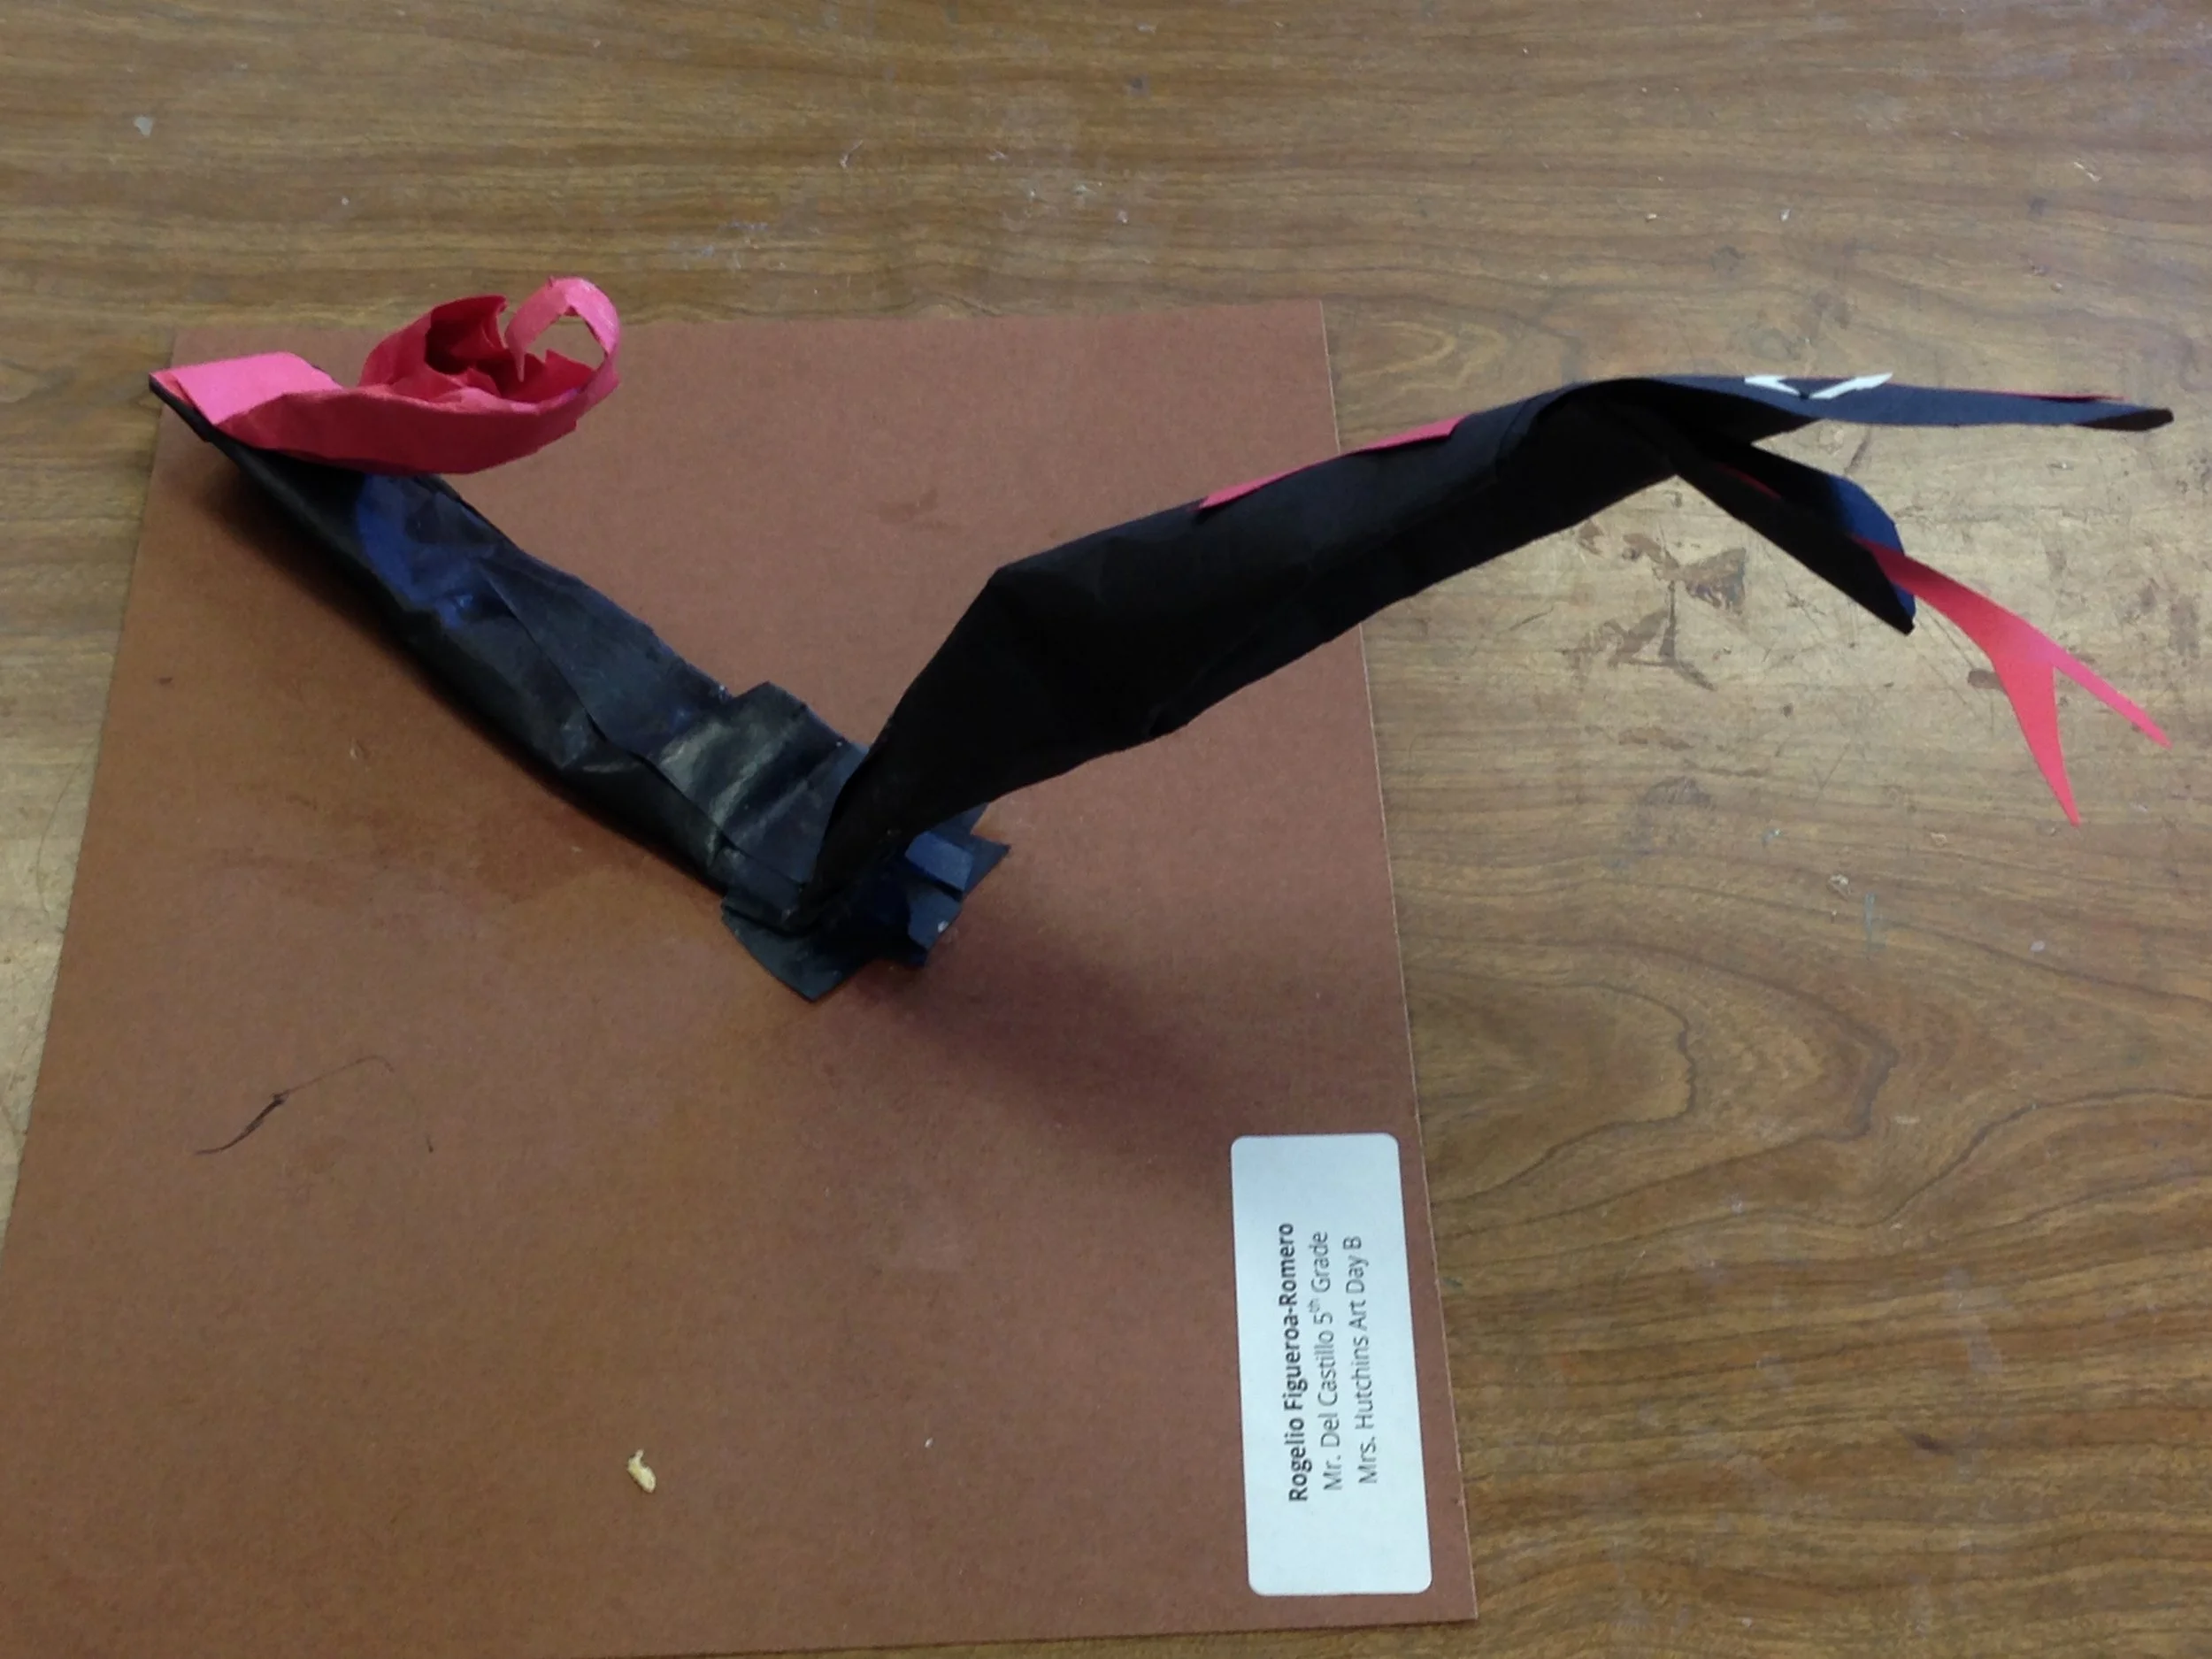
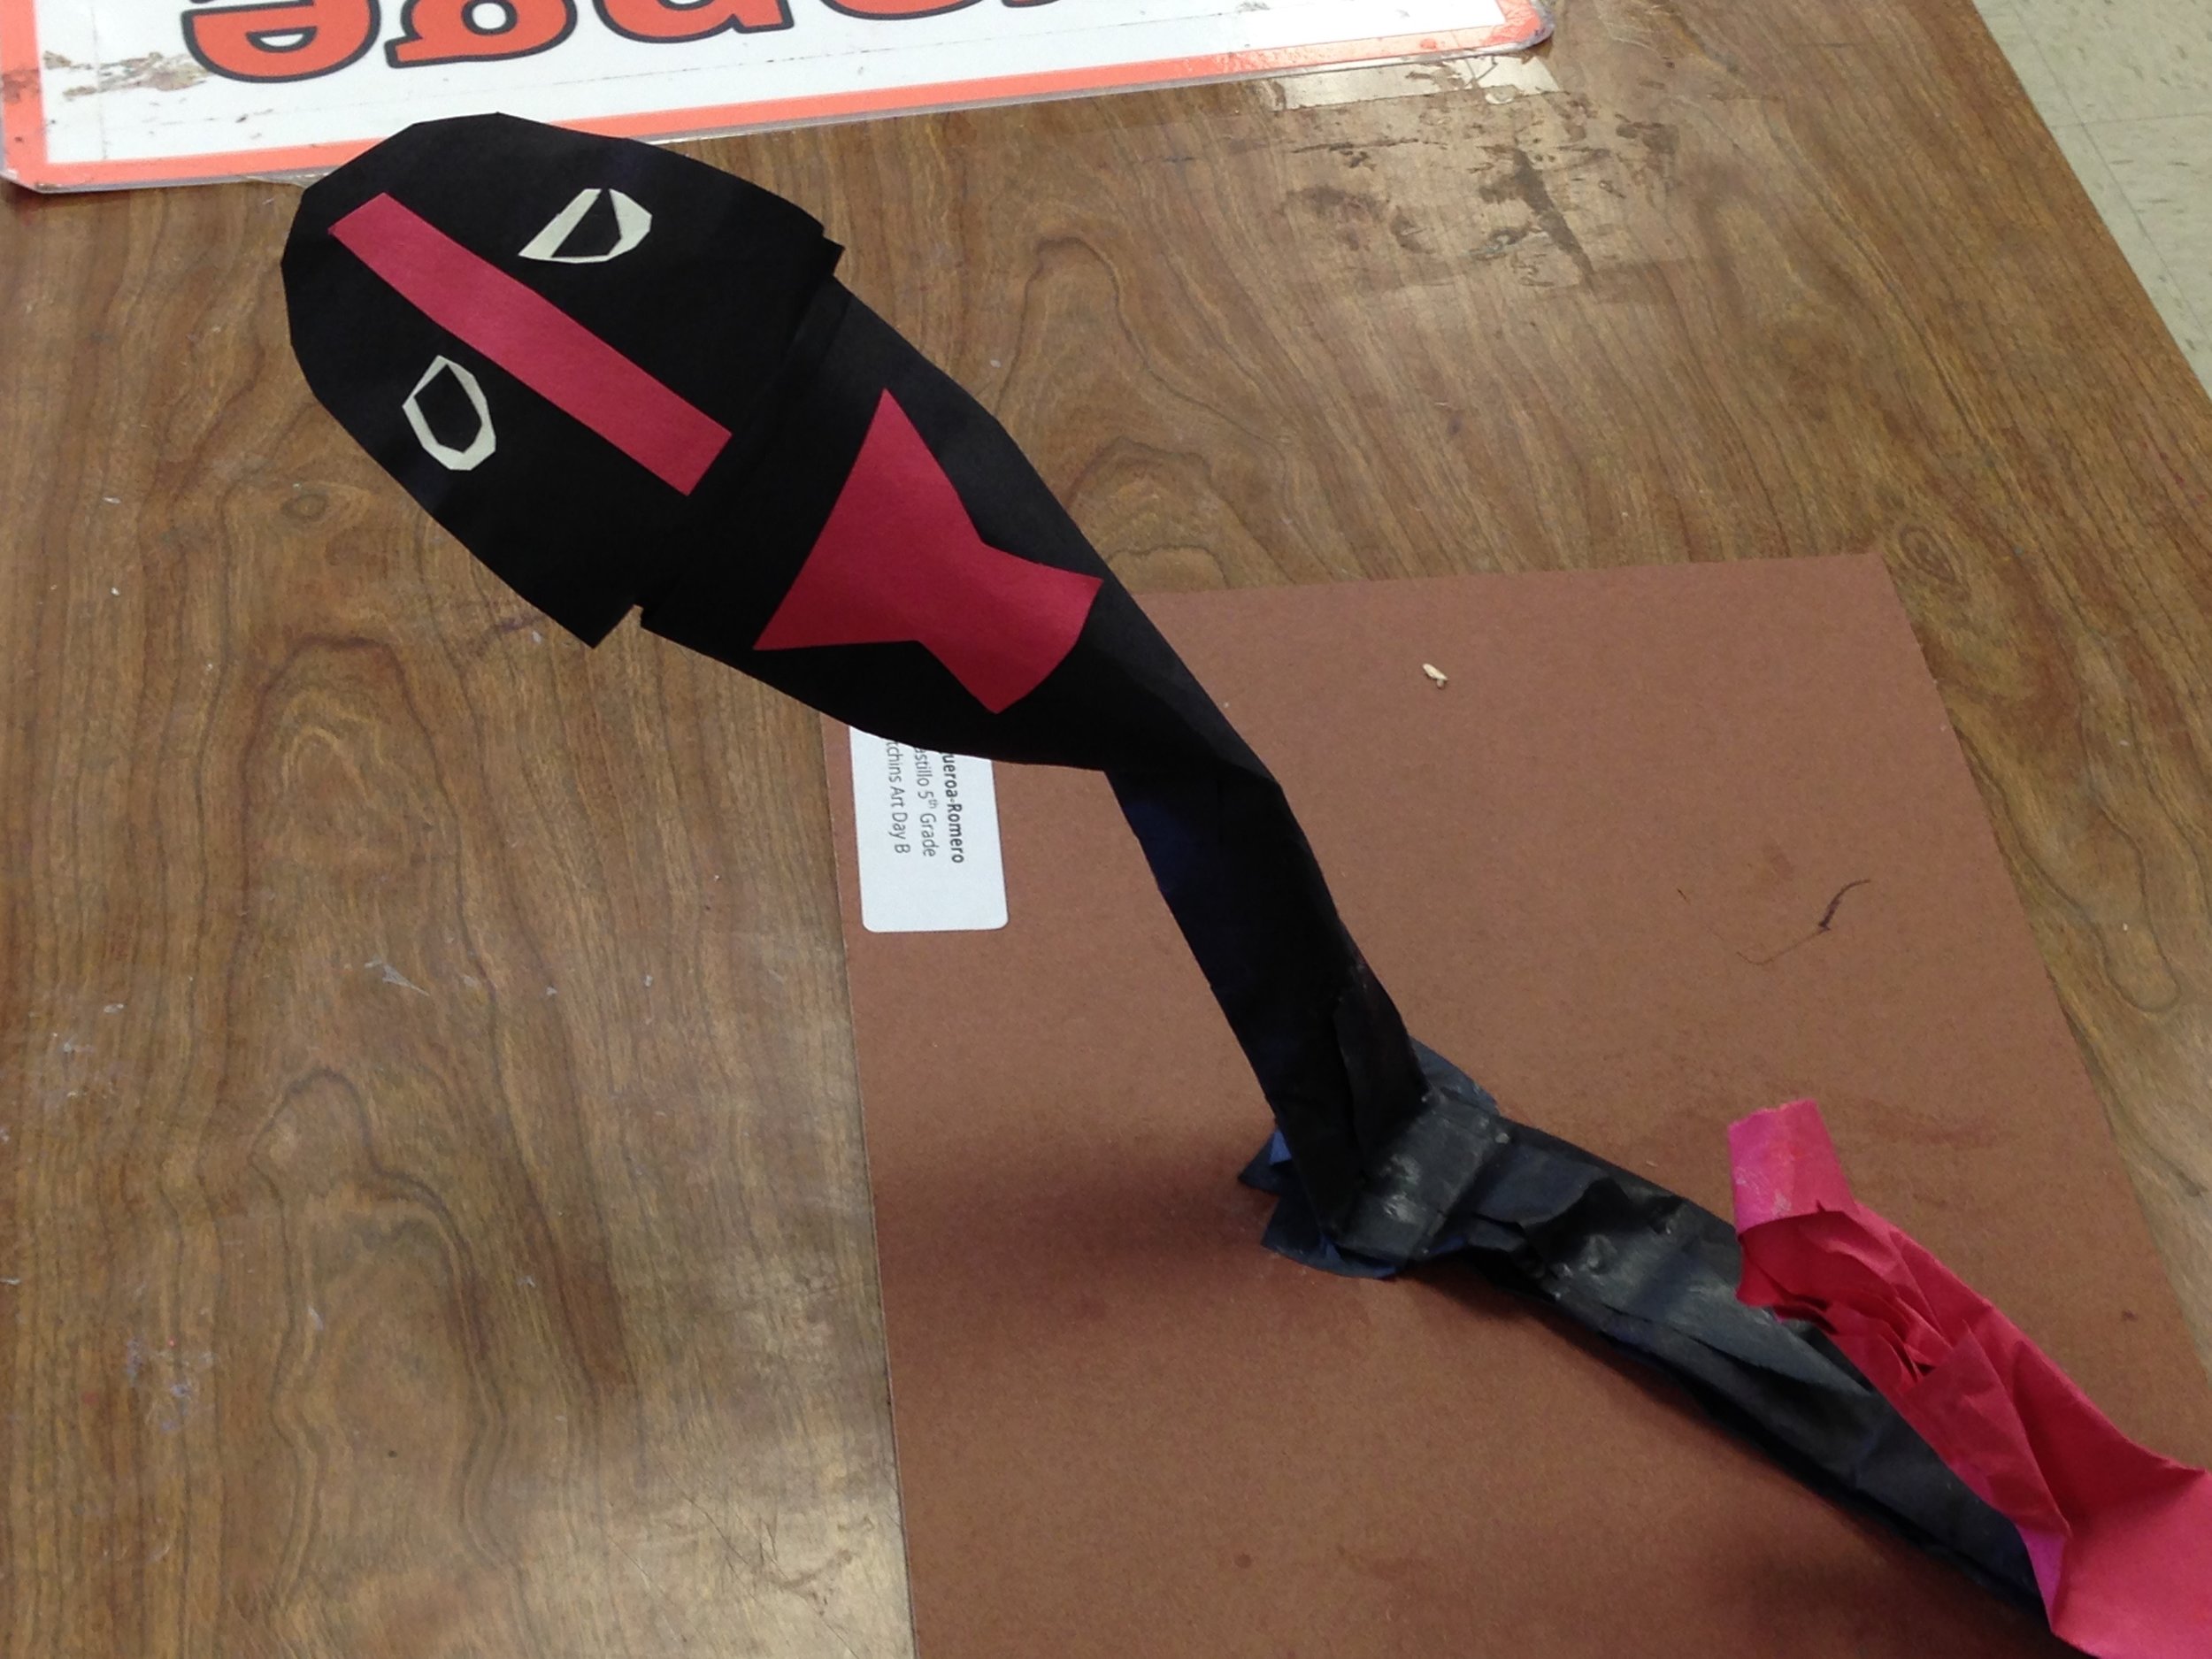
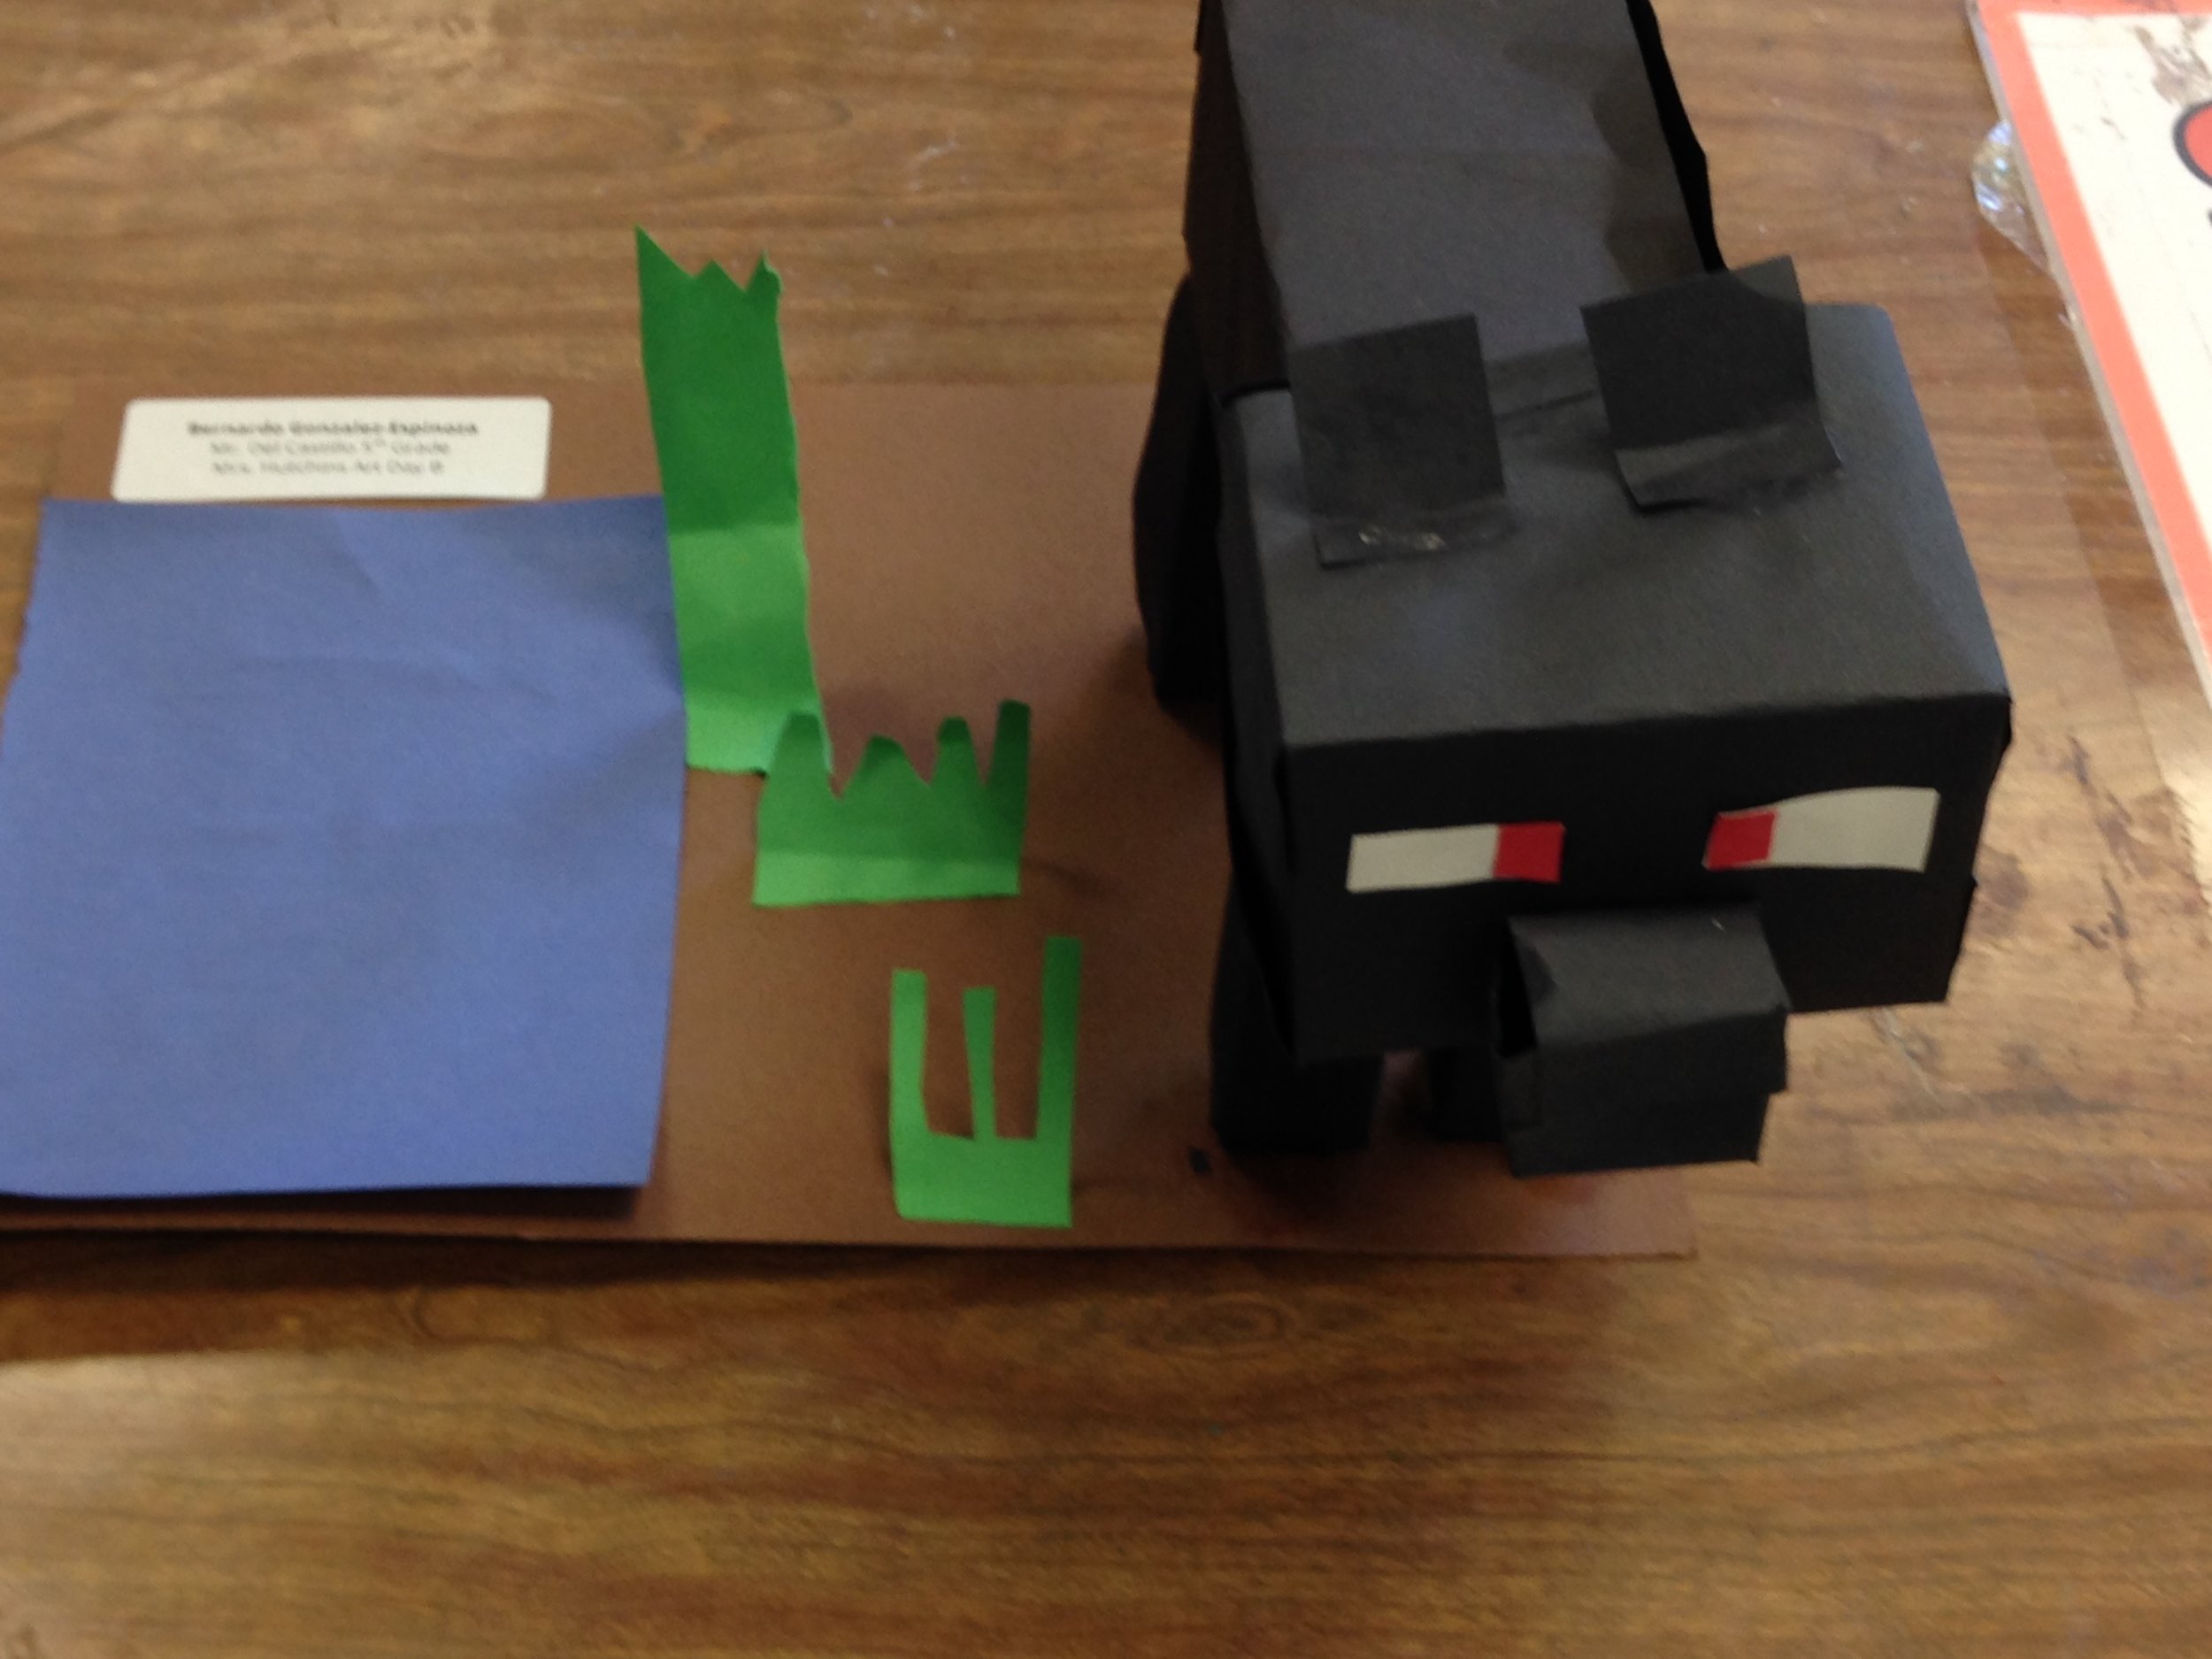
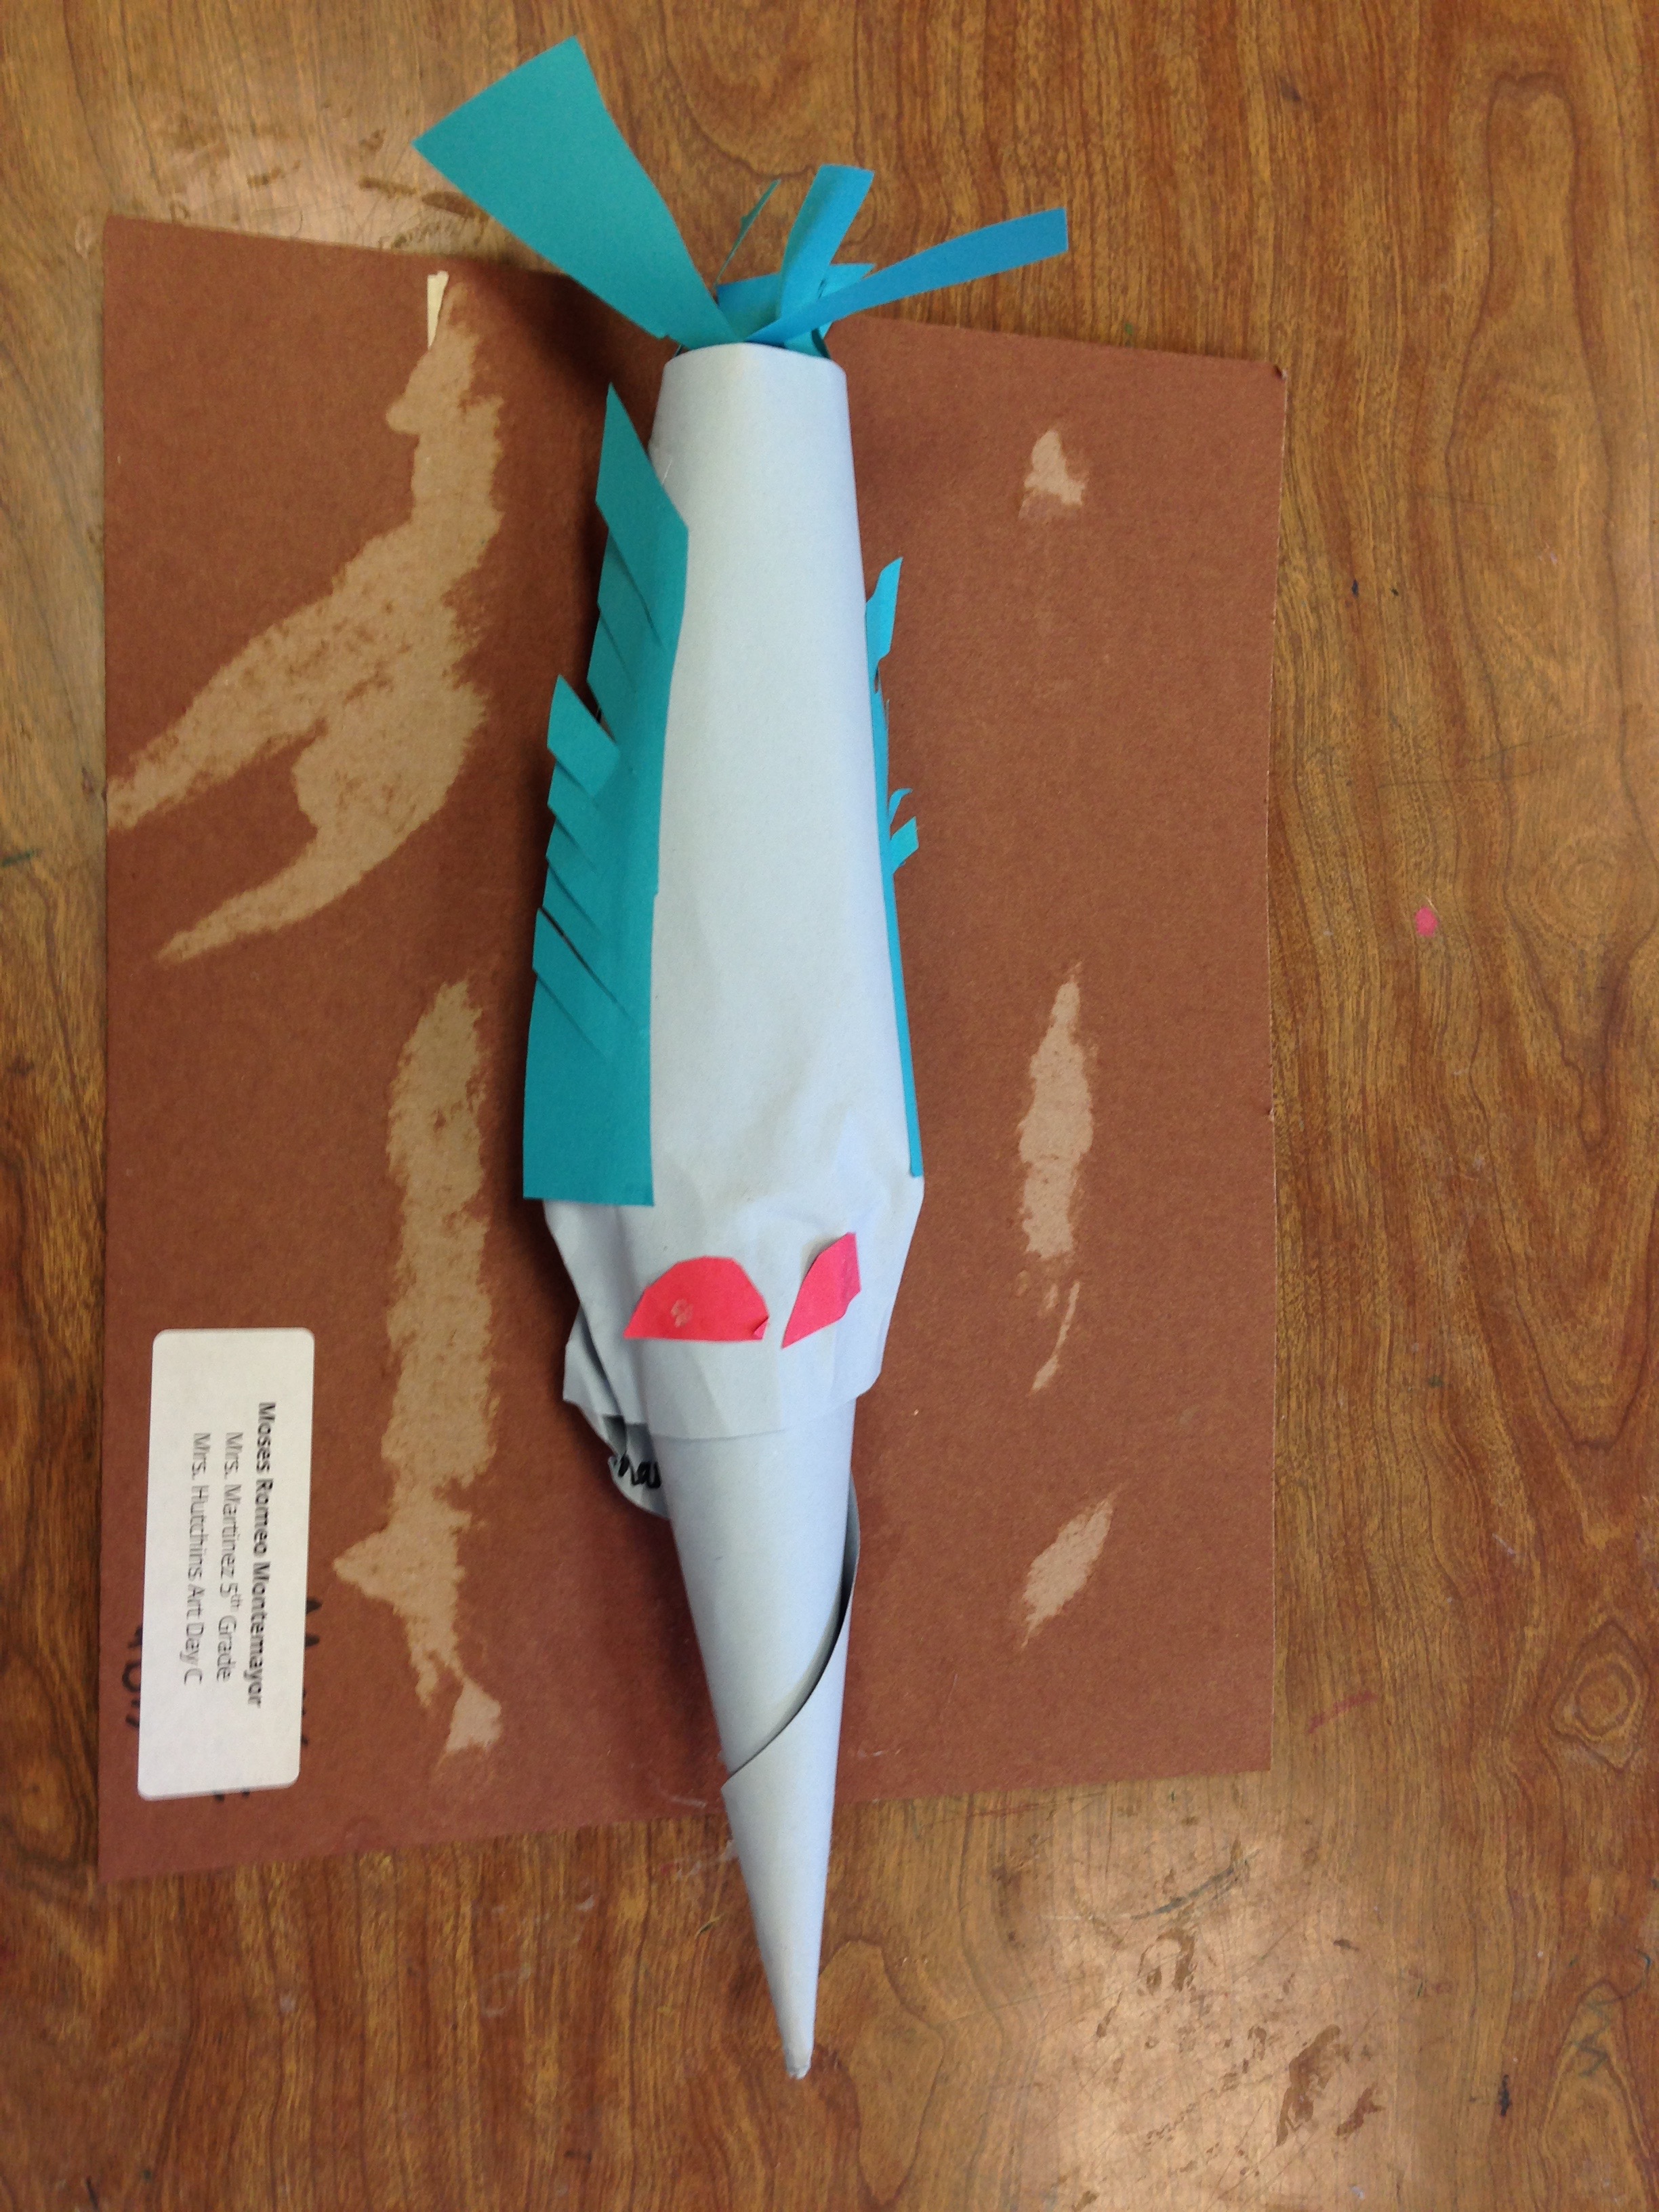
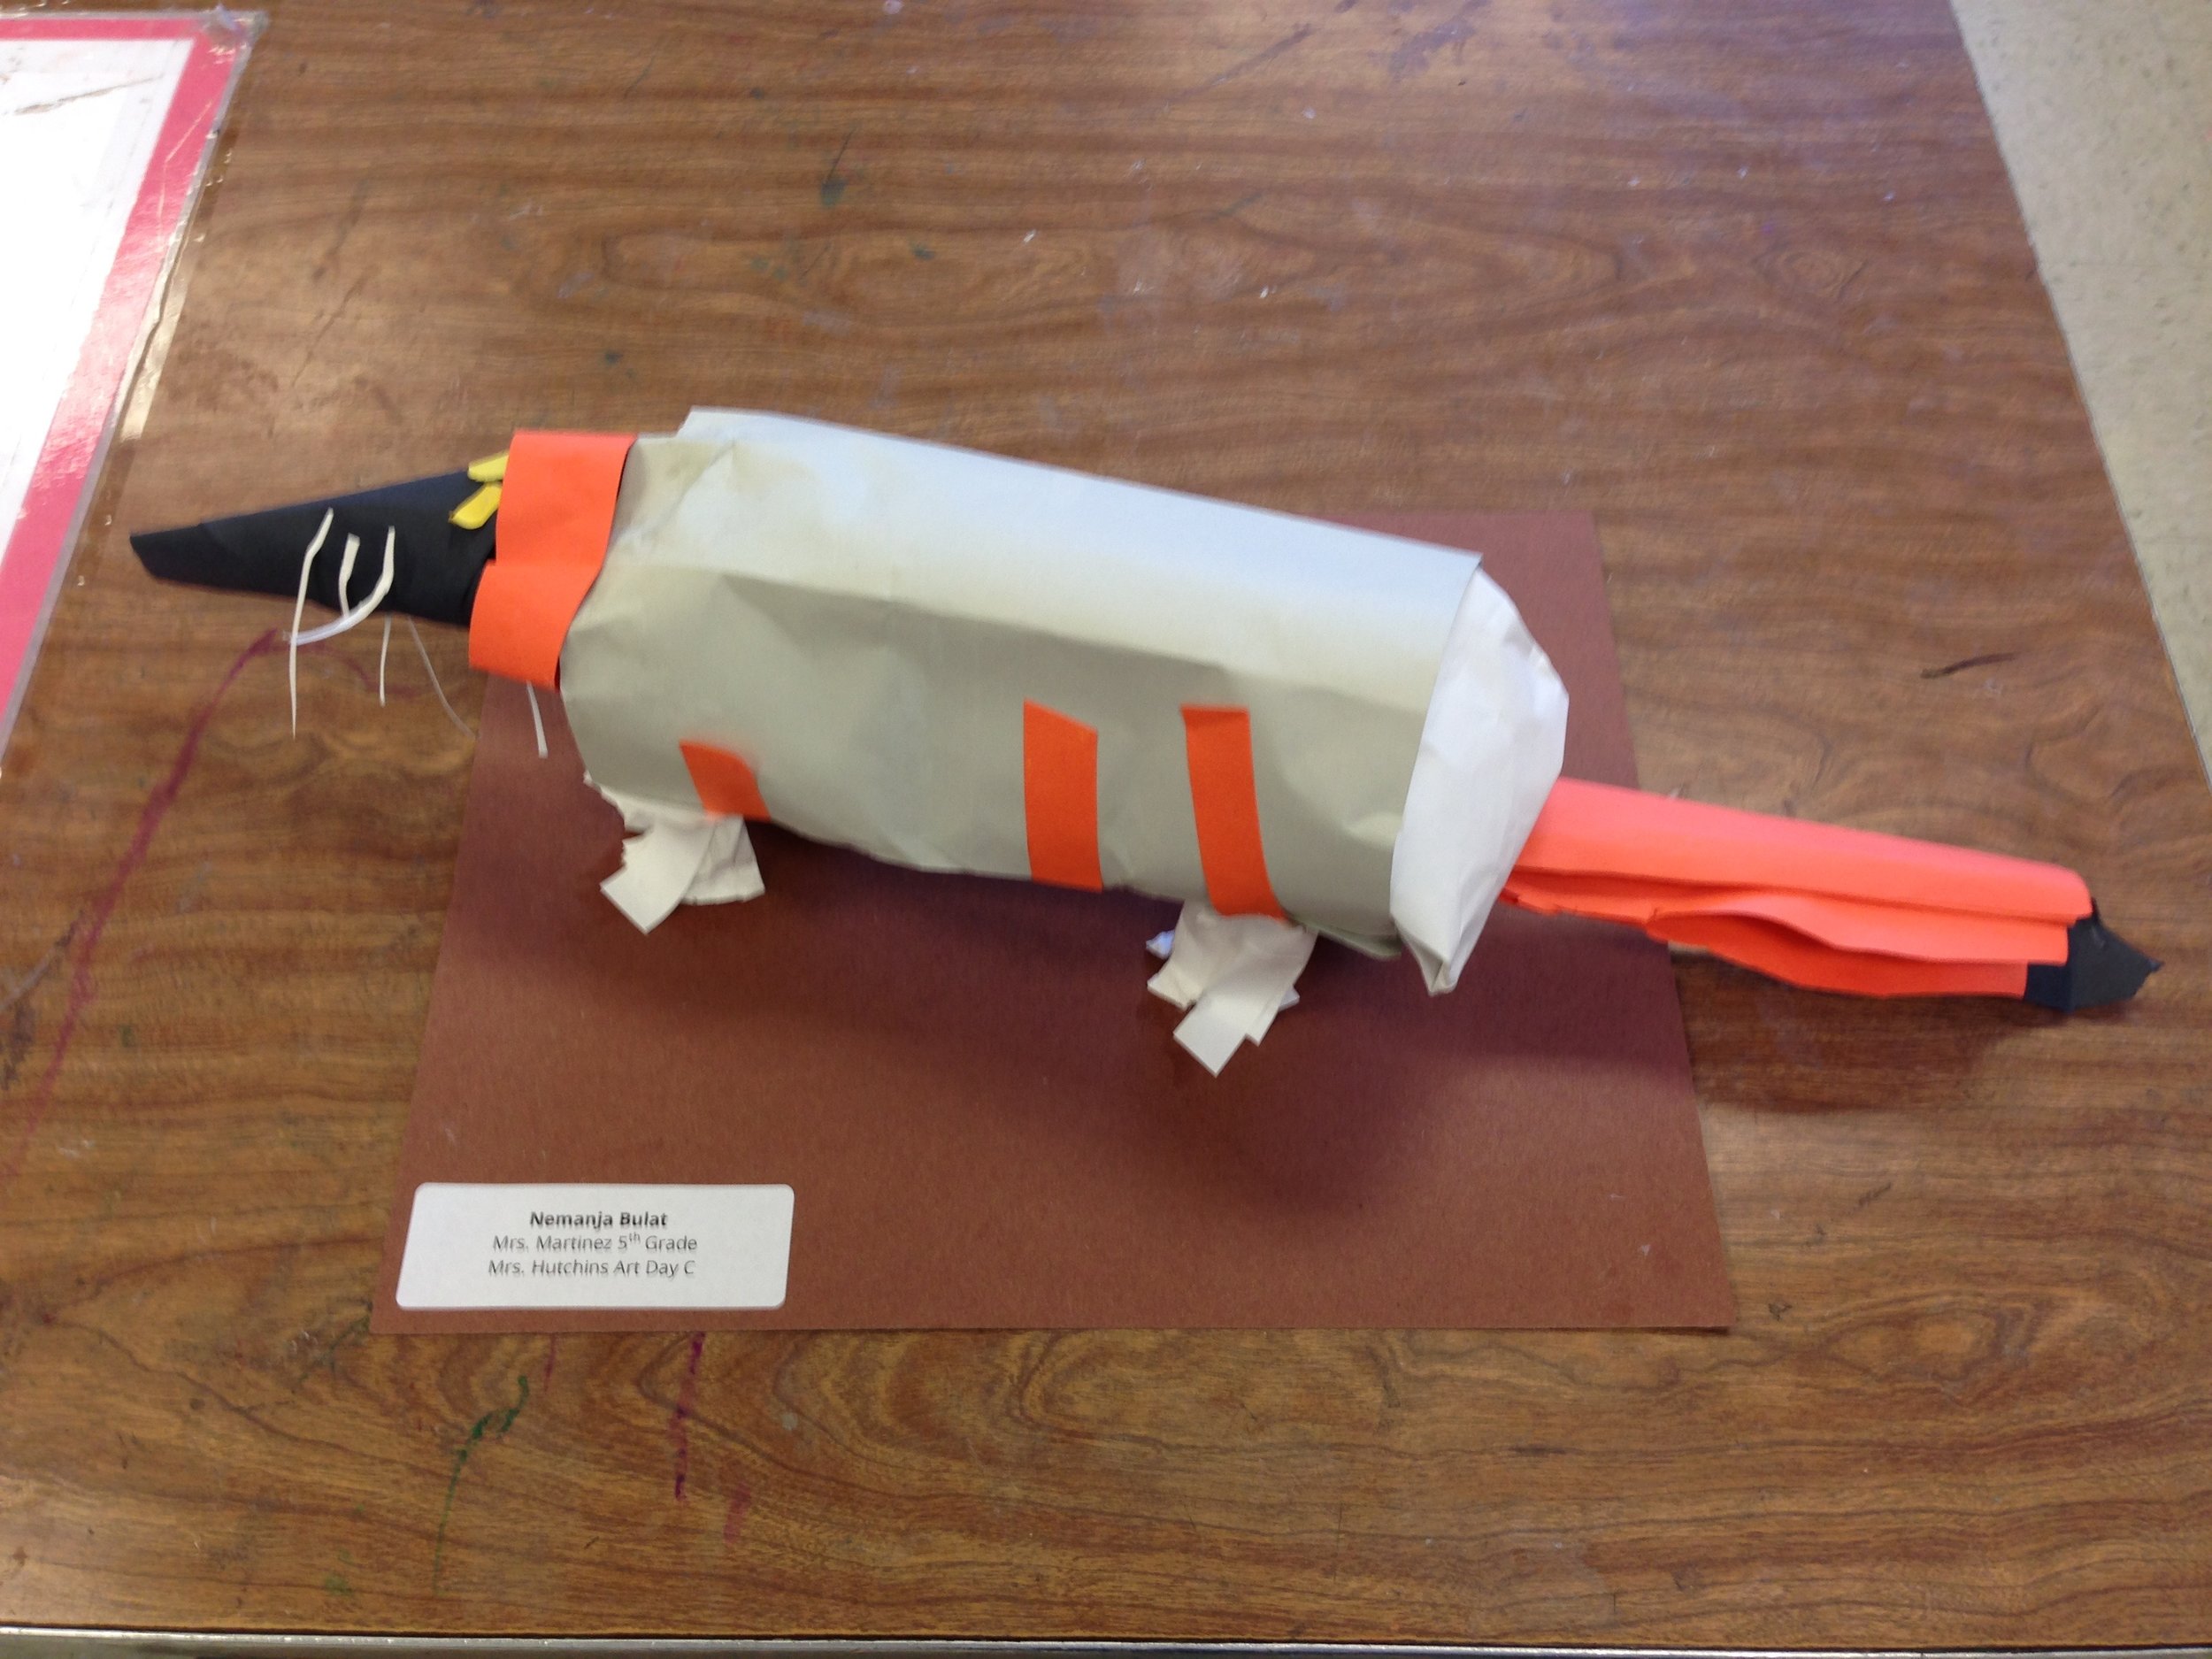
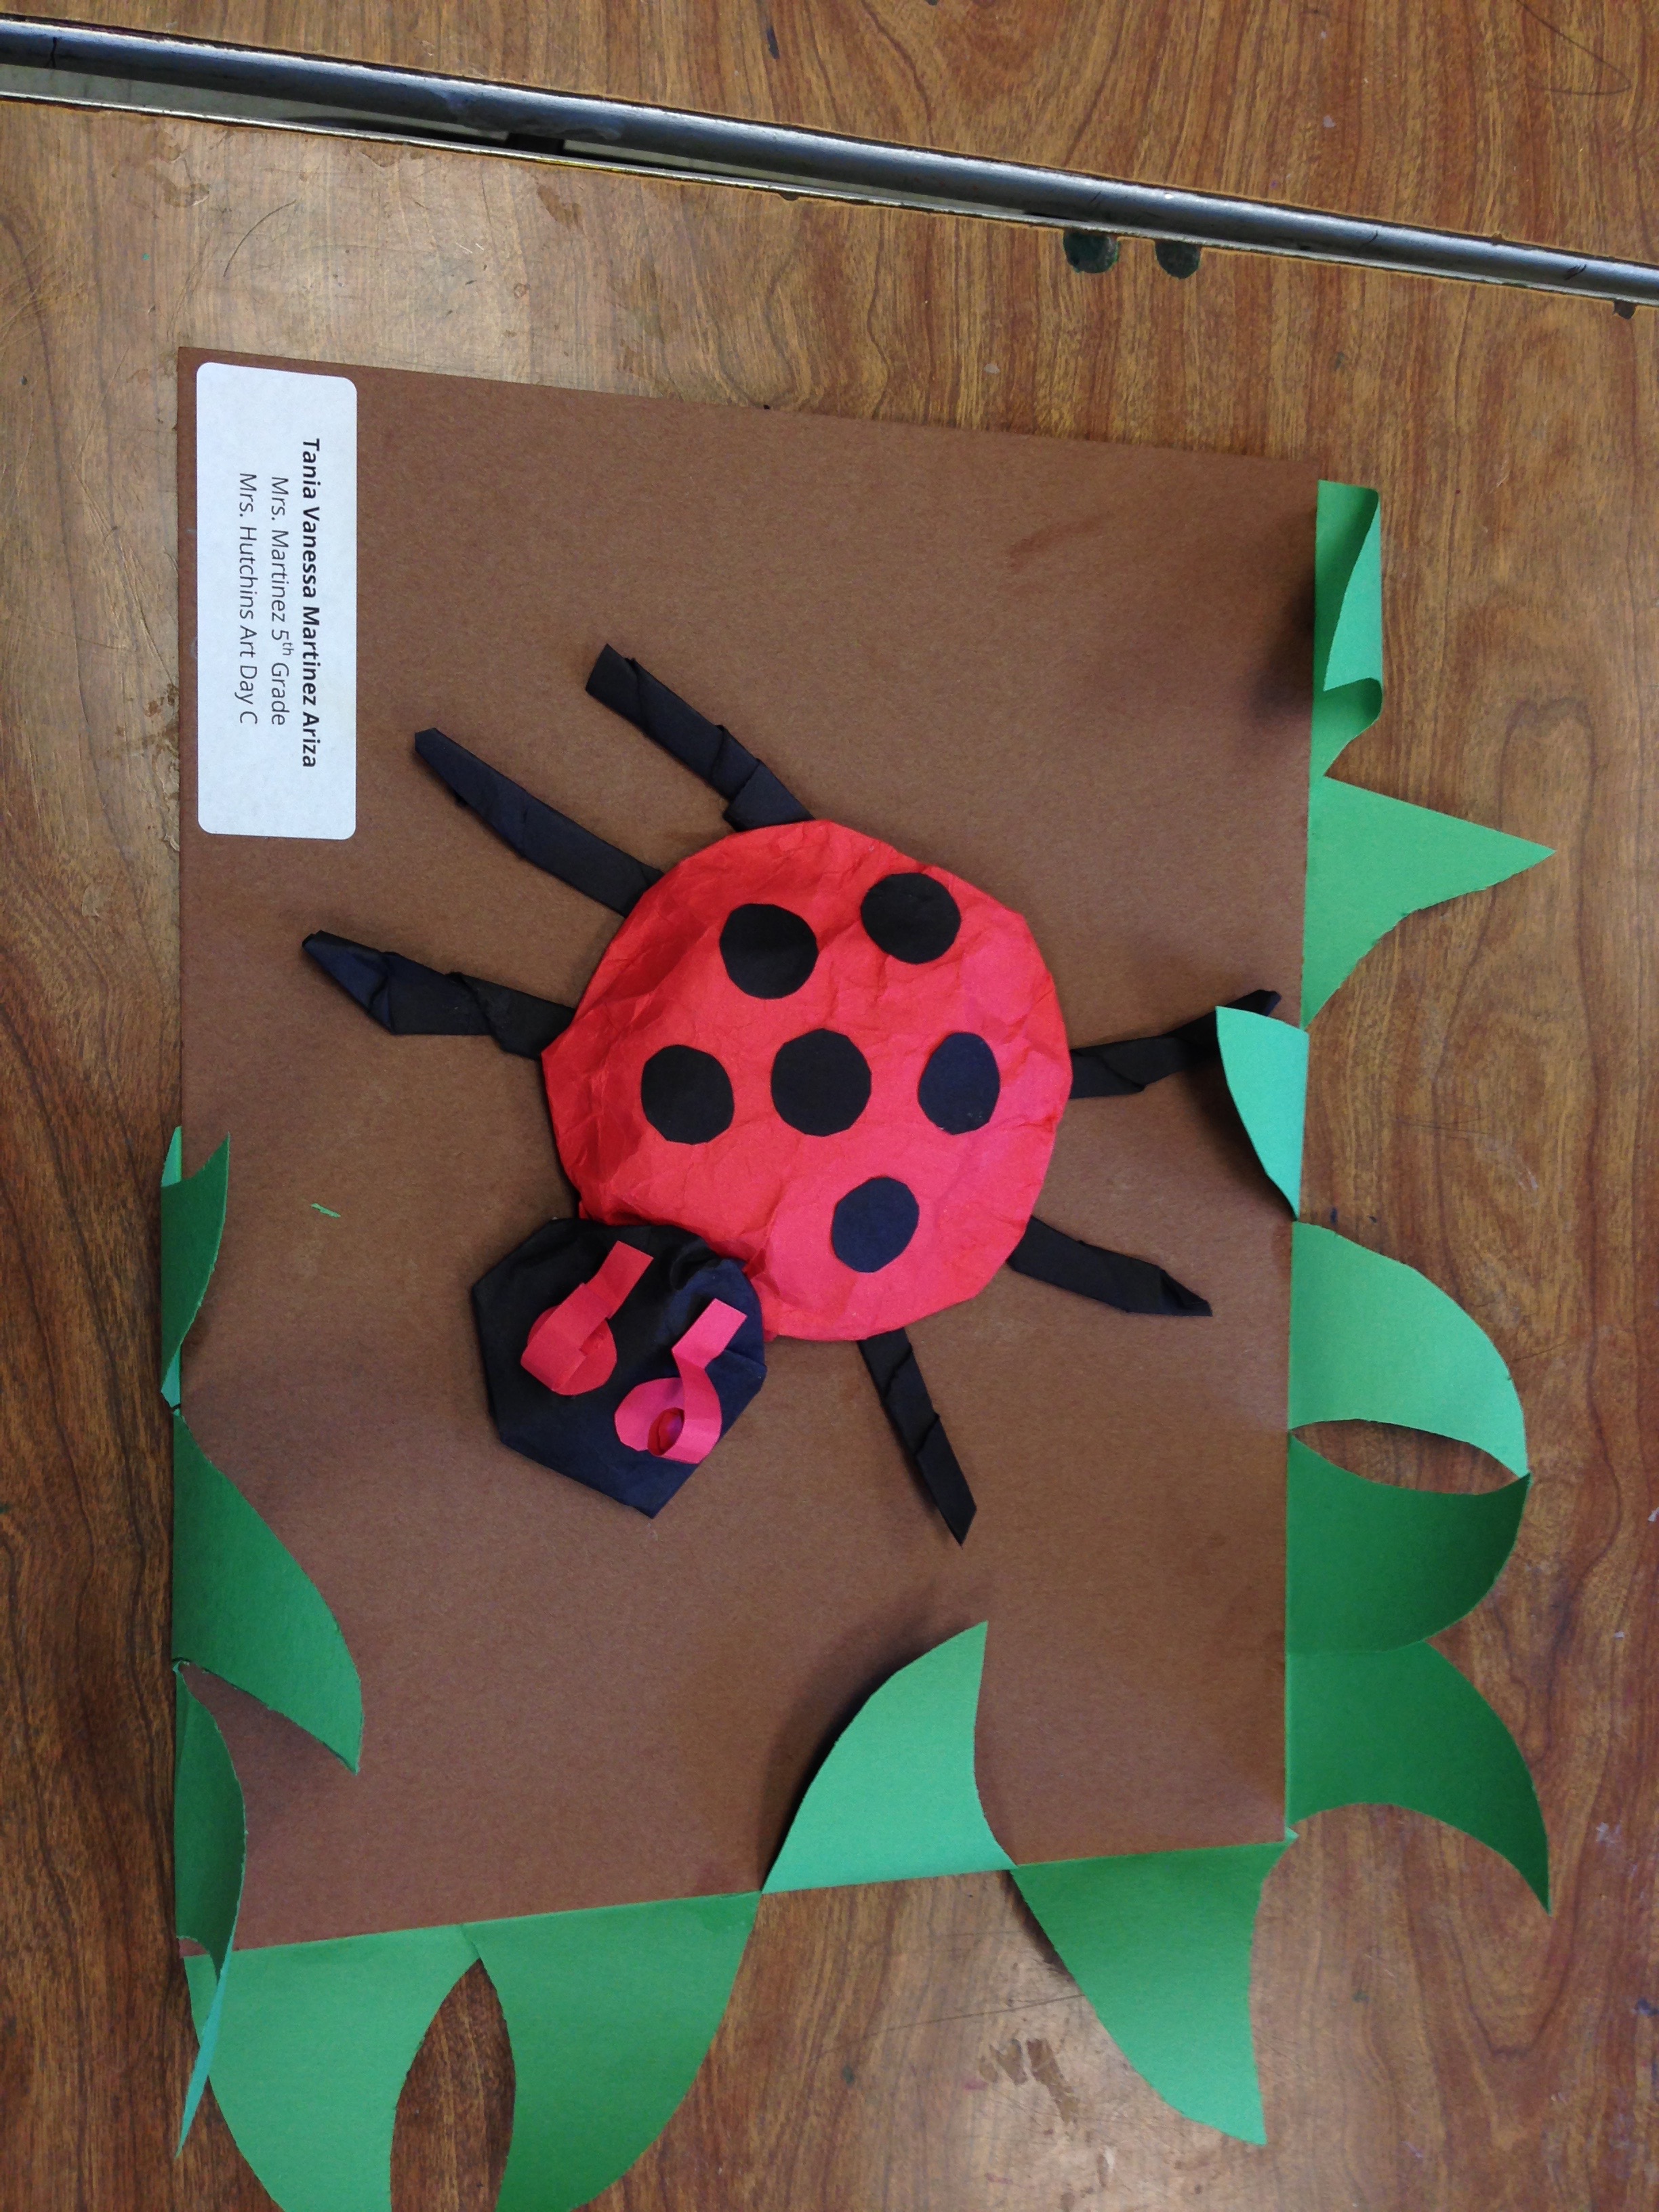
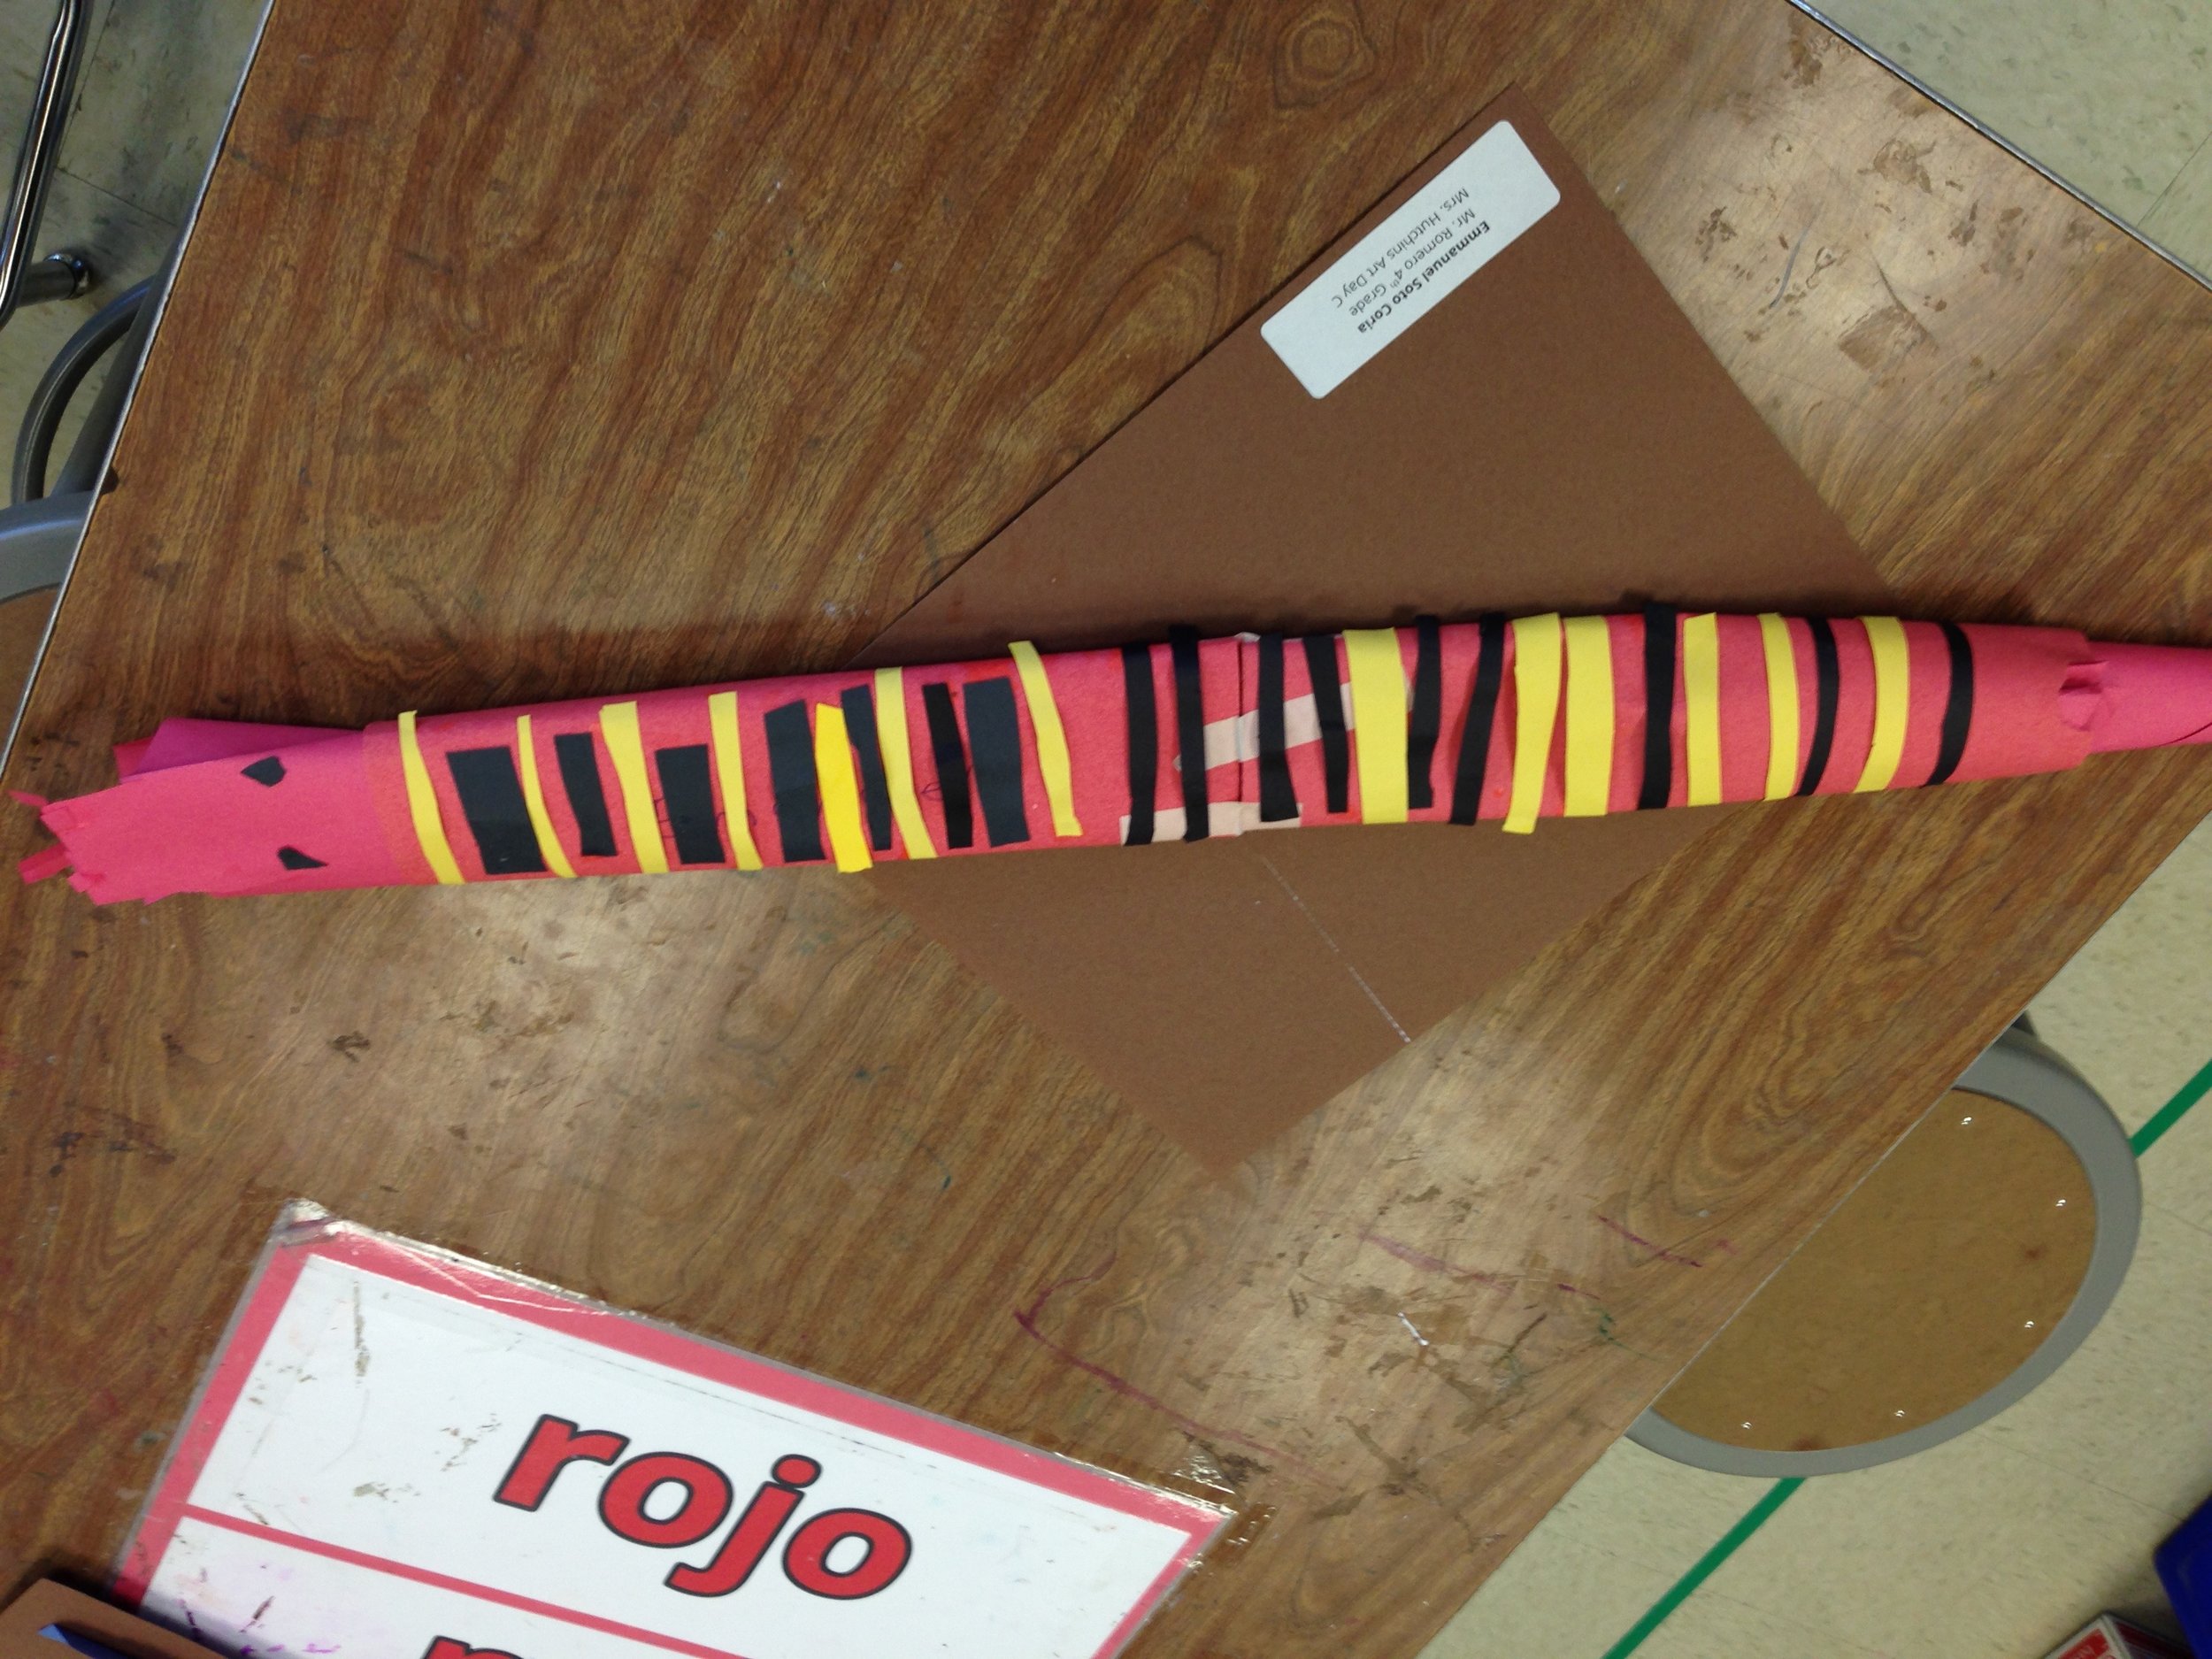
We talked about form (for animal parts, like the belly or legs) and texture (e.g. the torn paper shows the soft feathers, and the cut paper shows the sharp teeth). The goal was for students to connect the quality of materials to characteristics of the animal. An interactive display board was one of the most helpful anchors for that objective. I attached rolled cylinders, rolled cones, curled strips of paper, folded prisms, torn strips of paper, twisted and braided paper, etcetera.
During this class dialogue, I asked students about an animal they wanted to make. E.g. I would call on Jorge, who would say “A Lion,” and then asked him to look at the board and point to something he could use for its form or texture. And he would respond, “A cylinder for the belly” and “curly paper for the mane.” Then I would turn to the class and ask, “Does anything else here remind you of a lion?” and they would respond with more ideas, like, “Cut zig-zags for the sharp teeth!” Throughout the course of the project, I would use the board to talk 1-1 with students, especially when they were stuck on what part of the animal they should make next, and how.
After this introductory dialogue, I showed students where/how to get their materials and I transitioned them to work-time by asking, “Who will start by making the animal’s head? Who will start with the feet? When I call your table, get your materials then get started.” Down to this transition, which helps the student visualize how to get started, I delivered this lesson based on techniques I learned in grad school.
Lessons 4 and 5…and 6: Staying Motivated and On Task
Enter here the main challenges of this unit, for my particular student population. To sum it up, my kiddos were used to a lot more structure in the art classroom (i.e. step by step procedures, with less but still some opportunity to individualize their art). They had a difficult time creating individual artwork as independently as prompted by this unit.
They found it difficult to take risks and often felt frustrated until I talked with them. “I don’t know what to do” was a too-often repeated statement. I would model risk-taking to the class and praise student accomplishments at the beginning of each new session. I am so thankful I was undergoing training on Social Emotional Learning, and it definitely helped to praise my students whenever they demonstrated positive Studio Habits of Mind (shout out to Eisner & Hetland!).
I provided differentiation, i.e. pre-made paper prisms and cylinders, having certain students to work in pairs, and a timed paper exploration station. Advanced students took on helper roles and had free-time activities they could choose to work on. Still, most students spent a lot of time off task until I had 1-1 dialogue with them, guiding them to problem-solve the next step. I put incentives and consequences to work. There were moments of creative play that brought out fantastic details in their work. But most students showed difficulty with staying focused, and (as I now understand is an important need for my students) I spent a lot of time on behavioral interventions. I work at a Title-1 school that has a large Special Behavioral Services unit (at one point we had two units), and often times our wonderful T.A.s are spread thin. A large part of my job is helping my students to improve their emotional and social skills, deescalate conflicts, and maintain a safe and positive classroom climate.
At this time I was working with an Art Teacher mentor, a veteran teacher in my district who taught with the same student population at a school just a few blocks away from me. My district has a program that assigns a mentor to first year teachers, and we are required to meet weekly. I am so happy I had this support! My mentor loved the higher-level thinking involved in the unit but quickly noted that it may be too ambitious. She gave me some feedback from the start that I needed to provide more structure to my students. Based on her feedback, I had students work from their inspiration photos (instead of the mind’s eye), and I showed examples before the students began their own work. These anchors are deviations from my grad school’s presentation of the “ideal” unit. Ideally, as I learned, students at this age (developmentally, a key time for story-telling) should be prompted to visualize and manifest details from their own ideas about their animal.
As my professor also pointed out, I had to take an honest look at my students’ response to the unit. For its many rewards, it was overall very slowly paced and perhaps asked my students to reach a little too high, as they ended up spending so much time off task. Putting safe and kind behavior first, I found it a challenge to deliver 1-1 artistic guidance and the scaffolding most students needed to work at a more productive pace.
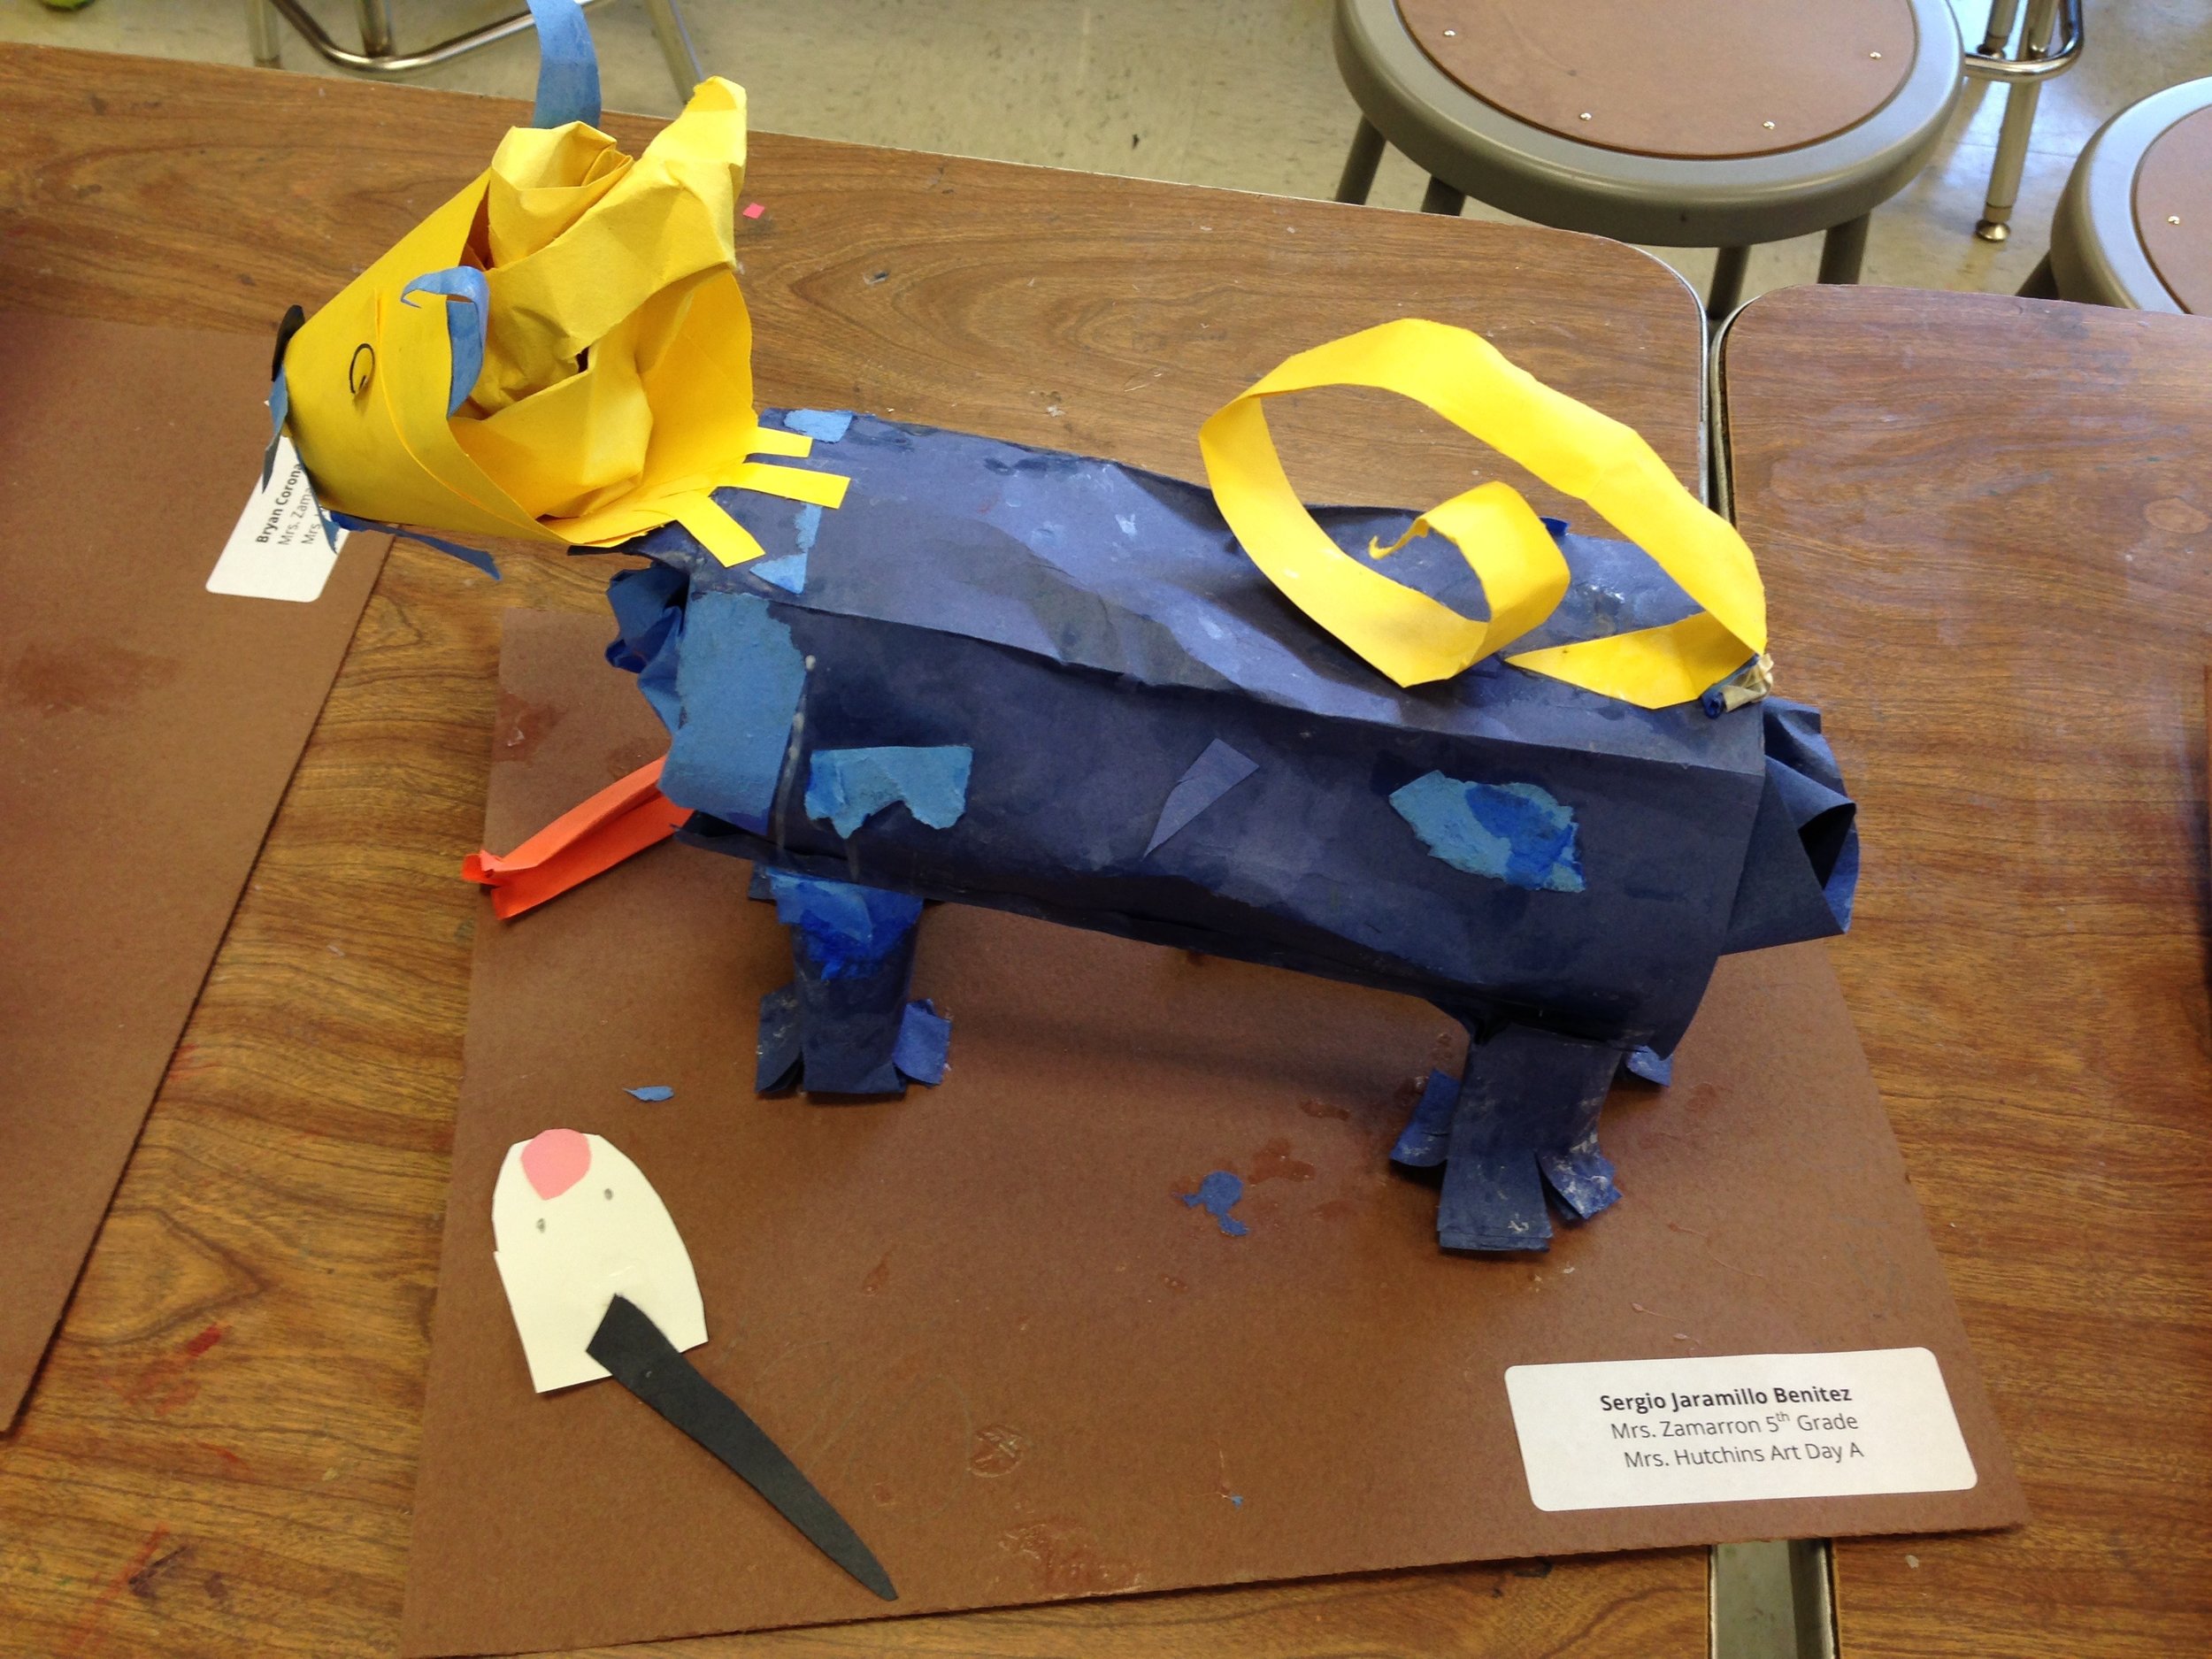
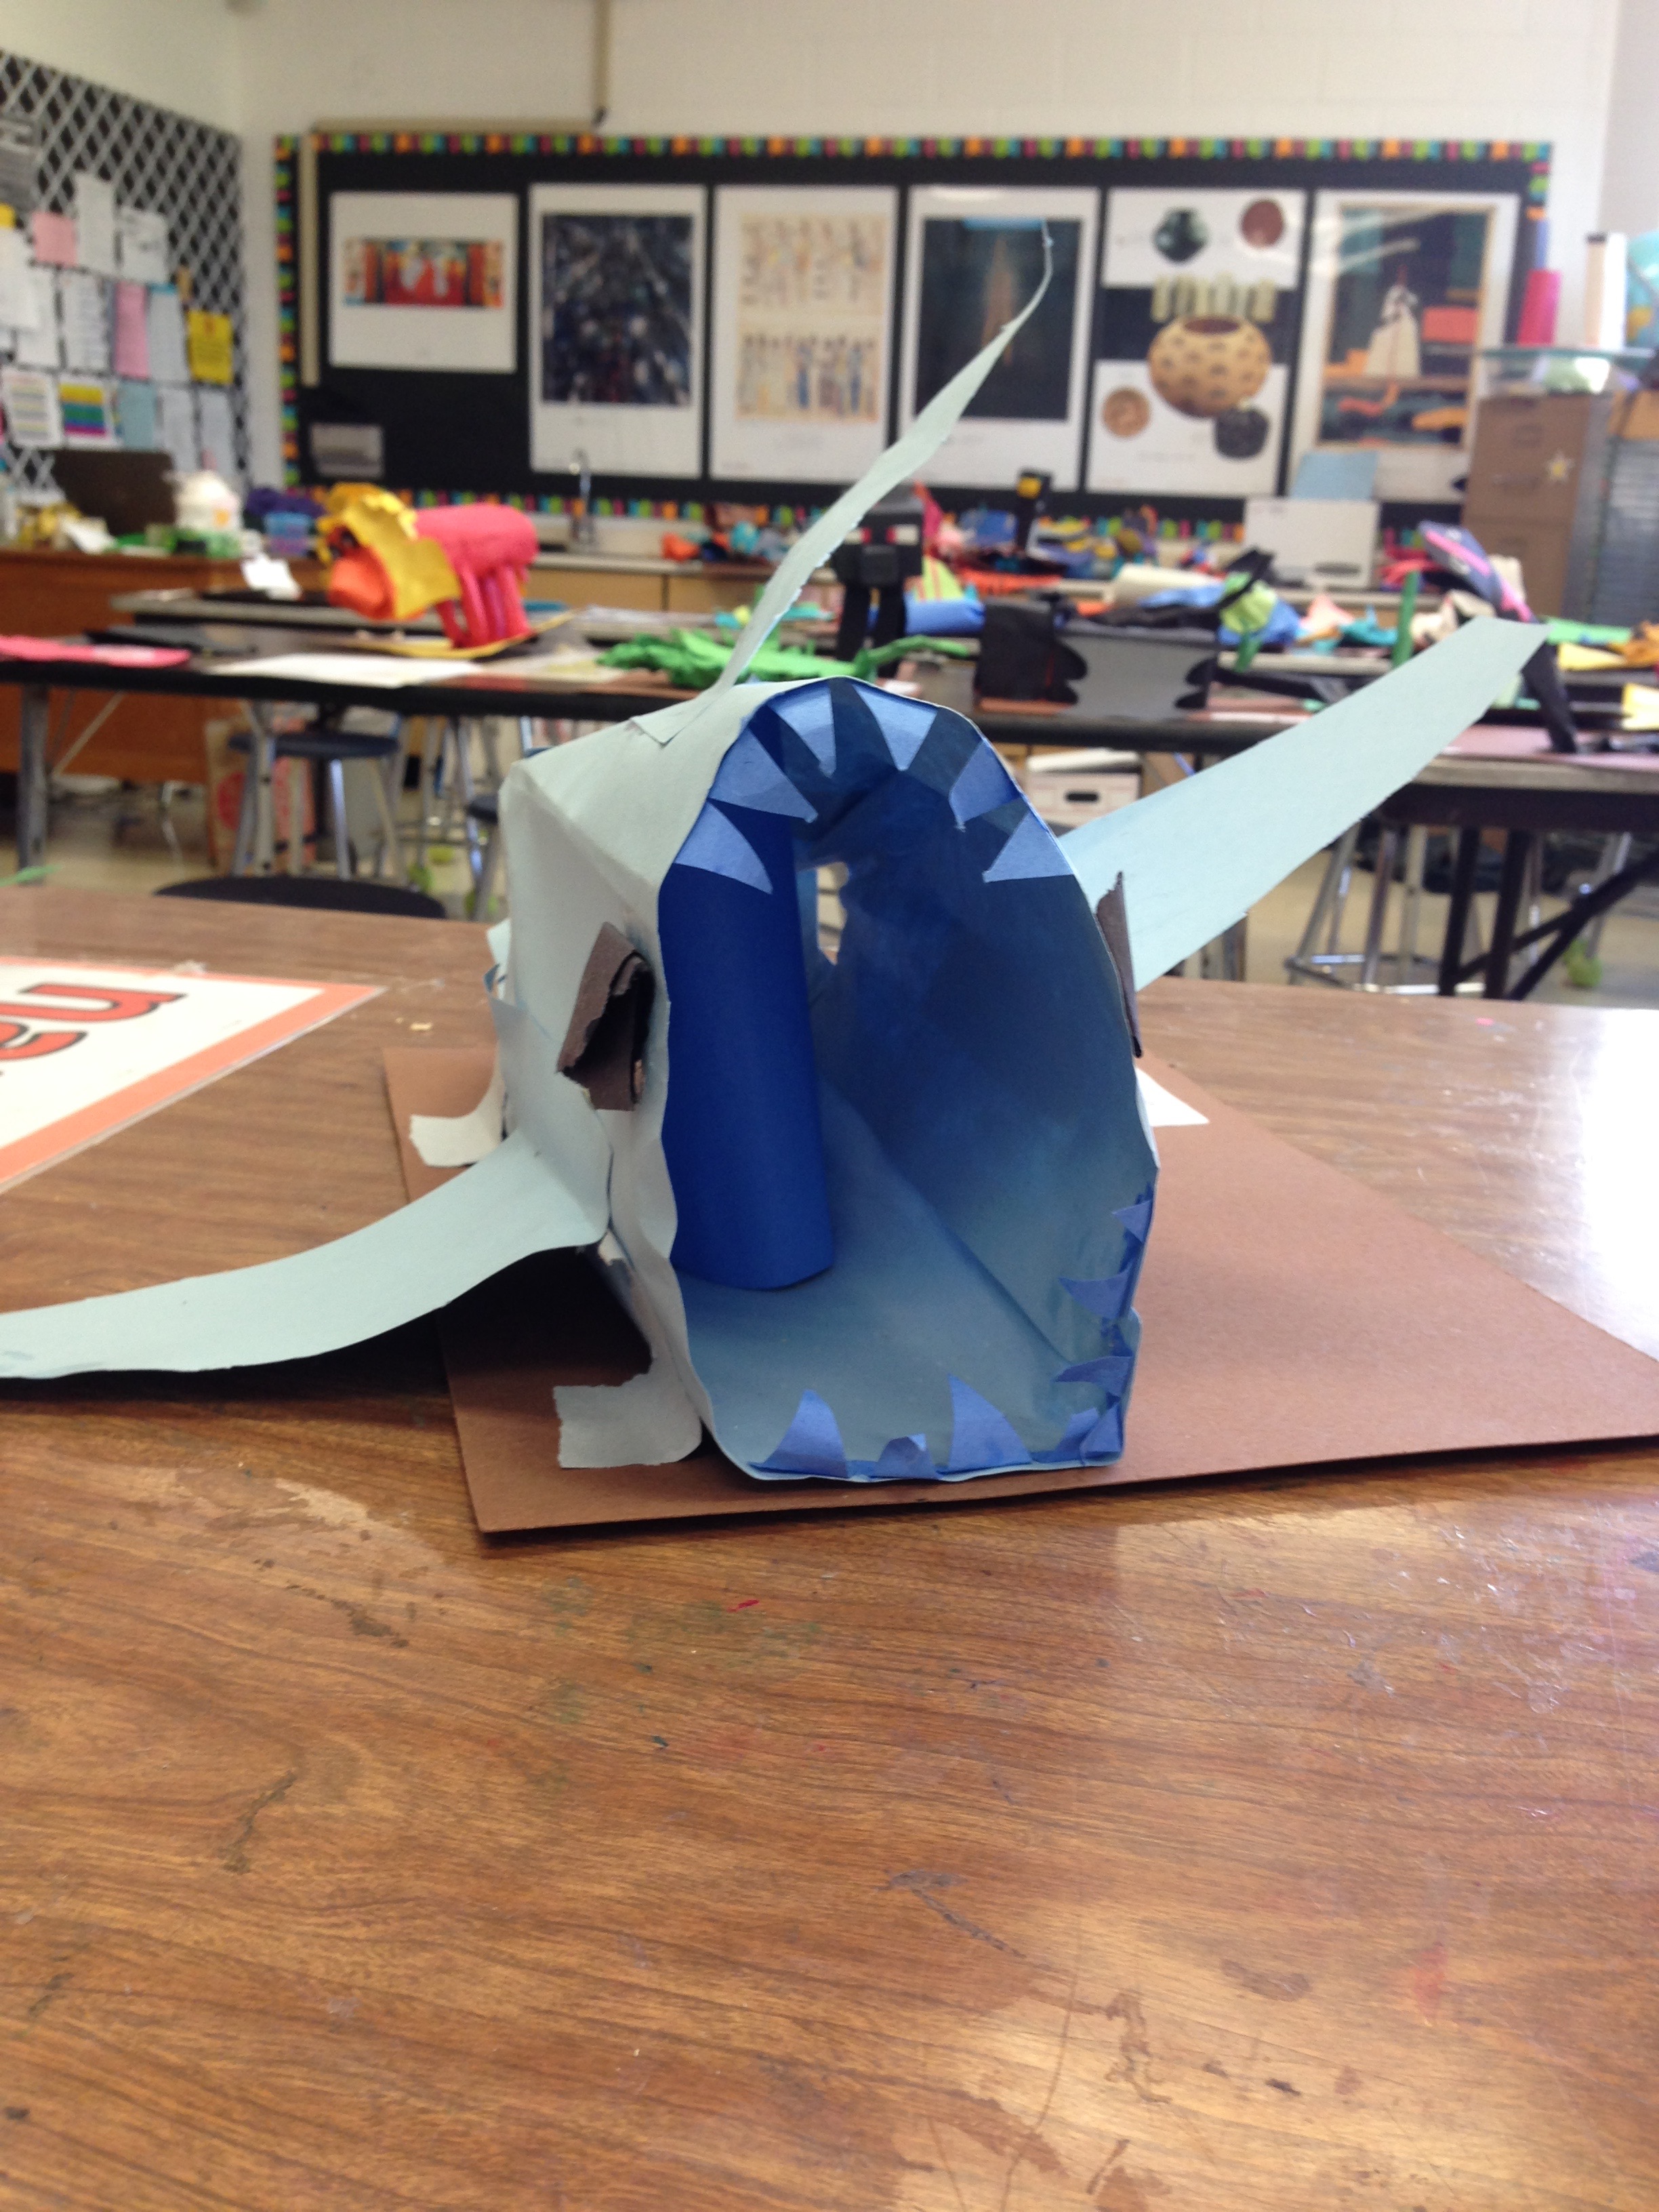
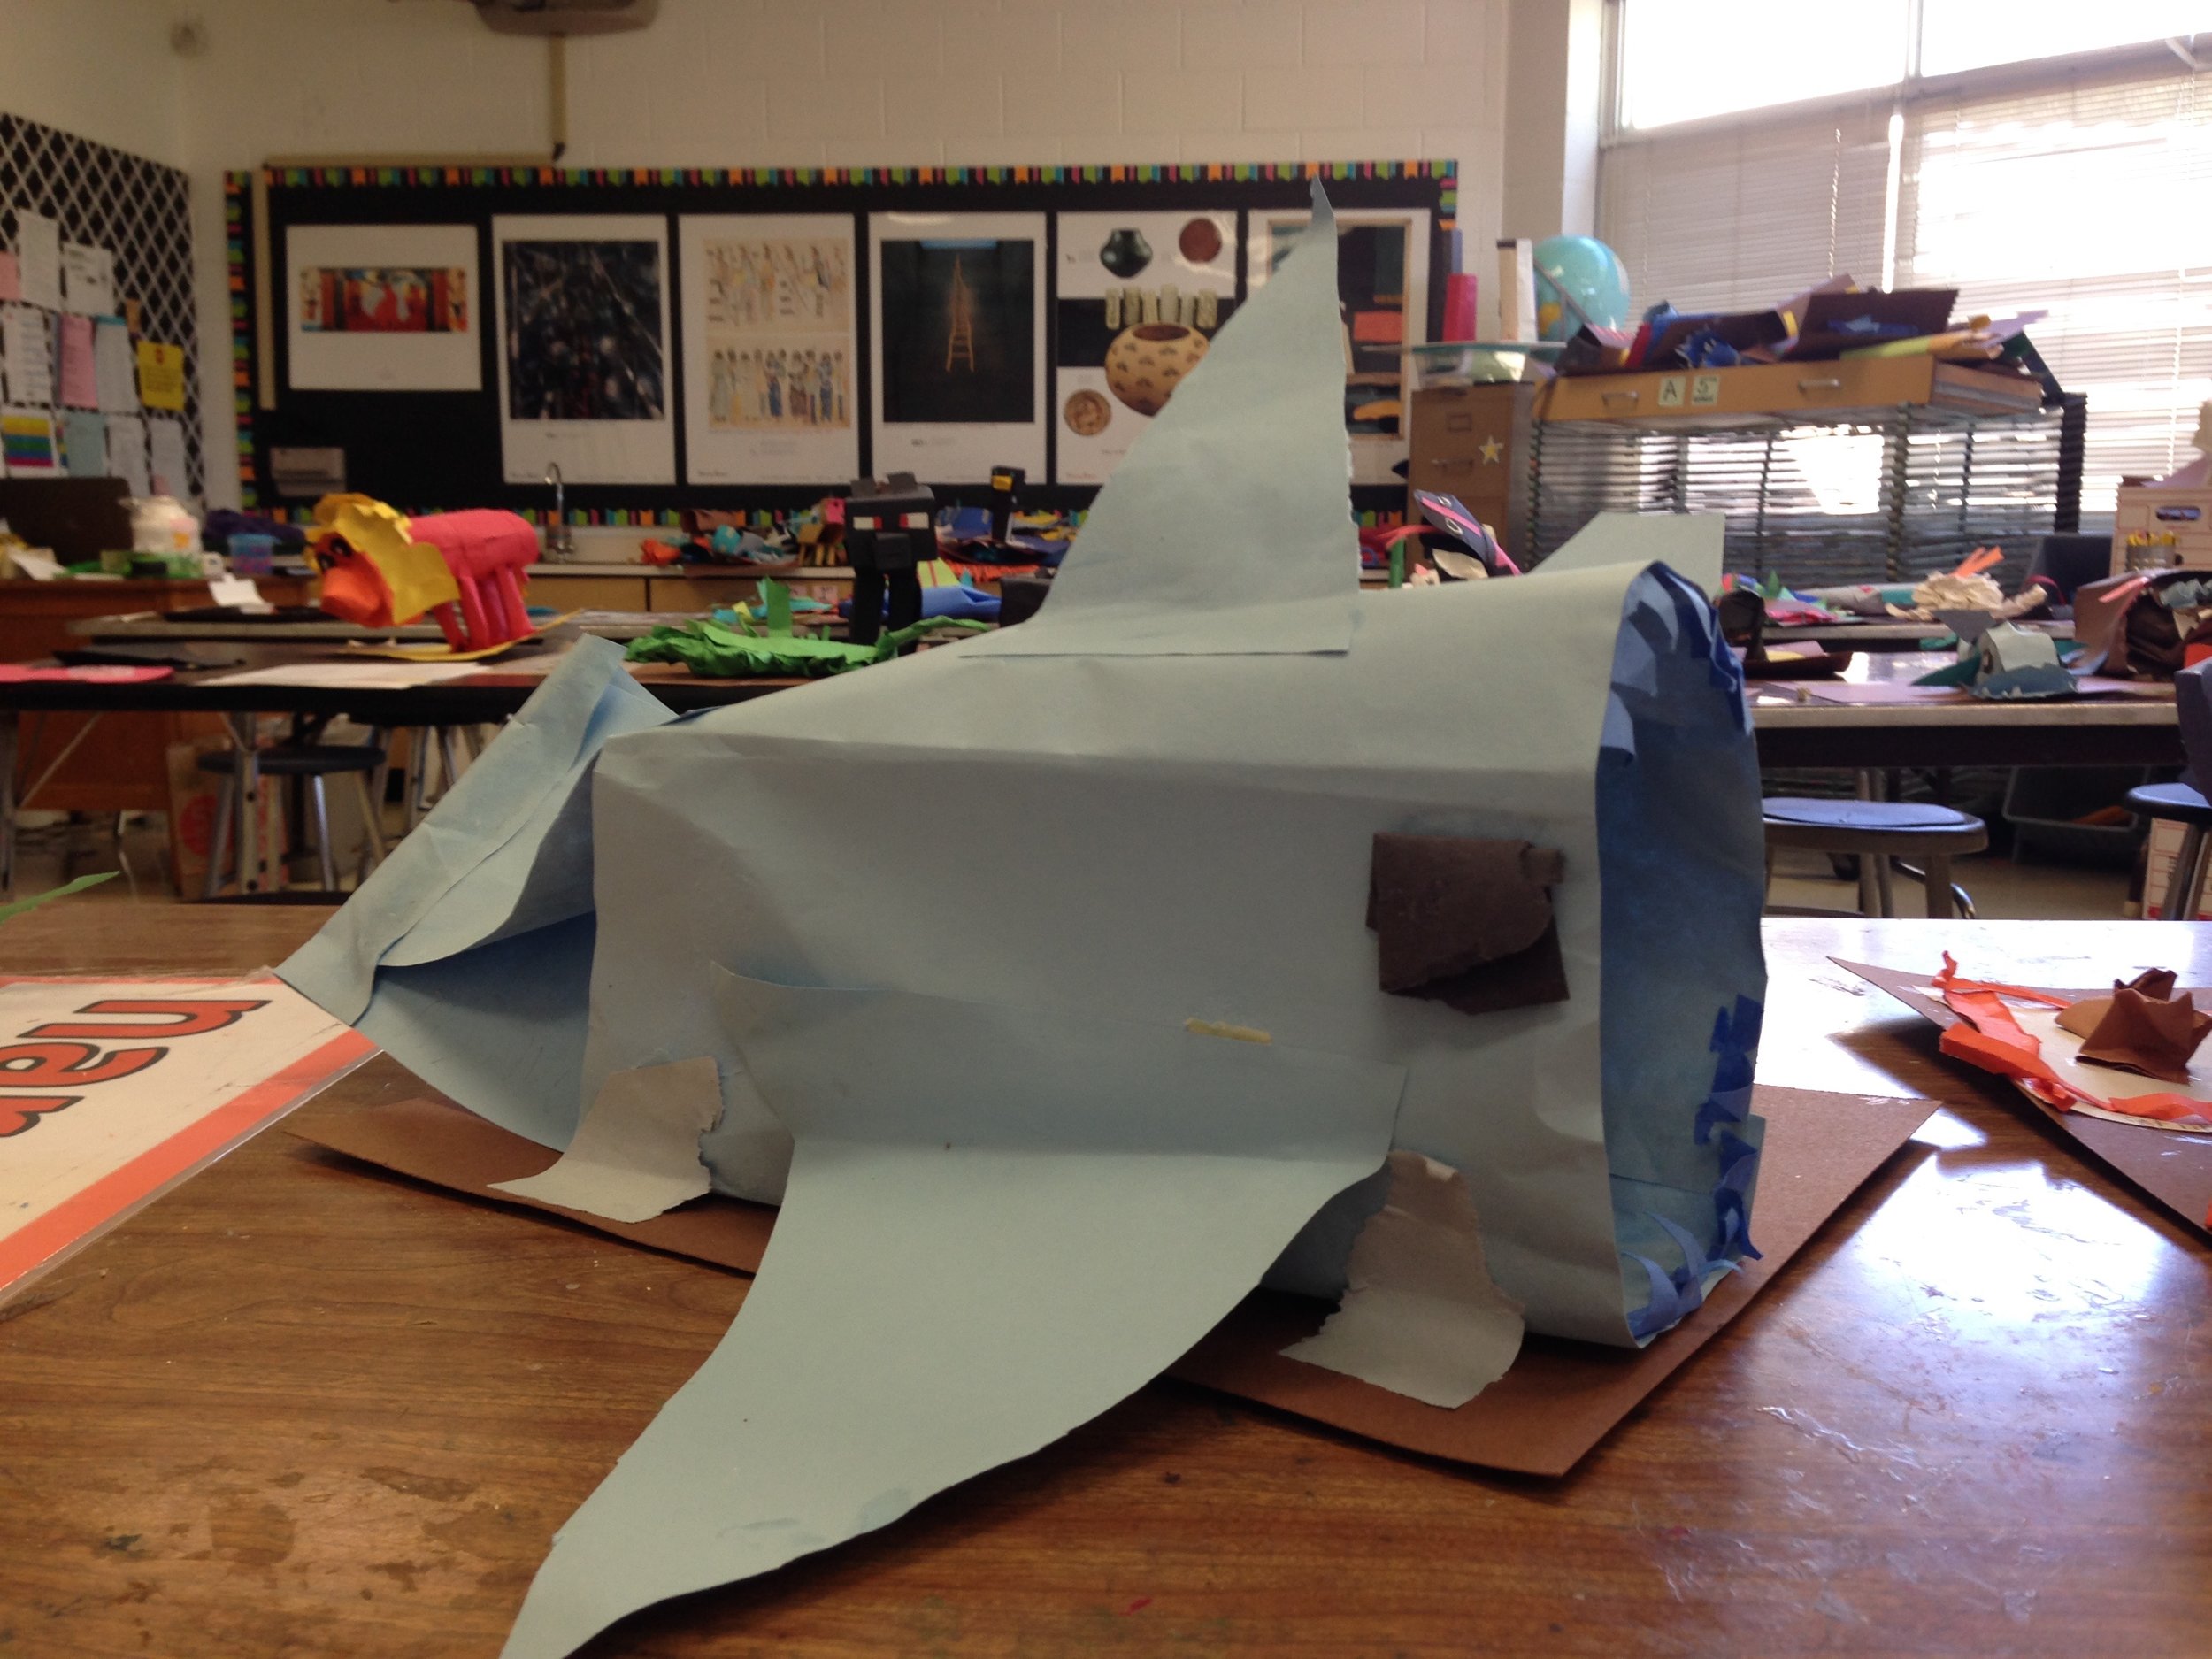
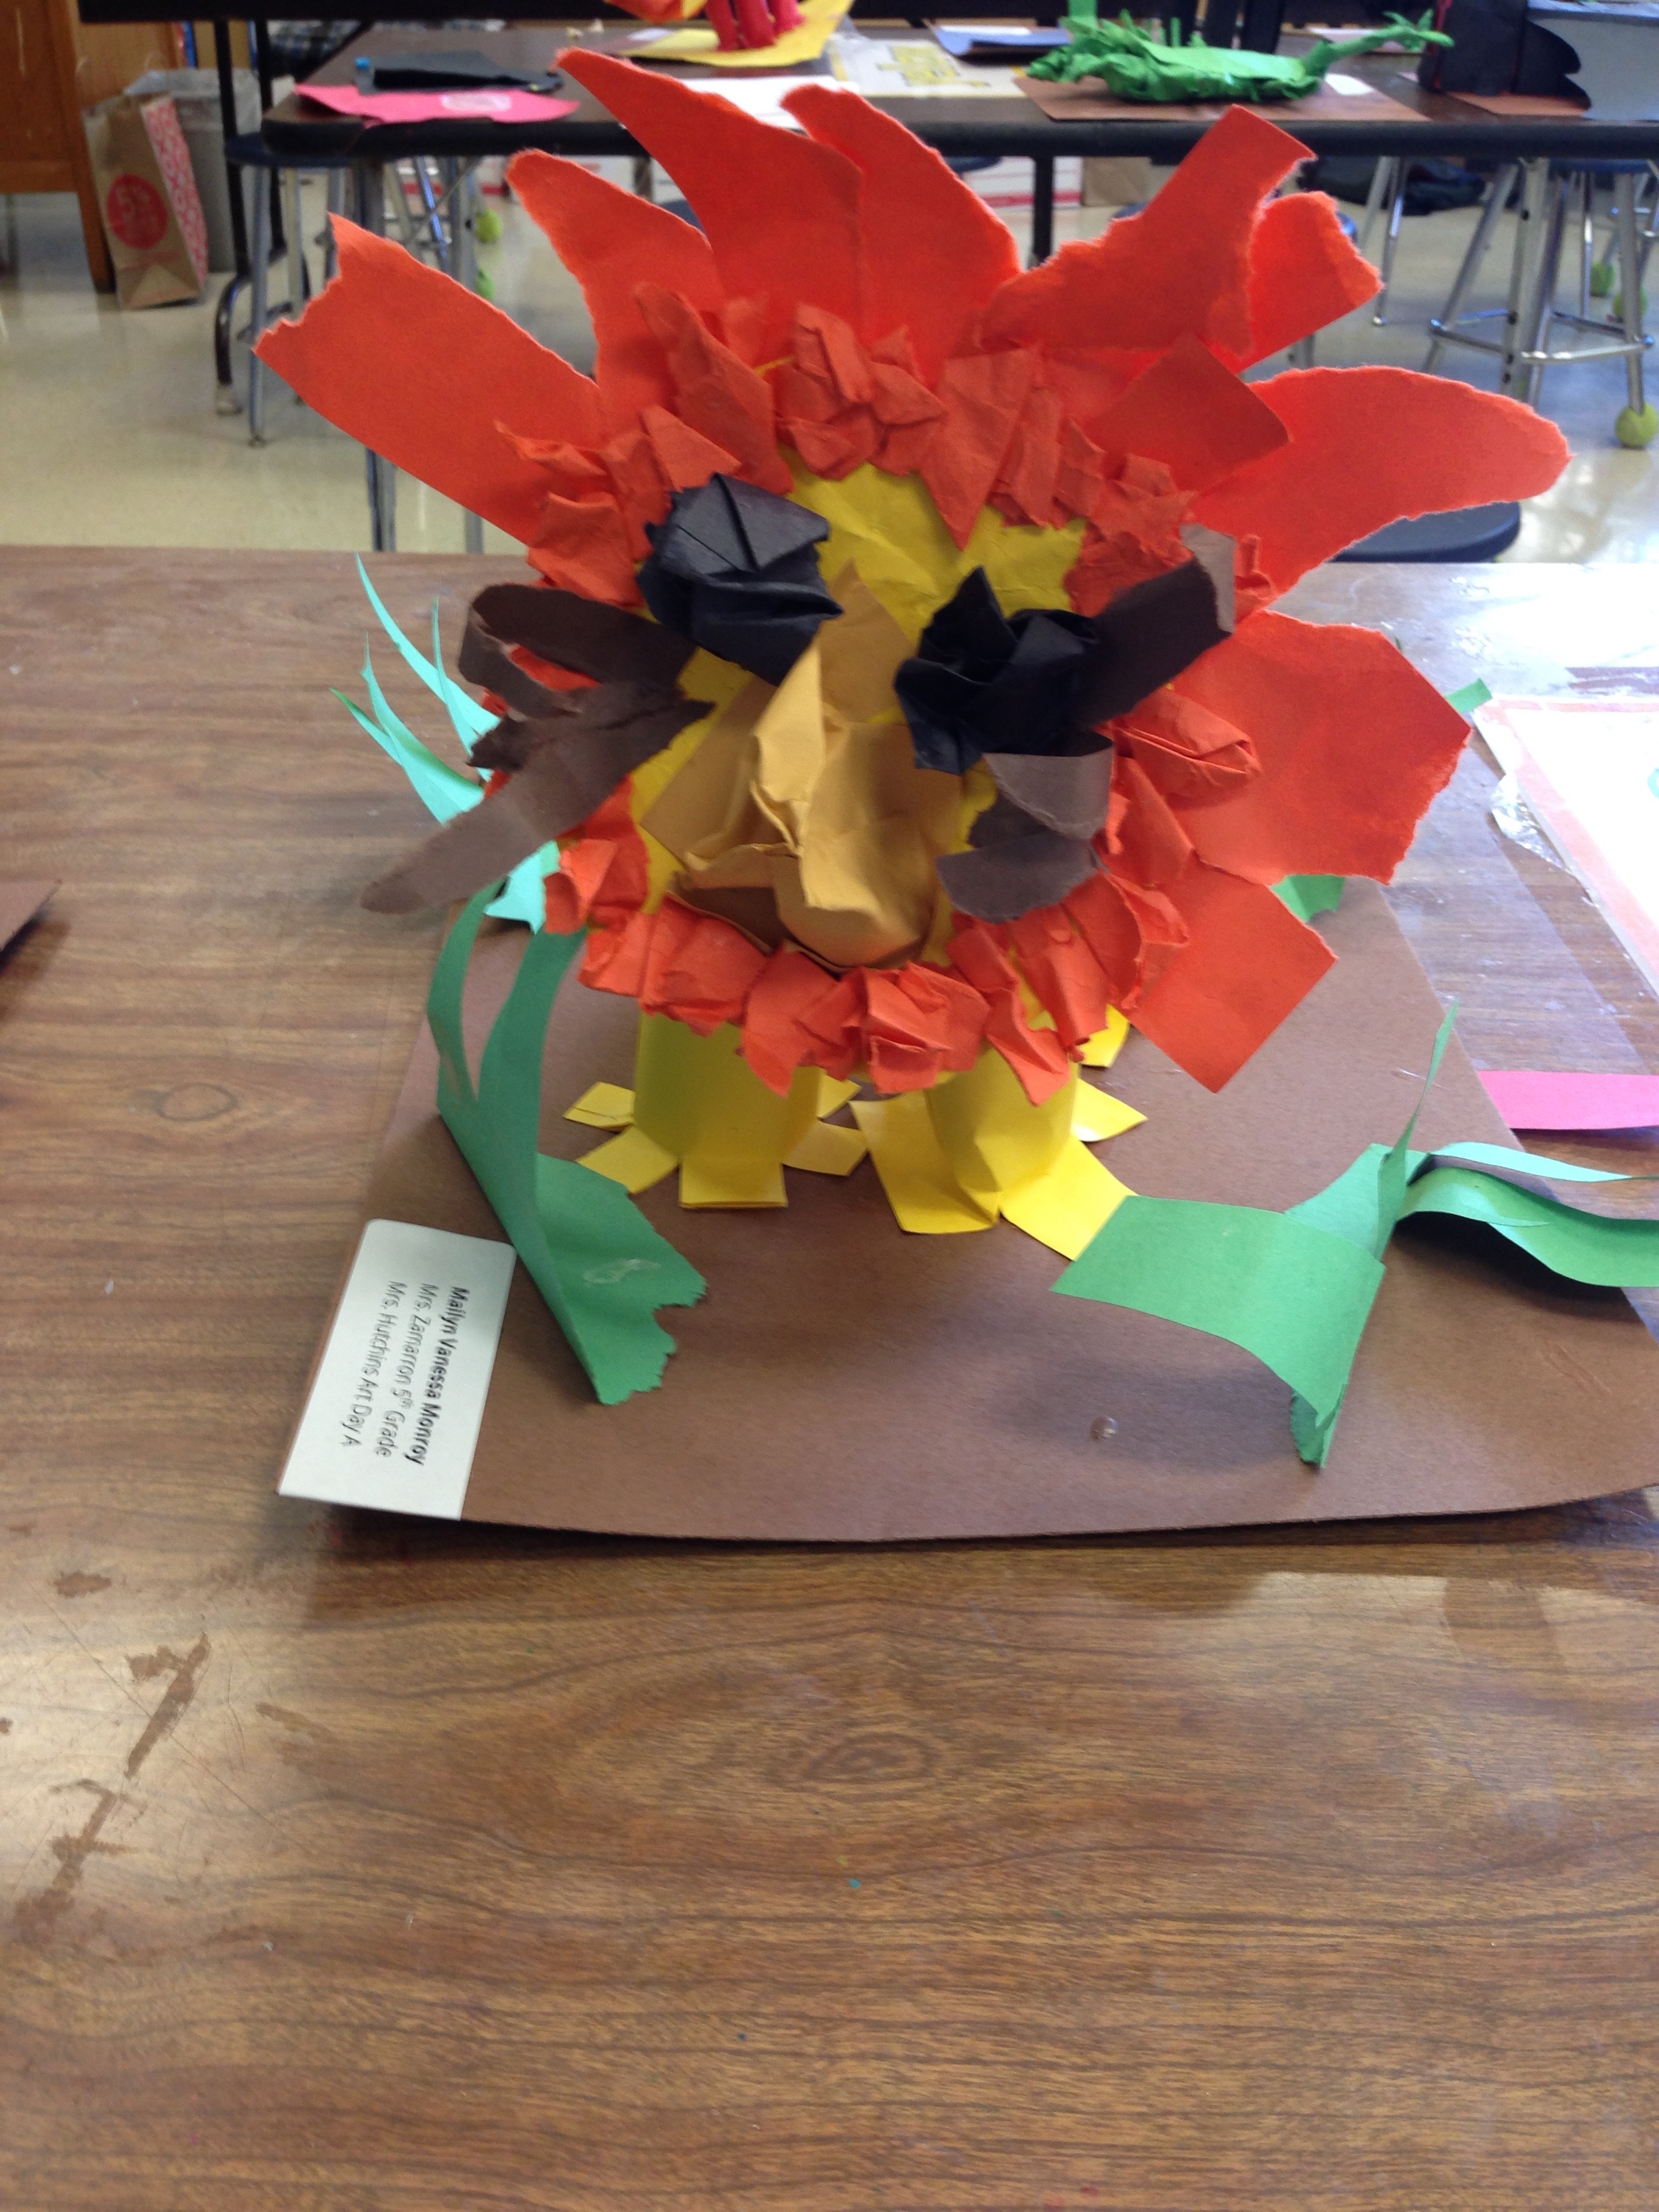
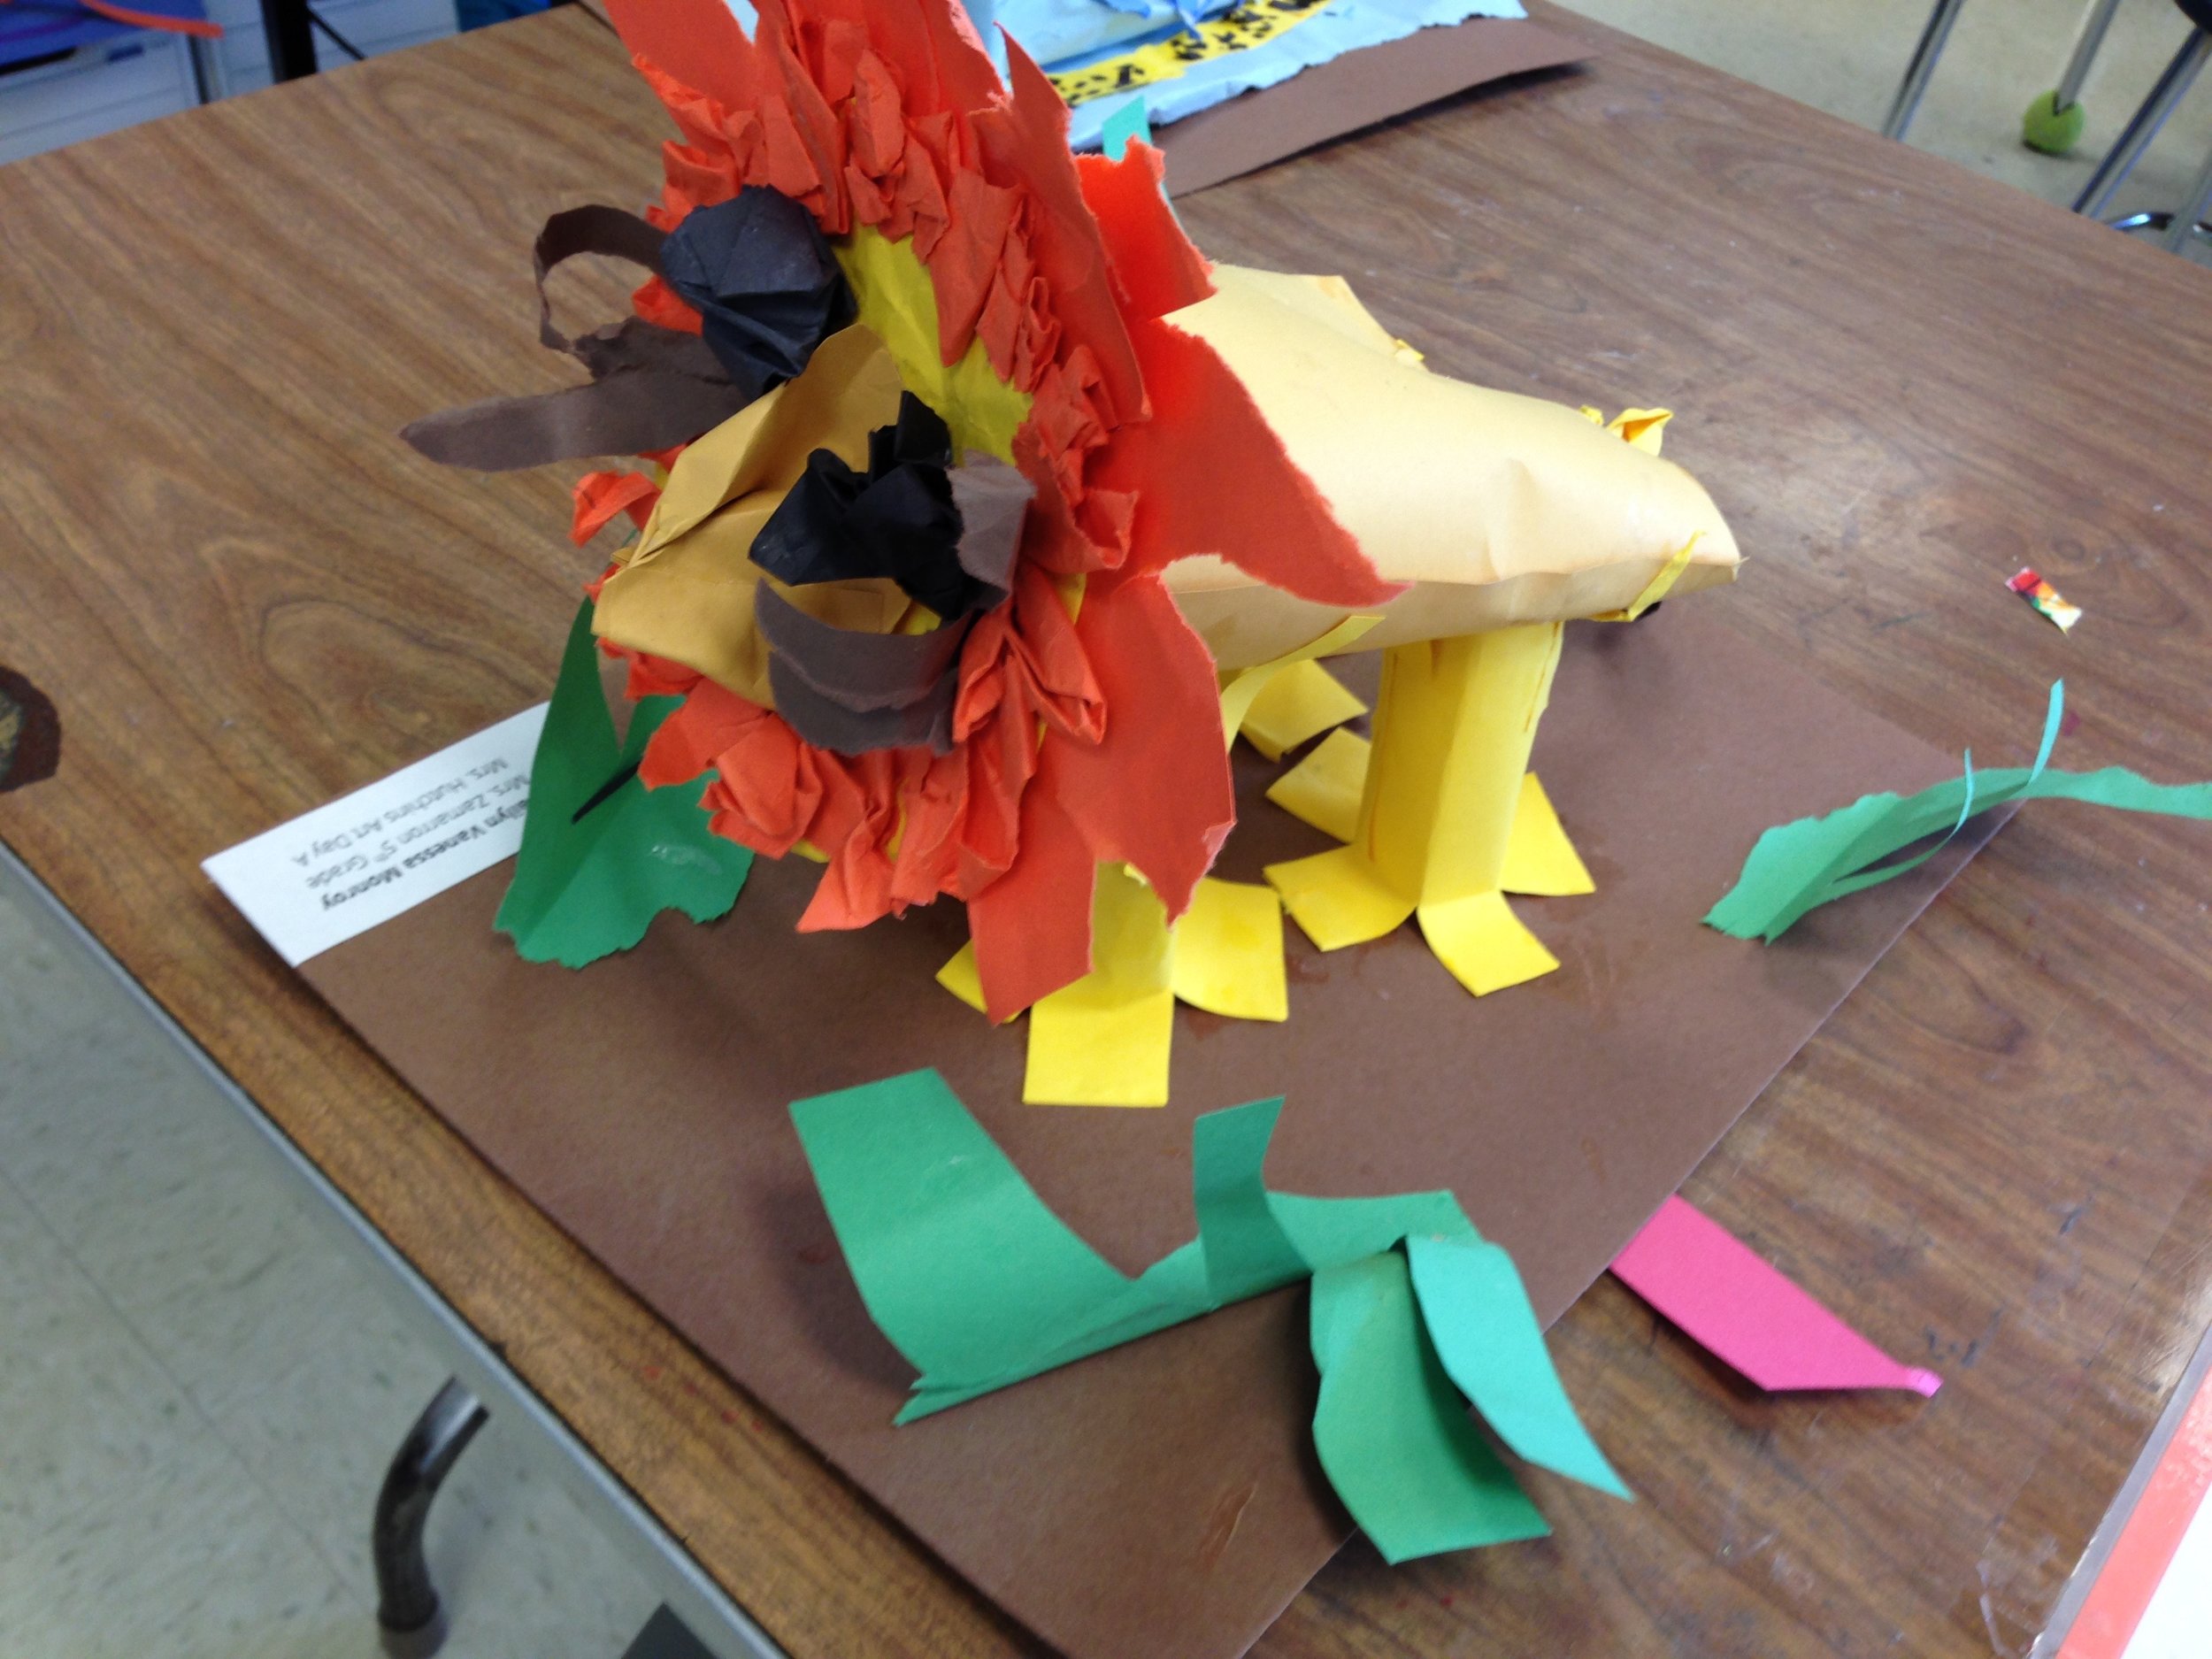
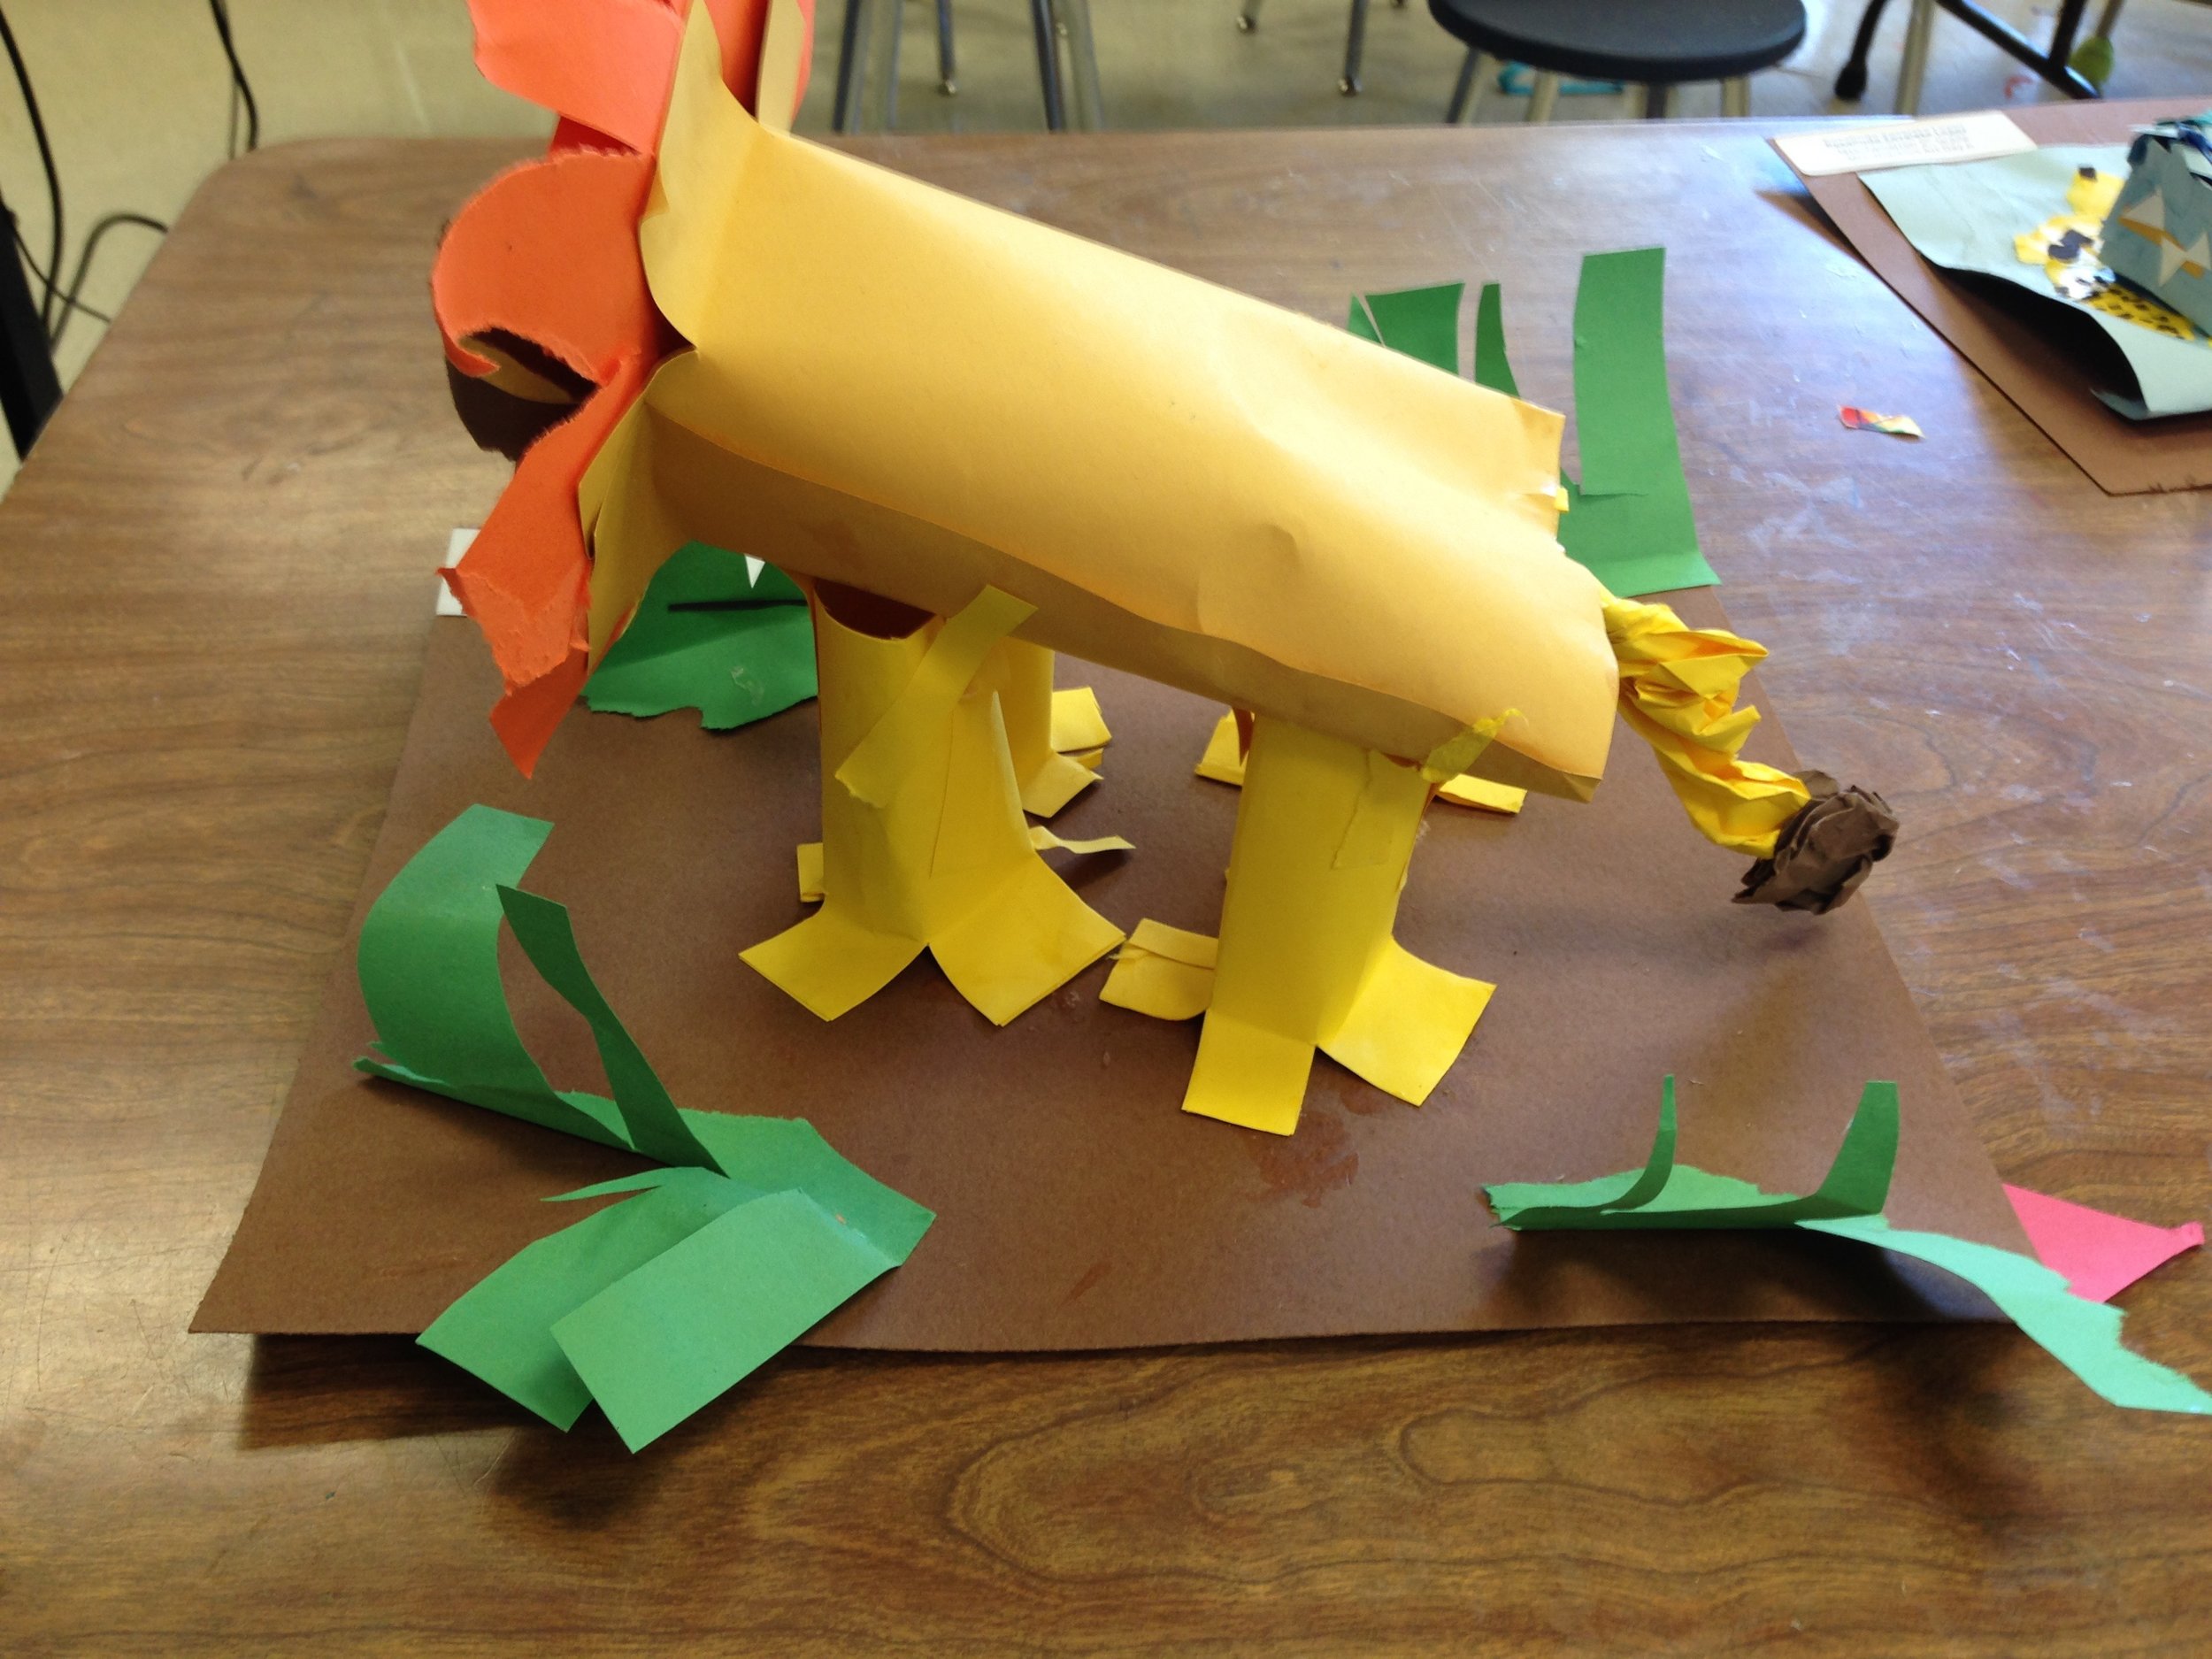
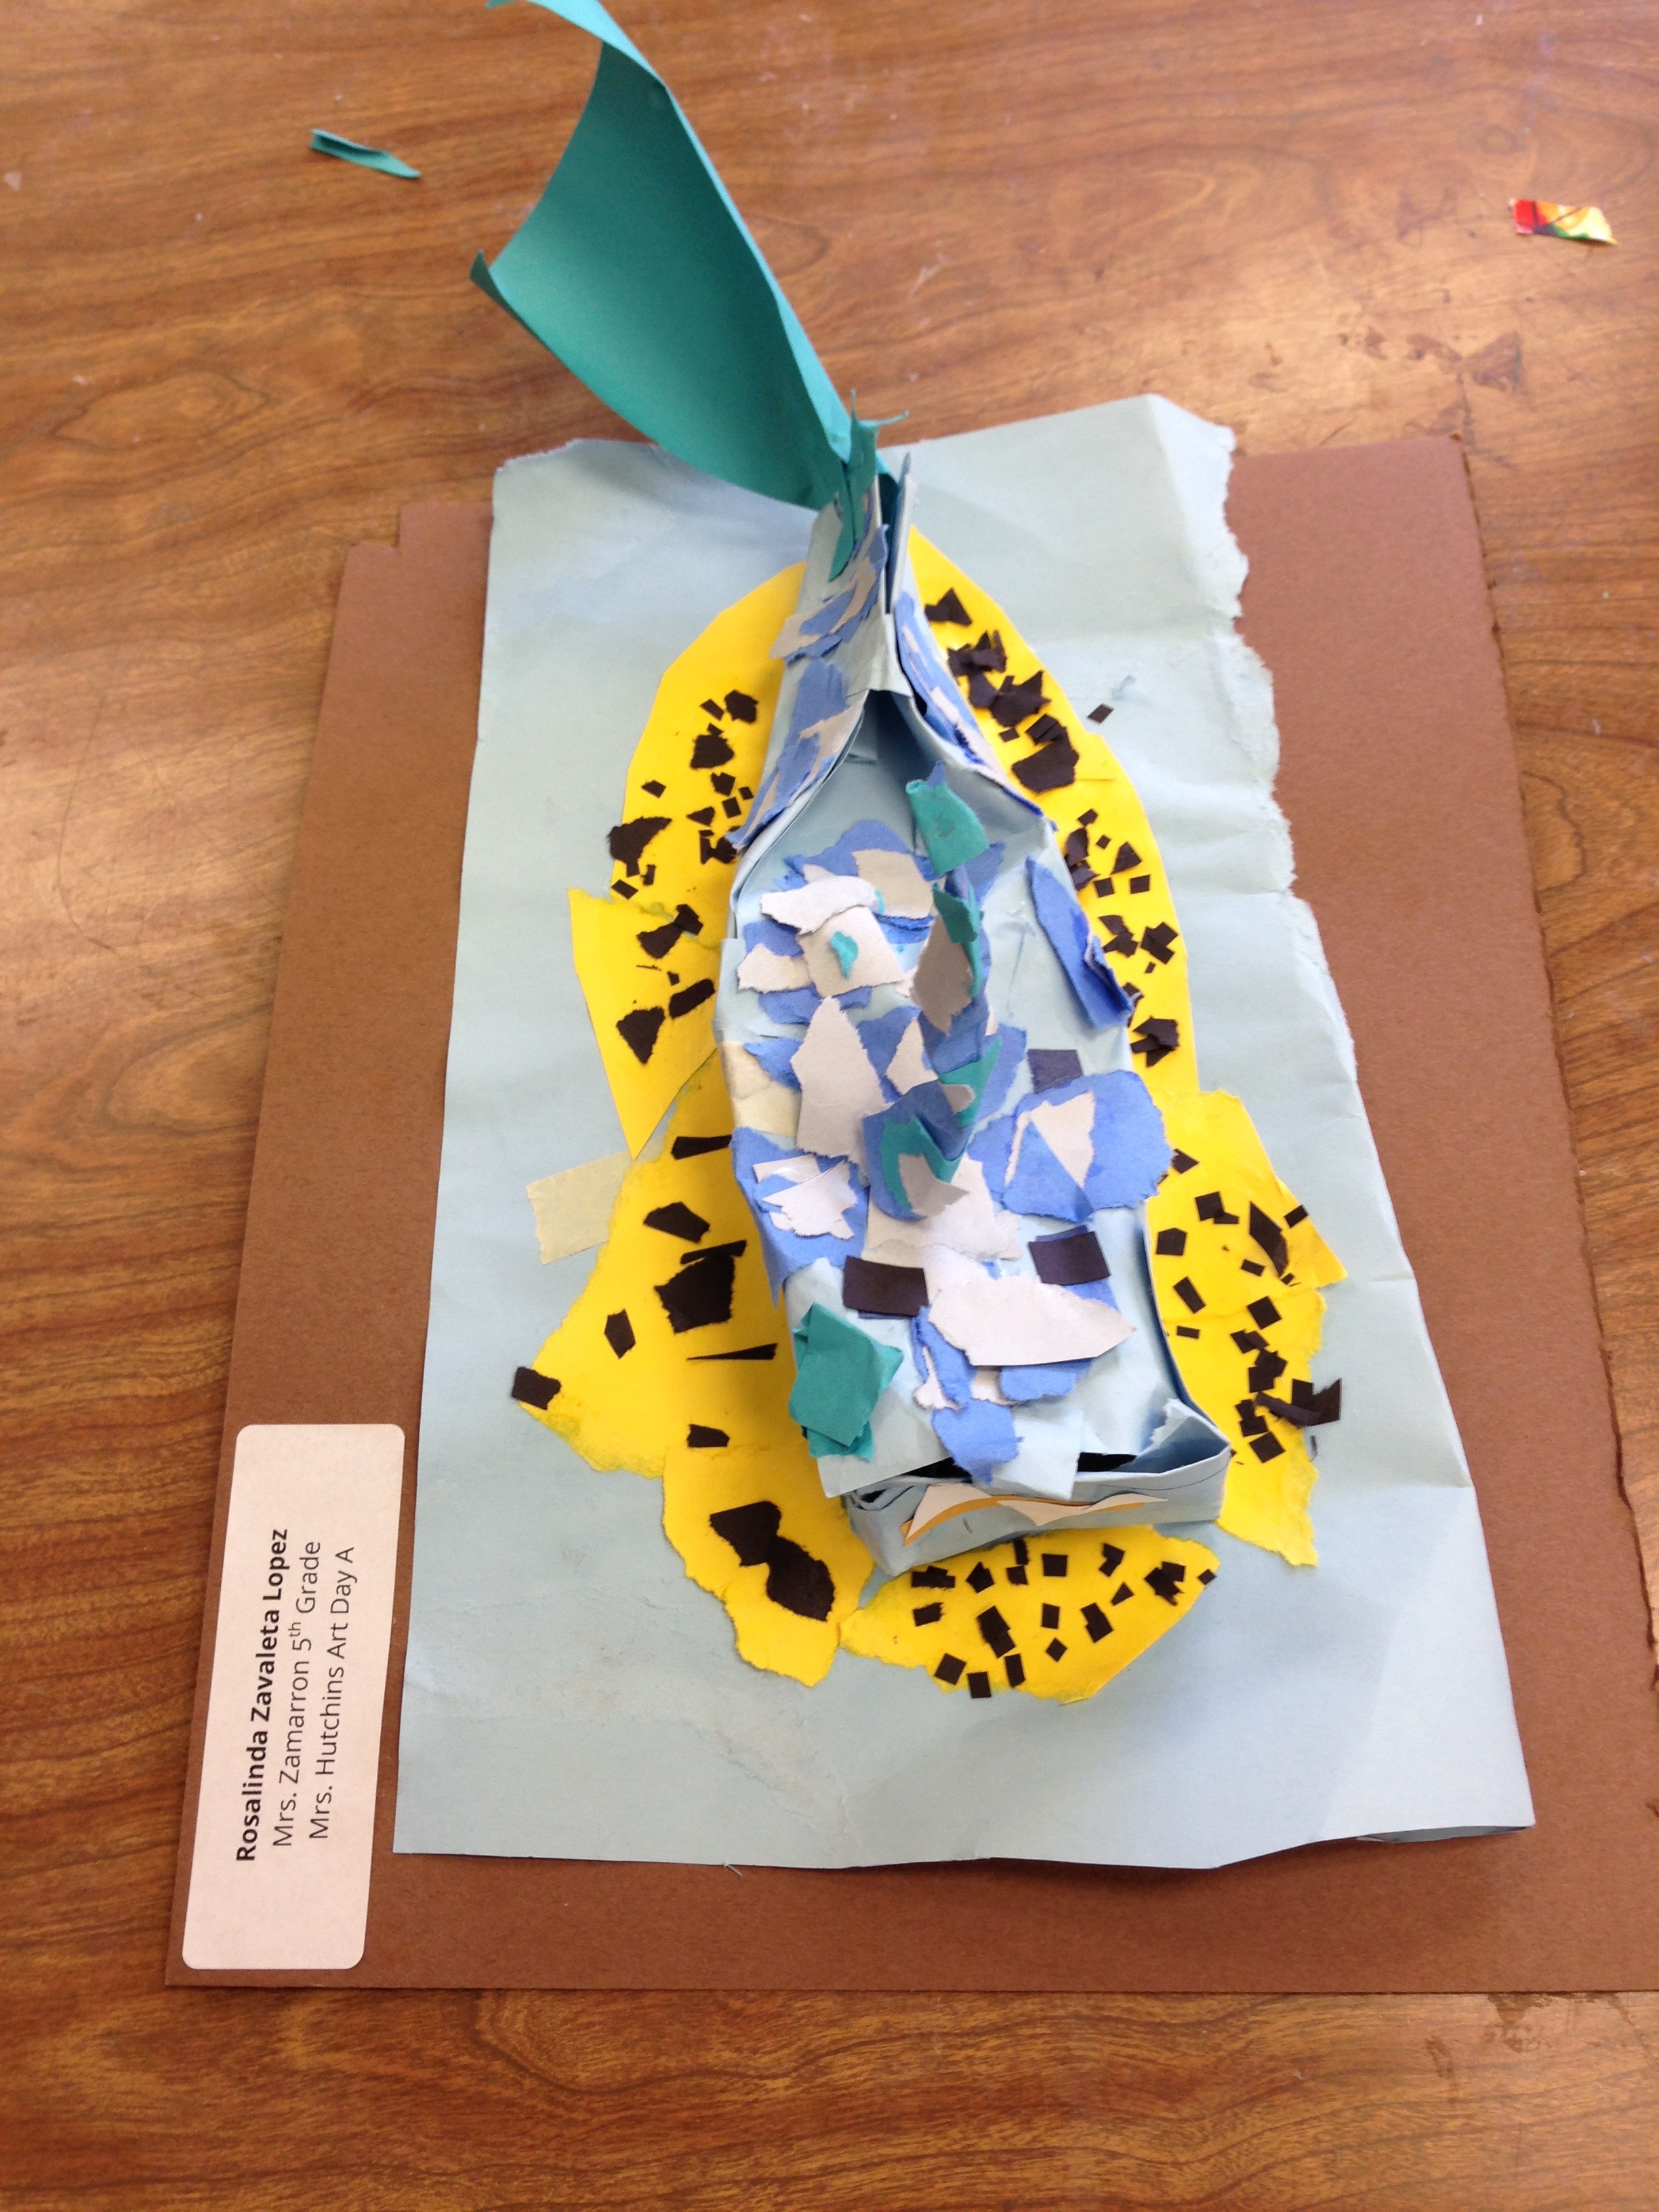
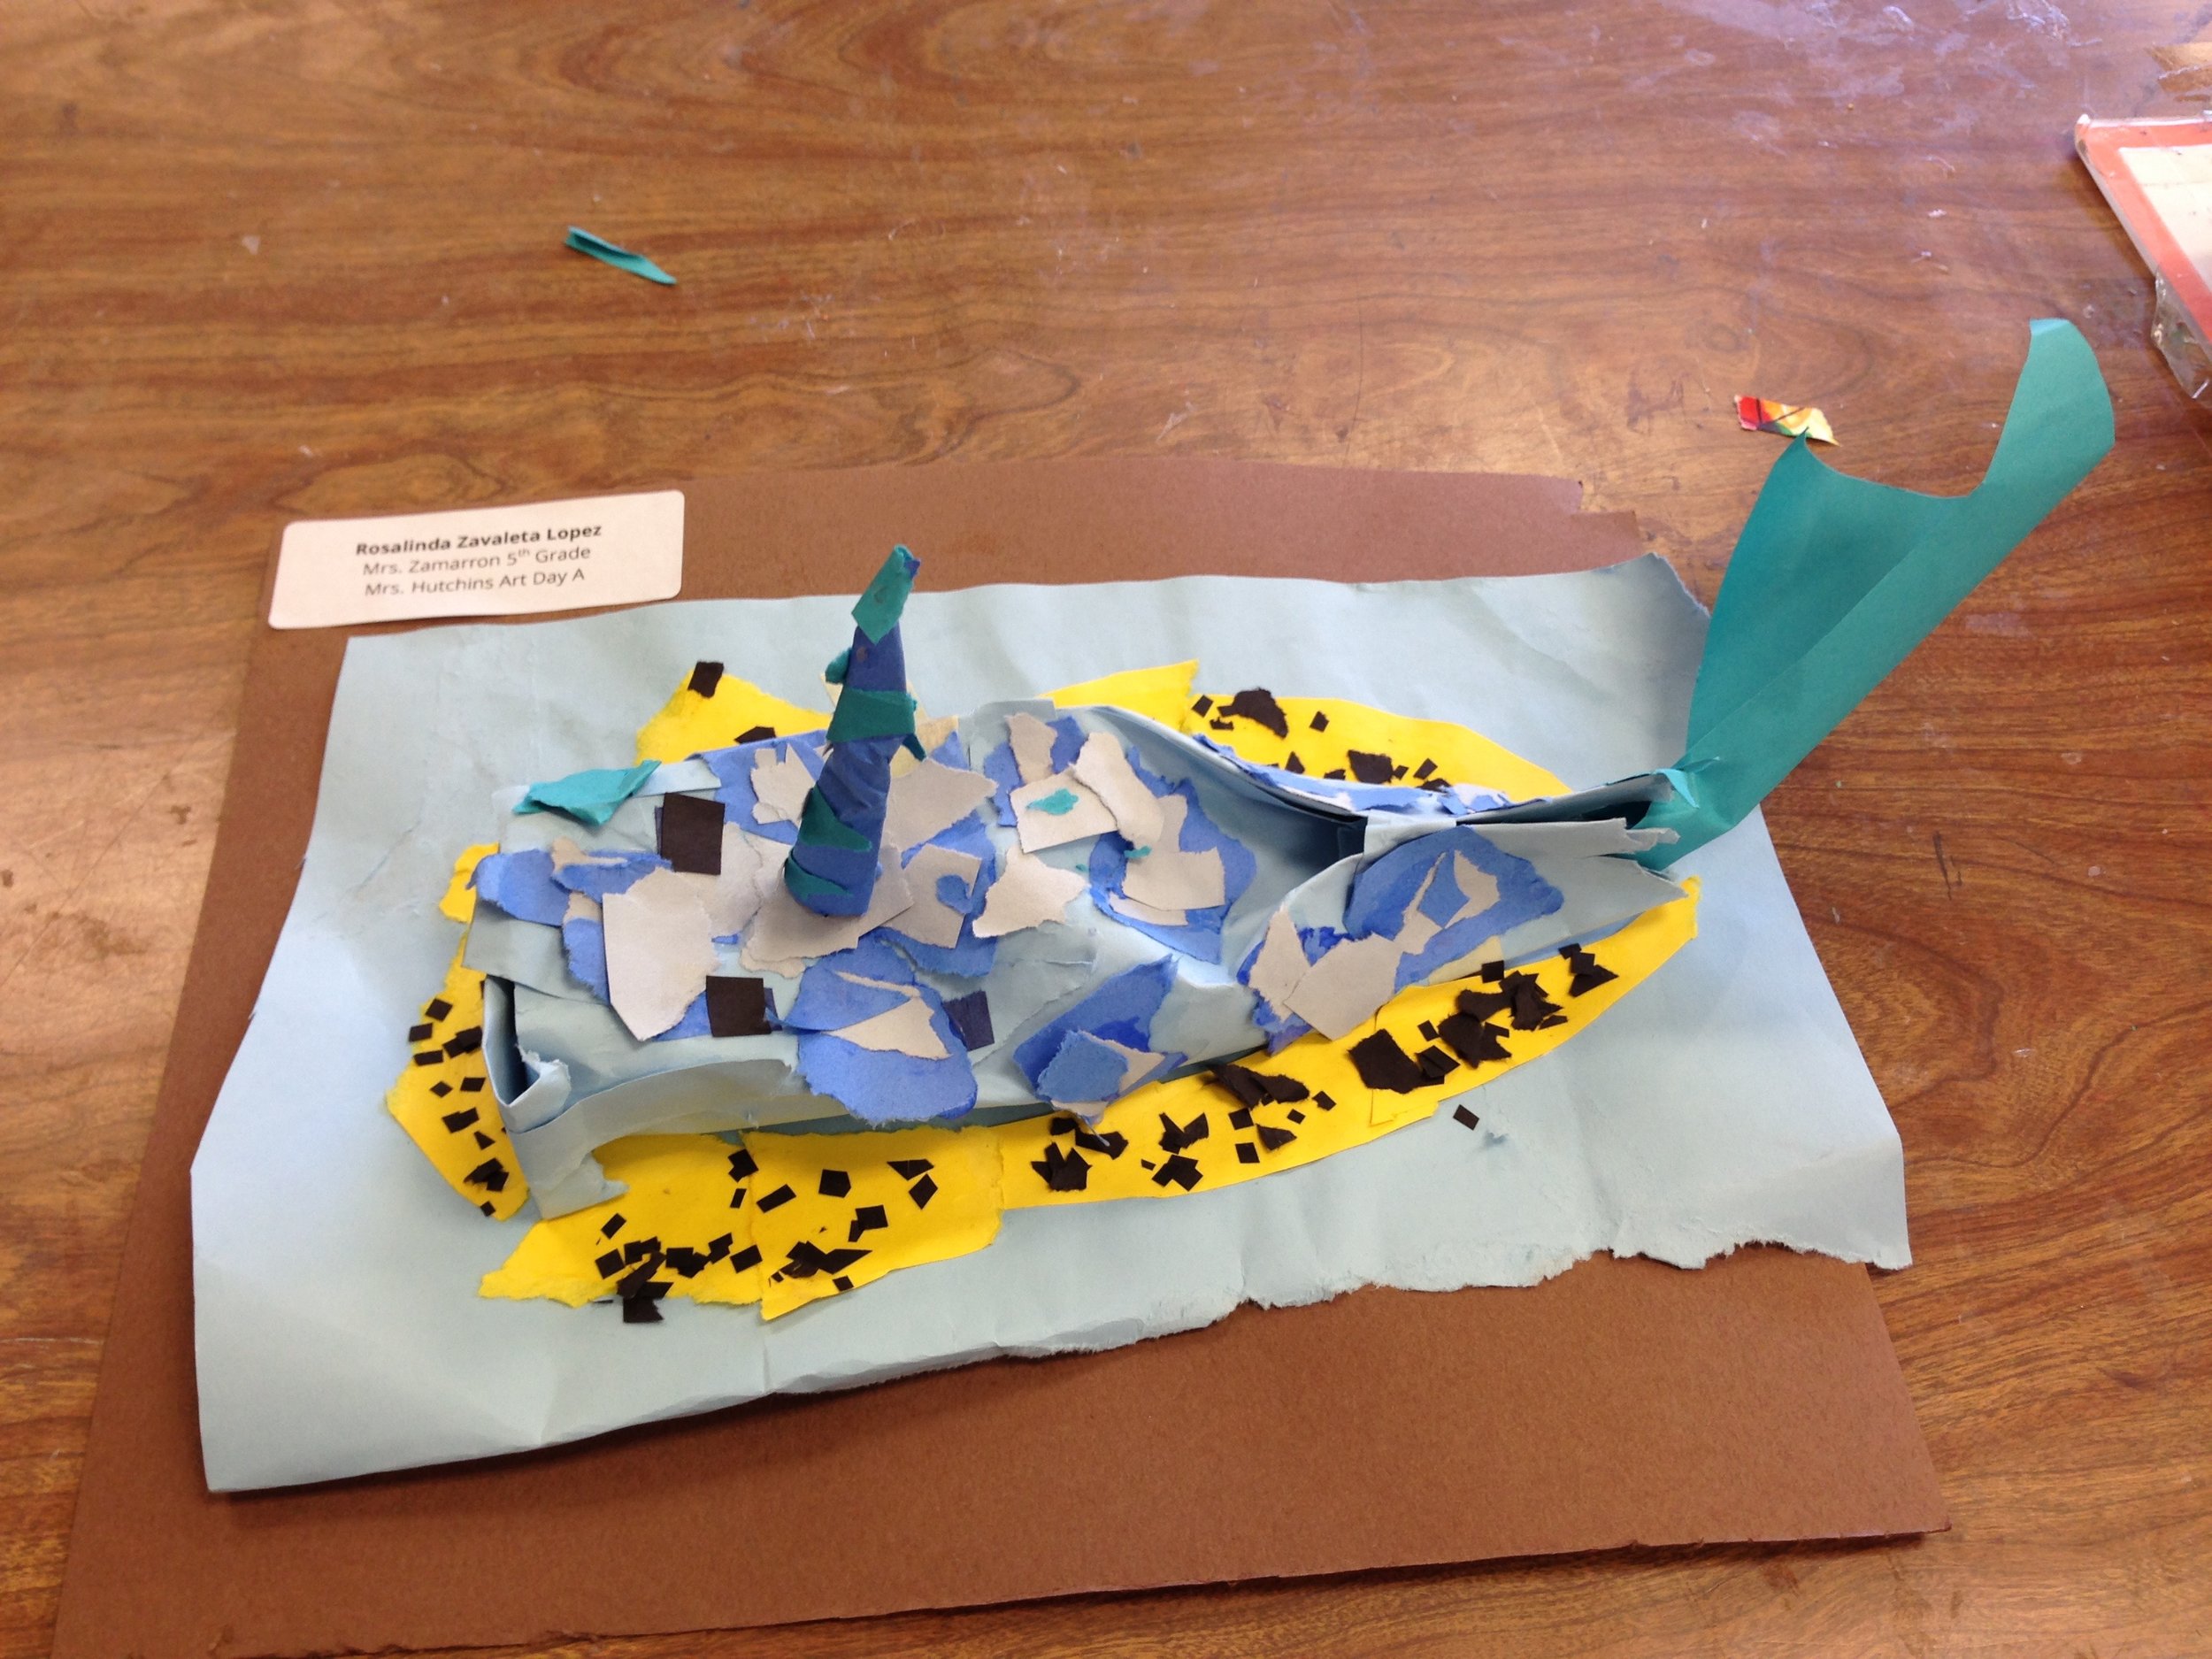
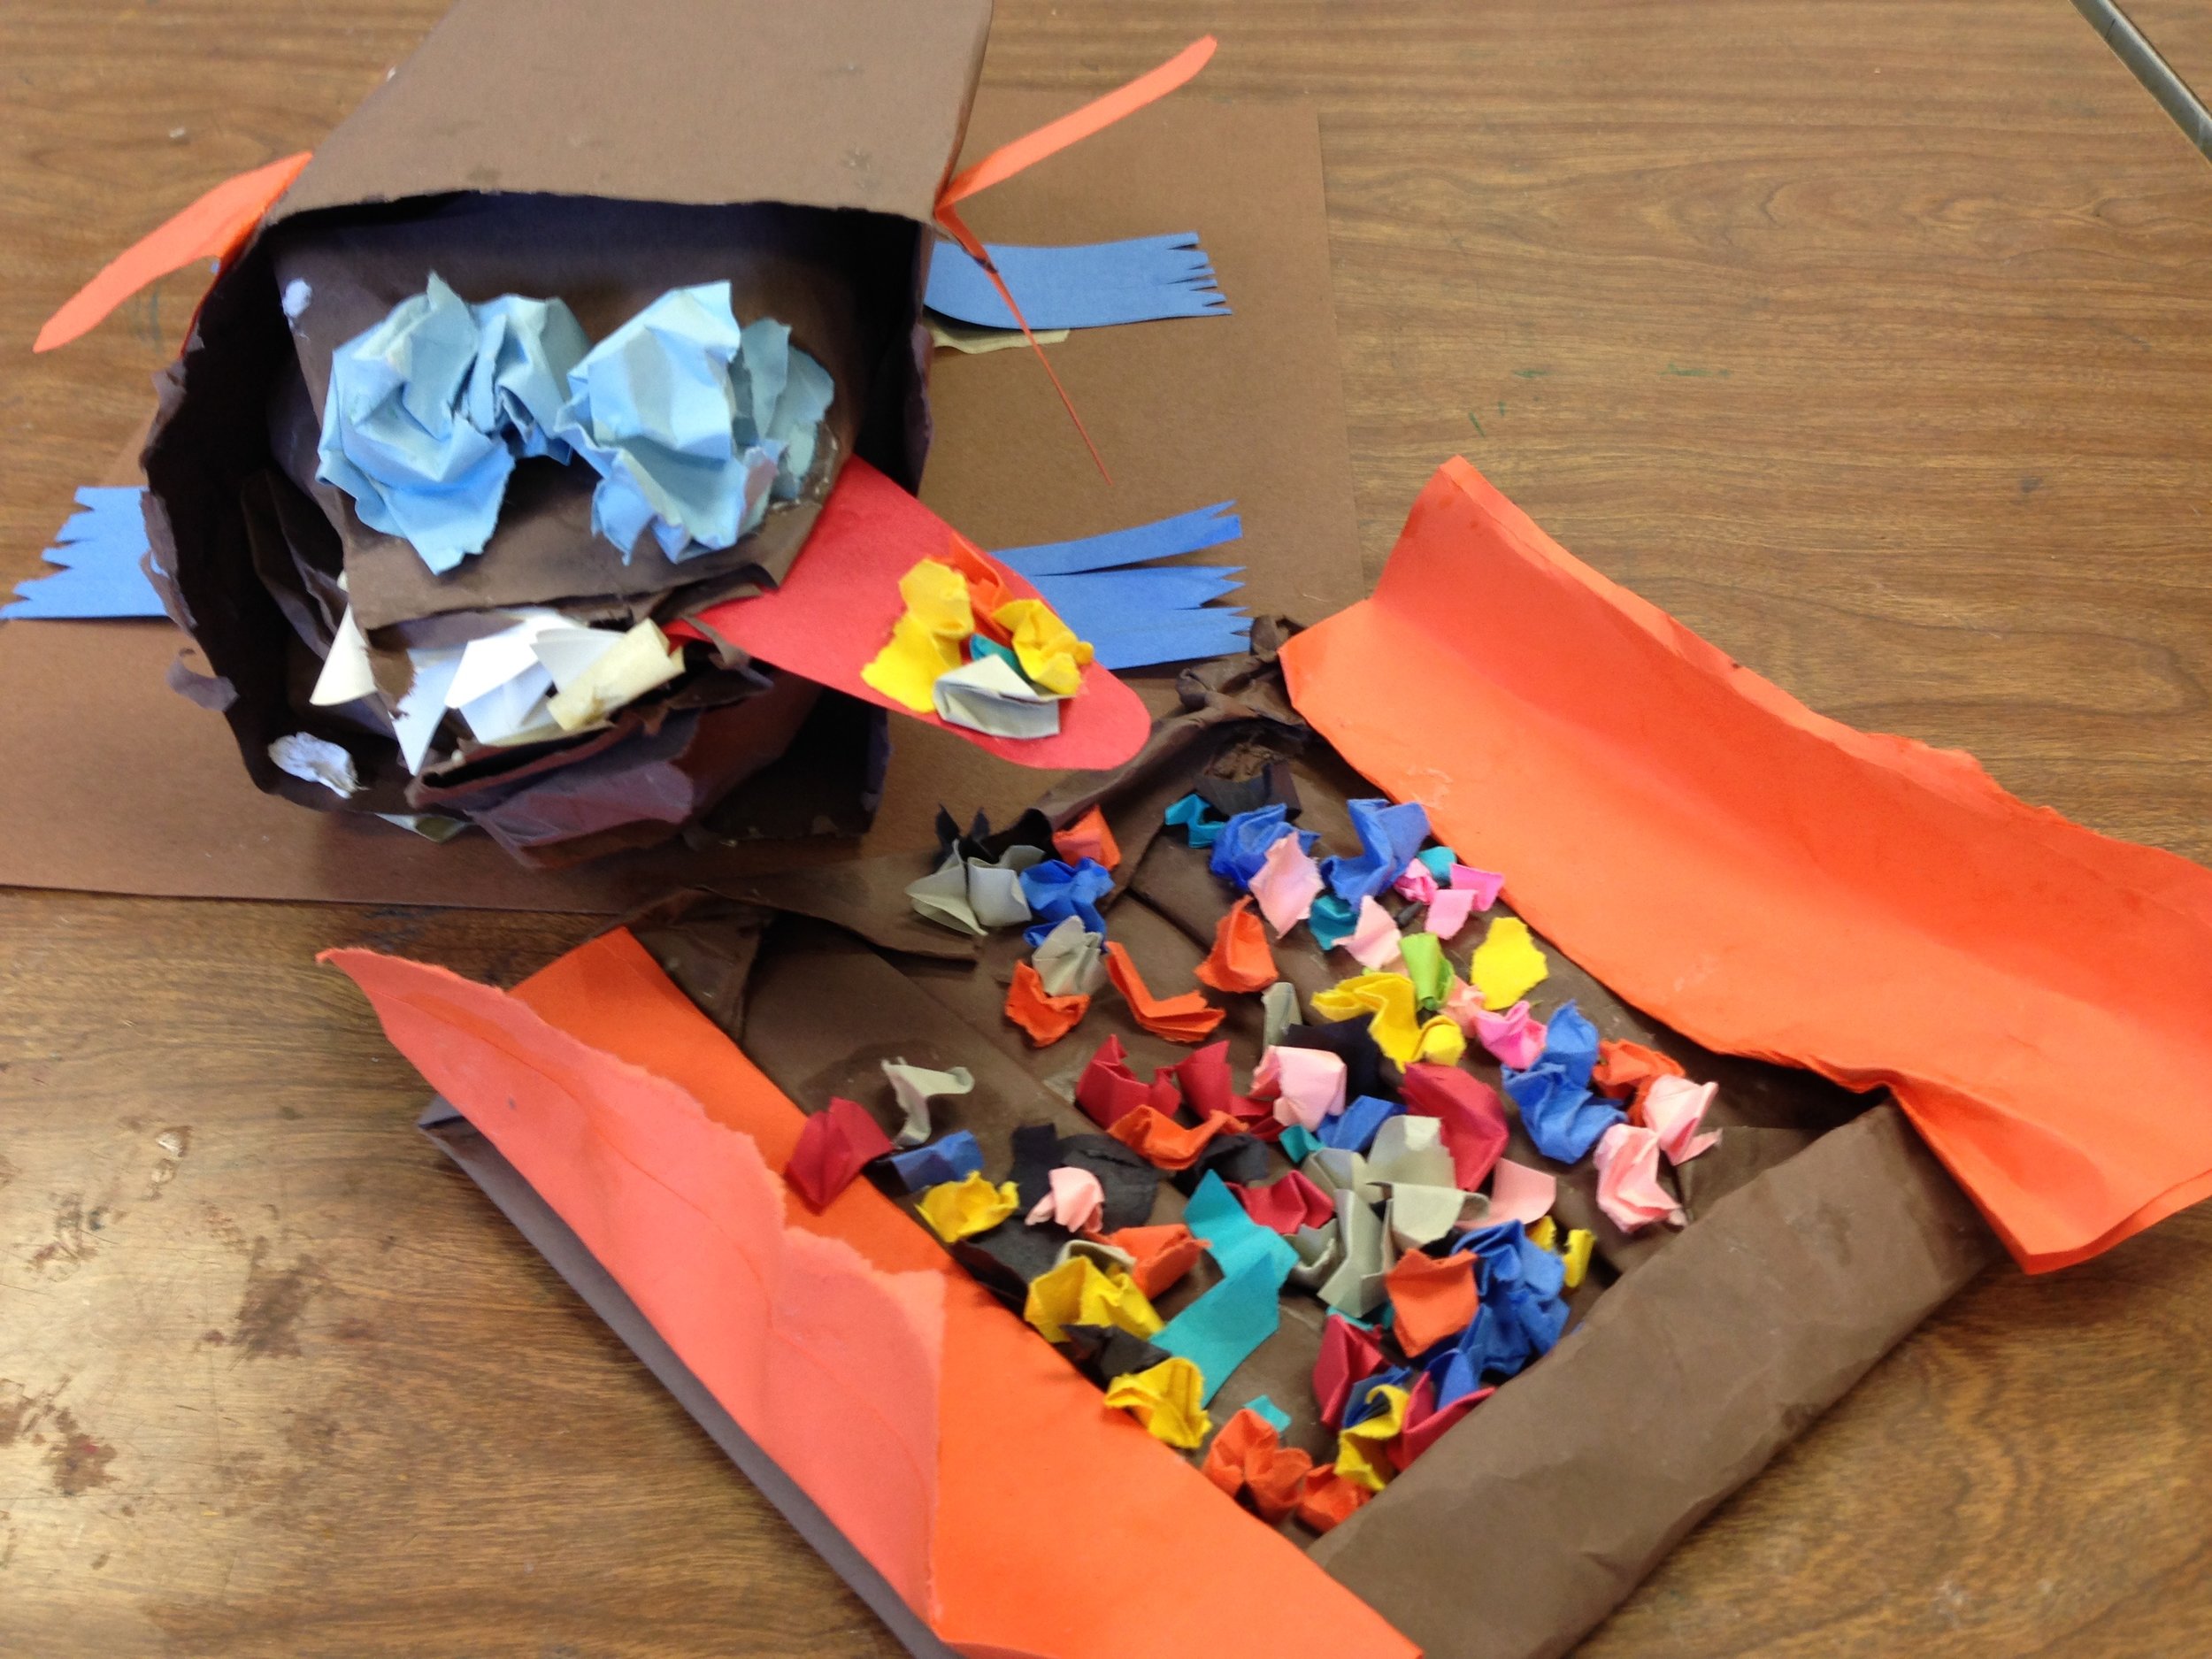
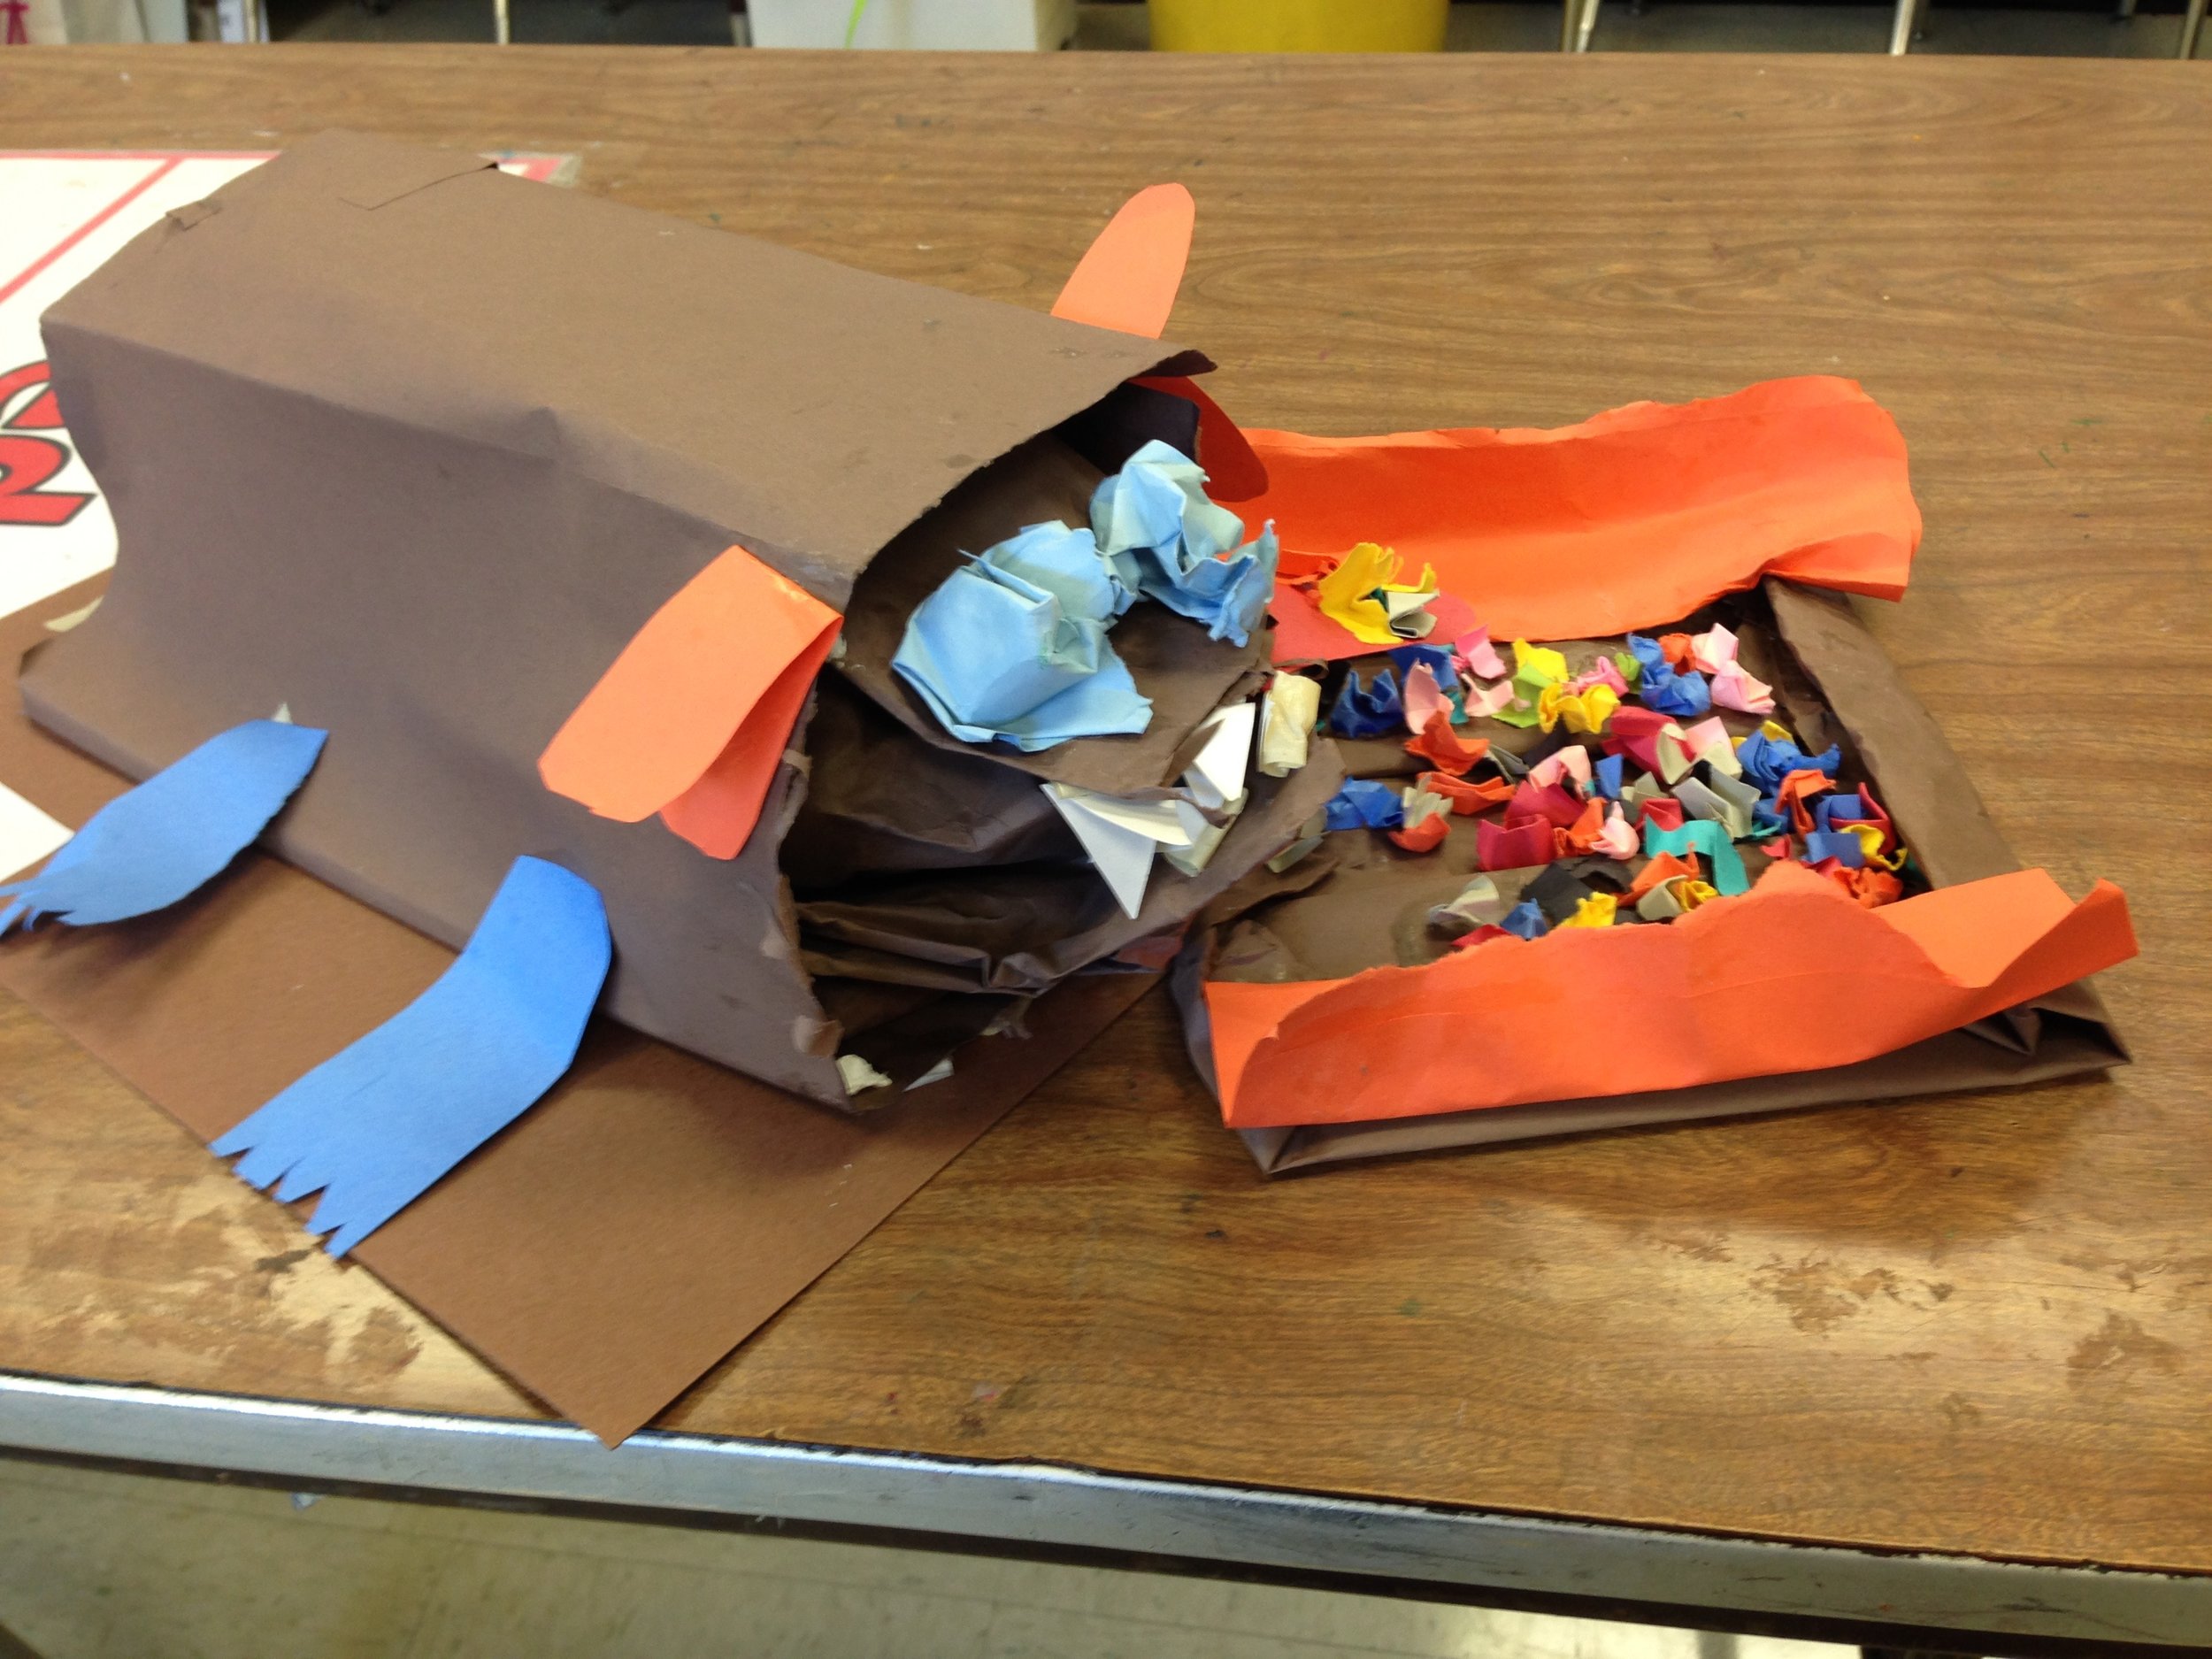
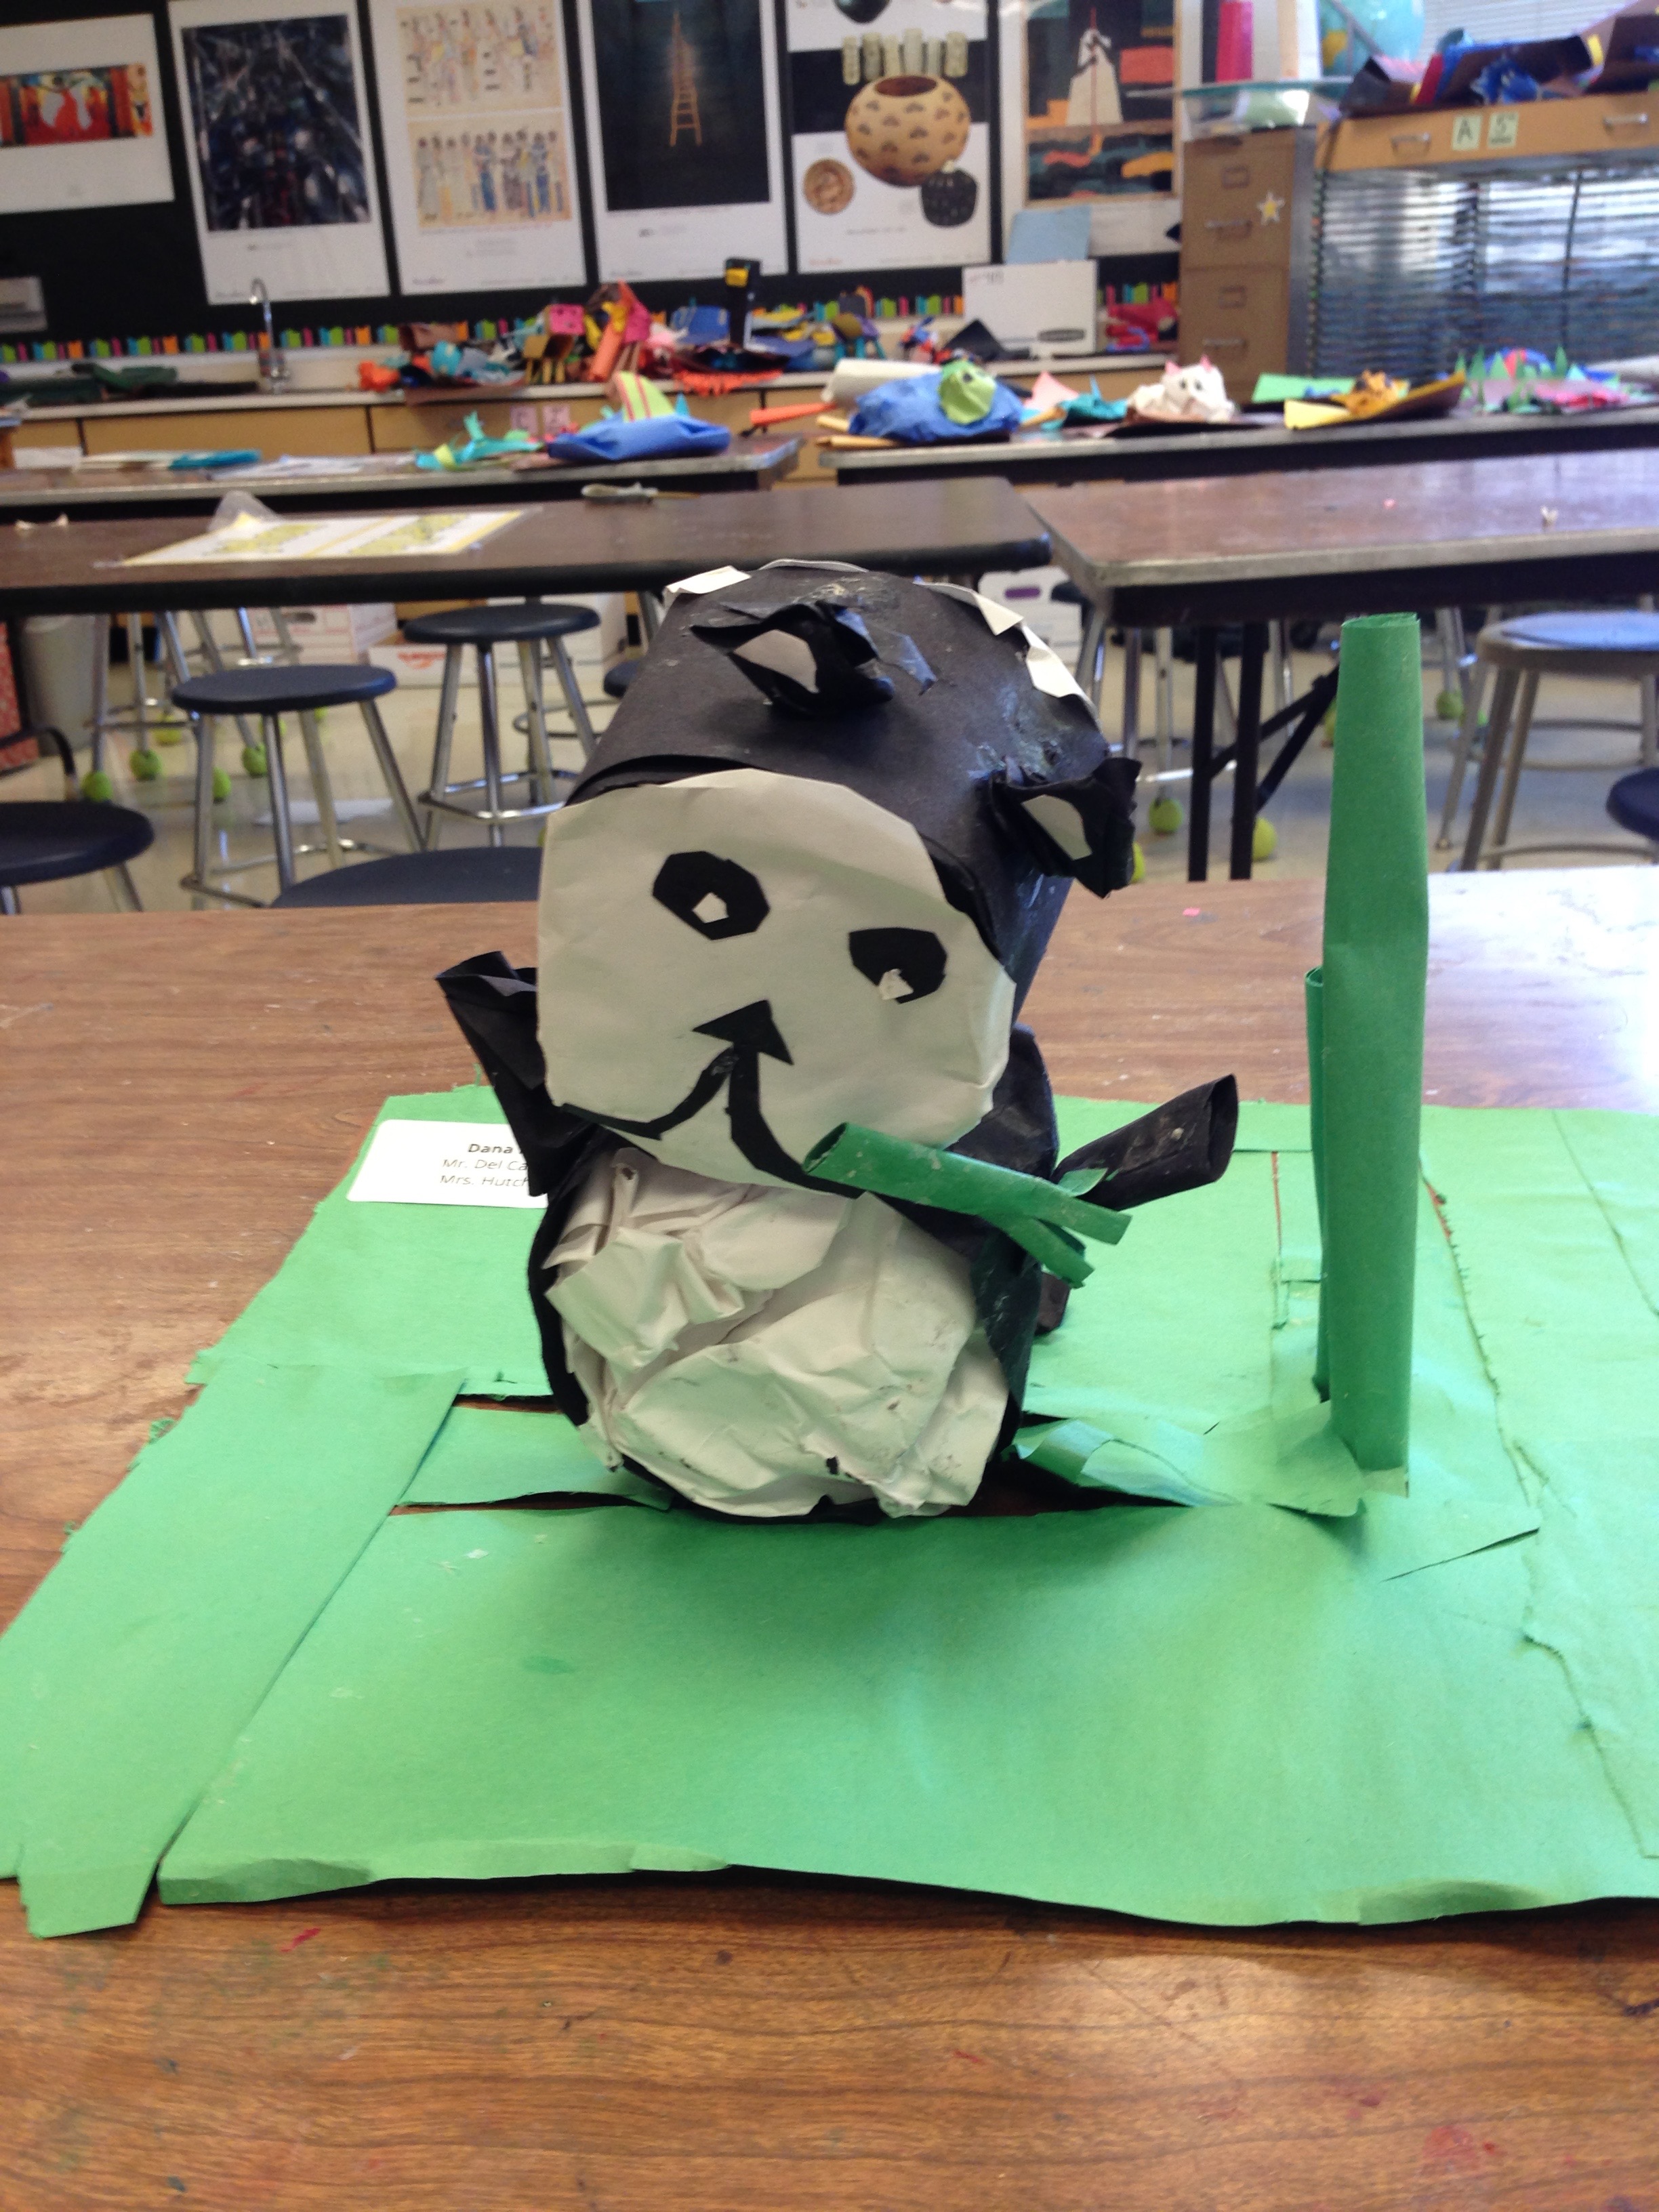
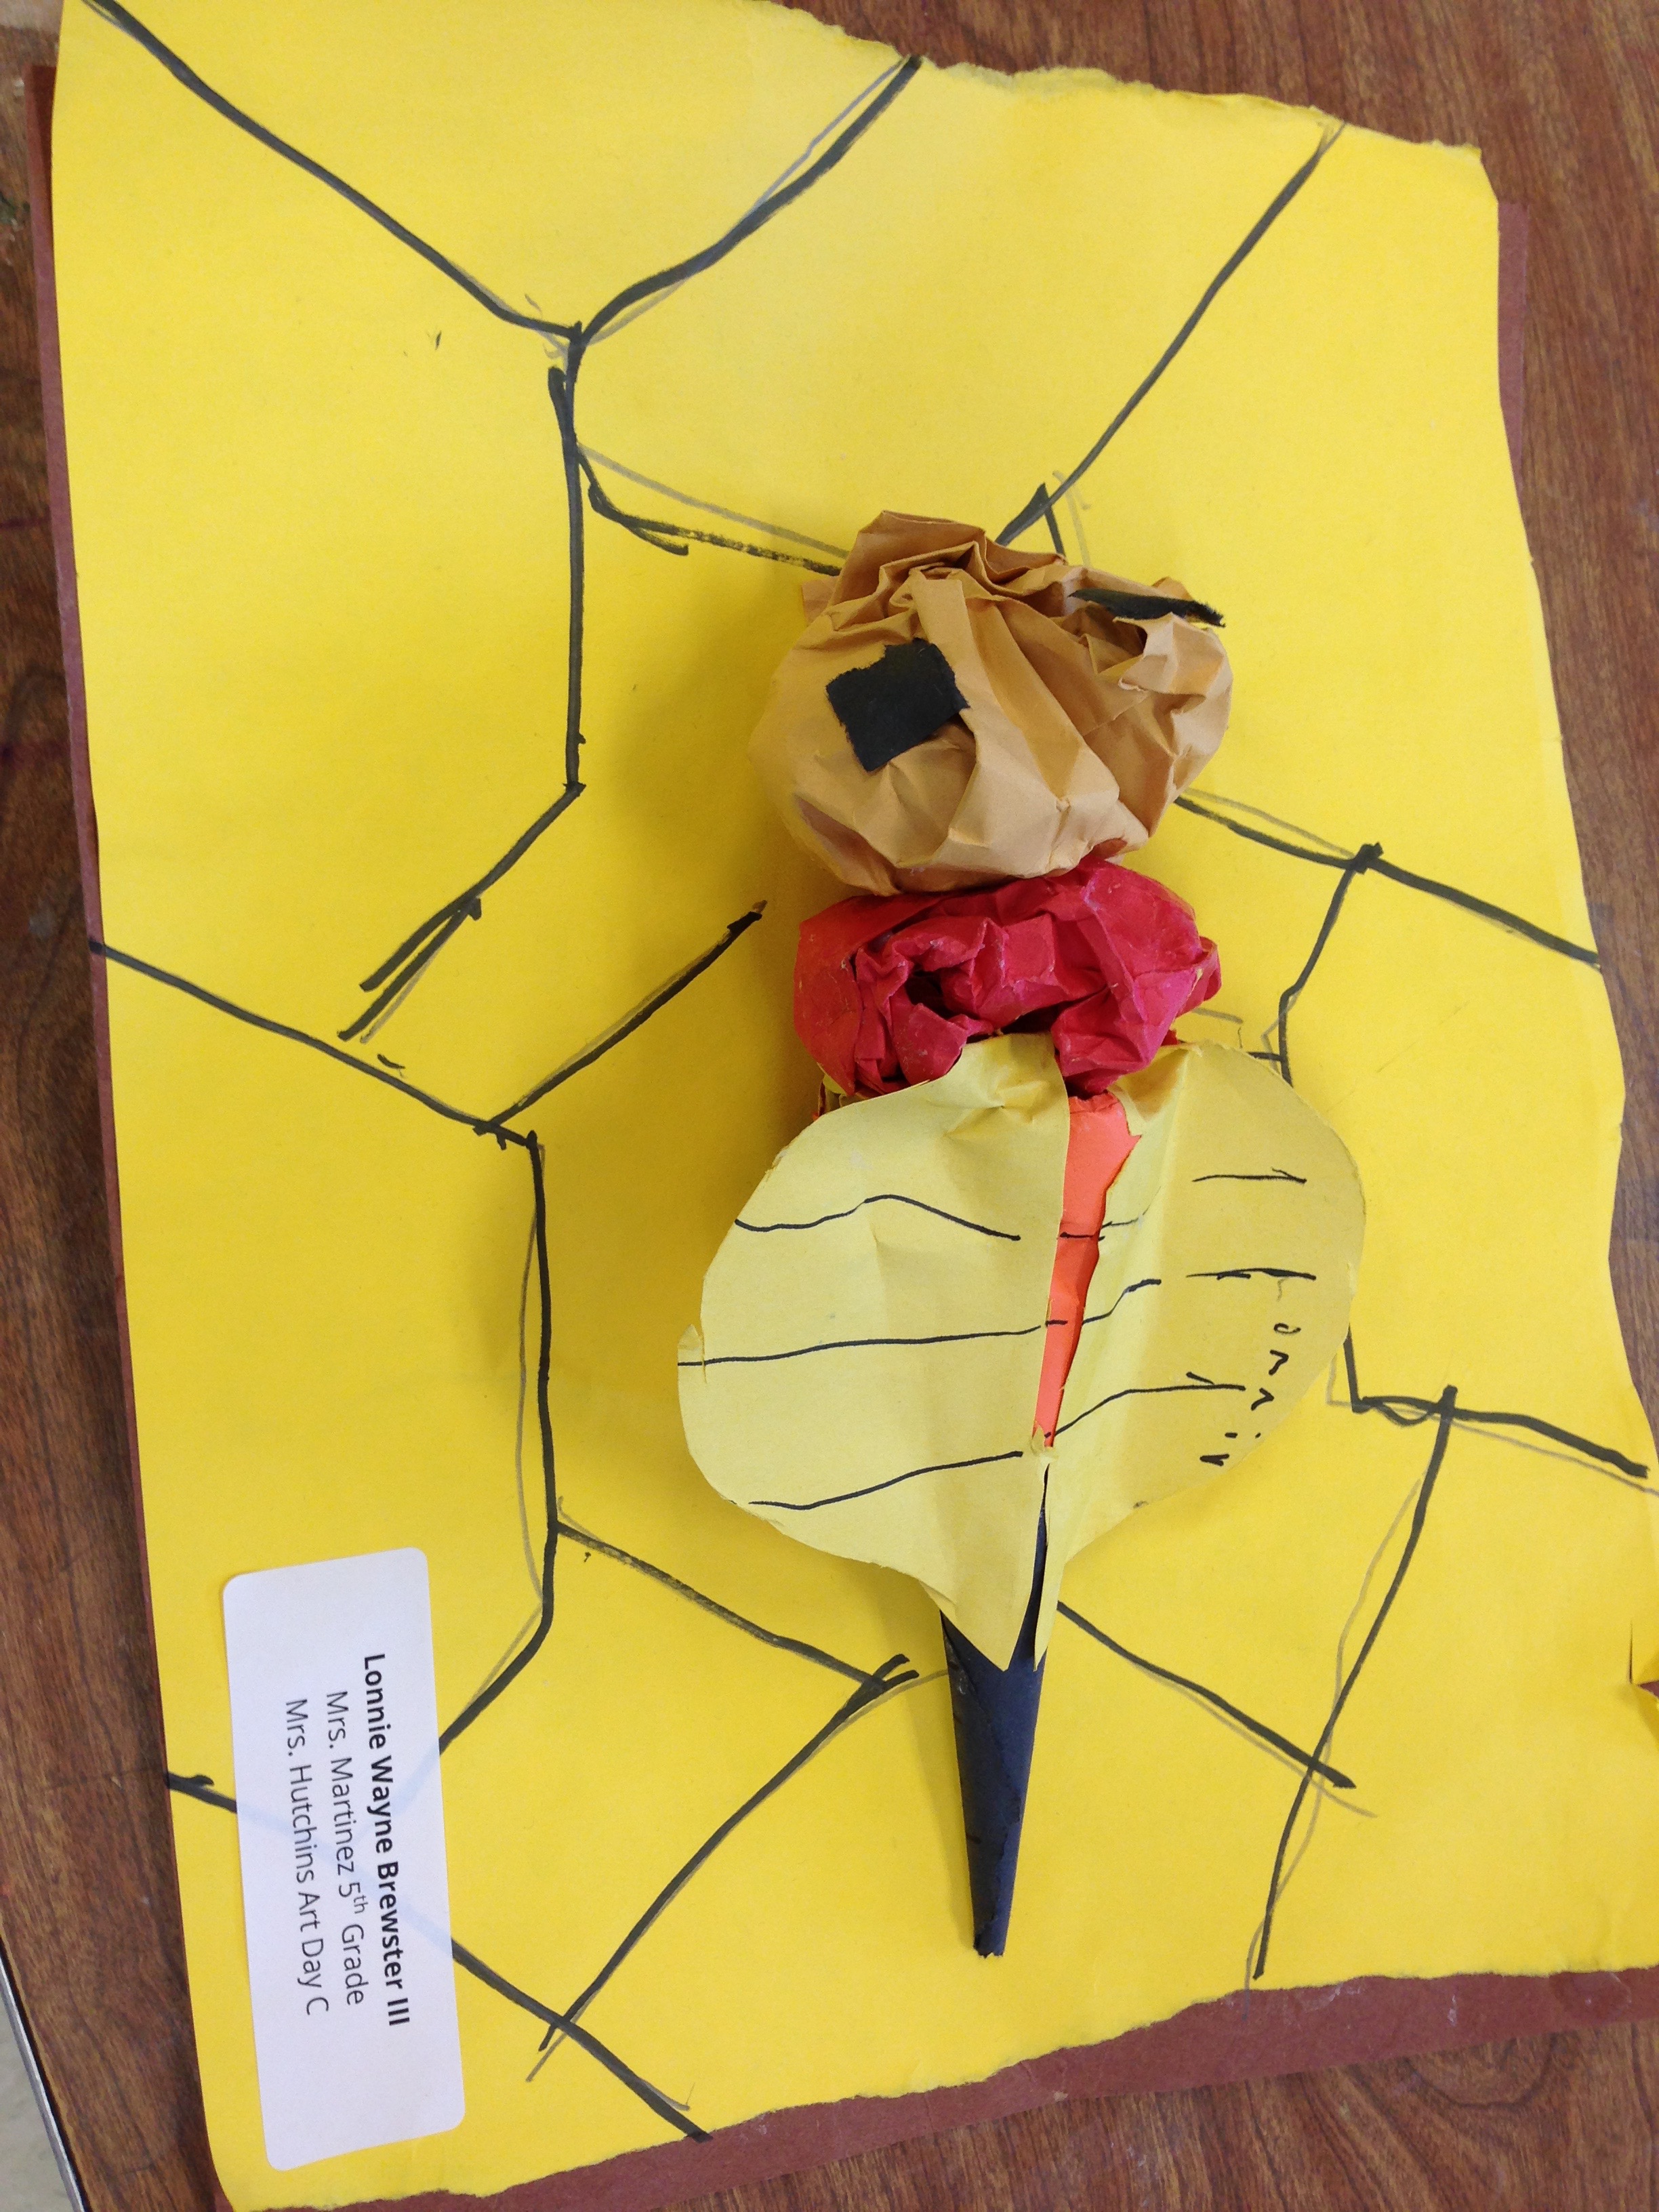

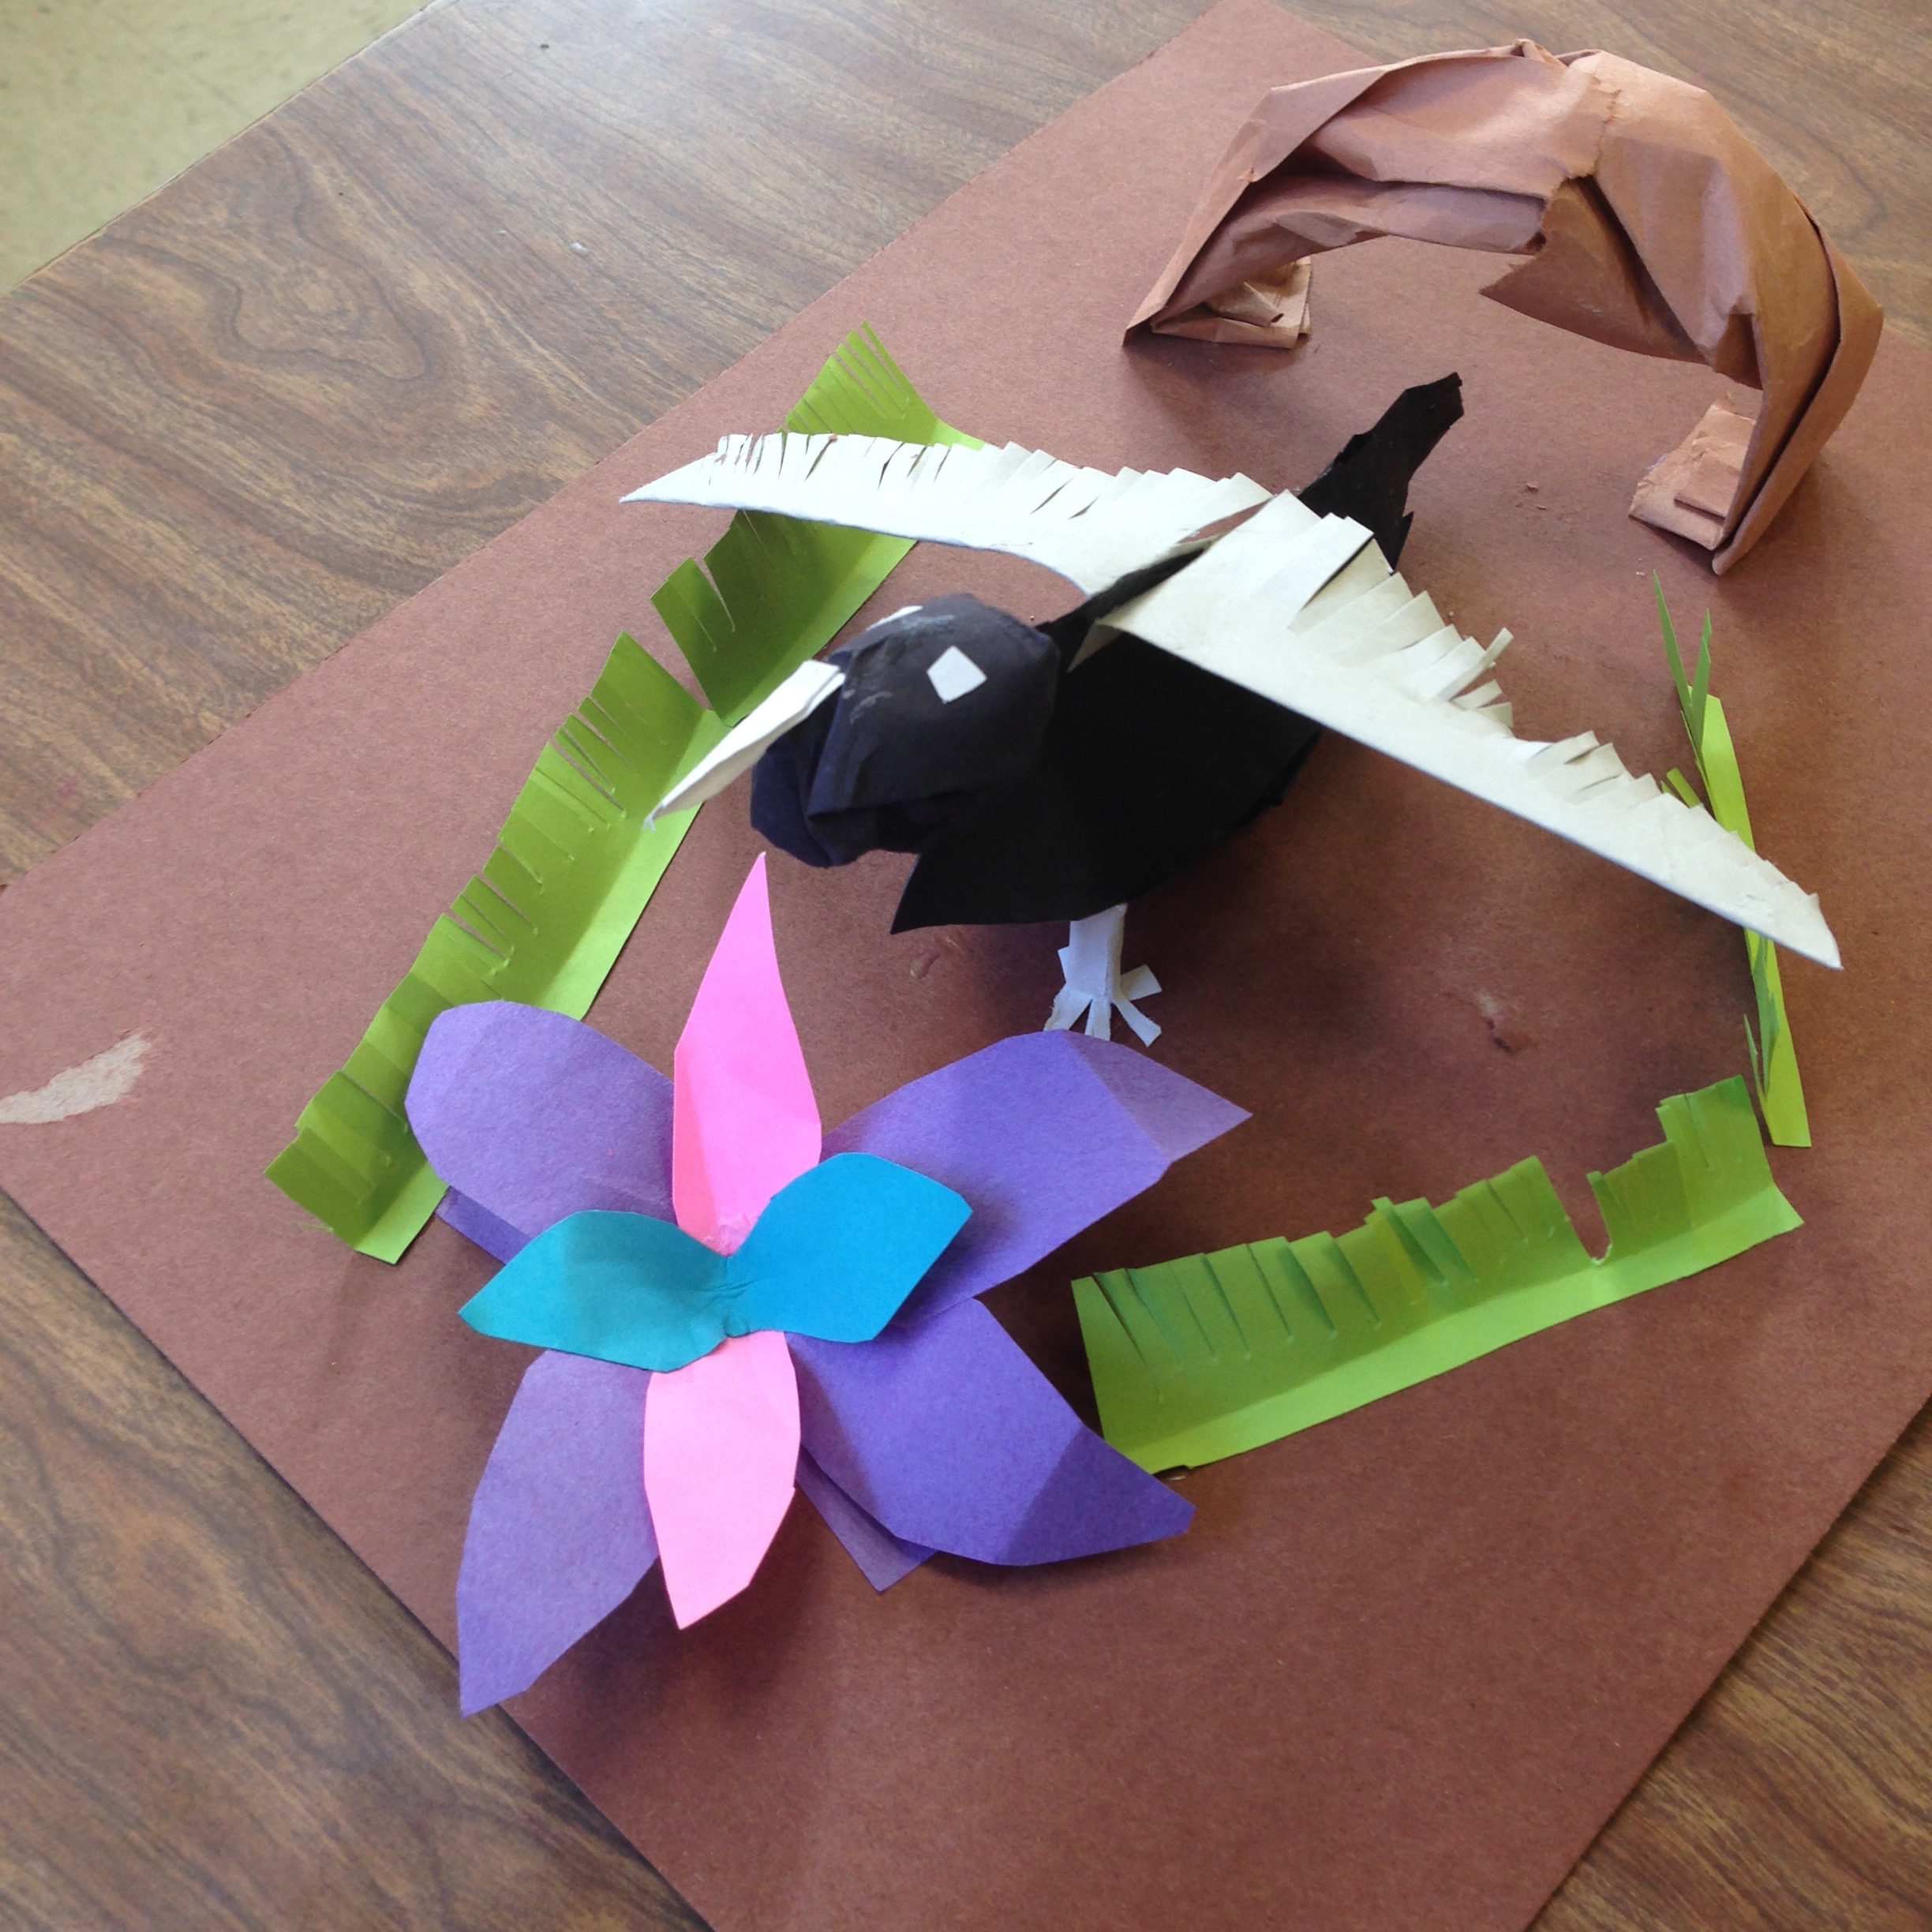
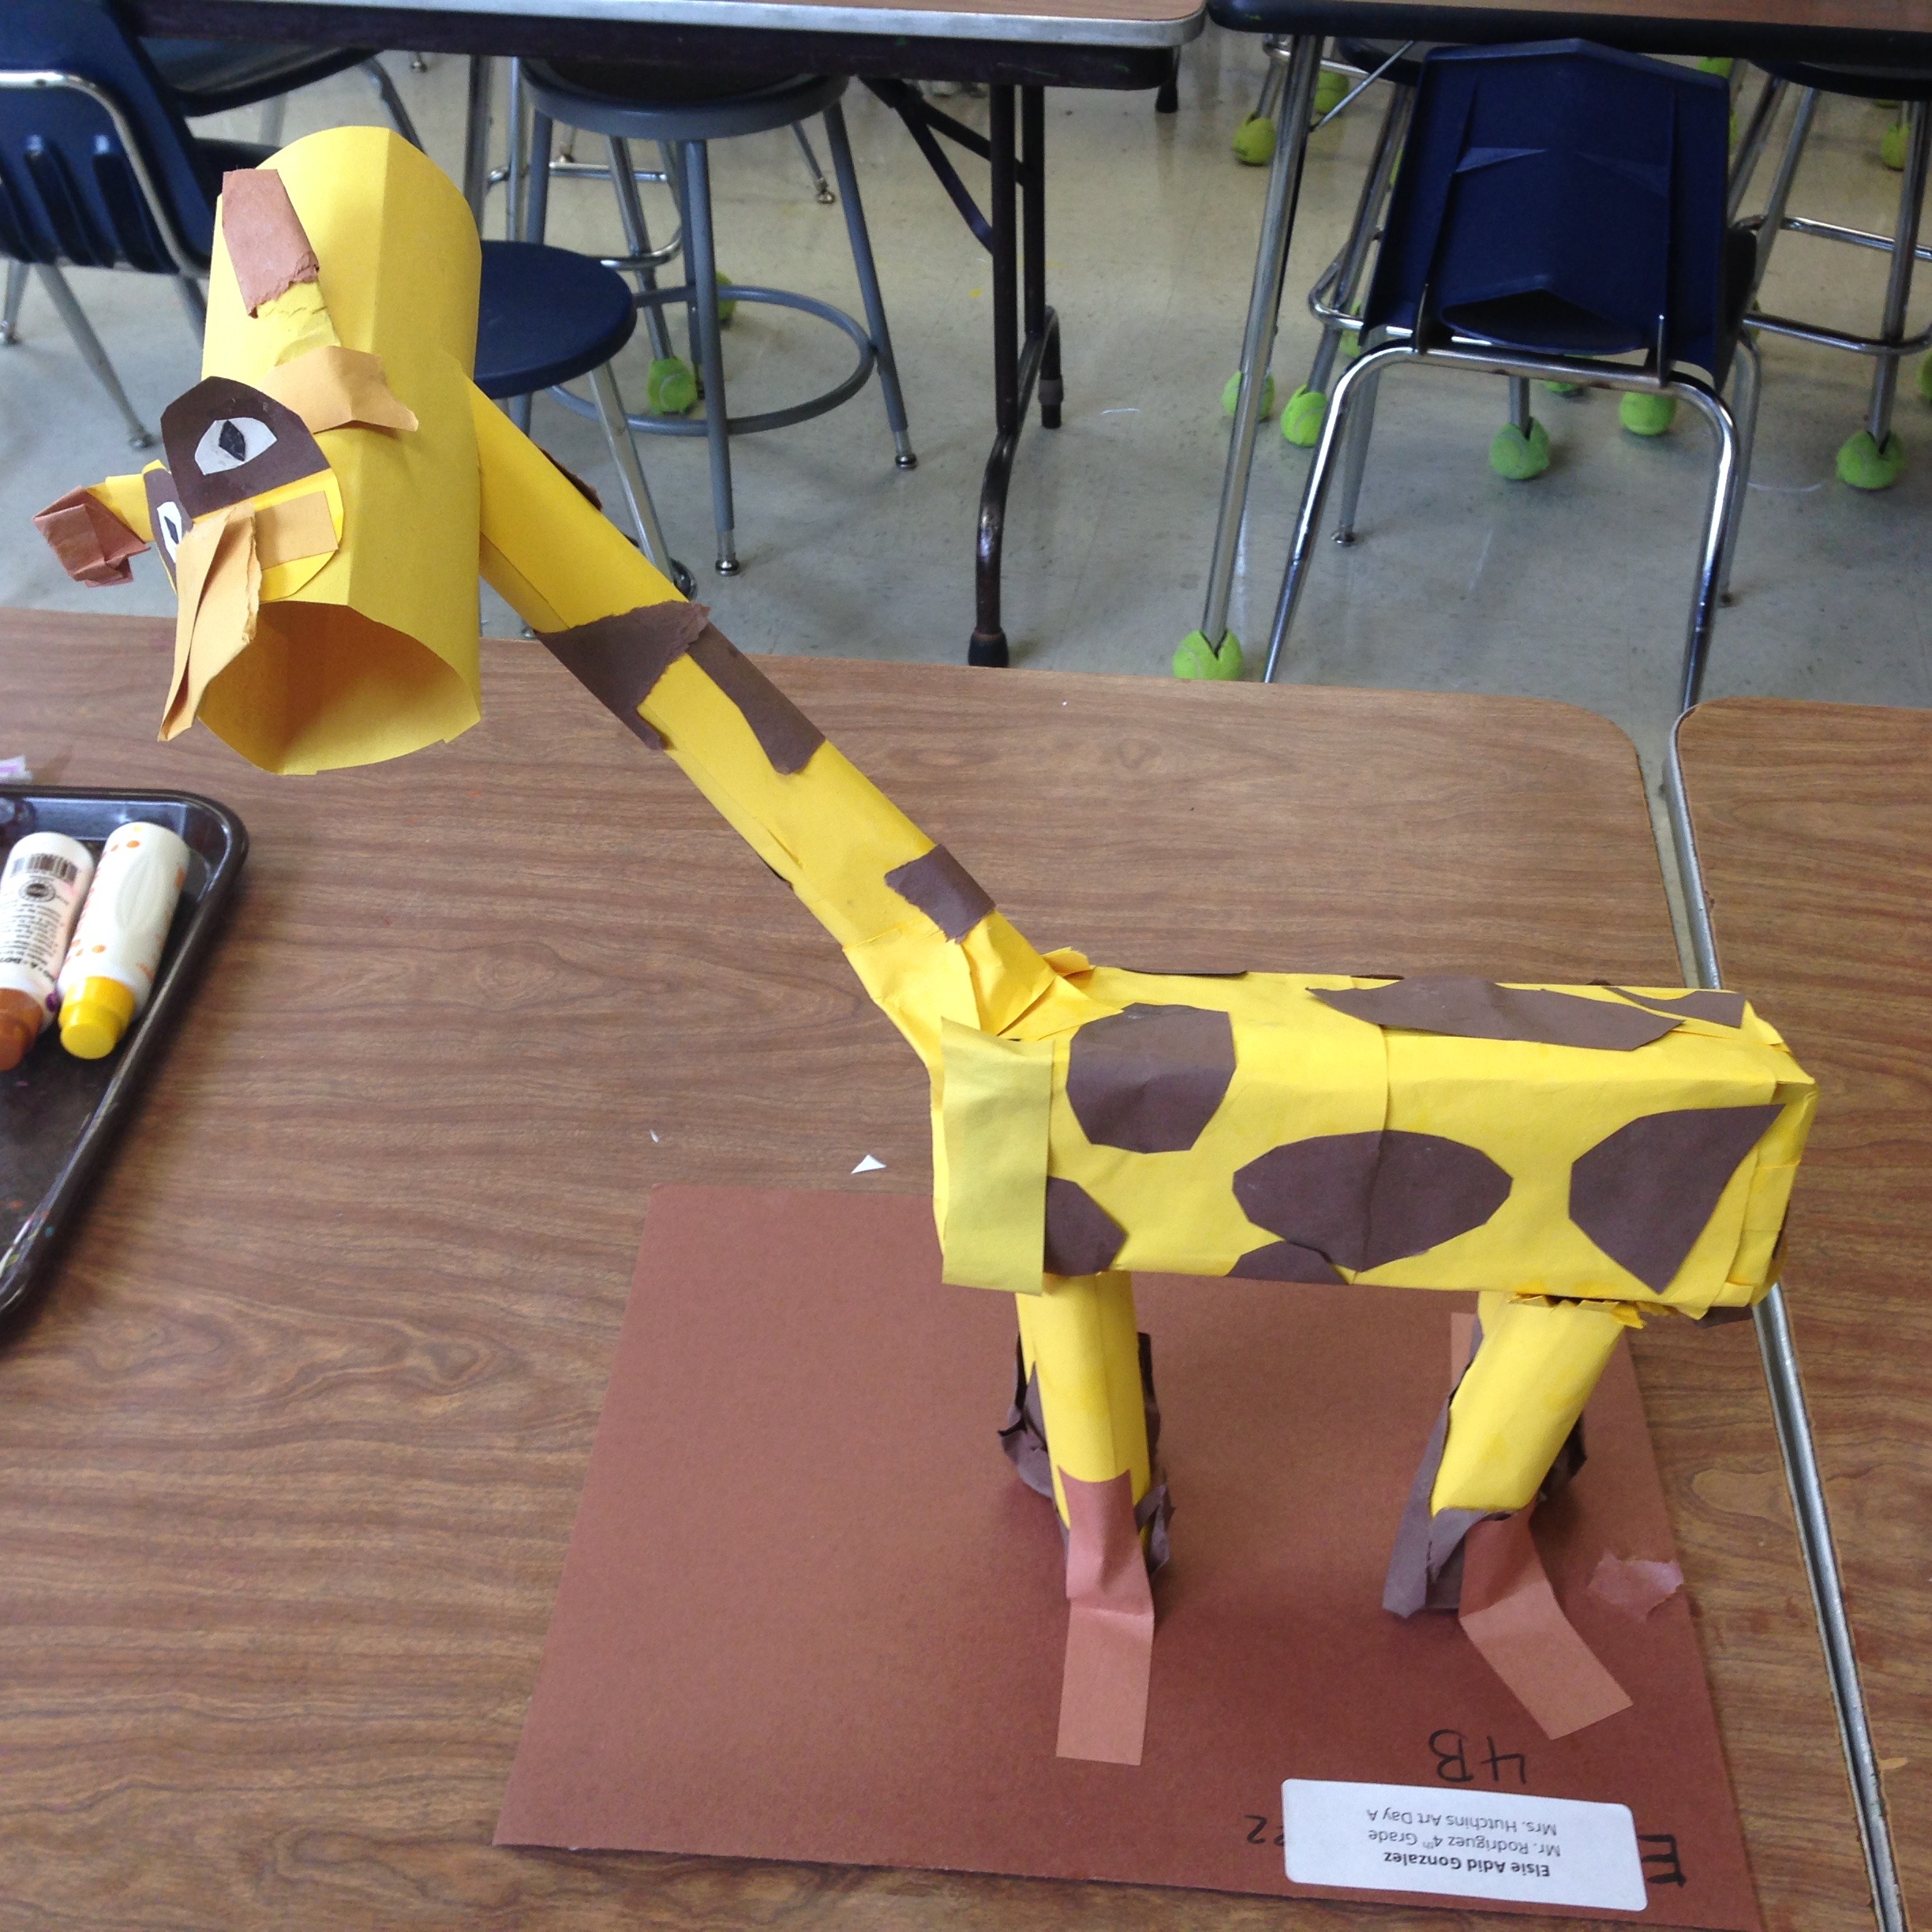
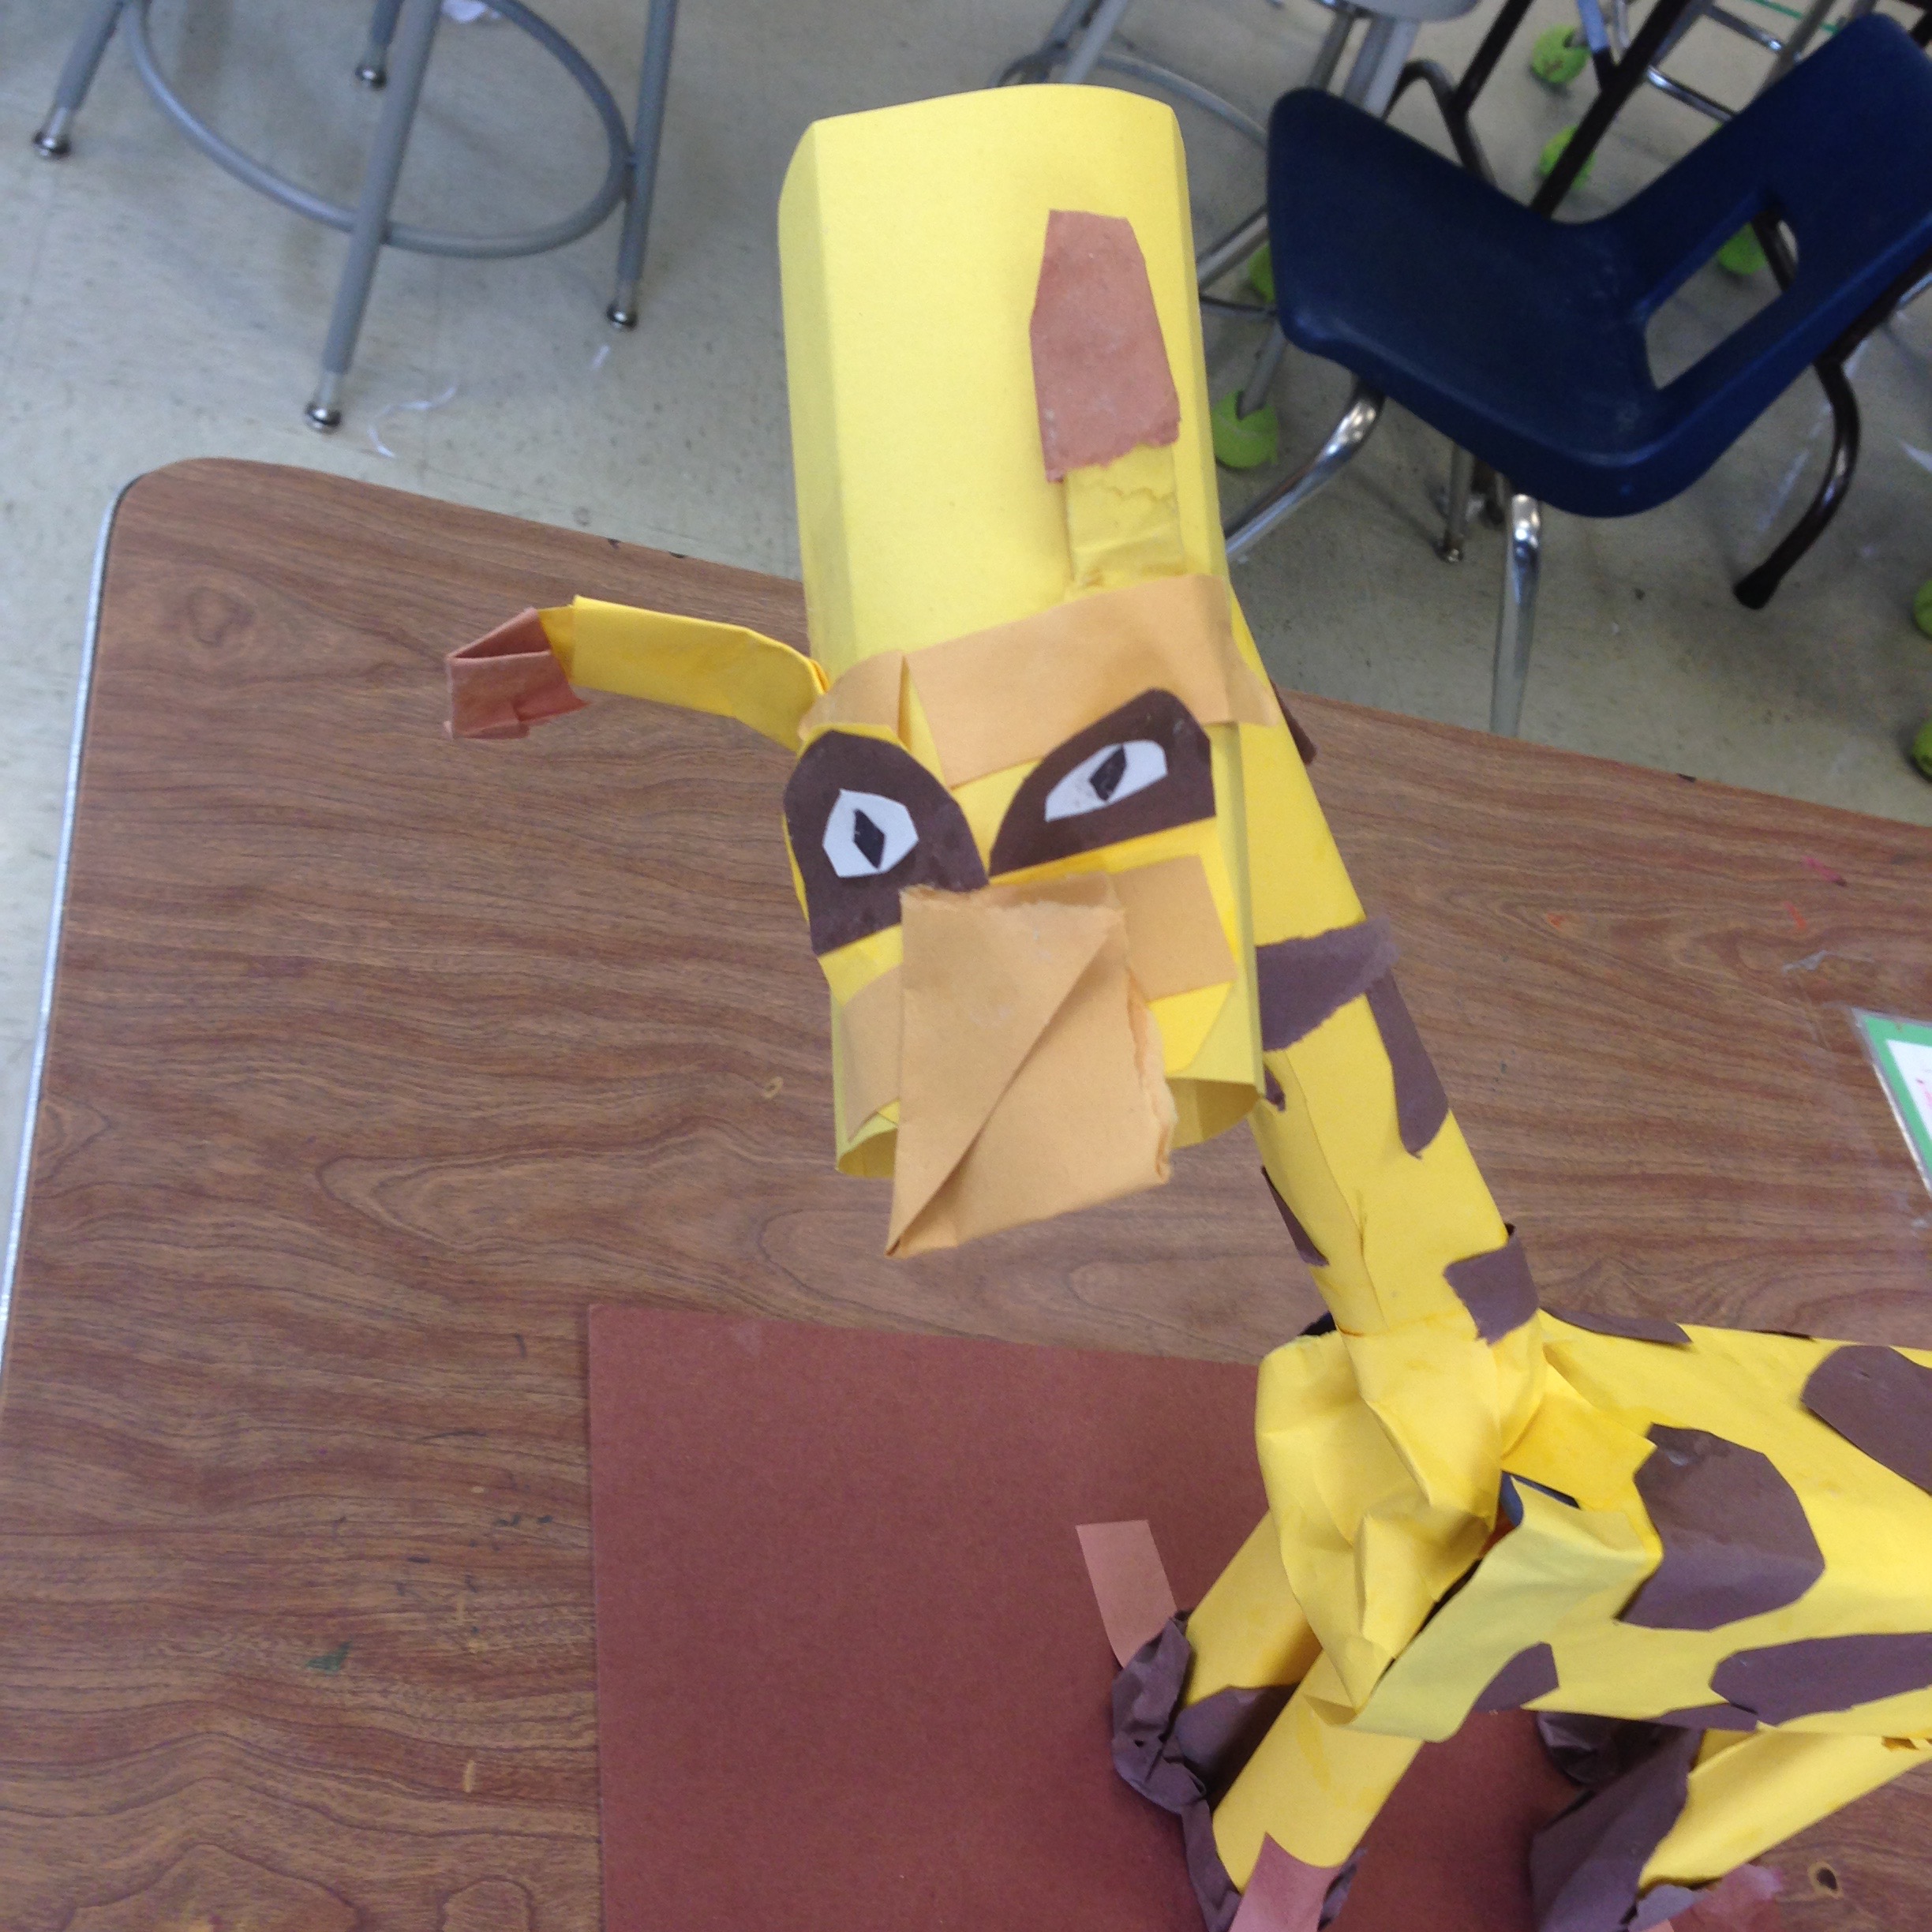
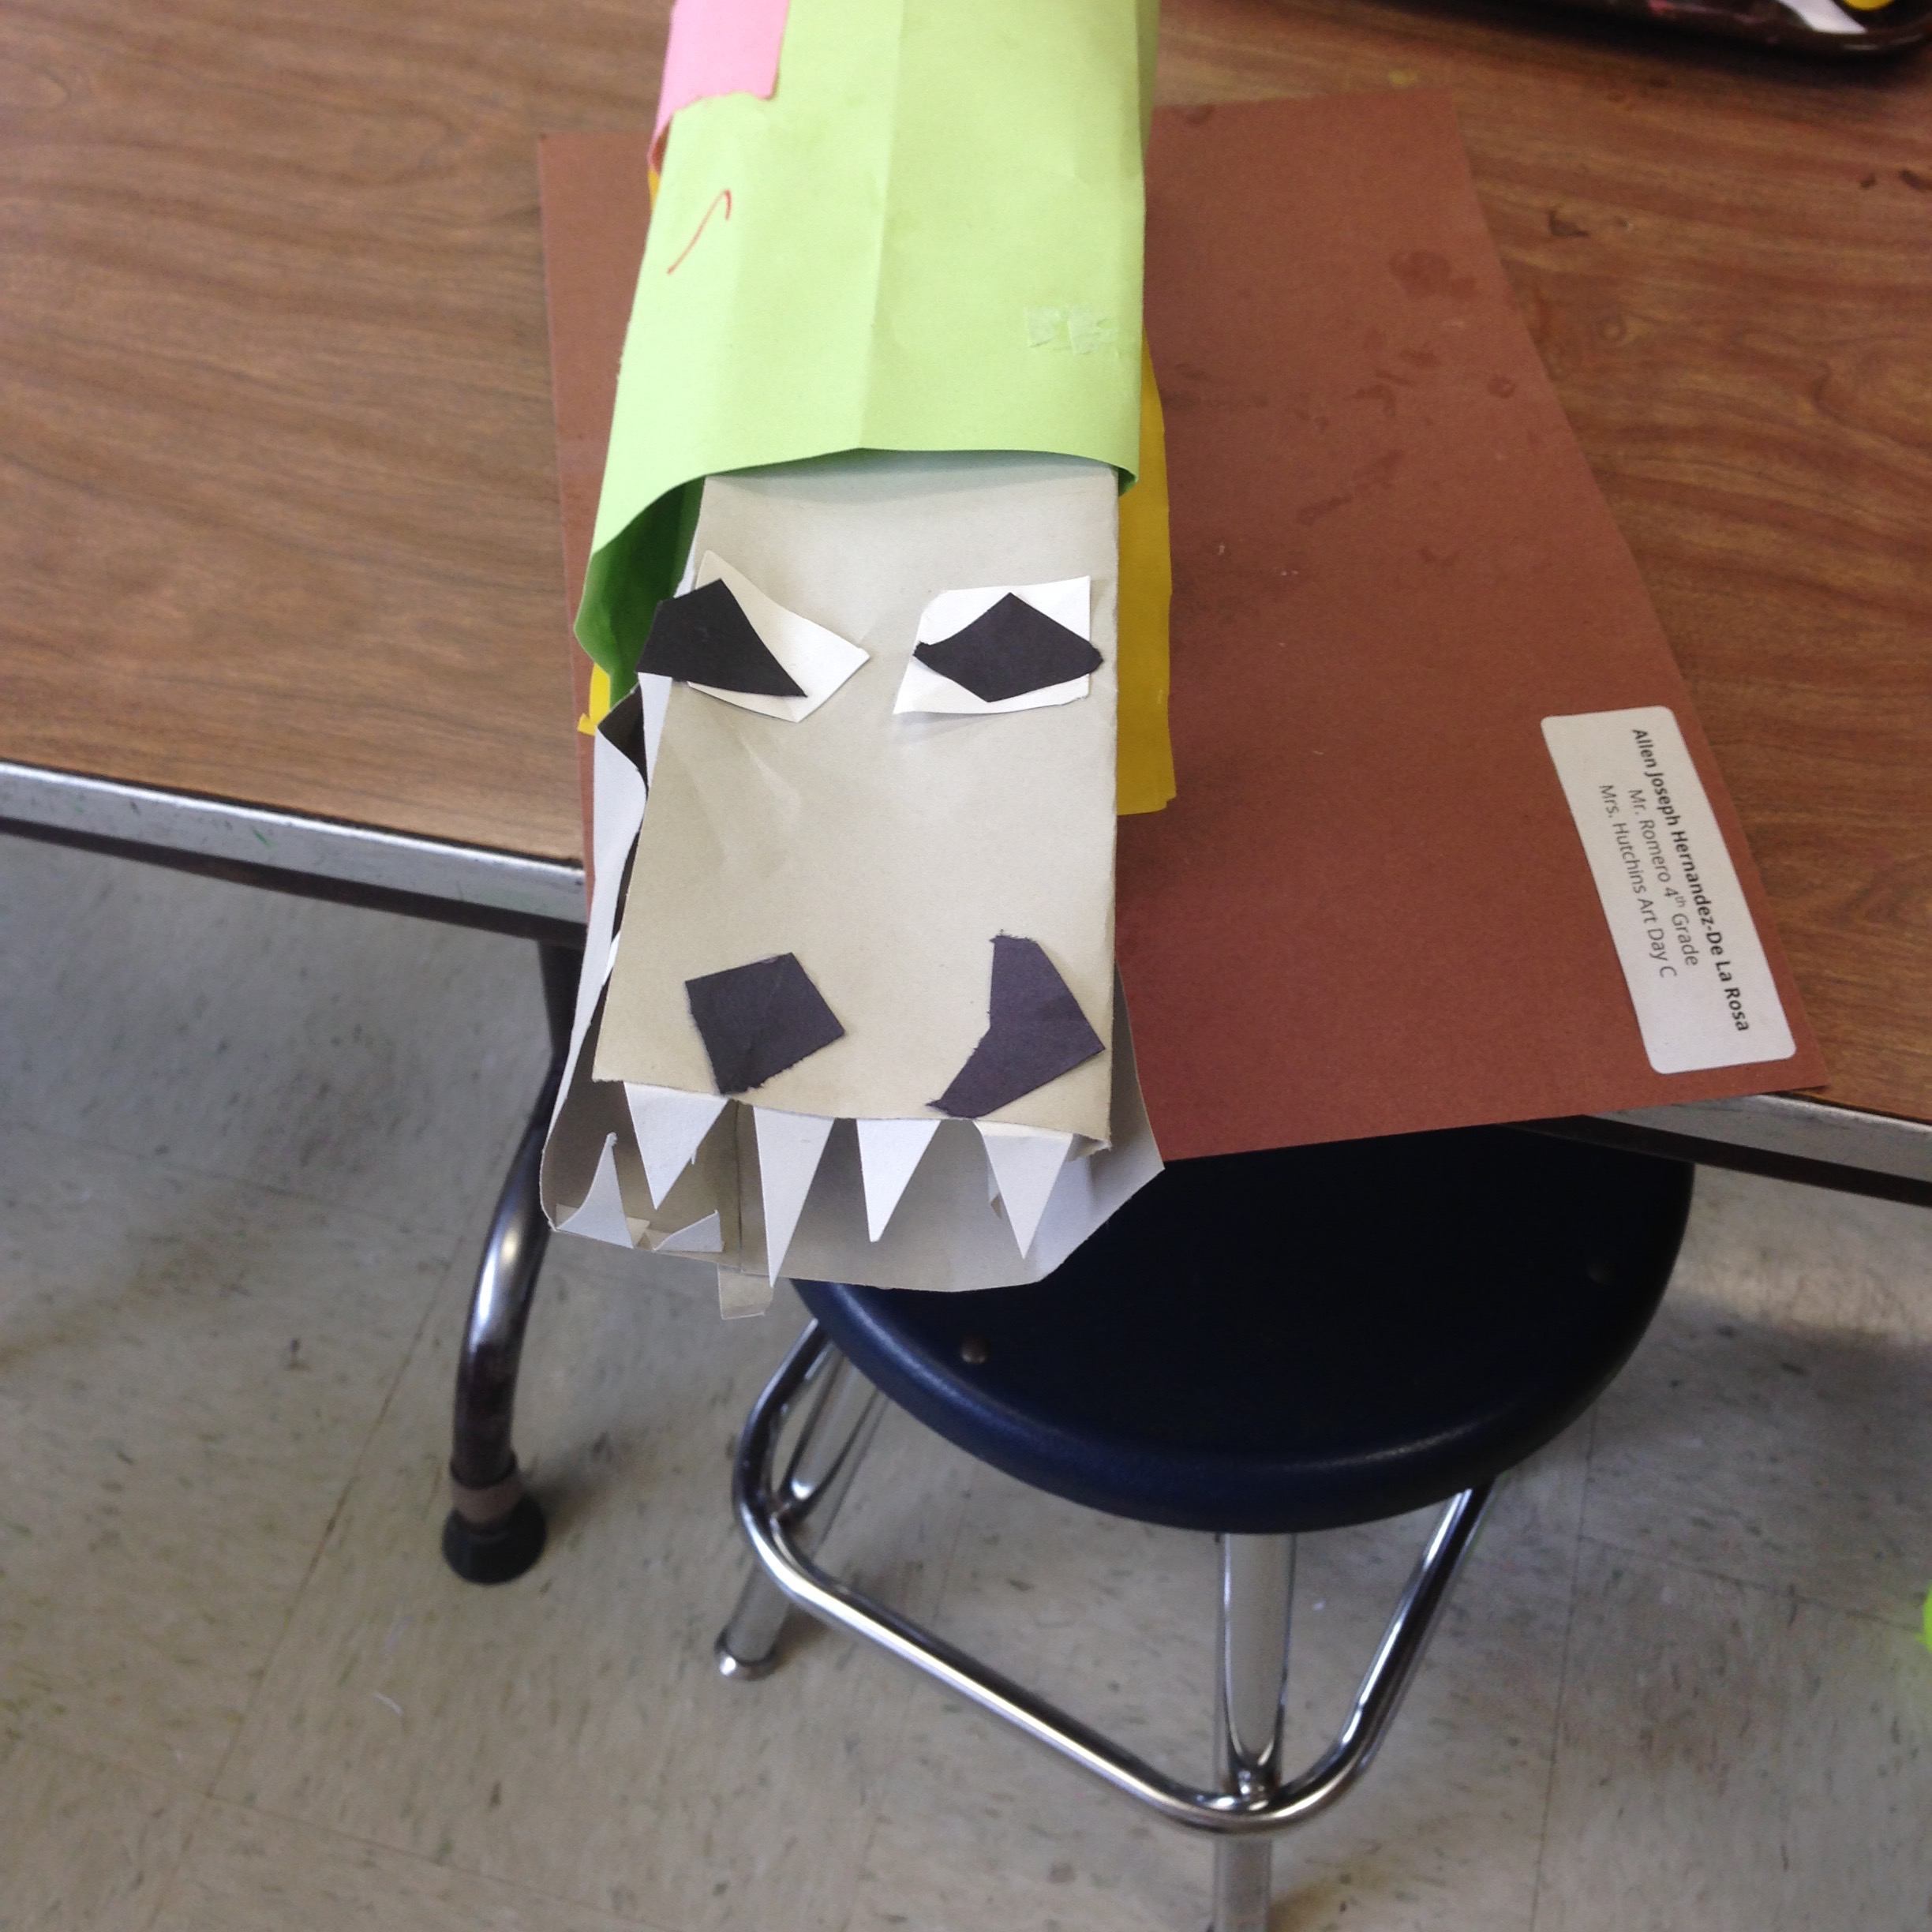

Lesson 6-ish: Art Evaluation & Cultural Relevance
I have a tendency to connect student projects to artists who explore similar subjects or big ideas. After a docent experience with The Contemporary Austin (more to come on this great resource), I also began to think of connections to artist based on media.
Connections to Subject Matter: When it comes to animal art, there is a plethora to choose from. Some examples that caught my eye are Spider by Louise Bourgeois, lots of friendly animals by Manga-loving artist Hiro Ando, and check out this fierce gorilla by Richard Orlinski! Before doing a little research, the fierce animals we see in Rousseau’s work first came to my mind. I’m self aware that I focused on modernism in my art history studies, so I watch out for my tendency to present students with ODWM artists. If I show modern art, it’s among examples of contemporary art and culturally diverse artists. I want to empower my students – it should be no question to them that successful artists come from all backgrounds, and that great artists are working creatively today just like them.
Connections to Media: The eye-catching and large-scale sculptures of José Lerma & Hector Madera are fantastic examples for using paper expressively and representationally. The Saatchi Gallery offers great resources on these artists. With any artwork, I use questioning techniques to prompt student response, and sometimes look to MindPOP for more dynamic art evaluation activities.
José Lerma & Héctor Madera, Bust of Emanuel Augustus, 2012. Paper bust, dimensions variable.
José Lerma & Héctor Madera, The Countess, 2012. Paper, dimensions variable.
Anyone think of origami when they hear about paper sculptures? One of my 5th grade sections would not stop talking about origami during this unit! It also turns out that, in this class, there was the most disparity in working pace. So, I used the final lesson to show them Between the Folds, paired with this worksheet. The origami documentary kept students quietly engaged, while I worked with those who needed extra guidance and time to complete their work.
Extras: More Motivation and Optional Extensions
Video Clips: One of the most practical suggestions my mentor gave me was to show short video clips to students at the beginning or end of class. I was teaching three other units at this time, to a total of 500 students, with zero minutes in between each class. Like me and many other teachers in my district, my mentor had no prep time between classes. So she suggested allotting 10 minutes clean up time, paired with a relevant video to keep students seated and engaged if they were done cleaning up (she tended to show read-aloud book videos). Like my mentor, I didn’t always need to use a video, but it was a helpful tool to have on hand! For this unit, I used short animal videos like Hedgehog Boat that also motivated students to feel joyful about their project. While they watched I would swap out materials for the next class, increasing overall instruction time.
Creative Writing: “Mascots and Monologues” is an optional extension for this unit. Kids can develop their animal’s character and write a monologue from its POV. I designed these character development worksheets when I first taught the unit at a writing center workshop.
My Takeaway
In this unit, Lesson 1 (with the Builder’s Challenge) was by far the most effective for my students. I witnessed how a successful lesson plan can be a powerful behavior management tool. It’s great to see students engaged and in that ZPD. Also, a big part of the success was that students felt comfortable to take risks and explore the material. Once the creative task became representational, they’d barely take a step without 1-1 support.
A fellow art teacher suggested that, within this unit, I could deliver a “Follow-Me” mini-lesson on drawing an animal by breaking down body parts into shapes. I admire this teacher, who delivers many follow-me drawing lessons and says they help her students build a repertoire along with their confidence. To me, this outlook once sounded at odds with that “ideal” art education; in my head I would hear my professors likening follow-me drawings to short-circuit thinking, or grad school peers calling it “cookie-cutter” art. I now feel that, along with ample opportunity for individual expression, follow-me activities are beneficial to my students. Step-by-step projects can be a great fit for while offering artistic learning at a productive pace. These activities provide a lot of structure and can teach students how to break down a problem into smaller parts.
Ultimately, my students learned quite a lot about expressive creation and studio habits of mind from the “Fierce and Friendly” unit. As the result of lots of 1-1 dialogue, they each eventually came up with their own solutions and used vocab about form and texture along the way. They had fun while using paper three-dimensionally and expressively. And, without disregarding these benefits, it was important for me to realize that my students were relying too heavily on individualized teacher support. I quickly shed the judgment I once had for more structured approaches to art education, and gained empathy (and great respect) for all kinds of art teachers. We got to figure out what works best for our students (whole child, behavior management and safety first). There are many great ways to foster artistic learning.


